Many people consider dim headlights or wiper wipers to be a reason to replace them. But this procedure is either unnecessarily expensive due to the purchase of original parts, or its effect is short-lived if cheap Asian analogues are used... However, it is not difficult to restore the efficiency of cloudy headlights and glass with your own hands and without replacement! Special highly effective polishes for glass and polycarbonate are designed for this purpose.
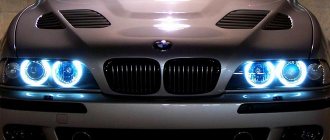
Standard headlights must be appreciated and protected! Standard lighting devices are manufactured with high precision in the formation of the light spot; their glass has the greatest resistance to abrasion from cleaning and road sandblasting. But when they become cloudy with age and stop efficiently illuminating the road, the cost of original spare parts when replacing terrifies the owner of a new car... A pair of headlights for the popular Kia Rio will cost 24-25 thousand rubles, for a Volkswagen Passat it’s already 40 thousand, for a BMW X5 - all 140 ...
Original spare parts are expensive, but non-original parts are quite affordable! You can purchase and install Asian analogues of headlights, the price of which is several times lower than the part with the automaker's markings... But the survivability of such headlight clones is extremely low, the luminous flux is often crooked and difficult to adjust, the fastenings do not always match, plastic glasses cannot withstand the temperature even from rated power lamps...
Don't rush to change your entire headlights! Neither the original nor the analogue. The transparency of glass and lighting fixtures can be easily restored using specialized polishes. The DoctorWax range includes highly effective products for both transparent glass and polycarbonate surfaces. Let's look at some of them.
DoctorWax DW5040 Headlight Restoration Kit
The DW5040 is an effective two-part kit for cleaning and polishing headlights with polycarbonate (“plastic”) lenses. The kit provides deep cleaning of microdamages, removes marks and abrasions, restores transparency and luminous flux and prevents further clouding. It consists of two bottles and a tool holder with special grinding and polishing discs.
First, use a bottle of liquid to sand the clear plastic. The composition is applied to the headlight glass and polished with three special discs from the kit alternately. After that, the headlight is wiped and the contents of the second bottle are used - polish for transparent plastic. Apply a small amount of polish to a soft cotton or microfiber cloth and rub in a circular motion until shiny. The result is headlights like new, and without replacement with “mongrel Asian”!
Safe ways to remove yellow plaque
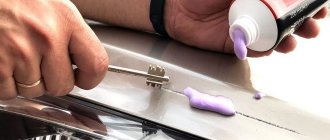
You can get rid of the yellow coating on the headlights using improvised means. Regular toothpaste and soda come to the rescue. GOI paste also has a good effect, but to apply it you will need to purchase a grinding machine.
Toothpaste
You can give your headlights their original appearance using toothpaste. Use it as follows:
- dust and other contaminants are removed from the headlights;
- a small amount of paste is applied to a soft toothbrush and smeared in a circular motion over the yellowed surface;
- wash off the paste with water;
- Rub the surface of the headlight with a microfiber cloth.
The paste is a budget-friendly and effective solution for removing yellowness from headlights, but you need to work with it carefully. It is important to choose a soft brush that will not damage their protective film and will not leave scratches.
How to clean with soda?
You can whiten yellowed headlights using baking soda. How to use it:
- Clean the headlights from dust using a clean cloth.
- Wash them with soapy water. If they are heavily soiled, leave it on the surface for 15 minutes, then rinse with clean water and wipe with a towel.
- Dissolve a tablespoon of baking soda in a separate container, add vinegar in the amount of ½ teaspoon.
- While the reaction is taking place, the composition is applied to the headlights. This is convenient to do with a sponge.
- Wipe the headlight with a clean, damp cloth. If the result is unsatisfactory, the procedure is repeated several times.
- The remaining soda is removed with a towel and the treated surface is wiped dry.
You need to wear gloves when working with vinegar and soda to avoid irritating the skin of your hands.
Polishing mastic and paste GOI
Polishing mastic and paste GOI (State Optical Institute) are products that contain chromium oxide . It is this substance that provides the necessary effect of eliminating yellowness.
Using them manually is difficult and time-consuming; it is preferable to use a sanding machine with a flannel attachment, since felt is used for car body care. Manual work will only allow you to cope with dullness, but not remove yellowness.
Mode of application:
first you need to wash the glass with water and shampoo or liquid soap, then degrease it with alcohol or glass cleaner;- dry the headlights until the moisture has completely evaporated;
- mix one spoon of GOI paste with 1 drop of machine oil;
- apply the composition to the polishing wheel, treat the entire surface;
- you need to move the machine according to the principle of overlapping stripes - you must control the force of pressure on the device, movements should be light and smooth;
- During work, the paste must be removed with a clean napkin to evaluate the result. When it is satisfactory, work is stopped.
Although 3-valent chromium oxide, which is part of the GOI paste, is not harmful to humans, when working with it you need to wear safety glasses and a mask, since the dust released can cause irritation of the mucous membranes.
GOI paste has several varieties. Composition No. 2 is suitable for processing headlights . It is thin and not rough, so it allows you to achieve the optimal effect.
Polishing mastic is used by analogy with GOI paste. If you need to restore the transparency of glass with slight yellowness and minor damage, then you should choose polishes with a matting effect.
When the headlights have deep scratches and strongly ingrained yellowness, preference is given to polishes with a varnishing effect.
Grinding
You can get rid of yellowness using a special tool - a grinding machine. The procedure is as follows:
- Go over the surface with a solvent to degrease it.
- The elements surrounding the headlight are covered with masking tape. This is necessary in order not to damage the paint during work.
- Put an attachment with the finest sandpaper on the sanding machine and run it over the entire surface until it becomes perfectly smooth. Periodically, the nozzle must be moistened with water to prevent it from overheating.
- Then polishing paste is applied to the surface of the headlight and a foam pad is passed over it. The procedure is carried out until the headlights become perfectly smooth, the yellowness has completely disappeared from them and the original shine appears.
Polish for clear plastic DoctorWax DW8344
For those who are too lazy to carry out the two-step grinding process, DW8344 is a cleaning and polishing compound for headlights made of transparent plastic. This is a one-step remedy that is very easy to use. The polish is applied to the plastic and rubbed with a cloth. The product is more delicate than the previous one, and is intended not for very cloudy lighting devices, but for those beginning to lose transparency. With regular use (at least once every three months), DW8344 eliminates clouding and prevents yellowing, eliminates minor scratches, marks, and abrasions. You can also use it to update worn plastic elements of taillights, instrument panels, motorcycle helmet visors and other transparent plastic surfaces - including those not related to cars!
Replacing light bulbs when the headlights don't shine well
Imported cars usually come equipped with high-quality lamps from the factory. On domestic cars, on the contrary, they install those that are cheaper, and they usually shine poorly. Most buyers are forced to somehow solve this problem. One possible way out of the situation is to replace the lamp with a higher quality model.
We recommend the following options:
- Philips X-Treme Vision +130% - the model can be equipped with different bases, there are variations in the color of the light beam, and is durable. This white light bulb is suitable for halogen headlights.
- Osram Night Breaker Unlimited - belongs to the new line from Osram, has almost perfect light, the only bad thing about this model is its service life (I would like it to be longer).
- KOITO - these Japanese lamps have the best combination of brightness and lighting efficiency, they shine well and do their job.
- Philips +30% , made in Holland and packaged in cardboard packaging - this line is no longer produced, although in terms of quality and light performance it is not inferior to the more expensive X-Treme Vision.
How well or poorly the headlights shine depends largely on the lamp installed in them. With a standard model from even a well-known manufacturer (for example, Osram Standart), the light will still not be ideal, although this is not the worst option. To achieve maximum lighting quality, you will have to invest financially in devices with high light performance and a quality guarantee.
Glass polish and cleaner DoctorWax DW5673
If the previous products were intended for the restoration of polycarbonates and other transparent plastics, then DW5673 is a polish-cleaner for glass surfaces. It can be used to restore headlight lenses, mirrors, windshields and side windows. The polish effectively restores transparency and cleans car glass parts from stubborn dirt and traces of insects. Treatment of the windshield will smooth out micro-roughness and micro-risks - this will eliminate eye strain both in dry weather and in rain, improving the performance of the wiper blades, which will no longer smear water with a film. DW5673 imparts dirt- and water-repellent properties to treated surfaces. Does not leave streaks and does not change the optical properties of glass. Application is simple: the composition is applied to the surface, slightly dried and polished by hand with a soft cotton or microfiber cloth until perfect transparency is obtained.
Polishing and cleaning compounds for headlights and glass are perhaps the most “financially saving” automotive chemical products for the car owner’s wallet! Headlight glasses, body glass and mirrors are quite expensive parts, and replacing them, especially on an older car, causes significant damage to the budget. The use of polishing compounds extends the life of the original components, improves road illumination, visibility through glass, and increases the service life of wiper blades. In other words, self-polishing of headlights and glass using compounds from DoctorWax can significantly improve safety and driving comfort and, at the same time, significantly save money.
What you need for work
Before you start work, you need to stock up on everything you need. We will need the following tools and materials:
- tooth powder or tube of toothpaste;
- clean towels;
- White Spirit;
- water and detergent;
- grinder or electric drill;
- nozzles;
- scotch;
- brush.
Before starting work, we recommend removing the headlights from your car to make it easier to work with. We cover everything except the surface to be treated with film and tape to avoid the ingress of paste and other foreign substances. Now we can get to work.
Cleaning headlights with toothpaste
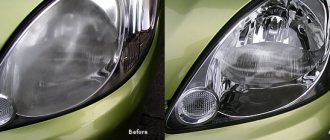
Why do the headlights become dim?
Over time, any headlight becomes cloudy, whether it is made of plastic or glass. Only the time period after which this happens depends on the quality of the headlight housing material.
The operating conditions of any car are such that it has to be washed regularly. When it rains, the headlights get splashed with dirt, and sometimes you have to quickly wipe them down in order to continue driving. The dirt that remains on the headlights consists of water, fine gravel, soil and other almost invisible, but quite hard elements. Of course, if you simply wipe the headlights and do not wash off the dirt with water, these small particles leave a network of scratches. The damage is so small that it is not even visible on a wet headlight, but over time the “web” will grow so large that the headlight will look cloudy, although it would be more correct to say scratched. The consequences are obvious - the light beam will scatter uncontrollably, and the quality of lighting will deteriorate significantly.
Methods for restoring reflectors
There are several options for repairing a reflector:
- tape with a reflective surface;
- metallized foil;
- special paint;
- vinyl film.
Workshops offer silver restoration services, but this is an expensive procedure that not every driver can afford. For one chrome element, specialists will demand 1500-2000 rubles. If the optics use separate units for turns, high beam and low beam, then the service will cost 8-12 thousand rubles.
Using tape
You can repair a defective section of the headlight using metallized tape, which is sold in a car accessories store.
Restoration of headlight reflectors:
- Sand the defective surface with sandpaper.
- Measure and cut out the elements of the tape in accordance with the reflector pattern.
- Degrease the surface.
- Paste reflective material.
- Smooth out with your fingers and thoroughly degrease.
- Remove the transparent protective film.
The advantages of the method are ease of operation, low cost of material, and long service life. Drivers include visual defects in the form of unevenness and pronounced seams as disadvantages.
Using foil
Food foil and epoxy glue can withstand high temperatures, so they are suitable as a reflector. Before starting work, you need to sand the headlight reflector, prepare an adhesive composition, a brush and gloves.
Repair with a metallized foil element:
- The pre-prepared part is degreased.
- Using a brush, apply a small amount of glue to the surface of the reflector.
- Apply foil and straighten it with your fingers.
- Excess composition is removed with a cloth.
To prepare the pattern, you can use a sheet of paper and regular tape. This will allow you to select the exact dimensions and not spoil the material.
The advantages of this method include high temperature resistance and good reflectivity. The negative factor is the lack of possibility of repeated restoration due to persistent glue, which cannot be removed.
Dye
There is a special chrome paint on sale that is applied in an even layer and has excellent reflective characteristics. Painting headlights from the inside, if the technology is followed, has no disadvantages in the form of unevenness or seams. Using liquid chromium, you can achieve excellent results at home.
Chrome plating of headlight reflectors:
- Clean the headlight reflector with a degreaser.
- Apply paint in several layers.
- Dry according to instructions.
How to paint:
- Motip;
- Abro;
- Bosny.
These companies have proven themselves well and are often used by car owners.
Vinyl
Oracal 352 film can withstand temperatures up to 120 °C and stretches well when heated with a hairdryer. Before wiping the surface of the headlight with degreaser, you need to check the reflector for smoothness with your fingers.
If any irregularities are detected, they need to be sanded down with 1500-2000 micron sandpaper.
How to make a template:
- Cut the paper and attach it to the headlight.
- Smooth out the material and trim off any excess corners.
- Secure the template with tape.
A piece of vinyl is cut out from the pattern, applied to the degreased headlight and smoothed out with your fingers. Complex areas are heated with an industrial hair dryer and stretched into shape.
To increase the strength of the film, you can apply clear varnish or chrome paint at the joints. The material from the “Gloss Chrome” series perfectly reflects light and can withstand high temperatures.
After complete drying, the headlight is assembled in the reverse order and installed on the car. The repaired part will improve the appearance of the machine and have a positive effect on the formation of the light beam.
Let's sum it up
Problems with headlights plague many car owners today. You can easily fix such problems using several methods. The first method is to polish and clean the inside of the headlight to achieve the desired efficiency. The second option is to replace some of the side elements to troubleshoot problems. In the third case, you can replace the headlight with a used one from disassembly, which will help you get an almost new factory element without problems if you select it successfully. And the last repair case is purchasing a new headlight unit at an auto parts store. To do this, just contact the seller.
You can install a new headlight yourself or have it done at a service center. At first glance, no problems may arise in this process. But in reality it turns out that there are a lot of difficulties with installing the headlight unit. It is important not to damage the fastenings, break the contacts and not break the tightness of the unit itself. All these tasks can be performed by specialists at the service. It is also possible to carry out such an installation yourself, but it will require some time and attention to detail. What do you think about headlight repair options - what ideas can you use?
Other causes of poor headlights: alternator problems
It is not always the lamps or other elements that cause the headlights to shine poorly. This problem can also be caused by incorrect operation of the car's electrical circuit. After turning on the engine, the headlights are powered by the generator, which is the main source of electricity in the car. It needs to be checked first. If the voltage from the generator is insufficient, the following problems arise:
- all vehicle devices that depend on the supply of normal voltage electric current do not turn on or do not work well;
- when the entire electrical network is operating, the generator supplies only 8 -9V to the headlights (instead of the required 12V), which is why they do not shine well; usually with such a malfunction, the light becomes normal when the engine is turned off;
- a poorly functioning generator increases fuel consumption, this is caused by the fact that the on-board computer tries to increase the voltage in the network by increasing engine speed;
- If the generator is not working well, the driver may notice that when accelerating (pressing the gas pedal), electrical appliances inside the car begin to work at full capacity.
The best solution for a car is to install a native generator produced at the car manufacturer. You can often choose a modification that will be more powerful than the preinstalled one. This is a good way out of the situation, but it is worth remembering that with such a replacement, other elements of the car begin to work differently, for example, fuel consumption may increase. If you do not take this into account, then native generators can radically improve the situation.
Most often, problems with a car generator occur during operation in the cold season. This is due to the number of electrically powered devices in the car. If at normal temperatures the music center, fan and headlights are turned on, then in winter you also need heated windows and seats, airflow and constant light. Simultaneously powering all these devices puts a large load on the generator, which can cause the headlights to start shining poorly.
Cleaning reflectors yourself
The reflector serves to collect all the light generated by the lamp into a single beam. With use, the reflector begins to become cloudy.
If you notice that the light from your optics has become dim and scattered, you need to tidy up the reflector.
To clean it indiscriminately, you can use the following method:
- remove the headlight housing;
- take out all the light bulbs from there;
- take a wire about 15-20 cm long;
- wrap electrical tape around it to the middle;
- secure a soft, lint-free cloth on top of the electrical tape;
- soak in glass cleaner;
- insert a wire into the hole in the headlight housing;
- carefully begin cleaning the reflector;
- only without sudden and strong movements;
- Dry any remaining moisture with a hairdryer;
- put everything back together.
Headlights must be as sealed as possible. This will prevent moisture from accumulating inside and allowing a large amount of contaminants to penetrate.
Internal cleaning is rarely carried out when the headlights have served more than one season. But outside, you need to take care of the optics much more often and more actively. If you do not want the glass to become cloudy and scratched, you should use protective films for headlights, which will significantly extend their service life. Their advantage is a good level of protection and the ability to quickly change as needed.
That's all for me. If you have anything to add or have any questions, write in the comments.
Subscribe, leave reviews, come to us again and don't forget to bring your friends!
( 3 ratings, average: 5.00 out of 5)
Safety glass
In the early 1990s, due to safety requirements, a new standard for head-mounted optics was introduced. In case of accidents, it should not fly apart into small pieces, injuring others. Automakers have begun to phase out glass headlights en masse. They were replaced by plastic, which turned out to be even stronger and more functional. The technology for making new low-break headlights was taken from aviation, where windows have long been made of plexiglass or plexiglass.
However, transparent plastic, while having many advantages, also has a number of disadvantages. As a result of prolonged use, it fades and acquires a yellow tint. Moreover, headlights using cheap xenon light bulbs suffer the most.
Until the mid-2000s, headlights were mainly made of polycarbonate on new cars. But later a new material appeared - acrylic. The new type of plexiglass is no longer afraid of exposure to ultraviolet radiation and no longer turns yellow as intensely as before.
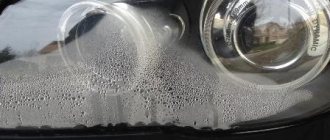
Why do headlights fog up?
In order to understand this issue, you need to understand what a car headlight is. Regardless of the type of headlight, there are several important points that apply to all lighting equipment. Firstly, the headlight housing cannot be completely sealed, since there is a heat source inside it - a lamp. A closed volume is characterized by one physical phenomenon - as the temperature increases, the pressure increases, since the molecules expand when heated. It follows that the headlight housing cannot be made sealed, otherwise it will rupture. To reduce pressure in the housing, there are special valves that are designed in such a way as to prevent the penetration of dirt and water, while reducing the pressure inside the headlight.
However, moisture can still get inside the headlight along with the air. A similar phenomenon occurs when, in conditions of high humidity, for example in autumn, air enters the headlight, where the temperature is higher than outside. By the time the headlight cools down, condensation will form on its body from the inside. There is nothing wrong with this if it disappears after a while after turning on the headlights again. But there are situations when fogging does not go away. For example, if the valve responsible for reducing pressure was damaged or its protective cap came off. Or in the case when the body of the headlight itself was damaged, which led to the formation of cracks.
In the case of the valve, increasing its diameter causes too much air, as well as water and dirt, to be admitted into the headlight housing. If a crack forms on the headlight housing, the pressure inside it will decrease, which will lead to excess moisture.
Final points about poorly functioning headlights
The situation when the car's headlights shine poorly is extremely uncomfortable for the driver. Incorrect operation of lighting devices not only threatens driving safety, but also does not add confidence when driving. Driving in dim light brings even more danger when driving on wet pavement. It is unacceptable to put up with such a situation and allow a decrease in safety on the road due to the fact that the devices illuminate poorly. The performance indicators of the head light should not be lower than the original ones when the car first came out of production. If circumstances are favorable, the luminous flux can even be improved by installing more modern lamps.
It is also important to check the electrical circuit of the car, the voltage level supplied by the generator to the devices. This will help you understand the features of electrical appliances and identify the reasons why the headlights do not shine well. When driving in traffic with bright lights, poor performance of lighting devices is doubly noticeable. If the headlights begin to shine poorly, think about changing the lamps to more powerful ones. By installing an inexpensive modification, you will immediately improve the light performance of your car. Driving will become more comfortable and safer.
How to Clean Headlights Using Baking Soda and Vinegar
Household cleaners are often the easiest and best way to clean many items. Some people promote the use of vinegar and baking soda, alone or in combination, to clean headlights.
Using a microfiber cloth or even a toothbrush, rub vinegar, baking soda, or a combination of both into the headlights.
Then rinse and repeat as necessary. Once the plastic has dried, you can add a layer of wax mixture to polish the headlights.
The naturally abrasive quality of baking soda can release dirt, but this method may not meet the demands of highly oxidized plastic. You can try this inexpensive alternative and see how well it works, just know that any results will be temporary and that you'll have to do this type of cleaning regularly to maintain the appearance of your headlights.
Video on how to wash the inside of a headlight. We recommend viewing
The most expensive method is to replace the headlight unit with a new element.
When replacing a headlight and purchasing a new part, do not forget that it is worth buying a couple of elements at once. If one optical element is beautiful, shiny and new, and the second turns out to be old and unattractive, it will be impossible to fully enjoy the purchase. Of course, the cost of the block for most cars turns out to be very, very high, so sometimes car owners are simply not able to purchase a set right away. If you replace the headlights with new ones, you should do the following:
- find a store where the cost of original production products turns out to be affordable, and ensure certain financial benefits of your purchase;
- select and order, if necessary, delivery of the optics that are necessary for your car, select according to the VIN code and other details for confidence;
- obtain and carefully inspect optical instruments, perform a detailed study of each detail, so as not to acquire any surprises in the near future;
- dismantle the old optics, you can try to sell them on ad sites or at the nearest disassembly site; such optics are often taken away for car restoration;
- install new headlights, correctly and carefully carry out fastening, connecting, and also check their functionality, only after that you can begin operation.
If you use high-quality purchasing solutions, you can get truly reliable headlights with a long service life. Remember that it is better to buy original optics. Otherwise, you will have to fix problems already at the installation stage. Chinese analogues or Taiwanese headlights for your car will often have problems with the quality of plastic, the integrity of the fasteners and the quality of the connection. So it’s better to overpay for equipment from the car manufacturer. See, for example, how to replace the headlight on a previous generation Renault Logan:
What to do if the headlights are dim
The only way to combat cloudy headlights is through restoration. It is necessary to carefully remove the damaged plastic layer by layer, and then polish it to return the headlights to their original appearance. You can eliminate the cloudiness yourself or by contacting a service center. This service is not very expensive, and experienced professionals will do everything faster and better.
Sandpaper and polishing pastes and gels are suitable tools for polishing headlights. Before polishing, the headlights must be thoroughly rinsed to remove dirt. After the damaged plastic is removed with sandpaper, a gel is applied and the surface is polished, microfiber can be used.
In most cases, in order to keep the optics in their original form, it is necessary to keep the car clean and periodically check the correct operation of the optics. This is very simple to do: in the dark, you need to drive up to the wall and turn on the headlights. The light should be moderately bright and with a clear glow path. However, even if a problem occurs, following the instructions, restoration work can be carried out independently, without major costs.
Cleaning the outside of the headlight
Many drivers, when washing their car themselves, forget to pay due attention to the headlights. However, their cleanliness is much more important than the cleanliness of a bumper or car door, because safety depends on the quality of lighting
From yellowness and plaque
Sometimes an unsightly yellow coating forms on the outside of the headlights. It not only spoils the appearance of the car, but also makes the headlights dim.
Today on the car cosmetics market there are a large number of products designed to combat this plaque. However, the most effective of them is already in your home - regular toothpaste. After all, if a product can remove plaque from teeth without corroding them, then it will cope with plastic just as well.
To clean a headlight with it, apply a small amount of paste to a towel or toothbrush, then buff the yellowed area in a circular motion. When finished, rinse the headlight and evaluate the result. If the plaque is very strong, repeat the procedure.
Video: how to clean plaque with toothpaste
From sealant, glue or varnish
After carelessly gluing the headlights, a small amount of sealant may remain on the plastic. It does not affect the operation of the device, but spoils the appearance of the car. To remove the sealant, it must first be softened.
But what exactly to soften it with is a big question. The fact is that different compounds are removed using different substances. Unfortunately, you are unlikely to know what type of sealant was used at the factory. In this case, you will have to try all these means one by one.
Very often, the remaining substances can be dissolved using ordinary vinegar. If vinegar doesn't work, try White Spirit. In some cases, treatment with gasoline, alcohol, oil and even very hot water helps.
In some cases, the headlight can be cleaned using a special silicone sealant remover. You can buy it at almost any store that sells car cosmetics. However, this product is not universal and is suitable, as you might guess, specifically for silicone compounds.
Once you have managed to soften the sealant, take a straight screwdriver and wrap it in a cloth soaked in the softening compound. Clean the desired area centimeter by centimeter. Then wipe the headlight with a clean cloth and enjoy its appearance.
Video: how to remove sealant using sunflower oil
To remove excess glue or varnish from the headlight, use WD-40. It will most likely be able to solve your problem. Nail polish remover without acetone is also suitable for removing glue.
With skillful hands you can remove any dirt, even bitumen residues. The main thing is that when cleaning headlights with your own hands, inside and out, follow the basic rules: do not use alcohol for the reflector and acetone for plastic. If you have tried all the remedies and the contamination still remains, try taking the problem to a car repair shop. Experienced specialists will do all the work, and at the same time suggest an effective cleansing method that you can successfully use in the future on your own.