Signs of a muffler malfunction
A change in exhaust sound is a clear sign of problems. At the same time, it is extremely undesirable to ignore such problems, since muffler repair is usually advisable only at an early stage.
Typically a muffler:
- flogs;
- broken;
- burns out;
- collapsed from the inside.
- falls off.
When the muffler cuts, this indicates a loss of seal (often at the joints). In this case, the sound is chirping. If the muffler is broken, the exhaust sound is sharp, and the smell of exhaust gases in the cabin is clearly felt.
If the muffler is burnt out or completely rotten, the noise resembles the sound of a direct flow operation. In this case, the smoke will not come out of the pipe, but somewhere on the surface of the can itself. If the muffler falls off, its body simply swings on the hangers, no smoke comes out of the exhaust pipe, and when the engine starts, the sound is sharp and quite loud.
It also happens that the muffler is visually in order, but its internal structure is damaged. In this case, you can hear changes in the exhaust sound, gases come out unevenly, the tonality may change when driving over uneven surfaces, when the can sways (the sound changes from loud to low).
Repair with the power of sealant
Often inexperienced drivers think that any damage can be patched with sealants. But this is far from true; it simply serves as additional protection for connections. Sealants are most often used to coke hard knocks where different elements of the system and clamping rings meet. It can also be taken if the connecting elements were selected in the wrong sizes or the gasket was replaced with a new one. Sealing with a sealant allows you to simplify the process of disassembling the exhaust system in the future.
Source
Basic moments
To replace the VAZ 2107 muffler as quickly as possible, you will need screwdrivers, a set of keys and sockets, as well as an inspection hole. If there is none, then you can raise the entire rear of the car as much as possible so that it is convenient to work under it. The main muffler is located at the rear of the car. Its edge is visible when looking at the car from behind. This element must be replaced either in case of severe deformation, as a result of which the ability to pass exhaust gases is greatly deteriorated, or if it is completely burned out, due to which exhaust gases escape from the muffler without being cleaned and noise reduced. Even if there are breakdowns or burnouts, the noise level increases many times. In this case, it is necessary to replace this element.
Pay attention to weight
Due to the fact that the water pipe weighs an order of magnitude more than the one that comes with the part from the factory, you will have to strengthen the fastenings. In addition, you should insert the flexible corrugation into place that goes after the exhaust manifold.
Thanks to such changes, the noise level will be significantly reduced, and the service life of the part will be more than 2 years. By the way, the heavier the pipe, the less vibration it will emit.
Modification of mufflers for VAZ 2106
When the muffler begins to “tire” from work, the driver will begin to notice this on himself: increased noise when driving, the smell of exhaust gases in the cabin, a reduction in engine dynamics... Replacing the muffler with a new one is not the only way to eliminate all these problems. Fans of experiments often tune the exhaust system, because this way it lasts longer and works better.
Today, car enthusiasts distinguish three types of muffler modifications:
- Audio modification is the name of tuning, the purpose of which is to enhance the “growling” sounds in the muffler while driving. This modification really allows you to turn the quiet “six” into a roaring lion, but it has little effect on the performance of the exhaust system.
- Video modification is a tuning aimed at external decoration of the exhaust pipe rather than at creating improved performance characteristics. Video tuning usually includes replacing the exhaust pipe with a chrome one and using nozzles.
- Technical tuning is the most effective in terms of performance. It is aimed at improving the performance of the exhaust system and even increasing engine power by up to 10–15%.
How to make a sporty muffler
A sports muffler is a straight-through muffler. It is necessary to create additional dynamic properties and give the model a special sporty look. The straight-through muffler has an extremely simple design, so you can easily make it yourself, even from a standard VAZ 2106 muffler.
To make a sports forward flow you will need:
- standard muffler;
- a pipe of a suitable size (usually 52 mm);
- welding machine;
- angle grinder (grinder);
- drill;
- metal cutting discs;
- ordinary metal sponges for washing dishes (about 100 pieces).
Video: how forward flow works on a VAZ 2106
The procedure for manufacturing a direct-flow muffler boils down to the following work:
- Remove the old muffler from the car.
- Use a grinder to cut out a piece from its surface.
- Remove all internal parts.
- On a 52 mm pipe, make cuts in the form of a herringbone or drill many holes with a drill.
- Insert the perforated pipe into the muffler and weld it securely to the walls.
- Fill all empty space inside the muffler with metal sponges for washing dishes made of metal.
- Weld the cut piece to the muffler body.
- Cover the product with mastic or heat-resistant paint.
- Install direct flow to the car.
Photo: main stages of work
A direct-flow sports muffler of our own production optimizes engine performance and makes the VAZ 2106 more sporty and dynamic. There is a huge selection of such modifications of mufflers in stores, so if you have no manufacturing experience, you can buy a new one.
Do-it-yourself and purchased nozzles for Glushak
Attachments, which are usually used as a decorative element, allow you to modify the muffler and optimize its performance. Thus, a correctly made and installed nozzle is guaranteed to improve the following indicators:
- the fuel burns out completely;
- less carbon deposits form on the spark plugs;
- the power of the power unit increases by approximately 15%;
- fuel consumption is reduced (by about 20%).
That is, the use of an attachment can improve the basic indicators of vehicle convenience and efficiency. Today you can find attachments of various shapes on sale; the choice is limited only by the financial capabilities of the driver.
The nozzles create an attractive appearance for the body and also optimize the operation of the entire exhaust system.However, you can make the attachment for the “six” muffler yourself. To do this you will need the simplest materials and tools:
- stainless steel sheet with a thickness of 1–1.2 mm;
- cardboard for template;
- Bulgarian;
- sandpaper and polishing materials;
- metal scissors.
A typical exhaust pipe nozzle has a round cross-section, so the easiest way to make just such an element is:
- Use cardboard to model the body of the future nozzle, taking into account the locations for fastening joints.
- Using a cardboard template, cut out a product blank from sheet material.
- Carefully bend the workpiece and fasten the joint with bolted connections or welding.
- Clean the future nozzle, you can polish it to a mirror shine.
- Install on the vehicle exhaust pipe.
Video: making a nozzle
The nozzle is usually attached to the pipe using a bolt and a through hole or simply on a metal clamp. It is recommended to lay fire-resistant material between the pipe and the nozzle to increase the service life of the new product.
Why is a homemade element better than a factory one?
Due to the large number of fakes, it is very difficult to find a truly high-quality spare part today. And if such a part is found, the price for it will be simply exorbitant. Moreover, most of the complaints concern the elements of the exhaust systems. The muffler rusts and burns out very quickly. Its service life does not exceed 1-2 years. It doesn’t matter how intensively you use your car. It burns out not from mileage, but from time. Even if the car is driven once a week, this will not add life to the muffler. It will still have to be changed in a year or two.
After this time, car enthusiasts have a question about the need to replace or repair this part. If you repair the muffler yourself or make it from scratch, you can be sure that it will last much longer. After all, we will not skimp on important materials. Also, by making a muffler with your own hands, you can add your own configuration to the exhaust system. For example, make a forward flow to increase engine power. However, driving long distances with such a “can” will be uncomfortable. Therefore, you can remake the system in a different way by adding an additional resonator to it. This way the machine will run much quieter.
From the washer to the muffler
To make a muffler from washing tubs, you will need:
- washing tanks (stainless steel);
- Bulgarian;
- drill;
- welding machine.
Now proceed with the following steps:
- Cut open the washing machine tank.
Parts of a cut tank from a washing machine
- Bend the resulting sheet fragment to the shape of the old muffler and weld the seams.
- Do the same for the other half.
The first half of the future muffler
- Make 2 perforated pipes of the required diameter and size from stainless steel, drill holes by hand or take ready-made metal (a tank from a foreign washing machine).
View of a homemade perforated pipe
- Cut the muffler walls and baffles to the required size.
An example of what shape you need to cut the walls for a homemade muffler
- Weld everything to each other along the edges.
View of the parts connected together (perforated pipe, tank and wall)
- Insert the first partition, previously connected to the second perforated pipe, and weld it so that the wall is not at the end of the first half of the barrel, but a little deeper; If desired, you can make holes on the partition.
View of the parts connected together (perforated pipe, tank and partition)
- Weld together the first and second parts.
Connect the parts and cook
- Weld the second baffle to the second perforated pipe and weld this structure to the second half of the muffler.
- Paint with heat-resistant paint (optional).
- Evaluate your work.
Muffler assembled from a washing machine
- Finally, weld the new muffler to the exhaust pipe.
DIY exhaust tip
If you want to make an exhaust pipe nozzle at home, then you will need:
- a piece of stainless steel of a suitable size, about 1 mm thick;
- cardboard;
- an angle grinder with a cutting disc or a jigsaw with a blade for cutting metal;
- electric drill;
- car tool kit;
- sandpaper and polishing materials.
There are many different options for making a nozzle; it can be of different shapes and from different materials, but the design principle is the same, namely:
- The required shape for the future nozzle is cut out of cardboard, taking into account the attachment to the pipe.
- A cardboard template is constructed.
- Using the template, the body of the future nozzle is cut out from part of a sheet of stainless metal.
- The workpiece is bent and the joint is joined.
- The nozzle is cleaned and polished to a shine.
Secure the product so that it fits tightly, but is easy to remove. This must be done so that later it will be possible to clean the case from dirt.
An example of a homemade nozzle
The muffler is an indispensable part of the car. Thanks to it, we drive cars comfortably, and its faulty operation puts people's lives in danger. Don't forget to take care of your car's exhaust system, and it will serve you for a long time and faithfully.
Do-it-yourself exhaust for UAZ 469
To turn the classic UAZ-469 SUV into a two-seater off-road coupe, the authors of the concept had to completely abandon the bodywork of the Ulyanovsk enterprise. As a result, all that remained from the factory UAZ was the frame, modernized suspension components, steering and braking system. Many components were borrowed from its descendant - UAZ Patriot. The 75-liter fuel tank was moved back under the trunk for more optimal weight distribution, and the spare wheel was also located there. The entire design and assembly process, which generally lasted 1.5 years, was carried out in an ordinary garage. The standard engine was replaced with a 16-valve ZMZ-405 engine with a power of 155 hp, after chip tuning the power was increased to 170 hp. with a maximum torque of 7000 rpm. The exhaust system has also been completely redesigned and a zero-drag air filter has been installed. The gearbox and transfer case were left original (4 synchronized “short” gears) - the CRAB’s acceleration was not at all all-terrain. The maximum speed is up to 160 km/h, but there is still some reserve left.
The car was equipped with a snorkel (protecting the engine from dust and water), which is usually used by professional racers to overcome shallow streams, rivers and swampy areas during racing races. The maximum ford depth that the UAZ Crab can overcome on its own reaches 1.2 meters. The homemade exhaust was made direct-flow, with pipes running on both sides of the car. For 100 kilometers, the all-wheel drive two-seater Crab, weighing 1,600 kilograms, consumes from 15 to 17 liters of AI-95 gasoline.
The first sketches of the body were made from ordinary photos of the frame and components, scrupulously finishing everything in Photoshop. But the main modeling was done with our own hands using cardboard and foam plastic. For example, the hood was remade only in metal 3 times. The roof and doorways were borrowed from the Honda CR-X. The plumage and all other body parts are independently made from sheet iron, which is then puttied and painted. The name “Crab” came to mind to its creators already during construction. The car received this name thanks to its widely spaced front wheels, optical lighting technology and the bright red color of the body, which the designers decided to paint the car they were creating.
Shooting when starting up
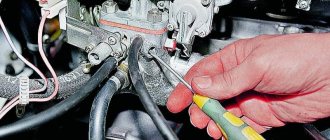
If you hear popping noises from the muffler, this may indicate a variety of problems - from a clogged air filter to an incorrectly adjusted carburetor. Accordingly, different repairs are applied:
- Replacing the filter.
- Carburetor adjustment - checking the fuel level in the chamber, the integrity of the float, cleaning the jets.
- Normalization of ignition - it can “shoot” if it is too late.
- Adjusting the thermal clearance of the cylinder head valves.
- Tightening or replacing the timing belt, toothed pulley, grinding valves.
Experts determine causes and consequences by conducting computer diagnostics; this is the fastest way to understand which part of the car is the problem.
Repair with ceramic tape
Ceramic tape is an equally easy repair method. It can withstand temperature loads of up to 1000 degrees Celsius thanks to its ceramic base. Tape won't help when changing whole parts, but it will help to fix a problem with a small hole or gap.
It is easy to use ceramic tape:
- Clean the muffler before repairing.
- Wet the tape with water.
- Wrap at least 2 layers around the damaged area.
Repairing a muffler using a ceramic tape bandage
Ceramic tape is still a temporary option and will last up to three months. It will not be possible to solve the problem completely with its help, so it is only suitable as an emergency measure.
Features of operation and types of mufflers
There are two types of mufflers used in modern cars: resonant and direct-flow. Both can be installed in conjunction with a resonator (pre-silencer). In some cases, a straight-through design can replace a front muffler.
Resonator device
Structurally, the muffler resonator, which is also called a flame arrester, is a perforated pipe located in a sealed housing, divided into several chambers. It consists of the following elements:
- body (has a cylindrical shape);
- thermal insulation layer (exhaust gases have a very high temperature);
- blind partition (to turn the flow of gases);
- perforated pipe;
- throttle (allows you to change the cross-section of the exhaust gas flow).
Resonant muffler design
Cross-section of the muffler
Unlike the preliminary muffler, the main resonant muffler is more complex. It consists of several perforated pipes installed in a common housing, which are separated by partitions and located on different axes (see Fig. Silencer in section):
- front tube with perforation;
- rear tube with perforation;
- inlet pipe;
- anterior partition;
- middle septum;
- posterior septum;
- exhaust pipe;
- body (oval section).
Thus, a resonant muffler uses all types of transformation of sound waves of various frequencies.
Features of a direct-flow muffler
The main disadvantage of a resonant muffler is the effect of creating back pressure, which occurs as a result of redirecting the flow of exhaust gases (when it collides with partitions). In this regard, many motorists tune the exhaust system by installing a direct-flow muffler.
Direct flow muffler
Structurally, the direct-flow muffler consists of the following elements:
- sealed housing;
- exhaust and inlet pipe;
- perforated pipe;
- soundproofing material - fiberglass is most often used, which is resistant to high temperatures and has good sound-absorbing properties.
In practice, a straight-through muffler has the following operating principle: one perforated pipe passes through all chambers. Thus, there is no noise suppression by changing the direction and cross-section of the gas flow, and noise suppression is realized solely through interference and absorption.
Due to the unhindered passage of the exhaust through the direct-flow muffler, the resulting back pressure is very low. However, in practice this does not provide a large increase in power (from 3% to 7%). On the other hand, the car has a characteristic sports car sound, since the noise-absorbing technology present in it only eliminates high frequencies.
The comfort of the driver, passengers and pedestrians depends on how the muffler works. So, during prolonged use, increased noise can cause serious inconvenience. Today, installing a direct-flow muffler in a structure for a car moving within city limits is an administrative violation that threatens with fines and an order to dismantle the device. This is due to exceeding the noise limits specified by the standards.
Detection of resonator defects
All of these defects, to one degree or another, worsen the sound quality of instruments: they reduce the volume or cause several reeds to sound simultaneously, worsen the excitability of the reeds, or increase air consumption. Therefore, in most cases they can be identified by playing them on an instrument.
To determine the causes of poor sound, it is necessary to disassemble the accordion and carefully check the bars and resonators.
Detection of defects in resonators should begin with checking the strength and accuracy of installation of the resonators. If the resonator is installed correctly, defects should be looked for in the installation of strips on the resonators. If there are no defects in the installation of voice strips on the resonators (the gaps between the strips and the resonator are well filled with mastic), the strips should be removed and the resonators checked. All adhesive connections and parts of the resonator are checked.
With removable resonators, air may pass between the soundboard and the sockets due to loose joints of the pads on the sockets or their unequal thickness.
Direct flow muffler
Taking into account the fact that any standard muffler provides acoustic comfort, but takes away power, in some cases the muffler and resonator are modified.
On the one hand, the car in this case is noisy, but on the other hand, you can get an increase in power.
To put it simply, direct-flow mufflers or straight-through mufflers do not have partitions (walls). As a result, exhaust gases do not encounter resistance, it is easier for the engine to “breathe”, the cylinders are better ventilated, etc. By the way, if you additionally cut out the catalyst, install a tuning exhaust manifold or install a flame arrester, in general you can get a 7-10% increase in power.
Of course, such modifications are prohibited in many countries, as the car becomes noisy and exhaust toxicity increases noticeably. However, partial modernization, when only a quiet forward flow is installed, is quite acceptable. This allows you to make the exhaust sound “richer,” although you should not count on an increase in power after installing such a muffler “can.”
Possible inconveniences associated with a quiet muffler
It is also necessary to test in action how the exhaust system works so that gases exit normally through the exhaust pipe. Therefore, it is necessary to check at higher speeds, then it will be possible to draw the right conclusions. But as a rule, gases will escape through such a resonator without difficulty.
And then in the video there is another way to reduce the sound of the muffler, making a really very quiet exhaust system:
Fans of auto tuning are ready to endlessly carry out “experiments” on their car, just to somehow stand out from the crowd, but the first thing that changes in the device is the installation of sports mufflers. Any intervention in the design of standard machine systems must have a clear justification and be carried out in compliance with certain technologies and rules. When starting to modernize components such as the exhaust system, you should know exactly what the final result should be and how to do it correctly.
Kinds
Resonators or additional mufflers are classified depending on the type of engine they are used on.
Therefore, there are 2 main types of devices.
- Designed for installation on two-stroke engines. If the vehicle is equipped with such a motor, which is not so common these days, then the resonator becomes a mandatory element of the exhaust system layout. If the resonator is missing, this will immediately lead to an increase in the amount of fuel consumed. The operation of the motor will change for the worse, speed and power will decrease. This is due to the fact that not only exhaust gas will be removed, but also incompletely burned fuel. Hence the drop in speed parallels the increase in fuel consumption.
- Resonators installed on four-stroke power plants. In the case of such engines, the resonator may not be beneficial to the car, but may create certain additional problems. Removal allows you to increase the engine power level by approximately 15%. Experienced motorists believe that on four-stroke engines the resonator only interferes with the normal operation of the engine. Yes, if you remove it, the power will actually increase. But at the same time, the environmental friendliness of the vehicle will deteriorate, and the exhaust will begin to pollute the environment. Therefore, 4-stroke engines still have resonators that allow them to achieve the required environmental standards.
There is one more additional classification that distinguishes resonators according to their design features.
Some cars are equipped with standard monoblock type elements. But gradually, almost everyone is switching to combined devices.
The second type of resonators consists of two main parts. This is a classic design with a pipe and partitions, as well as a chamber filled with special materials with noise-absorbing properties. Often, materials based on basalt fiber are used in structures.
Combined devices are more efficient, modern and useful in the operation of automobile engines and exhaust systems. Therefore, these types of resonators are found on most vehicles.
Small mufflers or muffler resonators are divided by their size. The following subcategories are distinguished:
- short;
- average;
- long.
Resonators are also sometimes classified depending on their volume. This is a useful classification method, since volume largely determines how effective a resonator will be in the design of an automobile exhaust system. If there is a volume deficit in the resonator, then when the driver sharply presses the gas pedal, the noise level will be extremely high. Some people like this sound, and therefore resonators are specially installed. But for reasons of safety of the exhaust system, as well as out of respect for people around, it is better to install devices with sufficient displacement.
Resonators or small mufflers are made from various materials. The most cost-effective designs are created on the basis of aluminized steel. Although in reality it is the simplest steel, on top of which a small layer of aluminum is applied. They look like full aluminum, but in fact they are not able to withstand significant loads. Requires more frequent replacement. The aluminum layer only temporarily prevents corrosion from forming on the device.
Car muffler resonator
If a motorist wants to get a truly high-quality, durable and efficient resonator, when the standard factory element is not satisfactory or has worn out, it is optimal to choose designs based on stainless steel with a double casing.
The exhaust system is constantly subjected to heavy loads in the form of high temperatures. As a result, malfunctions periodically occur in the normal operation of the entire vehicle. To ensure that the breakdown of a resonator or other component does not come as a surprise to the car owner, it is strongly recommended to carry out a preventive check and diagnostics of the unit’s performance. Having noticed the primary signs of malfunctions, you can take timely measures, carry out repair and restoration work, or simply completely replace the failed resonator.
How to use?
Do-it-yourself cold welding of a muffler is done as follows. First, the surface goes through a preparation procedure. The area should be cleaned with sandpaper. After this, the surface is degreased using white spirit, gasoline or another solvent. Next, you should prepare the adhesive composition. Cut off the required amount of sealant and knead it. In the case of using liquid analogues, mix them thoroughly. Next, apply glue to the damaged area of the muffler and level the mixture.
Please note that the composition hardens within a few minutes, so all work with the sealant must be done very quickly.
Finally, you need to wait until the mixture dries completely. Depending on the brand of the manufacturer, this takes from 1 hour to a day.
Purpose
As you know, the mixture ignites during operation in an engine. This fire is accompanied by a characteristic sound. During an explosion, colossal pushing energy is generated. It is so large that it can lift the piston to top dead center. In the last stroke of work, gases are released. They escape into the atmosphere under pressure. But what is the exhaust system for? It serves to dampen sound vibrations. After all, without it, the operation of even the most technologically advanced engine would be loud and unbearable. Thus, the exhaust system performs the following functions: Removing combustion products from the engine cylinders. Reduced gas toxicity levels. Preventing combustion products from entering the vehicle interior.
Repair features
Once the inspection is completed, you can proceed directly to repairing the damaged unit. Much depends on the complexity of the damage. Let's consider several main options:
- If there are problems with the resonator (we have already discussed how to diagnose the problem), you need to cut out the old device, buy a new one and weld it in place. If you do not have welding skills, then it is better to entrust the work to specialists or, at a minimum, take several welding lessons. It is very important to follow safety rules (prepare sand, install grounding, and so on).
- A small burnout in the “body” of the muffler can be repaired using conventional sealant. But when choosing a product, pay attention to the permissible temperature range (the maximum limit should be up to 1000 degrees Celsius). If this requirement is not met, the treatment will not be durable - the hole will quickly return its “rights”. The best option is to choose a silicone-based sealant. The composition must be applied only to a well-cleaned surface, first remove soot and corrosion from the edges.
- If there is serious damage, the use of sealant will be ineffective. In such a situation, you can use special fiberglass fabric (if desired, you can find it at the car market or in a spare parts store). The mounting process is very simple. The area around the burnout is coated with epoxy resin, and the prepared patch is attached on top. To achieve maximum effect, immediately after installing the fiberglass and installing the muffler, warm up the engine well for 30-40 minutes.
- The most difficult situation is when damage appears at the junction between the resonator and the exhaust pipe. The best option here is to use conventional welding. If you don’t have a welding machine at hand or you don’t have special skills, you can use synthetic resin. When applying the latter, the surface must be well cleaned. If you decide to cook, then monitor the quality of the seam - it should be continuous and neat.
- Another important point is the repair of the corrugation - a special unit designed to absorb vibrations from a running motor. If the corrugation is faulty, repairs should not be delayed. As for the probable causes of the breakdown, there may be several of them - failure of the catalyst, damage to the engine mounts or the mounting rubber bands that hold the muffler. In addition, the corrugation braid can be damaged by chemicals and road impacts or impacts from stones.
Remember that repairing the corrugation is impossible - it can only be replaced. The process is quite simple. The old assembly is cut off using a grinder, the joints are cleaned, and a new corrugation is welded. After completion of the work, the joint must be painted over to protect the metal from corrosion.
Alternative muffler repair methods
Along with cold welding, you can repair a part using:
- Special fiberglass bandage. This material is also able to withstand high temperature loads. Fiberglass bandage is suitable for repairing large areas of the muffler where cold welding is not suitable. This material also contains silicates and epoxides.
- Metal patch. It also does not require the use of a welding machine. The patch is fixed using clamps.
- Special tape. This product consists of a high-strength, high-temperature adhesive that activates and becomes ceramic upon contact with water. The muffler strip can also be made of fiberglass.
However, welding, tape, bandages or patches do not always help get rid of unpleasant “symptoms”. Many car owners often start looking for cracks in the muffler if water starts dripping from it, but the reasons for this phenomenon are rarely associated with a leaky part.
What malfunctions occur
Before talking about malfunctions, it is necessary to clarify one question: why can it fail in the first place?
First of all, the conditions of its operation “help” rapid wear and breakdowns:
- From the inside, the metal walls are constantly exposed to a pulsating hot flow of gases - this alone causes rapid aging of the body and erosion. In addition, during the idling period of the engine and during warming up (for example, in winter), the gases remaining in the pipes are cooled below the dew point - that is, condensation occurs. And excess moisture always causes the metal to corrode faster;
- From the outside, dirt and even ice (in winter) inevitably stick to the body of the part while driving. Moisture, dirt and impacts of the spare part on uneven roads also create favorable conditions for the development of corrosion and loss of sealing of the housing.
Methods of protection against corrosion
Corrosion is the main enemy of all metal parts of the device.
Modern exhaust systems are already manufactured taking into account the resistance to the destructive effects of rust and metal rotting, however, a thin layer of coating may not protect the silencer 100%.
Even the thickest pipe walls can be damaged due to metal corrosion
To ensure that the new muffler lasts as long as possible, car enthusiasts use two main methods to combat corrosion:
- Drilling holes for condensate drainage.
- Metal treatment with anti-corrosion paint.
The first method allows you to quickly remove all the moisture accumulated inside..
Accordingly, the less water in the system, the greater the chance that the metal will last longer.
It is enough to drill one hole with the thinnest drill approximately in the middle of the body so that the condensation drains as it forms.
The second method is considered more reliable.
Painting a car muffler not only protects the product from corrosion, but also prevents the aging of the metal.
For these purposes, it is necessary to choose heat-resistant paint with anti-corrosion protection.
Automotive stores offer many varieties of such materials.
The main thing is to choose a paint that can withstand temperatures up to 400 degrees Celsius (this is the heating threshold of most devices).
Silicone-based paint can show excellent results.
Before applying such a coating, there is no need to pre-treat the pipe surfaces.
It is important to heat treat the surfaces after applying several layers of paint.
To do this, you can use a regular hair dryer: dry the paint and give additional protection.
In some cases, car owners turn to specialized organizations to additionally heat the part.
Formation of holes
Holes in the muffler can appear for two reasons:
- the effect of corrosion;
- mechanical damage due to road unevenness.
If the destructive effect of corrosion can be combated with paint, a protective coating or drilling holes, then it is almost impossible to avoid hitting potholes on the asphalt.
A hole of this size can still be welded, but if you have the financial opportunity, it is better to immediately buy a new element
If a hole has formed in the housing, it is necessary to either weld it (put a patch) or completely replace this element of the exhaust system.
Welding work is advisable when the hole has a small diameter.
Why did the muffler burn out?
If while driving the driver hears a strong roar of exhaust and smells unpleasant odors in the cabin, then, most likely, this part is to blame - it has burned out.
Mufflers most often burn out due to prolonged operation of the car at idle speed and during short-term driving over short distances. This fact has been proven by millions of car owners around the world.
The burnout may also be because the part was welded poorly.
Today on the car market there is a huge number of non-original “silencers” that are produced in garage conditions without any heat treatment or rust protection.
Accordingly, very soon such products fail - they burn out under the influence of high temperatures.
It’s better not to waste time and effort on repairing a muffler with a burnout, but to immediately buy a new one
If the plug is burnt out, then it is best to replace it with a new one.
If the burnout area is small, then it is permissible to use welding or apply a thermal protective coating to the entire body of the product.
However, such measures will be temporary, since it is unlikely that it will be possible to recreate 100% tightness for a long time in case of burnouts.
Replacing the muffler suspension system
Replacing rubber car muffler hangers
Rubber hangers are easy to change - all you need is a little oil and a long screwdriver.
This system is a set of rubber cuffs that are installed between the body and a metal muffler. They wear out mainly from impacts, and rubber is also subject to aging from high temperatures. The number of such elements is calculated when designing the exhaust system, so one broken fastening rubber will lead to a break in the rest. They are easy to change, and all you need is a little motor oil and a long screwdriver. Oil is necessary to lubricate the hinges with a screwdriver, remove the fastening rubber bands, and then install new muffler hangers.
How to repair a muffler using bandage tape
Let's move on to how to properly use tape to repair a muffler.
- Step 1 . Prepare the muffler for use. It must be at room temperature - it is unacceptable to work with hot parts! Using a wire brush or other abrasive device, remove dirt, paint residues and burns. Degrease the surface.
- Step 2 . Prepare the bandage tape for use. If it is made on a silicate basis, open the package and pour water inside. Wait a few minutes, shaking the contents occasionally.
- Step 3 . Apply the bandage to the problem area . Wrap it tightly, as if you were looking at a regular elastic bandage. Additionally, secure with the wire that comes with the kit or another wire that you have on hand. Apply the tape overlapping, layer by layer. Start winding not from the damaged area, but with a margin of 1-2 cm. For high-quality repairs, eight to ten layers of tape are enough.
- Step 4 . Wait for the adhesive layer to harden - this will take a maximum of 45 minutes. Constantly level the tape all this time - this way the result will be much better. It takes one day for complete polymerization.
If you are using a sodium silicate bandage and only one part needs to be repaired, use the package at a time - it does not last long. Work in a warm (temperature 14–22 °C) well-ventilated area, use gloves as personal protective equipment.
Some manufacturers sell the tape complete with pastes and resins. They help speed up the hardening of the adhesive layer and improve sealing performance.
Follow the listed steps and our recommendations exactly - this will help you end up with a repaired muffler or other product that needs urgent restoration. But remember that this type of “reanimation” does not eliminate the need to replace the muffler in the future.