Removing a car battery from a vehicle is a procedure that every car owner is probably familiar with. It is performed when the battery needs to be replaced, it needs to be recharged or placed in temporary storage, for example, in a heated room for the winter. Quickly dismantling and then putting the battery back in place is a task that any car enthusiast can handle. To perform such a procedure, you do not need any specific skills; it is enough to know a couple of simple rules and perform everything in a strictly defined order.
How to connect a car battery
To connect the battery to the car, you must follow the sequence of actions below.
- Clean the inner surfaces of the wire lugs. It is recommended to use fine-grained sandpaper.
- Clean the battery terminals.
- Connect plus. It is forbidden to connect the negative first. This is due to the fact that a short circuit is possible if the key carelessly touches the car body.
- Before connecting the second terminal, you need to check that the connection diagram is correct and the polarity is not reversed. On some cars, for safety reasons, the tips have different diameters.
- Tighten the nuts securely.
- If there are plastic protective caps, place them on the terminals.
How to safely remove clamping devices
First you need to disconnect the battery. Then, in strict order, perform the following steps:
- We remove the plastic protection (casing), thereby gaining access to the battery itself. Let's reduce the negative (-) clamp.
- Remove the connector from the terminal with the minus sign. We fold the removed negative electrical wire together with the connector so that it does not interfere with the subsequent work process, and also cannot return back.
- Similarly, remove the connector (+).
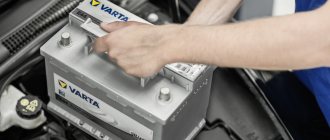
- Only now we pull the battery to the surface.
Take note! When performing the above manipulations, use only tools special for this work. You don’t have to worry about unscrewing nuts and bolts using ordinary pliers. There are adjustable wrenches for this.
If the terminals are oxidized
Oxidation at the terminal terminals occurs:
- due to a leaky battery case;
- due to a faulty generator giving overcharge.
The oxide forms in the form of a whitish coating, similar to salt, which indicates that it is urgent to take some measures to eliminate this defect. If plaque has accumulated on the battery terminals, it will not be easy to remove the wires from them, and before unscrewing the nuts and bolts, you must first remove the formed oxide.
The easiest way to clean the battery from plaque is with a baking soda solution; it must be applied to the oxidized surface and wait for a while. After the build-up has dissolved, its remnants will need to be thoroughly removed using a clean rag, and only then can you begin to remove the wires.
We recommend: How to remove and clean injectors on a VAZ 2110
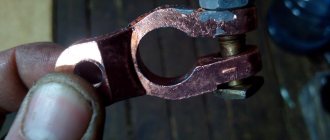
Another important point is that oxidized deposits accumulate on the inner surface of the battery cable terminals. It must be cleaned, otherwise contact is lost, the engine starts with problems, and the wires get hot.
You can clean oxidized areas using:
- sandpaper;
- WD-40;
- ordinary water and rags.
By the way, with a cloth moistened with water, the plaque can be cleaned effectively; you just need to spare the liquid and repeat the action several times. On the contrary, it is better not to use a metal brush - deep scratches form on soft metal, in which dirt accumulates, causing contact to deteriorate.
Putting the battery back into the car
Step-by-step instruction:
- Inspect the terminals attached to the ends of the battery cables to make sure they are clean and free of corrosion. If not, clean them up using a terminal cleaning tool. There is a special tool on sale that fits onto a stand, with another brush that is inserted into the clamp. In its absence, a sturdy wire brush can do the job. The cleaner the clamps, the better the connection.
- Try on the battery so that the red positive terminal matches the positive terminal and cable location.
- Reinsert the battery. Secure it with the clip or retaining system you removed earlier.
- Remove the plastic covers that cover the battery terminals and install anti-corrosion washers on them.
- Apply a thin layer of grease to the terminals before connecting the positive terminal for the first time. A special anti-corrosion lubricant can be purchased to prevent the formation of fluffy greenish-white corrosion that can actually prevent the battery from charging. As a last resort, use regular Vaseline. Using a wrench, tighten the connector until it stops. Then repeat the same steps for the negative post and terminal.
- Try rocking the battery slightly. If it moves, tighten the clamp or retaining system. You have finished installing your car battery.
Which terminal to remove first?
To understand which terminal needs to be removed first, you need to remember your school physics course. The “ground” is connected to the negative terminal of the battery, which is the metal elements of the car - the body, frame, engine, etc. All energy consumers in the car are connected to the positive terminal - the starter, lighting, headlights, audio system, etc.
When any terminal is removed, the circuit opens, so formally the order of removal is not important. However, if the removal procedure is incorrect, there is a risk of a short circuit. In this case, not only the elements of the car can be damaged, but also the person performing the manipulation.
If you remove the positive terminal first, and then accidentally touch the positive contact of the battery and the metal part of the car (ground) with a metal object, for example a wrench, then a strong short circuit will occur. If you remove the negative terminal first, the mass will be de-energized, so further removal of the “plus” will not lead to a short circuit even with careless actions.
Therefore, the sequence of actions when removing the battery is as follows.
- First, the standard battery mount is unscrewed.
- The nut securing the negative contact is loosened.
- The negative terminal is removed.
- Then the nut securing the positive contact is loosened.
- The negative terminal is removed.
- The battery is removed from the stand.
How to remove a battery with stuck terminals
If the battery is working properly, then the intervals between its removals can be quite significant. This threatens that the wire terminals may become stuck to the battery electrodes, and attempts to remove them by simply loosening them will not bring success. It is necessary to use a special product called contact cleaner; they are produced by many well-known brands (Liqui Moly, Abro). As a last resort, it is permissible to use WD 40; most car owners will find this product.
The procedure should be performed in the following sequence:
- treat the terminals with a special agent;
- let the liquid seep into the cracks, and then try to carefully hook the terminal from below with a thick screwdriver and try to press on it;
- if a breakdown occurs, remove the terminal in the usual way, twisting it in different directions and simultaneously pulling it up.
Many drivers practice hitting the terminal with a hammer or other heavy object. This is unacceptable - both the electrodes themselves and the wire terminals are made of soft metal, and such a barbaric method of removal can lead to their destruction.
To prevent the terminals from sticking in the future, you should treat them with Litol/Negrol lubricant, grease or a special product such as Liqui-Moly spray, domestic Tsiatima or Molykote HSC Plus. All of these means protect the terminals from oxidation and corrosion.
Required Tools
In order to connect and disconnect the battery on a car, you need the tools that are presented in the table below.
Table - Tools required to connect and disconnect the battery
| Tools | Note |
| Set of heads | Sizes from “10” to “18” depending on the machine model and terminal type |
| Ratchet | With extension |
| open-end wrench | For unscrewing and tightening terminal fasteners if it is impossible to reach with the head |
| Screwdriver | With straight or cross blade. Necessary for disconnecting some types of terminals |
| Brush | For cleaning dirt and oxidation |
| Sandpaper | For stripping terminals |
We recommend: VAZ 2107 - engine tuning
Disconnecting and connecting battery terminals rarely leads to injury. Despite this, the battery is a chemical source of electricity and poses a certain danger. When working with it, there is a risk of contact with acid from the electrolyte. The voltage at the terminals is usually 12 V, but even this can lead to electrical injury under unfavorable conditions. Therefore, many car owners use protective equipment such as gloves and goggles for reinsurance.
Avoiding short circuits
However, it is believed that you should always disconnect the positive terminal of the battery first to prevent electricity from leaking from the battery. Let's consider a case from life. This is the story of what happened to a professional dentist who sometimes likes to fix his sports car himself. He decided to remove the battery from the car using a socket wrench to loosen its clamps. The key came into contact with the man's wedding ring, and the ring, in turn, touched the battery clamp. A massive short welded the ring to the clamp and wrench, which in turn was welded to the positive terminal.
Car batteries store enormous amounts of energy and are optimized to deliver it in a very short period of time. A shorted battery can easily produce several hundred amps—more than an arc welder. Within a second, the wedding ring became almost red-hot, and only the quick reaction of his other hand to break the connection by pressing the wrench prevented the ring from starting to melt right on his finger. The jewelry was cut from the finger in the emergency room and it took more than a month before the hapless motorist was sure he wouldn't lose his finger.
- When working with tools, remove all jewelry.
- Always disconnect the battery ground clamp before loosening the positive one. If you remove the negative and inadvertently complete a ground fault, no current will flow because the terminal is already grounded. Subsequently shorting the positive terminal to ground will not cause current to flow, since the current has no path back to the negative terminal.
- Connect the ground last.
Removing the BMW E53 battery (pre-styling)
On some cars, the battery is quite difficult to remove, and a lot of work needs to be done to dismantle it. The electric energy storage device of a BMW crossover is located in the trunk, and it is not at all easy to get to. To remove the battery on a German SUV, you must:
- open the very back door, remove all things from the trunk;
- by pressing the button in the rear of the body, remove the lower shelf, under which the spare tire is located;
- disconnect the spare wheel mount, then remove the spare tire from the trunk;
- there is an air suspension compressor under the wheel, it is covered with a casing, so unscrew the nuts securing it;
- after removing the compressor along with the casing, we finally get to the battery, disconnect the negative terminal;
- but that’s not all, then we dismantle the compressor mounting brackets (attached at four points);
- using a wrench and a 10mm socket, unscrew the fastening of the battery itself;
- unscrew the nut securing the positive wire;
- Now the battery can be removed.
On technically complex cars with a large number of different electronics, it is better to trust the removal of the battery to professionals; repairing expensive equipment will cost much more than replacing the battery.
Battery connection
When installing the battery, you need to check the condition of the wires leading to it, clean the clamps from corrosion and lubricate the clamping screws. To properly connect the battery in a car, you first need to make sure that no one is in the car, since the connection may activate the airbags. All actions must be performed in the reverse order to what was done during removal. The sequence of connecting the battery terminals should be as follows:
- The first thing you need to do is put the red wire on the plus terminal of the battery.
- Connect the negative black wire next.
- Tighten the nuts with a 10 mm wrench.
- Secure the battery, put on the pressure plate, tighten the bolts.
Connection
If, when disconnecting, you must first remove the negative terminal from the battery, then connect the battery in the reverse order. That is, you connect the “+” first, and are not afraid that you will accidentally create a situation that could cause a short circuit. Then, calmly connect the minus.
Where is the clamp located (+)
The connector devices (+ and -) on the battery have a direct or European arrangement, as well as a reverse one, i.e. Asian.
If you did not pay much attention to this feature when purchasing a battery, then do not despair: this polarity can be seen on the battery case. There it will be spelled out using notations.
The positive connector will be (+), and the negative connector will be (-). The inscriptions are applied to the body of the device in relief so that they can be identified even in the dark.
In addition, the diameter of the positive one is much larger than that of the negative one.
If in a hurry you try to put the negative connector on the positive terminal, then it simply will not fit on it (or it will stretch with great difficulty).
It is worth noting that the diameter of the European positive terminal will be 19.5, and the Asian one - 12.7. The negative clamp corresponds to smaller parameters: d(EUROPE)=17.9 and d(ASIA)=11.1.
The power wire that goes to the (+) terminal is red, insulating. Another difference lies in its thickness.
