Dear readers, today we’ll talk about what an automatic transmission brake band is. Automatic manufacturers are working to improve gearboxes and the comfort of the car owner. One of the purposes of a brake band is to reduce shock when changing gears. We'll talk about this further.
What do you know about the brake band? Write in the comments.
Purpose of the brake band
Many novice drivers ask me why a brake band is needed in an automatic transmission. The band brake secures the planetary mechanism of the automatic transmission. Self-clamping occurs. And then the tape relaxes. Thanks to this action, the car owner does not feel jolts when changing gears when one gear shifts to another.
Attention! If the transmission limit in the automatic transmission is adjusted incorrectly, the driver will feel a strong jerk when switching to first gear and reverse gear. Prolonged incorrect operation of the brake band will lead to failure of the engine and automatic transmission.
Do you know how the TL automatic transmission works and how to set it up? Write in the comments.
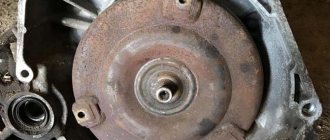
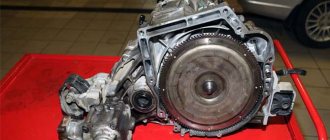
First, let's see where it is located.
- one end of the tape is connected to the machine body;
- the other end is with the servo piston.
The entire clamping procedure is carried out by the pressure force created by the transmission fluid.
- The planetary gear drum is locked when clamped. The latter occurs due to the servo piston. He is pushed by the oil and he clamps the tape.
- The planetary gear stops for a split second.
- The lubricating fluid enters the shutdown cavity. Next, release occurs, during which the drum begins to move in the other direction relative to the braking effect.
- At the same time, gear changes occur. Since the parts of the planetary gear, which restrained the brake mechanism, rotate in the other direction.
- The piston returns to its permanent location and the brake band is released. This process happens in a split second.
Read
5 Decent Automatic Motorcycles
The TL in an automatic transmission is small in size and narrow in width, but is capable of holding mechanisms several times larger than it. Do you know what types of TL automatic transmissions exist?
Types of brake bands
Did you know that there are three types of band brakes. These types are given in the table, as well as their characteristics.
| Type LT | Characteristic |
| LAT 2 | This tape will operate at a pressure of no more than 5 MPa. Withstands friction temperatures up to 350 degrees. Used in tropical countries. |
| EM-K | This tape will operate at a pressure of no more than 3 MPa. Withstands friction temperatures up to 250 degrees. Used in countries with dry climates. |
| EM-1 | This type is used in various countries. Temperature characteristics – from – 60 to + 250. This is a rolled type of tape. |
The band brake for automatic transmission consists of elastic strips. They are manufactured at the manufacturing plant and undergo rigorous testing. Such tests include:
- tensile test. Strength and reliability are determined;
- flexibility test;
- to counteract abrasion.
Only after passing all these tests “excellently” can the band brake be allowed to be installed on an automatic machine. But no matter how durable it is or made of a flexible and indelible metal alloy, if the automatic transmission is used incorrectly, the vehicle will quickly become unusable.
Operating an automatic transmission with a brake band
Operating the vehicle with an automatic transmission gradually wears out the mechanism. If a driver likes to drive in urban conditions, it means that he often has to brake at intersections and pedestrian crossings. Frequent braking will lead to rapid wear of the friction and metal layer.
Read
What are automatic transmission clutches and how to replace them yourself
If you buy a new tape, pay attention to the presence of bolts in the kit. They are usually sold together with the TL. It is also advisable to replace these screws together with the gear shift braking mechanism.
Attention! The bolt heads are protected from corrosion and any exposure to moisture. Using one of the bolts of the kit, the driver can adjust the tension of the TL. This makes the work easier, since there is no need to climb into the machine itself and dismantle the casing.
Have you ever replaced or adjusted the transmission line in an automatic transmission yourself? Write in the comments.
Typically, all this work on adjusting and replacing the transmission fluid is carried out after changing the transmission fluid or after adding oil to the automatic transmission. No matter how much you would like to, you will have to turn the TL adjustment bolt so that the car does not jerk when changing speeds. For your comfort.
Features of operation
Typically, the tape is made from a flexible metal alloy and consists of many strips of it. The metal, despite its flexibility, is quite strong and can withstand high loads of abrasion and tearing. To make the belt more durable and reliable, a friction coating is applied to its inner part at the factory.
Appearance of the brake band:
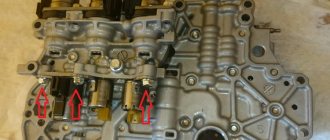
Operation of an automatic transmission leads to gradual wear of both the friction coating and the metal of the belt itself. Therefore, after a certain mileage, it may become necessary to replace it. On sale you can find both tapes supplied separately and equipped with tension bolts; It is advisable to purchase the tapes in the latter version. This is what the bolt looks like:
To the right of the screw you can see an adjusting pin with a lock nut, which may also be needed when adjusting the tape. The installation location of the tension bolts varies depending on the company that produced the automatic transmission: they can be located both inside the box and on its outside.
Internal placement of screws has a number of advantages:
- they do not corrode or become dirty;
- Adjustment of the belt can be done without dismantling the automatic transmission casing.
The latter is also important because the belt tension can be adjusted independently, without wasting time and money on expensive car service services.
The tension should be checked and adjusted not only after replacing the belt, but also in general after any repair and service operations on the automatic transmission, including topping up and changing the oil. If the box begins to “kick” and jerk, you should also check the belt tension.
Signs of brake band wear
If the transmission line of the automatic transmission is worn out, then you will observe the following symptoms:
- Grinding and jerking indicate destruction of the friction layer. In this case, the planetary gear set is not completely clamped and blocked;
- jerks after each gear change or change in the position of the gear selector from “Forward” to “Reverse”, or vice versa. These symptoms indicate destruction of the servo piston cuff;
- If the servo drive rod is damaged, its destruction is not noticeable at first. Only later, when the wear products of the metal mechanism get into the filter and other parts of the automatic transmission, will the driver notice that the automatic falls into the emergency gang or does not want to shift. Ignoring the problem for too long will lead to a major overhaul of the automatic transmission. This is why it is so important to do annual maintenance on your machine;
- destruction or stretching of the spring will lead to the fact that the reverse gear will not work in the automatic transmission. And the tape itself will jam when switching.
Read
How to distinguish and what is better DSG or automatic
To avoid the problems listed above, it is important to pay close attention to each part of the automatic transmission and respond to any abnormal twitching or jolting of the machine.
Reasons for incorrect operation and adjustment of the automatic transmission brake band
During operation of a vehicle's automatic transmission, malfunctions may occur related to the planetary gear fixation unit.
Causes and effects:
- Damage or wear of the friction layer of the brake band, leading to incomplete blocking of the planetary mechanism. When changing gears, shocks and even grinding noises are felt in the automatic transmission;
- Breakage or other damage to the servo piston cuff. In this case, the brake band is not able to block the planetary assembly. Each change in gear ratio is accompanied by jerks from the automatic transmission;
- Damage to the servo piston rod. In the event of mechanical damage, the piston is destroyed, as a result of which its fragments are carried in the working fluid, end up in different automatic transmission components and can damage them. If the problem is not corrected in time, the box may fail;
- Wear or damage to the spring, contamination of the opening cavity of the servo drive. In this case, the brake band will “wedge” the moving parts of the automatic transmission. The car cannot start moving, reverse gear does not work, etc.
However, in some cases, adjusting this tape helps eliminate a number of problems. During the operation of a car equipped with an automatic transmission, malfunctions associated with shifting gears often occur. During switching, shocks or jerks appear in the box itself.
So, with the help of adjusting bolts or studs with locknuts acting on the system levers, the gap distance between the band and the brake drum changes. In other words, the gaps can be compensated, which allows you to get rid of automatic transmission shocks.
Adjustment features:
- the stud with lock nut is tightened with a torque wrench;
- It is important not to overtighten the brake band;
- It may be necessary to dismantle the gearbox pan (if the adjusting bolt is located inside the gearbox housing);
- adjusting the gap using special rods (only some types of automatic transmissions are adjustable).
It is also possible to adjust the automatic transmission brake band without a torque wrench. In this case, the order of adjustment is as follows:
- the car should be on a slight slope;
- to prevent the car from moving on its own, it is necessary to put the handbrake on, while placing a stop or brake shoe under the wheel;
- after that, the car must be removed from the handbrake and checked whether the brake shoe holds it;
- then you need to put the car on the handbrake again, while moving the brake shoe so that it is a few centimeters from the car wheel;
- it is necessary to loosen the locknut to make it easier to tighten the adjusting bolt;
- then you need to tighten the adjusting bolt until it stops lightly;
- Next, you need to remove the car from the handbrake, gradually loosening the adjusting bolt of the brake band until the car starts to roll;
- tighten the adjusting bolt 2-3 turns (the number of turns is determined experimentally until there is complete absence of jerking when shifting gears).
Malfunctions related to the automatic transmission belt
Malfunctions associated with the brake mechanism in the gearbox, as I already said, may include:
- spring wear. As a result, the vehicle may become immobile;
- rod damage. Its wear products traveling through the automatic transmission will lead to the destruction of friction discs or even kill the turbine blades and pump wheel of the gas turbine engine.
To prevent this from happening, I recommend that the mechanism be adjusted frequently. I will describe how to do this in the next block. Have you ever done an independent LT adjustment?
Adjustment procedure
Adjusting the TL is not as easy as it seems at first. You need to know a number of specific subtleties. Therefore, if you have never adjusted the brake band on an automatic transmission, then invite a friend who understands this topic. Then, you can begin the procedure.
Tools you will need:
- torque wrench;
- wrenches to remove the pan. Since on some automatic machines the adjusting bolts may be located inside the automatic transmission. To get into it, you will need to drain the transmission fluid.
Because there are machines in which the gaps are adjusted using rods. Adjustment is carried out by selecting the desired length of each rod. And these rods are located inside the gearbox housing and are adjusted by experienced mechanics during an oil change.
Attention! I recommend making adjustments after each lubricant change if you have the automatic transmission described above.
You will find what force to apply to tighten the rod in the manual for operating the machine. I do not advise exceeding the efforts indicated in the manual, and I also do not advise tightening the bolt with an eye to the future. The brake mechanism may fail due to overtightening.
If you do not have a torque wrench, you can tighten it by placing the vehicle on a hillside. Be sure to take a partner.
Read
Which is better, tiptronic or automatic: choice and what’s the difference
The process is as follows:
- Place the vehicle on a slope. Put the handbrake on
- Place brake shoes under the wheels to prevent the car from rolling.
- Move the shoes slightly forward from the wheels.
- Your partner should notify you when the car starts moving.
- Loosen the locknut of the screw.
- Tighten the bolt a little until it stops. Don't do it too hard.
- Remove the car from the parking brake.
- Loosen the bolt securing the vehicle until the vehicle rolls on its own.
- Replace the shoes and tighten the bolt two turns.
Now you will need to get into the car and ride it. If the tremors disappear, then you did everything right. If not, then the procedure should be repeated.
The subtleties of adjusting the tension yourself
The subtleties of adjusting the brake band adjustment bolt lie in the correct calculation of revolutions, if the brake belt has not been replaced, and the adjustment procedure is carried out on a mechanism that is already somewhat worn out. A precisely adjusted automatic transmission brake band prevents premature failure of clutches and gas turbine engines.
Let's look at an example using the A4LD and 4R44E machines.
- On these automatic transmissions, the bolt fit does not exceed 7 mm. The stock of the rod until it hits the wall is calculated using the following formula: 7 – 2.5 = 4.5 mm. This is the distance from the end of the bolt to the wall. Where 2.5 mm is the piston stroke, which was taken from 2 turns of the screw with a pitch of 1.25 mm.
- We remember the thickness of the friction layer. It is no more than 1 mm. This is what the manufacturer sets.
- Calculate the circumference of the working surface of the tape after taking the first measurements. We use the formula 2nR. It turns out 2x3.14x1. According to the formula, the following figure comes out - 6.28 mm. It means the difference between a complete friction layer and one worn down to 0 mm.
- Now let's find out when the piston hits the wall. This calculation corresponds to the formula 2x3.14x0.72. The last figure is the wear of the friction layer in mm. And the equation in this case will indicate 4.52 mm.
Read
Do-it-yourself repair of automatic transmission BTR M11
From these calculations we can conclude that if the layer is erased by 0.72 mm, then the rod will rest against the wall and there will be nowhere to tighten it. In this case, you will need to install a new automatic transmission transmission.
Features of TL adjustment
The task of servicing an automatic transmission (in particular, the brake mechanism) is to regularly check the size of the gap between the belt and the drum. The gap is adjusted using a system of levers that change the distance between the elements of the locking device. For these purposes, there is an adjusting screw, which in some automatic transmission models is replaced with a pin.
The stud must be tightened in a controlled manner using a torque tool. The recommended force applied can be found in the user manual - as a rule, the differences depending on the model are small in absolute terms.
When the screw is twisted in one direction or another, it affects the stop, changing its spatial position. And the emphasis already affects the tape fastening mechanism, which, as you know, is fixed on the box body. If the adjusting screw is located on the inside of the transmission, you will have to remove the transmission oil pan.
There are options for automatic transmissions in which the gap is adjusted using rods. In this case, it will be necessary to disassemble the unit and replace the rod with an element of the required length. Typically, automakers offer sets of such rods, the length of which is distributed in a certain step, that is, the adjustment process is discrete in nature.
The clearance check should be carried out within the time limits recommended by the manufacturer, or if there are suspicions about inadequate operation of the braking device. Typically, the procedure for changing the oil in an automatic transmission requires dismantling the pan, and this is an excellent opportunity to perform unscheduled diagnostics of the gap with its adjustment in case of non-compliance with the nominal dimensions.
It is not recommended to tighten the TL more than necessary, and also to tighten the adjusting screw with a force greater than the recommended one - this will accelerate the wear of the automatic transmission components, including the locking mechanism.
Replacing the brake band
To replace the brake band on an automatic transmission, you will need to follow the steps in the following procedure. The work will be more complicated than the adjustment.
- Drive to a level place and place the wheel on the automatic transmission side on a jack.
- Unscrew the bolts and remove the wheel.
- Remove the battery and air filter so that you can easily get to the automatic transmission.
- Place the second jack under the machine and lift it.
- Remove the box mounting pad.
- Lower the automatic transmission as slowly as possible. Then unscrew the bolts that block access to the brake band.
- Remove the brake band and install a new one.
- Now repeat all steps in reverse order.
- Tighten the machine adjustment screws with a torque wrench.
- Take a ride in a vehicle. If you do not feel shocks or hear noises, then you have completed the procedure perfectly.
But it's not that simple. Let's consider some things that the average car owner does not take into account when changing the automatic transmission transmission.
Subtleties of replacing the brake band
The first thing you will notice is the sealant on which the back cover of the machine is mounted. Remove it carefully, without tugging, so as not to deform it. Place a container to drain the oil, as it may leak.
Check how the LT fits against the body and drum. Pull it back. There should not be more than 4 gaps where it contacts the drum. If it is more, but the LT is new, then check the drum for defects.
Advantages
Band brakes are often used to create various types of lifts and cranes. Despite the simple design, these mechanisms are very reliable. Design engineers cite the following advantages of band brakes:
- small sizes;
- ease of maintenance;
- simple design;
- the ability to achieve greater braking torques with increasing coverage angle.
Of all the varieties, the most popular are simple belt mechanisms. They are easier to regulate. In addition, using simple calculations, you can calculate the band brake. Calculate the weight of the load and the braking force.
Subtleties of replacing the brake band
The first thing you will notice is the sealant on which the back cover of the machine is mounted. Remove it carefully, without tugging, so as not to deform it. Place a container to drain the oil, as it may leak.
Check how the LT fits against the body and drum. Pull it back. There should not be more than 4 gaps where it contacts the drum. If it is more, but the LT is new, then check the drum for defects.