Repair is a delicate matter
Repairing a car yourself can bring great pleasure to many car owners and also save some money. It is better to entrust most repair work to specialists, but there are also those that can be done independently without any problems.
For example, Mazda 6 owners can replace the headlight with their own hands in case of breakdown, mechanical damage, or if they want to restyle it. Let's figure out how to complete the task simply and without wasting extra time.
Lamps for PTF
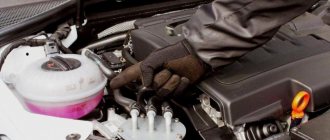
The attached instructions from the manufacturer kindly provide the owner with information about all lamps installed on the car. In particular, lamps with an H3 socket are installed on the PTF. (see also the article Features of installing fog lights on Gazelle Business)
Note! On top of the headlight itself, on transparent plastic, there are inscriptions indicating which socket is used for low and high beams, as well as for PTF and turns.
Removing headlights on 6 Mazda
To perform all manipulations, you will need a screwdriver (a screwdriver will also do if you don’t have one), a ratchet, an extension cord and sockets (10 and 8). When everything you need is at hand, you can begin removing the headlights.
Unscrew the bumper
The designers of the Mazda 6 tried to ensure that a process such as simply replacing a headlight was accompanied by additional work. Unfortunately, it is impossible to do without removing the bumper.
In order to remove it you need:
- Open the hood and remove the radiator grille. Specifically, the grille is secured at the bottom with latches and 2 screws at the top. Unscrew the screws and you can safely remove the grille. In some cases, the grille is held on by 2 bolts. You also need to immediately remove the clips (for ease of removal, you can use a flat-head screwdriver). They are located to the right of the bolts or screws.
- Removing the bumper starts from the bottom. Under the bumper (just in front of the wheels) there are a total of 10 bolts (5 on each side). 4 bolts for 8 (they are hard to miss) and 1 for 10 (it is slightly offset towards the center of the body).
- Next you need to remove the fasteners located in the arches. Unscrew or simply remove 2 clips securing the bumper to the sills. Just above them, in the area where the bumper and fender meet, there is another screw that also needs to be unscrewed. For convenience, you can turn the wheels out and bend the sills a little.
- If nothing is missing and all fixing elements have been removed, then you can carefully begin to remove the bumper. It additionally “sits” on the latches. It is enough to start bending it from the side of the wing and it should come off easily. Many owners of a Mazda 6 car who have encountered removing the bumper find it easy. If this does not happen, check again that all clips and screws have been removed.
We can consider that the first stage of work is completed. Now it's time to start actually removing the headlights.
Unscrew the headlights
The headlight is held on by 5 screws and one clip.
They are located as follows:
- 2 on top;
- 2 below;
- 1 side;
- The clip is located at the top next to the topmost screw.
Finding fasteners is quite simple: they screw the plastic frame of the headlight to the metal body.
Once everything is unscrewed, don't forget to unplug the power cable. After that, simply pull the headlight in your direction. If you have difficulty disconnecting the cable (it’s not convenient, you can’t disconnect it), then first pull the headlight towards you.
At this point, the removal of the headlight from the Mazda 6 can be considered complete. The process for the right and left sides is absolutely identical. Re-installation after replacement or if it is necessary to install a new lighting fixture is easy to carry out according to the instructions described above, only all steps must be done from the end.
And of course, for all Mazda fans, the following video will be interesting, which shows in detail how to remove the bumper:
And how to replace the headlight:
Automotive giants today produce cars equipped with ECU systems. These electronic control units using sensors...
When choosing a car, the future owner quite reasonably analyzes all the information relating to the vehicle of interest. Today thanks to...
Mazda MPV is a Japanese-made car designed for 7 seats. In some Asian countries, the model...
Angel eyes
Let's look at the process of installing angel eyes on the headlights of a 2009 Mazda 6.
At the initial stage, the following kit is available:
- adaptive bi-xenon lenses dorest;
- LED rings with drivers with a diameter of 80 mm - internal 68, and external 84;
- two voltage stabilizers;
- soldering iron;
- Poxipol glue.
The following is the procedure for installing angel eyes on Mazda 6 GH lenses:
- The optics and protective radiator grille are dismantled.
- The power connectors are disconnected and the mounting screws are unscrewed.
- Using a hairdryer, the glass is heated and removed.
- Nodal elements are thoroughly cleaned, including using alcohol.
- Angel eyes are glued onto the prepared reflector. In this case, the power wires on the rear side should be located on top. The driver is also fixed with glue on the back side of the reflector;
(link to photo source) - On the voltage stabilizer, the rightmost contact leg is unsoldered, to which the positive red conductor is soldered to the low beam of the Mazda 6 GH.
(link to photo source) - The input conductors are soldered to the stabilizer, and the output conductors are fixed to the eye connectors after installation in the headlight. In this case, it is recommended to immediately use the T10 LED base.
- The red wire from the stabilizer is connected to the blue positive low beam Mazda 6 GH.
- The contacts of the angel eyes' wires are soldered, after which the headlight is assembled and installed.
- The power unit starts and the voltage on the stabilizer is adjusted using a special corrector. Recommended voltage level 9.98 V;
- All that remains is to secure the stabilizer with double-sided tape.
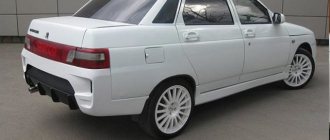
How to Remove a Mazda 6 Gh Headlight
Delicate repair
Repairing your car yourself can be a great experience for many car enthusiasts and can also save you some money. Most repairs are best left to professionals, but there are some that you can easily do yourself.
For example, owners of a Mazda 6 can replace the headlight with their own hands in case of breakdown, mechanical damage, or if they wish to restyle it. Let's see how easy it is to complete the task without wasting time.
Removing headlights for 6 Mazda
For all manipulations, a screwdriver (also a screwdriver in the absence of the latter), a ratchet, an extension and heads (10 and 8) are useful. Once everything is in your hands, you can start removing the headlights.
Turn off bumper
The designers of the Mazda 6 tried to make sure that a process such as the usual change of headlights was accompanied by additional work. Unfortunately, you can't do without removing the bumper.
In order to remove it, you need to:
- Open the lid and remove the grill. The grille is fixed directly at the bottom with latches and two screws at the top. Remove the screws and you can safely remove the grille. In some cases, the grill rests on 2 bolts. You should also remove the clips immediately (you can use a flathead screwdriver for easy removal). They are located to the right of the bolts or screws.
Video on replacing low beam lamps for Mazda 6 2002-2008
Step 1: Open the hood
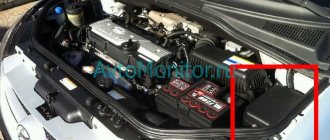
First, make sure your headlights are off. Next, open the hood from inside the car. Locate the lamp cover near the outside edge of the vehicle (Figure 1). This may be a problem for some car models. V6s and turbocharged versions of Mazda are tightly packed to the engine. This makes it difficult, but still possible, to gain access to the headlight housing. You might find someone with small hands, or remove the front bumper (but that's a whole other story).
Step 2: Reach down and grab the lid (Figure 2). Scroll left to open.
Step 3: Remove the lid and set it aside.
Step 4: Look at the headlight assembly. Pay attention to the latch that blocks the low beam.
Step 5: Push the latch back and to the side to release it.
Step 6. Now you can lift the latch and tie it to the top edge (thanks Mazda engineers).
Step 7: The low beam is now free and can be CAREFULLY removed from the headlight housing. I say cautiously because the lamp may not have burned out, but there may simply be a problem with the connection. Remove the bulb slowly and carefully so as not to touch the actual surface of the bulb with your hand, and you may save a bulb.
Step 8: Take note of the position of the lamp in relation to the wire harness. This will help when you insert the new lamp. Remove the lamp by pulling on the surrounding piece of metal (Remember to try and avoid touching the glass!).
Step 9 : Look at the filament. Perhaps it is not broken, then just check the contacts; perhaps the lamp does not require replacement.
Step 10. If the filament is still damaged, replace it with a new H1 lamp
Step 11: Remove the new bulb carefully (again being careful not to touch the glass) and insert it into the wiring harness, paying attention to the position you marked earlier.
Step 12 : Carefully and slowly place the low beam back into the headlight housing.
Step 13: Pull the latch down from the holder and place it back in place.
Step 14. Now you can turn on the light and check the operation of the bulb. If everything works fine, you can close the lid. If it doesn't work, there's probably a wiring problem or a blown fuse. Check the fuse.