01/26/2021 16,869 Video and media devices
Author: Ivan Baranov
If the rear view camera in your car does not work, this is not a reason to despair. In most cases, the problem lies in small malfunctions that can be corrected independently. You will learn from the article what to do if the rear view camera in your car does not work and how to fix it.
[Hide]
Why does not it work
When choosing a location for installation, three options are considered:
- Trunk handle.
- Number plate illumination frame.
- Interior of the car.
According to statistics, many camera malfunctions are noticed when it is installed inside a car. This is due to intense exposure to environmental factors causing an increase in moisture levels. There are also mechanical loads and other influences in the cabin.
Any contact of the device with liquid leads not only to system failure, but also to significant picture defects. Car owners often contact the service center due to poor quality images or spots on the screen. This problem is explained by moisture getting on the lens of the device.
If the camera stops working, the possibility of a power failure cannot be ruled out. When installing the system yourself, mistakes are often made in connecting it to the energy source, which lead to failure of the device.
CONCLUSIONS
In general, I was very pleased with the impressions of what was done and the quality of both the camera and the image from it. The performance is good, the picture is acceptable for cameras in this price segment. It is worth considering the fact that it was displayed not on a 5-inch or 7-inch screen, but on a huge TV. At night you can also see objects. Unfortunately, I didn't know that I was supposed to take a photo of the night image. I really regret this. It is also worth noting that there are a lot of cameras of this type on the market. Prices range from $7 to $28. But what’s inside remains a mystery. But I wouldn’t risk disassembling this kind of gadgets in the future)))
How to disassemble
Top 4 wireless rear view cameras with a wi-fi module for a car
To find the cause of failures in the functionality of parking equipment, you need to disassemble the view camera. Step-by-step disassembly instructions will help you solve the problem without any difficulties. At the diagnostic stage, you should consult a person who has already dismantled or disassembled the camera.
Before starting repairs, you need to disassemble the system, following these instructions:
- If there is no signal at all, the camera must be removed from its installation location. To do this you will need to dismantle all the casing.
- First of all, the panel under which the bolts are located is disassembled. With their help, the main part of the cladding layer is fixed. Further under it you can find 4 nuts connecting the trunk handle. Self-tapping screws are used to mount the camera. 2 screws secure the camera itself, and 2 screws secure the connection connector.
Alternative repair methods
It happens that there is no repair kit, and it is also impossible to get a piece of rubber. In this case, you need to use other methods of sealing the camera.
No glue
If the puncture happened on the road, there is no glue, but there is a patch from the repair kit, you can proceed this way. Let some air out of the wheel, apply a patch, then inflate the inner tube until the pressure presses down firmly on the rubber. This will help you get to your home or the nearest workshop.
Instead of rubber, you can also use electrical tape or a piece of moistened cellophane. The surface must be wiped as clean as possible, and then a “patch” must be applied. Another option for temporary camera repair is to seal the defect with a medical plaster. If we are talking about a car wheel, the driver always has a patch in his first aid kit. The method for sealing a defect with a plaster is as follows:
- cut 3-4 patches of different sizes (ascending) - from 2 to 4-5 cm;
- glue the smallest patch;
- then apply patches in ascending order of size.
Curing
Typically, the vulcanization method is used when repairing car inner tubes, but it can also be used on bicycles. This method requires the presence of special equipment, but after repair the camera will serve as good as new. A patch is applied to the hole, then the joint is heated until the rubber melts while applying strong pressure.
As a result, the chamber and the patch are tightly soldered, forming a single structure. Vulcanization is much more reliable than conventional gluing, but for it you will have to purchase at least a mini-vulcanizer and work with strict adherence to safety measures.
Table: why the rear view camera stopped working
| Malfunction | Causes | What to do? |
| No signal | Interference from phones and other devices operating at a frequency of 2.2-2.5 GHz will lead to signal loss | Do not use, turn on or install wireless network equipment near vehicle systems. |
How to connect a rear view camera to the radio
The camera shows blurry
The camcorder picture may have become cloudy due to dirt and dust. Dirt may permanently or partially block the lens, causing the display to be cloudy or individual elements to become difficult to see Clean the lens The camera flickers, blinks Flickering when the video camera is working is often due to the fact that when turned on at night or during the day with the car engine running, the signal is disrupted
- to repair a breakdown, you need to check the quality of contact on the wire of the standard camera or one installed in the mirror;
- make sure the cables are intact and there is no damage to the insulating layer; you will also have to check the operation of the electrics.
The image has become blurry, the camera is rippling, incorrectly detects markings or distances. The device shakes when the engine is running. To remove the defect, you need to fix the camera more firmly on the radio. The device should be connected and started after it has been secured as tightly as possible.
Blurred image, lack of sharpness Small scratches appear around the perimeter of the lens There is no point in repairing the display or lens, since buying components for the camera is quite problematic. If the device begins to display ripples when connected, then you need to install a new camera on the machine and adjust it.
The camera stops turning on when reverse speed (travel) is activated or does not always work. The device has disconnected from the gearbox sensor or its connection has become unreliable. You can fix the problem by installing a new sensor or checking the connection. Often you have to reconnect the regulators and restore contact.
Visualization problems:
- the device sometimes shows a blue screen;
- the image on the monitor turned black and white;
- The device stopped taking pictures
Camera malfunction, software problem To fix the problem with the white screen in the Chinese camera, you will have to reflash the device. It is recommended to entrust the solution to software problems to specialists.
The reflection in the camera automatically became mirrored, upside down. If the picture is mirrored, then the problem is related to the incorrect installation of the camera on the car. To turn the picture the other way around, you will have to reconfigure the device or reinstall the camera
DISASSEMBLY
In principle, this is why we have gathered here today. We begin disassembling the rear view camera. ATTENTION. I strongly do not recommend repeating these steps at home. Such cameras, especially those with moisture protection, are assembled thoroughly and once. Spare your tool and teeth
Unscrew the front cover of the rear view camera clockwise and remove the mounting bracket
This photo clearly shows something like silicone black sealant, which thoroughly penetrated the thread and firmly glued the lens to the body
There's no point in stopping here. Well, no, let's continue. We scrape out the sealant and try to unscrew the lens with our teeth. I don’t know how hard I tried, but I did it
We take the main part from the camera and see the camera matrix
CMOS type sensor
You won't see anything else here. We will dig down from the other side to see the insides of the camera. We remove the back cover and see that everything is filled with sealant. To be more precise, it feels like a compound.
... a little more effort and remove the board from the camera body
Here we see the matrix closer on one side and the board with sealant on the other
We clean further to see the control chips: Here is the first one - atmel218 24c08N non-volatile memory. Datasheet can be viewed here
And here we see a crystal oscillator that says 27,000 MHz
By the way, I did not find any traces of flux on the board. The soldering is neat. Having seen the insides of this camera, you can quickly assemble it. But after that it didn’t work. Apparently he was very furiously tearing the sealant off the board)))
Instructions for adjusting the device yourself
Rear view mirror with rear view camera: which one to choose
Parking lines
When you installed the camera, it works fine, the clouding has disappeared, it is important to adjust it correctly. Not all car owners know how to do this
Because of this, they cannot do everything themselves and check the functionality of the device.
The main task is to set up parking lines. This enabled mode makes parking much easier.
- Take an ordinary wooden block, 2 meters long. Its sides should be 2-3 centimeters.
- Place it about a meter away from the center of the rear bumper. The edges of the block should protrude from the sides of the car at approximately the same distance.
- Then, get into the car and go to the service menu. You may need to perform additional steps, such as turning the side lights on and off several times.
- After this, you will need to go to the camera settings and select the car brand.
- When the rear view camera is activated, you will need to turn the steering wheel first to the right all the way, and then to the left - this is done to adjust it. Then click "next". A rectangular outline will appear on the screen.
- Using the up, right, down and left keys you will need to place it so that the block is exactly in the center. Then click on confirm.
This, in fact, is all the steps you need to perform to configure the devices. Now, when you turn it on, yellow lines will begin to appear, making parking easier. Please note that any subsequent disassembly may require subsequent reconfiguration of the device.
How to seal a car camera: procedure
To repair a wheel at home, you need to get a piece of old rubber. You will need high-quality glue, for example, “Moment” or another that is suitable for rubber products. Also, to fix the problem you should prepare:
- sandpaper with medium grain;
- a container of water (even a puddle on the road will do);
- a piece of soap;
- scissors;
- solvent or other degreasing liquid;
- pump.
To repair cameras, you can purchase a ready-made kit at any car store, although the price will be higher.
Finding the location of the damage
After a tire puncture, a side cut, a small or deep crack, or a puncture may form. Such defects lead to a violation of the tightness of the product. Air begins to escape through the hole and the chamber deflates. Finding a puncture can sometimes be difficult, especially in wet weather when the tires are dirty. Most often, a defect forms on the “contact patch” - where the wheel comes into contact with the road. It is located no higher than 2/3 of the total height of the camera.
Rim damage caused by damage to the rim tape occurs less frequently. Another possible problem is a tear in the tube from the exposed iron strands of the tire cord. You can find the location of the defect using different methods. First you need to remove the tube using any non-sharp object or a special tire mounting device. Afterwards it must be visually inspected for holes. If there is no result, you can use the following methods:
- Dipping into water. Place the camera in water; even a small container will do. Rotate the product in water until escaping air bubbles become visible - this is where the puncture site will be. This method is even more effective when the water is soapy. Large car inner tubes can simply be lubricated with soapy water.
- Fine dust. This is usually found on roads in dry weather. It is necessary to bring the camera to the dust and press firmly on the product. When a stream of air begins to emerge from the damaged area, dust will begin to fly away.
- Hand. In calm weather, you can simply hold your wet hand at a distance of 1-2 cm from the surface of the camera. This is enough to feel a breath of air from the hole. To increase the effectiveness of the method, you can attract an assistant who will put pressure on the camera.
- Sound. If it is quiet outside or in the garage, you can hear the sound of air escaping (a slight whistle) from the puncture. You should first inflate the wheel to maximum elasticity.
After identifying the hole, you need to carefully mark it with a ballpoint pen. Then you can begin repair work. In a similar way, it is possible to repair other rubber inflatable products, for example, tubing for skating.
Patch
Applying a patch is a simple process. To properly prepare it, you need to take a piece of rubber (an unnecessary car inner tube or one taken from a cheesecake sled will do) and cut out an oval or round part with scissors. The size of the patch should not be large, covering the hole on each side by only 15 mm.
Next, you need to use sandpaper to clean the area where the patch is applied, as well as the cut out element itself. This way the adhesion force of the parts will be better. Afterwards, both surfaces must be degreased with acetone and alcohol.
Sealing the damaged area
Having prepared high-quality glue, you can start working with already degreased surfaces:
- Apply glue to both bases. Carefully level the adhesive layer with a small spatula and let it dry for 3-5 minutes. If indicated in the instructions, apply another layer on top of the first. You should not make the glue seam too thick, as this can ruin the quality of the finished product.
- Press the camera and patch together. For a tighter fit of the part over the entire plane, the camera must first be laid out on a table or other flat surface. After gluing, the patch should be at the top.
- Take a hammer and tap from the center to the edges of the patch in a spiral motion so that the element sticks more securely. It is enough to go through the patch 3 times.
After complete drying, you need to put the tube back into the tire, inflate it, and return the wheel to its proper place.
What to do
Possible ways to eliminate interference on the view camera:
- disabling the second signal source;
- removing the signal source from the vehicle overview;
- cleaning the device from dirt;
- complete release of the zone if access to the source of interfering signals is unavailable;
- replacement of non-functioning equipment.
If the rear view picture with a separate module is unclear, you need to move the transmitter closer to the monitor, leaving the camera in place. Low temperatures distort images displayed on dashboard screens; the system turns off. Some car owners claim that the cameras cannot cope with the cold.
A Volkswagen representative said the LCD panel screen was to blame. As a result of temperature changes, condensation forms, which negatively affects operation. The lens becomes clogged with dirt, debris, and road reagent, making it impossible to see anything on the screen other than a brown or black outline.
There is no need to use alcohol-containing glass cleaners to avoid damaging the lens. Auto mechanics suggest covering the lens of the device with a hydrophobic liquid to avoid snow and slush. Common causes of cloudy images include grease stains and fingerprints, so you need to check the front of the lens before blaming the device.
Poor quality equipment often causes blurry pictures. Shadows and sunlight on the horizon and lens flare can render images useless. When scratches occur, an optical effect called “diffraction” occurs, in which details begin to blur. The problem with scratched lenses can only be solved by replacing the lens assembly.
ABOUT THE CAMERA
In theory, next we should talk about disassembling the rear view camera. But I suspect that there would hardly be anyone willing to take it apart. But I decided to work out point 18 according to the full rules and find out what the developers actually put in the miniature case and... I broke the camera. Which, by the way, I don’t regret at all. But we will see all her insides... That's why I only managed to take one camera shot when she was still alive...Diagnostics
If your car camera fails, there is no need to despair. Most often, the problem is minor and can be fixed on your own. But before that, you need to diagnose the system and find the reason for the refusal to work.
The first step is to remove the connector and wipe it with a dry cloth. The inside is dried with a hairdryer or other similar devices. Then the connector is installed back, after which the system is checked for functionality. If the problem persists, you will need to conduct a more in-depth diagnosis.
The next step involves using a multimeter. The “Resistance” parameter is set on the device, after which it is connected directly to the connector. If the resistance is at unity, there is a high probability that the camera has been damaged and needs to be replaced.
If defects appear in the picture or loss of display quality, you need to make sure that there are no traces of water on the camera. Diagnostics are carried out after disassembling the bumper and dismantling the system.
CONCLUSIONS
In general, I was very pleased with the impressions of what was done and the quality of both the camera and the image from it. The performance is good, the picture is acceptable for cameras in this price segment. It is worth considering the fact that it was displayed not on a 5-inch or 7-inch screen, but on a huge TV. At night it is also fashionable to see objects. Unfortunately, I didn’t know that I had to take a photo of the night image. I really regret this. It is also worth noting that there are a lot of cameras of this type on the market. The price varies from 7 dollars to 28. But what’s inside remains a mystery. But I wouldn’t risk disassembling this kind of gadgets in the future)))
- Price for cameras of this type
- High-quality execution
- Moisture protection
- Good output image
I have everything for today...
And as usual, Nafanya says hello to everyone and expects positive votes from you
Video “Repairing and replacing a rear view camera”
This video shows the disassembly and repair of the device using the example of a standard Kia Sorento camera (by PCAVTO).
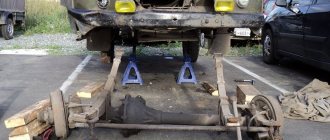
In winter, the rear view camera started to bother me. No, no, and it stops showing. And I got so used to her that in those moments when she refused, I felt very awkward.
The malfunction manifested itself as follows: when reverse gear was engaged, the monitor began to show and turned off. Moreover, it showed 2-3 seconds. At first I thought that the monitor itself was acting up. How can I check? I connected a camera to it (an ordinary digital point-and-shoot camera with a video output). I turned on the reverse gear, turned on the camera - everything shows perfectly. The monitor immediately fell off.
I dismantled the camera and took it home. The video output was connected to the TV and powered from the charger. So what are you going to do? shows perfectly... I started experimenting in all sorts of ways, and finally got it to go out.
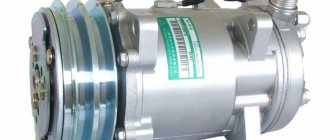
I noticed that the “node” on the power cord gets very hot
I decided that it was all about him and took it apart. This unit is not a wiring harness, but a voltage converter. Inside there is a cardboard that converts 12 volts to 3.3 volts.
So it gets very hot. It heats up to 90*C in about a minute. The temperature was measured with a Tseshka.
I captured on video the incident when the camera did not go off. In other similar cases, it “will go out, then go out,” in short, it behaves extremely unstable. But, since I don’t use reverse gear for a long time (I think less than a minute), I forgot about heating.
Then I noticed that in different positions of the camera itself it behaves differently. I thought that something was shorting inside the camera
I decided to take it apart.
During disassembly, 2-3 grams of water leaked out of the chamber. In the description of the product on the Chinese website where I ordered it, it was written that its degree of protection is IP66 (This means: the first 6 is Dustproof. Dust cannot enter the device. Full protection from contact, the second 6 is Protection from strong water jets. Water that gets inside the housing should not interfere with the operation of the device.).
There are three assumptions about how water got into the chamber: 1. Filled the camera at the car wash2. In winter, condensation on the trunk lid flows down the wire into the housing3. Again, due to condensation and temperature changes (+5 * C -30 * C), the air, contracting and expanding, “pumped” moisture into the case.
I dried the camera and sealed the case. I installed the camera in the car.
It's sad, but occasionally (once every two to three weeks) the camera doesn't work. As soon as it completely goes out again, I will take it apart again.
Returning a mirror of good quality
The quality of goods is regulated by the State Quality Standard (GOST) or technical production conditions (TO), which is indicated in the relevant accompanying documentation.
According to Article 4 of the Law “On Protection of Consumer Rights”, the seller is obliged to provide the buyer with a product suitable for use and corresponding to the description, taking into account its expiration date and service life.
If all standards are observed, the mirror is a product of proper quality.
The period for exchange and return of mirrors of good quality is 14 days.
Conditions
Based on paragraph 1 of Article 25 of the Law “On Protection of Consumer Rights”, the seller is obliged to accept goods of proper quality subject to the following conditions:
Basic
- The product has not been used
- Presentation and packaging preserved
- There is no violation of labels and seals
- Availability of cash or sales receipts
If the receipt is missing, then a refund is possible, supported by witness testimony.
Procedure
The buyer must perform the following actions:
- Draw up an application in 2 copies and give it to the seller. One copy remains with the buyer, and a mark indicating acceptance of the application is placed on it. The second copy remains with the seller.
- Give the mirror in its entire package to the seller. In this case, labels and seals must be intact. After delivery, the buyer’s copy is marked with acceptance of the goods.
- Present a document confirming the purchase of the goods at this particular outlet.
- Provide an identification document.
The application must indicate the requirement. That is, what is needed, a refund or exchange of goods. The seller is obliged to satisfy this requirement within no more than 3 days from the date of filing the application.
Why does interference occur?
The car camera works, but there are problems with image quality. In such a situation, you need to check the following:
- Wireless interference. One of the disadvantages of wireless systems, including backup camera systems, is interference. Wireless signals travel outdoors, and many gadgets use the 2.2 and 5 GHz frequencies. Therefore, a cordless phone, CCTV device and Wi-Fi router in close proximity to the car will cause signal interference.
- The camera is dim. Environmental influences degrade the signal. These include dust and dirt that partially or completely block your view of the device. Showers, snowfalls and thick fogs reduce the quality, and the video begins to flicker.
- Weak or grainy images. If the monitor displays an unclear picture, or the display “blinks”, there may be a problem with the signal.
- A common reason why pictures aren't sharp is due to camera shake, where the entire image often looks like a smear.
- The change in sharpness is caused by the formation of scratches invisible to the naked eye.
- At night there are no infrared images, or the picture begins to flicker. Infrared systems require darkness to function properly. The sensor, which includes infrared LED illuminators, only works in the dark.
The device installed next to the rearview mirror sometimes fails. Do-it-yourself repairs are possible if the car owner has enough knowledge and experience in performing such work.
INTRODUCTION
CCD
- this is a (charge-coupled device) CCD - a device with feedback charging. This type of matrix was initially considered to be of higher quality, but also more expensive and energy-consuming. If we imagine the basic principle of operation of a CCD matrix in a nutshell, then they collect the whole picture in an analog version, and only then digitize it.
Unlike CCD matrices, CMOS
matrices (complementary metal-oxide-semiconductor), CMOS - complementary logic on metal-oxide-semiconductor transistors, digitize each pixel on site.
CMOS matrices were initially less power consuming and cheaper, especially in the production of large matrices, but were inferior to CCD matrices in image quality. Difference between CCD and CMOS matrices
- CCD is a silicon-based matrix that acts as a charge-coupled device, CMOS is a field-effect transistor-based matrix.
- The analog signal in the CCD matrix is converted outside the photosensitive sensor, in the CMOS matrix it is converted directly into the pixel.
- The image quality obtained from CCD is higher than that from CMOS.
- CCD is more energy intensive.
- CMOS allows you to shoot video and take burst photos.
- CMOS has become widespread in mobile electronics
The color waterproof digital rear view camera differs from many of its “relatives” primarily in price. Designed for use in any type of car. It has a fairly wide viewing angle of 170 degrees, allowing for quick and safe parking. The camera is waterproof, which prevents water from entering and damaging the electronics...
How to fix
You can remove the mirror image of the camera by changing the settings in MMC. To do this, you need to go to the menu and disable the “Mirror” option. But in some cases, such actions are not enough, especially when it comes to flipping the picture vertically. Sometimes you need to open the device case and rotate the eyepiece 180° around its axis. But in some cameras such actions lead to nothing. To solve this problem, you need to make changes to the control scheme.
Inside the device case there is a board with a set of electronic components, among which there are several zero resistor jumpers with a resistance of 0 Ohm. Their use increases the functionality of the circuit.
They are designated FLP and MIR. The first (flip) allows you to flip the picture in a vertical plane. The second (mirror) will help correct the mirror image to a direct one.
To convert the picture to the required form, you need to disconnect the jumpers, i.e., remove the resistors
Due to the small size of the parts, work must be done carefully so as not to damage adjacent elements. The jumper designated JSC is intended for broadcasting static parking lines
It should be removed if they clutter the picture and do not participate in parking. Otherwise, it will be difficult to determine the distance to the obstacle.
After finishing the work with soldering the parts, the board is covered with a layer of varnish and given time to dry. After this, assembly can be carried out. The wires with terminals are installed in place, and the housing connectors are treated with sealant. The functionality of the device and the quality of the picture are checked after installing the camera on the car. Properly carried out actions should not negatively affect the quality of the kit. To avoid creating a similar situation, when purchasing or ordering a kit, you must indicate detailed information about the installation location and purpose of the device.
If you are not sure that the work performed independently will lead to the desired result, then it is better to contact a service center for help.
ABOUT THE CAMERA
This is all good, of course, but let's move on to the camera itself. The hero of the review is supplied in a retail box
The package contents are quite standard: the box contains a rear view camera, a power cord, a cord for a video signal to the monitor and instructions. They even put self-tapping screws to attach the camera to the car body
I wasn’t too lazy and measured the video signal cable - 6 meters, as the manufacturer claims. For a sedan, it’s enough to just drag it from the trunk to the dashboard, for a hatchback I think the same...
The plugs on the cable are standard RCA jack or, as in common people, “tulip” type
Instructions in English, which includes a connection diagram. As far as I'm concerned, there's nothing complicated there; it connects to the break in the reverse wire. In this case, the camera will turn on when reverse gear is engaged
The seller's page lists the following characteristics of the camera, which I hid under the spoiler. Also, I took measurements of the camera’s dimensions and its weight...
Adjustment secrets
After installing the device, you need to configure it. The car owner’s task is to configure the parking lines. To do this you will need a block about two meters long. There should be a distance of one meter from the rear bumper to the block. The edges of the block should protrude beyond the sides of the car at an equal distance. Next, you need to get behind the wheel, turn the side lights on and off. The next step is to enter the menu and select your device brand.
After activating the video camera, the steering wheel should be turned first to the right until it stops, then to the left. On the screen you need to click on o. The monitor will display a rectangular outline.
After this, you need to use the adjustment keys: you need to ensure that the bar is located exactly in the center on the display. The work ends with confirmation. A new disassembly will require updating the settings and performing the same manipulations. Which manufacturers take pride of place in the popularity ratings?
Adjustment
Sometimes the picture quality is lost after driving in rainy or snowy weather, visiting a car wash, or changing the operating mode of the parking system. But not all drivers know how to adjust the device and check its functionality. When adjusting the camera, you need to follow these instructions:
- To begin with, you should take a block 2 meters long, with sides 2-3 cm.
- Then it needs to be placed at a distance of a meter from the center of the rear bumper, making sure that the edges of the structure protrude from the sides of the car.
- Next, you should get into the vehicle and open the settings menu. It may be necessary to carry out other manipulations by turning the side lights on and off.
- Then you need to open the camera settings and select your car model. After activating the camera, all you have to do is turn the steering wheel to the right and then to the left - such manipulations will allow you to adjust the camera. Then click on the “next” item, after which a rectangular outline will appear on the display.
- Using the up, right, down and left keys you can position the outline in the desired part of the screen.
The listed recommendations allow you to quickly restore the system and get rid of poor picture quality, clouding and other defects. The subsequent launch of the system will lead to the appearance of yellow lines on the screen, which will greatly facilitate the parking process.
Causes of a tire puncture
The rubber inner tube of a car or bicycle can be damaged - punctured, cut or even torn - by colliding with objects lying on the road. Usually the cause of the problem is nails or screws, pieces of sharp strong wire. Thanks to careless people throwing bottles on the road, a wheel can be damaged by broken glass. It also happens that other iron parts that have come off the vehicles end up in the driver’s path.
Because of this “diversity,” there is a risk of ending up with a damaged tire even on the highway, so it is better to always have a minimum tire repair kit on hand. Most often, motorists who drive on old, worn tires or those who purchased a low-quality product encounter trouble.