Published:
18.03.2017
The parking brake on the KIA Spectra is a component of the overall braking system. Despite this, the handbrake performs a separate function assigned only to it - keeping the vehicle stationary during parking or a short stop. The hand brake system has a fairly reliable and durable design, which allows it to function uninterruptedly for a long time. But as for the adjustment procedures, the need for them arises regularly, due to the fact that the handbrake drive cables are gradually subject to stretching. Therefore, as soon as the car owner discovers that the brake pads are no longer capable of blocking the wheels with the required force, the question of how to tighten or replace the handbrake on the Kia Spectra becomes urgent in order to prevent it from spontaneously moving at the most inopportune moment.
The handbrake adjustment procedure must be carried out regularly, since the handbrake drive cables gradually stretch
Some drivers prefer to ignore the problem with a poorly working handbrake. As a result, you become accustomed to operating a car with “defective” brakes. And worst of all, such a careless attitude towards your own car can play a cruel joke on its owner. The consequences of driving with an ineffective parking brake can be dire, including a serious traffic accident. Knowing this, take appropriate measures, and you will learn how to tighten the handbrake on a Kia Spectra without resorting to qualified help below in the article.
Tensioning and replacing the KIA Spectra handbrake cable
The parking brake on the KIA Spectra is a component of the overall braking system. Despite this, the handbrake performs a separate function assigned only to it - keeping the vehicle stationary during parking or a short stop. The hand brake system has a fairly reliable and durable design, which allows it to function uninterruptedly for a long time. But as for the adjustment procedures, the need for them arises regularly, due to the fact that the handbrake drive cables are gradually subject to stretching. Therefore, as soon as the car owner discovers that the brake pads are no longer capable of blocking the wheels with the required force, the question of how to tighten or replace the handbrake on the Kia Spectra becomes urgent in order to prevent it from spontaneously moving at the most inopportune moment.
The handbrake adjustment procedure must be carried out regularly, since the handbrake drive cables gradually stretch
Some drivers prefer to ignore the problem with a poorly working handbrake. As a result, you become accustomed to operating a car with “defective” brakes. And worst of all, such a careless attitude towards your own car can play a cruel joke on its owner. The consequences of driving with an ineffective parking brake can be dire, including a serious traffic accident. Knowing this, take appropriate measures, and you will learn how to tighten the handbrake on a Kia Spectra without resorting to qualified help below in the article.
Kia Spectra. Replacing parking brake cables. KIA Spectra - Auto Call
I really couldn’t find anything on the Internet, I collected information bit by bit. to begin with, I removed the drums, by the way, again, who didn’t know, on the back of the casing, closer to the center of the hub, there is a small rubber band, taking it out, you can use a thin screwdriver to get to the self-release mechanism of the pads and try to bring the pads together by pressing on the mechanism.
cleaning the throttle Kia Spectra cleaning the throttle Kia Spectra is easy with Kia Spectra -…
How to adjust the handbrake with your own hands A special feature of the Kia Spectra parking brake system is that the handbrake adjustment is carried out in the cabin, without lifting the car and dismantling the wheels. how to change the handbrake cables The rear wheel pads are blocked by the left and right cables, each of which is responsible for its own wheel. The Kia Spectra parking brake system is designed in such a way that the rear wheel pads are locked using two cables.
Initially, I had 3 installation options in my head, and when replacing the handbrake cable, I chose the optimal one from the Spectrum cue. If the expected result could not be obtained, then the brake system should be bled. and finally, you need to remove the cable end from the slot in the equalizer so that the cable is completely removed.
how to change the handbrake cables The rear wheel pads are blocked by the left and right cables, each of which is responsible for its own wheel. The Kia Spectra parking brake system is designed in such a way that the rear wheel pads are locked using two cables.
that is, a separate cable is provided to control the right and left brake mechanisms. if tightening them does not lead to anything and the handbrake does not cope with its task, one should conclude that the cables are no longer suitable for use and must be dismantled.
in their place, pre-purchased new analogues should be installed. First you need to remove the floor tunnel lining as described in the first paragraph of the instructions for adjusting the handbrake.
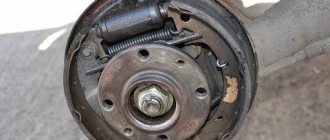
After this, the car will have to be raised using a lift or jack so that its rear wheels rotate freely. Next, dismantle the wheels and remove the brake pads.
The protective sheath of the cable is attached to the brake mechanism shield using a special fastener - it must be removed. then unscrew the two nuts of the bracket studs, with which the shell is attached to the rear suspension arm.
Now the cable end can be removed from the brake shield. the tension spring of the handbrake drive should also be removed, after which the bracket securing the cable sheath in the bracket located on the bottom of the body should be removed.
After this, the cable can be removed from the bracket without much effort. and finally, you need to remove the cable end from the slot in the equalizer so that the cable is completely removed. To dismantle both cables, identical steps are performed.
Installation of new cables is carried out in the reverse order of removal. Upon completion of the replacement, you should bleed the brake system and adjust the travel of the handbrake lever. and it would also be useful to twist the left and right wheels alternately with your hand to make sure that the handbrake, when inoperative, does not interfere with free rolling. As you can see for yourself, on a Kia Spectra car, replacing the handbrake cables can be done without the help of specialists.
In order to properly adjust or change the cable, you do not need to have any experience in automotive repair.
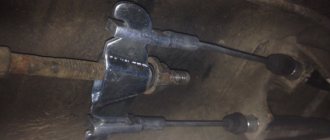
all that is required is detailed instructions and a simple set of tools. here is the tip that goes into the drum: here is the tip that is attached to the balancer; the rocker arm will have to modify the end of the cable that goes into the drum.
take a file and grind off the excess, fortunately the material is aluminum and sharpens with a bang. Now we grind off the already finished end and the unfinished eye of the cable from the top and bottom by 1 mm in a circle, and grind the part that goes into the drum, not even into the drum, but into a piece of tube sticking out from the drum shield.
We tear off the boot from the old cable and pull a piece of three “wrinkles” onto the cable. this boot will cover the entry point of the cable into the brake guard in this place: the VAZ “eye” of the cable, unfortunately, does not fit onto the handbrake lever in the shoes.
way out - cut off one “ear” on the lever. for clarity, I stuck an old cable into the modified lever and it is clear that this cut off “ear” does not affect anything. if in the future you have to install the original cable. Now with the VAZ cable, as I already wrote, the length of the original cable is a little longer. Therefore, the shank that is attached to the rocker arm is a little short.
tension the stretched handbrake cable for Kia Spectra
The solution is simple - you need to lengthen it. For this purpose I made a bar like this. the center-to-center distance of the holes is 15mm, the diameter for the bolt is m6.
kia spectra 2008, 101 l. With. - spare parts
We unhook the fasteners from the old cable and transfer them to the new cable in approximately the same places where they were. I placed rubber pads under the fasteners. We pull the cable into the drum, then fasten the cable to the lever or whatever it is called with two nuts.
We also attach the second fastener between the body and the tank. Then we stretch the end of the cable to the rocker arm and attach it to it through the bar with a bolt and M6 nut.
Source: https://autovizov.ru/kia/spectra/%D1%82%D1%80%D0%BE%D1%81%D0%B0-%D1%80%D1%83%D1%87%D0% BD%D0%BE%D0%B3%D0%BE-%D1%81%D1%82%D0%BE%D1%8F%D0%BD%D0%BE%D1%87%D0%BD%D0%BE %D0%B3%D0%BE-%D1%82%D0%BE%D1%80%D0%BC%D0%BE%D0%B7%D0%B0.html
How to adjust the handbrake yourself
A special feature of the KIA Spectra parking brake system is that the handbrake adjustment is carried out in the cabin, without lifting the car or removing the wheels. In this case, adjustment work can be carried out in three ways, but we will tell you how to tighten the handbrake on a Kia Spectra using the most convenient and rational method. To do this, you will need a 10" wrench and a flat-blade screwdriver.
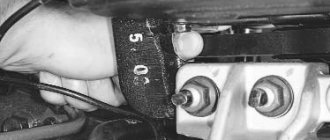
First, make sure that your car's handbrake is not working properly due to an overstretched cable - simply set the lever to the working position (pull it all the way towards you). If you hear seven or more clicks, it means that you definitely need to adjust the Kia Spectra handbrake, which should be done in accordance with the instructions below:
The KIA Spectra handbrake is adjusted in the cabin, without lifting the car or removing the wheels.
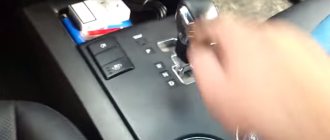
- Remove the floor tunnel lining by unscrewing seven screws: four screws secure the front part of the casing (two each on the left and right under the decorative plugs), two more are located in the niche for small items under the rug, and the last one is in the cup holder.
- After this, you need to remove the decorative covers from the gear shift knob and the handbrake lever, and also unscrew the gearshift knob itself.
- Now you can remove the tunnel lining, after which you will have access to the adjusting nut.
- Next, with the lever lowered, tighten the handbrake cable by rotating the nut. You need to tighten the handbrake and regularly check the lever travel to achieve the optimal number of ratchet clicks (from 5 to 7).
After this adjustment, the parking brake should function properly. If the expected result cannot be obtained, then you should bleed the brake system. If this measure does not help, the handbrake cable must be replaced, since it is too stretched and cannot be stretched any longer.
Kia Spectra handbrake repair - How to tighten or replace the handbrake on a Kia Spectra
The parking brake on the KIA Spectra is a component of the overall braking system. Despite this, the handbrake performs a separate function assigned only to it - keeping the vehicle stationary during parking or a short stop. The hand brake system has a fairly reliable and durable design, which allows it to function uninterruptedly for a long time.
But as for the adjustment procedures, the need for them arises regularly, due to the fact that the handbrake drive cables are gradually subject to stretching.
Therefore, as soon as the car owner discovers that the brake pads are no longer capable of blocking the wheels with the required force, the question of how to tighten or replace the handbrake on the Kia Spectra becomes urgent in order to prevent it from spontaneously moving at the most inopportune moment.
The handbrake adjustment procedure must be carried out regularly, since the handbrake drive cables gradually stretch
Some drivers prefer to ignore the problem with a poorly working handbrake. As a result, you become accustomed to operating a car with “defective” brakes.
And worst of all, such a careless attitude towards your own car can play a cruel joke on its owner. The consequences of driving with an ineffective parking brake can be dire, including a serious traffic accident.
Knowing this, take appropriate measures, and you will learn how to tighten the handbrake on a Kia Spectra without resorting to qualified help below in the article.
How to adjust the handbrake yourself
A special feature of the KIA Spectra parking brake system is that the handbrake adjustment is carried out in the cabin, without lifting the car or removing the wheels. In this case, adjustment work can be carried out in three ways, but we will tell you how to tighten the handbrake on a Kia Spectra using the most convenient and rational method. To do this, you will need a 10" wrench and a flat-blade screwdriver.
First, make sure that your car's handbrake is not working properly due to an overstretched cable - simply set the lever to the working position (pull it all the way towards you). If you hear seven or more clicks, it means that you definitely need to adjust the Kia Spectra handbrake, which should be done in accordance with the instructions below:
The KIA Spectra handbrake is adjusted in the cabin, without lifting the car or removing the wheels.
- Remove the floor tunnel lining by unscrewing seven screws: four screws secure the front part of the casing (two each on the left and right under the decorative plugs), two more are located in the niche for small items under the rug, and the last one is in the cup holder.
- After this, you need to remove the decorative covers from the gear shift knob and the handbrake lever, and also unscrew the gearshift knob itself.
- Now you can remove the tunnel lining, after which you will have access to the adjusting nut.
- Next, with the lever lowered, tighten the handbrake cable by rotating the nut. You need to tighten the handbrake and regularly check the lever travel to achieve the optimal number of ratchet clicks (from 5 to 7).
After this adjustment, the parking brake should function properly. If the expected result cannot be obtained, then you should bleed the brake system.
If this measure does not help, the handbrake cable must be replaced, since it is too stretched and cannot be stretched any longer.
How to change handbrake cables
The rear wheel pads are locked by the left and right cables, each of which is responsible for its own wheel
The KIA Spectra parking brake system is designed in such a way that the rear wheel pads are locked using two cables. That is, a separate cable is provided to control the right and left brake mechanisms.
If tightening them does not lead to anything and the handbrake does not cope with its task, it should be concluded that the cables are no longer suitable for use and must be dismantled. In their place, new analogues purchased in advance should be installed.
The process of replacing the Kia Spectra handbrake cable requires a socket wrench set to “12” and pliers and looks like this:
- First you need to remove the floor tunnel lining as described in the first paragraph of the instructions for adjusting the handbrake.
- After this, the car will have to be raised using a lift or jack so that its rear wheels rotate freely.
- Next, dismantle the wheels and remove the brake pads.
- The protective sheath of the cable is attached to the brake mechanism shield using a special clamp - it must be removed.
- Then unscrew the two nuts of the bracket studs, with which the shell is attached to the rear suspension arm.
- The cable end can now be removed from the brake shield.
- The tension spring of the handbrake drive should also be removed, after which the bracket securing the cable sheath in the bracket located on the bottom of the body should be dismantled. After this, the cable can be removed from the bracket without much effort.
- Finally, you need to remove the cable end from the slot in the equalizer so that the cable is completely removed. To dismantle both cables, identical steps are performed.
Installation of new cables is carried out in the reverse order of removal. Upon completion of the replacement, bleed the brake system and adjust the travel of the handbrake lever. It would also be a good idea to turn the left and right wheels alternately with your hand to make sure that the handbrake, when inoperative, does not interfere with free rolling.
https://www.youtube.com/watch?v=gOADp-IWoAU
As you can see for yourself, on a Kia Spectra car, replacing the handbrake cables can be done without the help of specialists. In order to properly adjust or change the cable, you do not need to have any experience in automotive repair. All that is required is detailed instructions and a simple set of tools.
carextra.ru
Kia Spectra Repair: Parking Brake
- Repair manuals
- Kia Spectra 2000-2011
- Parking brake
Replacing parking brake cables
Replacing the parking brake lever
Replacing the parking brake drive cables Replace the parking brake drive cables if they are excessively stretched (impossibility of adjusting the parking brake), mechanical damage and loss of mobility in the sheath. Replacing the parking brake drive cables is shown using the example of the left cable, the right cable is replaced almost...
Replacing the parking brake drive lever Replace the lever assembly if the gear sector or pawl is worn or damaged. In addition, it is necessary to remove the lever to replace the adjusting rod if its thread is damaged. You will need: a “10” wrench, a “12” socket wrench. 1. Disconnect the wire from the “–” terminal of the battery...
How to change handbrake cables
The KIA Spectra parking brake system is designed in such a way that the rear wheel pads are locked using two cables. That is, a separate cable is provided to control the right and left brake mechanisms. If tightening them does not lead to anything and the handbrake does not cope with its task, it should be concluded that the cables are no longer suitable for use and must be dismantled. In their place, new analogues purchased in advance should be installed. The process of replacing the Kia Spectra handbrake cable requires a socket wrench set to “12” and pliers and looks like this:
- First you need to remove the floor tunnel lining as described in the first paragraph of the instructions for adjusting the handbrake.
- After this, the car will have to be raised using a lift or jack so that its rear wheels rotate freely.
- Next, dismantle the wheels and remove the brake pads.
- The protective sheath of the cable is attached to the brake mechanism shield using a special clamp - it must be removed.
- Then unscrew the two nuts of the bracket studs, with which the shell is attached to the rear suspension arm.
- The cable end can now be removed from the brake shield.
- The tension spring of the handbrake drive should also be removed, after which the bracket securing the cable sheath in the bracket located on the bottom of the body should be dismantled. After this, the cable can be removed from the bracket without much effort.
- Finally, you need to remove the cable end from the slot in the equalizer so that the cable is completely removed. To dismantle both cables, identical steps are performed.
Installation of new cables is carried out in the reverse order of removal. Upon completion of the replacement, bleed the brake system and adjust the travel of the handbrake lever. It would also be a good idea to turn the left and right wheels alternately with your hand to make sure that the handbrake, when inoperative, does not interfere with free rolling.
As you can see for yourself, on a Kia Spectra car, replacing the handbrake cables can be done without the help of specialists. In order to properly adjust or change the cable, you do not need to have any experience in automotive repair. All that is required is detailed instructions and a simple set of tools.
Source
Kia Spectra handbrake adjustment
The official dealer of KIA Revolt Auto presents discounts on the model range
» Miscellaneous » Kia Spectra handbrake adjustment
Replacing parking brake cables
Replacing the parking brake lever
Replacing the parking brake drive cables Replace the parking brake drive cables if they are excessively stretched (impossibility of adjusting the parking brake), mechanical damage and loss of mobility in the sheath. Replacing the parking brake drive cables is shown using the example of the left cable, the right cable is replaced almost...
Replacing the parking brake drive lever Replace the lever assembly if the gear sector or pawl is worn or damaged. In addition, it is necessary to remove the lever to replace the adjusting rod if its thread is damaged. You will need: a “10” wrench, a “12” socket wrench. 1. Disconnect the wire from the “–” terminal of the battery...
Section 1. Car structure General information about the car Passport data Car keys Controls Heating (air conditioning) and interior ventilation Doors Seat belts, airbags and child seats Seats Steering wheel adjustment Rear view mirrors Interior lighting Sun visors Hood Trunk lid Gearbox control lever
Section 2. Recommendations for operation Safety rules and recommendations What you need to have in the car Running in the car Operating the car during the warranty period Preparing the car for departure Filling the car with gasoline Using a jack Towing the car
Section 3. Malfunctions along the way The engine will not start Malfunctions of the fuel injection system Idle has disappeared Interruptions in the engine The vehicle moves jerkily The vehicle accelerates poorly The engine stalls while driving The oil pressure has dropped The engine is overheating The battery does not recharge Electrical equipment malfunctions There are unusual knocking Problems with the brakes Checking the brakes Wheel puncture systems
Section 4. Maintenance General provisions Daily maintenance (EO) First maintenance (MOT-1) Second maintenance (MOT-2)
Section 5.
Engine Design features Possible engine malfunctions, their causes and solutions Useful tips Checking compression in the cylinders Removing and installing a decorative engine cover Removing and installing engine mudguards Replacing the power unit suspension mounts Replacing the protective bar Installing the piston of the first cylinder to the TDC position of the compression stroke Replacing the timing belt mechanism Replacing the tension and support rollers of the timing belt Removing, troubleshooting and installing the flywheel Replacing engine seal parts Engine cylinder head Removing and installing the engine Lubrication system Engine cooling system Engine exhaust system Engine power supply system
Section 6. Transmission Clutch Gearbox Front wheel drives
Section 7. Chassis Front suspension Rear suspension
Section 8. Steering Design features Possible malfunctions of power steering, their causes and solutions Steering column Steering rods
Section 9. Brake system Design features Possible malfunctions of the brake system, their causes and solutions Bleeding the brake system hydraulic drive Master brake cylinder Vacuum brake booster Replacing brake hydraulic hoses and tubes Front wheel brakes Rear wheel brakes Parking brake
Section 10.
Electrical equipment Design features Diagnosis of malfunctions of on-board electrical equipment Mounting blocks Battery Generator Starter Ignition switch (lock) Ignition system Engine control system Lighting, light and sound alarm Windshield wiper Removal and installation of a windshield washer Removal and installation of the electric motor of the radiator fan of the engine cooling system Heater fan Electric heating rear window Removal and installation of the cigarette lighter socket Instrument cluster Replacement of control lamps and instrument cluster illumination lamps Replacement of the control unit for exterior rear-view mirrors and the headlight electric corrector regulator Replacement of instrument panel switches Replacement of instrument panel switch illumination lamps Removal and installation of the clock Removal and installation of the ETWIS unit Car audio system Replacing sensors and switches Anti-theft engine immobilizer system
Section 11. Body Design features Replacement of bumpers Removing and installing the mudguard and front wheel fender liner Removing and installing the rear wheel mudguard Removing and installing the front fender Removing and installing the hood Doors Trunk lid Removing and installing trunk linings Fuel tank hatch cover Seats Additional passive safety system Rear mirrors view Instrument panel Removing and installing the instrument panel Heater and air conditioning Interior fittings Replacing the windshield Body care
Section 12. Car care Anti-corrosion protection of the body Preparation and anti-corrosion treatment of hidden body cavities Sealing the body Engine washing Car washing
Section 13. Purchasing spare parts Engine oil Greases Coolants Brake fluid Fuel fine filter Engine lubrication system oil filter Spark plugs
Section 14. A trip to the service station
Section 15. Winter car operation How to prepare a car for winter Recommendations for starting the engine in severe frost What is useful to buy for winter Useful winter tips
Section 16. Preparation for technical inspection Recommendations List of malfunctions and conditions under which the operation of vehicles is prohibited Changes to state standards regulating the maximum permissible content of harmful substances in the exhaust gases of vehicles
Applications Appendix 1. Tightening torques of threaded connections, Nm Appendix 2. Fuels and lubricants and operating fluids Appendix 3. Lamps used on vehicles Appendix 4. Basic data for adjustment and control
Electrical circuits Diagram 1. Headlight connections Diagram 2. Headlight and front fog lamp connections Diagram 3. Cooling system radiator fan control system and air conditioning condenser connections Diagram 4. ETWIS and interior lamp connections Diagram 5. Rear lamp connections Scheme 6. Connections of the DRL system Scheme 7. Connections of the electric corrector for headlights and rear fog lights Scheme 8.
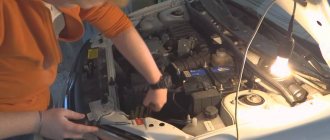
KIA Spectra automatic transmission › Logbook › Maintenance of rear brakes. Let's restore the handbrake. PART 1, Denial
Hello everyone, and, as usual, I would like to start my story with a little background. In short, there was no rear handbrake, there was none at all... tightening it did not give anything, but, on the contrary, only caused an even greater negative reaction, namely: when tightening the bolt from behind, an incomprehensible hum was heard, reminiscent of a tense spring. I’ll jump ahead and say that it was the handbrake cable that was rubbing against the hub and creating a characteristic sound. Since I didn’t know what exactly to change, one day I decided to do an autopsy in order to make a shopping list