Only in recent years has the Russian automobile industry begun to produce products that are in many ways similar to their foreign counterparts. Servicing such cars is mainly the work of service centers. With classic models everything is different. It just so happens that most of the work with the classics is done with one’s own hands. In relation to the VAZ 21093, repairs also became a concern for the car owner.
Main characteristics
First of all, the book repair and operation of a car tells the main characteristics of the car.
The sedan body is made simply, but at the same time elegant. There are no plastic masks on the front fenders, unlike similar models. The 1.5 liter engine shows good technical characteristics. The gearbox is made manually with 5 steps. The injection engine consumes little fuel, about 7-8 liters per 100 kilometers. For additional driver comfort, there is an on-board system that monitors errors. The windows are electronic and the doors are locked automatically. The seats guarantee comfortable seating for passengers and drivers.
What to put?
Indeed, the most important issue among VAZ 2109 owners is the range of engines that may be under the hood of their car.
Let's look at several popular solutions that are most often found among those who decide to change the engine on their VAZ 2109.
Option
Peculiarities
Gas is a cheaper alternative to gasoline, which will allow you to save big in the future at gas stations. This replacement is called the easiest. But you should take into account the fact that such a replacement will pay off only if the car is used frequently, and you will have a gas cylinder in the trunk. Such work can only be done by specialists with appropriate qualifications and permits.
VAZ injector 1.5 liters
A good alternative that will allow you to extract more power from your improved car. The injector is more powerful, it requires less fuel, and provides better dynamics. But in practice, changing engines from VAZ to VAZ is not the best solution, since there are many options among more reliable, powerful imported cars
Engines from Priora and VAZ 2112
Not bad domestic options that will easily fit into the space for the engine of your nine. Good output, excellent opportunity to transfer not only the engine, but also the gearbox itself
1.5 liter engine from Honda Civic
Here we are talking about 1.5-liter engines with a capacity of 92 horsepower of the 1991-1995 model. Injection engines of that generation perfectly fit the dimensions of the engine compartment of the VAZ 2109 and have good technical characteristics. A kind of improved variation of the previous version
Vectra engines of 1.4, 1.6 and 1.8 liters have proven themselves well. The engines, although old, are playful, quite powerful, and relatively economical. Their main advantage is their affordable price with good build quality. If you find a decent German engine of any of the presented volumes, your VAZ 2109 will perform significantly better compared to the factory engine
Motors from Mitsubishi Lancer
1.5-liter injection engines with a power of up to 100 horsepower are to the taste of many. Good dynamics, good assembly, pleasant economy. Finding such a motor is not very easy, but there shouldn’t be any big problems either.
An attractive replacement option that allows you to get a high-spirited, interesting, reliable Korean engine. The only important nuance is that the box from the nine does not match the features of the engine from the Korean, so you will have to change everything together
VW Passat or Golf
Excellent reliability, amazing engine life, despite their age. You won’t be able to install engines from the latest versions of these German cars, because then you’ll have to redo literally everything. But engines from the 90s will take your VAZ 2109 on board very well
Another example of the excellent German quality of the engine that can be installed on the nine. In many ways it is similar to engines from Volkswagen and Opel in terms of characteristics, dynamics, and efficiency. It’s not difficult to find, but try to choose a motor with minimal mileage. This way you will ensure a long and carefree life for your car.
You should choose engines up to 2.0 liters. The best option is a 1.6-liter engine with 16 valves and a power of 90 horsepower. You will find such engines on the Doblo model. There are quite a lot of them at car wrecking yards, so there shouldn’t be any problems finding them.
Torquey, quite powerful, dynamic engine with a good margin of safety. A good solution for our roads. Japanese quality is not much inferior to the presented analogues from Germany. At one time, engines for the 626 model received many positive reviews, which is why their installation on the VAZ 2109 is recommended by many experts
Weak spots
What weak points does the body of the domestic nine have? Let's try to find out.
If rotten or deformed elements of the car body are detected, they must be removed and appropriate measures taken to restore the integrity of these areas.
The most vulnerable areas of the VAZ 2109 body include:
- Front floor, reinforced sills, doors, fenders and rear underbody;
- The hood has relative endurance, but over time it begins to lose its former properties. The area above the battery is especially affected. This is where Nine owners most often notice the formation of rust;
- A noticeable problem that many drivers face is the fuel tank floor;
- Optics reflectors and a muffler also cannot boast of a long life without the appearance of signs of rust.
Corrosion is obvious
Corrosion is the main enemy of almost all domestic cars. Although anti-corrosion coatings are done quite well, time, weather conditions and the characteristics of our roads kill everything, rust actively begins to eat the metal and this problem must be dealt with.
Preparing for the reverse process
The process is completed by fixing the VAZ engine using a timing belt. It would be a good idea to use 1-2 bricks to help prevent the engine from falling. After making sure that the massive unit is fixed in space, the cushion is loosened and the engine is directly removed. Having secured the belt with your hand, you need to slowly remove the pipe.
If by this time the engine has not come off on its own, it is recommended to use a pry bar. After this, the unit is transferred to a temporary storage location for subsequent work with it. You need to remember - install everything in exactly the reverse order. If some elements have reached the end of their service life, it is better to replace them in advance.
The process of removing the “heart” of a car is complex and multi-stage. Accuracy and precision of actions is the key to successful repairs on your own. After removal, it is recommended to carry out a mandatory inspection of all engine components.
Source
Rear brake cylinders
First of all, for the VAZ 21099 the operation and repair manual provides for the replacement of the rear brake cylinders. The instructions give practical advice on how to repair brakes yourself. First, we put the car on the lift. Or rather, the rear part of the VAZ 21099 is lifted on a jack. We continue:
- turn the wheel out;
- We find two guides on the brake drum and pull them towards us.
Note. On the VAZ 21099 they are easily removed and practically no effort is needed. Unless, of course, the car is old and everything has not been corroded.
- Now we find the bolts securing the brake cylinder;
- turn them inside out;
Replacing brake cylinders
Note. Before you begin to unscrew these bolts, you should remove the copper tube through which the coolant flows from the brake cylinder. To do this, you will need to slightly moisten the mounting area with a special liquid, such as VD 40, and wait a while. After removing the tube, this place should be sealed tightly so that fuel fluid does not flow from there.
- after unscrewing the bolts securing the brake cylinder, remove it;
- install a new one;
- We assemble all the parts in reverse order.
Bleeding the brake system of VAZ 21099
The brake system of the VAZ 21099 is pumped not only when the cylinders are changed, but also if the brake pedal becomes too soft or, in other words, easily fails. After a few pumps, the pedal becomes stiff again. This condition also means that air has entered the system, which should be properly pumped out of the entire system. It is advisable to carry out this procedure with an assistant who will sit behind the driver’s seat and pump up the brake pedal when required. Even a teenager whose foot can reach the pedal can handle this task. Let's get started:
- open the reservoir on the master brake cylinder (make sure it is full of brake fluid);
- now you will need to find the bleeder fitting, which is located on one of the rear brakes and clean it of dirt;
VAZ 21099 operation and repair injector
- we take a special rubber hose and put it into the fitting (the hose must be of the required diameter and made of a material that can withstand brake fluid);
- lower the end of the hose into a container with a small amount of liquid liquid (it is advisable that the container be transparent to see how much liquid is coming in);
- ask the assistant to press the brake pedal several times and then hold it pressed to the floor;
- Now you should unscrew the fitting with a wrench until the brake pedal automatically falls off and the fuel fluid flows out of the hose, always with air bubbles;
Bleeding brakes VAZ 21099
Note. You need to warn your assistant not to release the brake pedal under any circumstances.
- tighten the fitting;
- We repeat the procedure exactly as it was done.
Note. It will be necessary to pump out air in this manner until bubbles stop coming out of the fitting. And the assistant sitting behind the wheel will feel how the brake pedal becomes tight.
After bleeding the rear wheel, you need to move to the front.
This is important. The repair and operating instructions for the VAZ 21093 and VAZ 21099 warn that these models use a diagonal brake drive. In other words, after bleeding the rear right wheel, you need to move on to bleeding the front left, which is diagonal to the first. In addition, when bleeding the brake system, one must not forget about the level of fuel fluid in the main reservoir. If the fluid level is low, be sure to add fluid of the same color.
The operating and repair instructions for the VAZ 21093 and VAZ 21099 are an opportunity to quickly find any malfunction in the car, as well as determine the cause. In addition, clear and precise advice makes it clear how to quickly eliminate all these malfunctions.
Technical condition assessment
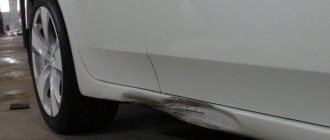
Before repairing the body of a VAZ 21099, it is necessary to assess its technical condition and decide what body work needs to be done and whether it is advisable to carry it out from an economic point of view.
To do this, visually inspect the surface of the body for:
- dents;
- chips;
- scratches;
- peeling of the paint layer;
- presence of rust (pay special attention to the sills, wheel arches and bottom).
The problem with any Tolyatti-assembled car, including the VAZ 21099, is the poor quality of the metal, the low, insufficient level of anti-corrosion treatment of the main elements of the body structure.
If the car has been in an accident, the geometry of the body is checked. It is impossible to do this with your own hands; you need a special stand, which is available only at specialized service stations, after which the factory geometry of the load-bearing elements is restored.
Then we decide on a budget. Body repairs can be major or local, partial. For VAZ 21099, when rust appears and the paint layer peels off, a major body repair is recommended, because local repair is a temporary solution, a deferment of the sentence. It’s better to invest once and do everything yourself, including with your own hands, than to restore it gradually, which leads to a decrease in the performance characteristics of the car, the appearance of hidden defects and more significant financial costs in the end. After all, the build quality of domestic cars is extremely low, and the attempt to create a sedan based on a station wagon was a very dubious design decision, which is confirmed by the practice of operating the VAZ 21099.
Carburetor repair VAZ 2109
Installing a carburetor in a VAZ 2109 car
If the car moves jerkily during the start and when accelerating, the carburetor is most likely clogged. Carburetor needs repair. Installation of the device in a car is shown in the photo. To troubleshoot you need:
- Replace high-voltage wires under the hood.
- Start the engine several times.
- The engine will not start, but the carburetor will be cleaned well.
- The wires are installed in their original position.
- The engine starts.
Advice: If the carburetor is not cleaned after three attempts, it is better to use another method of troubleshooting.
- The carburetor is removed from the car.
- The element is blown out with compressed air. In this case, you need to get acquainted with the literature or contact a specialist.
- In addition, all parts of the carburetor are washed after completely disassembling it.
These are just a few examples of how repairs and maintenance are carried out at VAZ. Any car owner can get acquainted with the repair of all components of a VAZ 2109 car by watching a special video.
Car painting
Repairing the body of cars assembled in Togliatti, including the VAZ 21099, is not complete without restoring the paint layer. Car painting can be:
- complete (involves removing old varnish and paint, applying new ones);
- partial (the paint layer is restored only in places where chips, scratches or peelings occur).
The choice of the necessary tool is determined based on the total volume and specifics of the work.
Painting a car can include various stages:
- grinding and cleaning (various abrasive materials are used, such as sandpaper or an abrasive wheel);
- applying a primer followed by sanding;
- coloring;
- applying varnish;
- polishing
Painting a car, including the VAZ 21099, can be done either in your own garage with your own hands, or at a service station, in a special chamber. Everything directly depends on the budget allocated for body repairs.
Source
Video “Removing the gearbox”
This video shows the step-by-step process of removing the transmission.
Most owners of 2108-21099 are aware of the problem with engaging and sometimes knocking out 2nd gear. And I was no exception))) Since the cost of work at the service station did not particularly suit me, I decided to go through the checkpoint myself. As it turned out later, there is nothing complicated about this. Without problems with the Murzilka, you can safely climb into the gearbox!)) Having studied a lot of articles on the Internet, having studied all the intricacies, I got to work at the moment while the car was being painted (naturally, only the bare body was painted), and everything else was in the garage and needed a little renovation. I took the box to the car wash. They washed it thoroughly for me there. The next day I disassembled the box, laid out each piece on pieces of paper and signed the next removal number)))) Oh, how tedious it was. The first problem arose with the nuts on the shafts, which only my father could unscrew. The second problem arose with the bolts securing the metal plate that holds the bearings of the primary and secondary shafts, under a Phillips screwdriver. Well, no matter how much they didn’t want to unscrew, I already broke 2 of my favorite large screwdrivers until I bought an impact screwdriver)))) The impact screwdriver became a new favorite, the screwdriver is SUPER))) Having unscrewed the plate, I found a collapsed plastic separator of the secondary shaft bearing (((
And naturally, the ball bearings were replaced with bearings with a metal cage, and the roller bearings were simply new
With grief, we pick out the retaining rings of the bearings with round pliers and remove the crankcase... I discovered a broken spring in the gear shift mechanism, which reduces the play of the lever and helps to disengage the gear.
I ran through all the auto stores and the search was unsuccessful ((((And of course, everyone offered to buy the complete mechanism for 1,700 rubles, diligently insisting that I had no choice, that I would still have to buy it. I even went to our production specifically for the spring GOC, in an attempt to find something similar, but alas... But to spite all the store sellers, I naturally found help on GOOGLE (I always turn to it) and found an interesting idea to install a spring from the radiator cap of a VAZ Classic. The old cap with 6ki father))) And of course she fit like her own.

