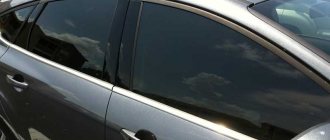
Covering a car with this material has both practical and aesthetic meaning. From a functional point of view, gluing carbon film is beneficial in that it protects the car’s paintwork from the effects of external factors, such as precipitation, grains of sand and stones, ultraviolet rays, and chemically active substances. This is especially true for parts exposed to road particles, such as the hood. Externally, the coating in question quite reliably imitates carbon, as evidenced by photos and videos. Therefore, it is usually applied to those parts that are most often represented by carbon analogues, that is, the hood, mirrors, etc. The film can also be used to cover plastic in the interior. Moreover, this coating is much cheaper than the original material. You can learn about the various options for applying film both on body parts and in the interior from photos and videos. In addition, if the hood or other parts already have damage to the paintwork, they can be covered with film to hide the defects.
That is, carbon film has attractive aesthetic qualities and at the same time is strong enough to protect the car’s paintwork from various environmental factors. In addition, this material is suitable for application to various materials, such as metal or plastic, so it can be used both for coating body parts and for interior decoration.
Subject to compliance with operating rules, the service life of carbon film is up to 10 years.
The main advantage of vinyl coating is ease of installation and minimal requirements for the surface to be treated. If painting a car with varnish requires multi-stage processing of the body, then this technology requires virtually no preparation of the elements.
For self-gluing, it is advisable to use a special film with channels to remove air, which is glued to a dry surface. To cover a car with carbon fiber yourself, you first need to thoroughly wash and dry the parts to be glued, degrease them, then:
- Cut out the blanks of the required size (it must be taken into account that the edges of the covering will bend). If the material has a striped texture, it is desirable that the stripes are located at an angle of 45 degrees.
- The film should be glued in one piece, starting with the smallest radius and stretching it over the entire surface. If you have to combine pieces, they need to be glued overlapping.
- After laying the carbon coating, you need to periodically heat it with a hairdryer. The canvas should not be heated above 70 degrees, otherwise it will lose color or begin to collapse.
- The edges of the film (5-10 mm) must be folded onto the back side of the glued element so that dust and moisture do not get under the porous adhesive layer, and the vinyl itself does not slip due to shrinkage when heated.
- If during pasting the carbon fiber sheet stretches or there is air under it, just press this area with a damp cloth and then heat it slightly so that the film shrinks.
- After applying the coating, do not wash the car or drive quickly for about 10 days, as the film will shrink slightly.
Work algorithm
Many car enthusiasts who are faced with the need for such work for the first time are concerned with the question: “How to glue carbon film to a car?” Let's talk. Before you begin to study methods of covering a body with carbon film, you must fulfill two mandatory conditions that guarantee high-quality work:
What equipment do you need to have for pasting? Below are the tools and materials that ensure complete and comfortable car wrapping with carbon fiber:
- Scissors.
- Knife for cutting vinyl.
- Squeegees, scrapers, forcing are special tools for smoothing the film web, removing formed air bubbles, and pressing the film tightly to the surface.
- Professional or semi-professional grade hand-held hair dryer.
- Liquid for degreasing the surface to be glued (alcohol, gasoline, white spirit).
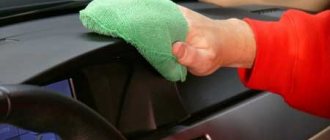
- Wiping material. It is recommended to use microfiber cloths.
- Masking tape to secure the edges. Special magnets that press (fix) carbon on the metal surface of body elements.
If the film is pasted wet, you will need a container with a spray bottle (manual model), a prepared soap solution (warm water with the addition of liquid soap).
How to stick film on a car using the dry method? The algorithm of actions is as follows:
- Clean and degrease the surface for pasting.
- After degreasing, the body part must remain dry. Make sure there is no dust and do not touch the clean surface with your hands. That is why you should choose a very clean box, with exhaust ventilation, and the gluing process itself should be carried out as quickly as possible.
- A carbon film sheet is attached to the body part and secured with magnets and/or masking tape.
- Using scissors or a sharp knife, a blank is cut along the contour of the body element. Be sure to leave allowances of 2-5 centimeters at the edges.
- Carefully one edge of the film is released and folded over half of the workpiece. At the bend site, an incision is carefully made into the backing that protects the sticky layer. Next, the substrate is removed from its place on the free half of the workpiece.
- Slowly we begin to carry out the process of gluing carbon fiber to the surface of the body in the direction from the center to the edge. We use scrapers and squeegees for smoothing. Having finished with the first half, we perform the same procedure with the remaining part.
- If during gluing there are air bubbles under the film or folds, they can be removed using a hairdryer and forcing (squeegee).
- We wrap the free sections of film left for allowances under the part and glue it with heat-resistant glue to its reverse side.
How to glue carbon using the wet method? You can do film body tuning yourself using the following tips:
- As in the case of the dry wrapping method, the body part must be in a grease-free, clean condition.
- A separate blank is made for each carbon-finished part. It is a kind of stencil, the dimensions of which are 3-5 centimeters (allowance) larger than the area to be pasted.
- Using a marker, mark the axes of the body part on the workpiece.
- Using a spray bottle, evenly apply a layer of soap solution to the surface of the part.
- Aligning the marks along the axes, we attach the film stencil to the surface of the part.
- Using scrapers and squeegees, we smooth out the carbon film, removing air bubbles and preventing wrinkles from forming.
- To make the film more flexible, it is heated with a hairdryer.
You must work very carefully, without stretching the vinyl sheet too much, as this can cause damage. Having finished gluing, it is necessary to dry the part covered with carbon fiber with a hairdryer until the soap solution is completely dry.
What is required for application
Car wrapping inside and outside can be done using two methods. I'll tell you about them a little later.
First, it’s worth listing the materials and tools that will be useful to you if you decide to cover surfaces with your own hands. In such a case you cannot do without:
- hair dryer (household or construction);
- squeegees;
- scissors;
- sharp stationery knife;
- degreaser;
- spray bottle;
- soapy water;
- soft, lint-free fabric;
- sealant or primer (edge treatment);
- 2 pairs of hands;
- Have a good mood.
It is really better to glue the film together, regardless of the chosen method. Although I would call the dry version more difficult.
As you may have guessed, pasting methods are divided into wet and dry. This is a lot like tinting your car yourself.
Wet technique
If this is your first experience in applying films, including carbon ones, and you have chosen a material that is not of the best quality, I advise you to opt for the wet method. It’s easier to implement, and the result will certainly be of high quality.
The procedure is performed in a certain sequence:
- take measurements of the parts and cut out the blanks with a margin of about 1.5-2 cm;
- remove all contaminants;
- degrease the surface;
- Apply a soap solution to the car using a spray bottle;
- remove the backing from the carbon film;
- Apply more solution on the adhesive side;
- attach the carbon to the surface;
- Use a squeegee to carefully align the film;
- Be sure to move from the center to the edges;
- do not pull the film;
- After removing water and air bubbles, dry with a hairdryer;
- go over the squeegee again;
- cut off the excess;
- tuck the edges inward, pre-treating them with a primer;
- give the car a day to dry.
The wet method is best used in a garage at a temperature of 20 to 25 degrees Celsius. Under the sun or in extreme cold, tuning should be postponed.
Choosing carbon film
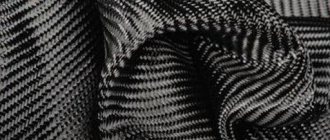
Carbon film itself is one of the varieties of the usual vinyl film. The only difference is in the design and color scheme.
There are currently three types of films sold:
- 2D is a smooth film with a pattern that imitates carbon fiber. The simplest and cheapest option. The disadvantage is the weak similarity with the original material; the advantages include the low price;
- 3D is an imitation of not only the image, but also the relief of carbon fiber. This film has a ribbed texture reminiscent of the original;
- 4D is a new product that has appeared relatively recently. Like 3D, it has a relief texture, but thanks to a special deeper pattern, it is the new look that is most similar to real carbon. This variety has almost no disadvantages, except for one thing - it is difficult to find on sale and its price is quite high.
The choice of coating depends on the surface you want to transform.
But if you need to paste over body parts, you should take a closer look at 3D. In addition to external advantages, such a film has a longer service life and more reliably protects the body from external influences.
Advantages and disadvantages
A carbon hood has the following advantages:
- it is extremely difficult to scratch;
- it weighs little and does not affect aerodynamics;
- has a prestigious appearance and a rich matte charcoal shade.
Among the disadvantages that accompany pasting with carbon film, it is worth noting:
- high cost of film;
- Covering a car with film with your own hands is quite difficult - if you stretch it too much, the film can tear;
- Some stickers containing carbon fibers will fade over time;
- if there is damage, you need to remove the old sticker and glue a new one - you won’t be able to disguise the imperfection on the hood.
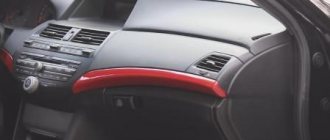
Carbon film on the dashboard
Updating the dashboard
Often, carbon film is used for decoration in the car interior and is glued to the instrument panel. Fans of interior tuning prefer to cover the handles of the unlocking mechanism, door handles, and small elements of the dashboard with carbon fiber.
Carbon film brings something new and unusual to the interior, complements it and makes it unique.
It would seem that there is nothing difficult in covering a small element from the interior, because small parts, at first glance, are much easier to cover with film. But in reality everything is not so simple. You will have to work hard with a hairdryer to achieve a good result. In any case, pasting small objects will allow you to develop skills, which in the future will make it possible to cover parts with carbon film that are more complex in shape and size.
Thus, if you want to cover one or another element of your car with modern carbon film yourself, it is quite possible to organize this. The cost of the material is not so high, and the range presented on the consumer market is unusually wide.
Main types of film material
There are several types of carbon film for cars in different colors and prices:
- Carbon fiber includes two layers: a textured carbon fiber film with a static pattern and a special glossy coating with lamination that protects the first layer from environmental influences. 2D vinyl comes in different shades, has excellent physical properties and high durability, and you can cover the body with carbon film at a low price.
- the second option differs from the previous one by the presence of relief microstripes, which provide a three-dimensional effect of static images. The price of covering a car with carbon film is slightly higher, but it has a higher quality visual perception.
- The most advanced carbon film coating has an additional varnish layer. This option has the highest quality and naturalness of the created visual effect, which is why the price of carbon fiber for a car is the highest.
Any carbon-look film can be made in various colors: black, blue, white, silver, red, gold, pink, orange, graphite, cherry, green and transparent.
Wet method
For those new to film wrapping, the wet method will be easier and faster.
Procedure:
- You need to cut a piece of film to the required size, taking into account a turn of 8 mm on each side. In large areas, it is allowed to leave folds up to 5-6 cm.
- The surface is degreased with a soap solution and washed with clean water.
- If there are uneven spots and scratches, then before applying the sticker you need to restore the structure of the surfaces using a primer or automotive putty. It is important to consider the following: if the primer dries in 5-7 minutes, then the putty takes up to several hours, and then it must be sanded with fine sandpaper.
- Afterwards, a soap solution is applied again - the carbon fiber will be attached to it. In order for the film to fit tightly, you must check that there are no contaminants left. And to apply the soap solution evenly, it makes sense to use a spray bottle.
- The film must be applied to the surface, having first removed the backing from it, and pressed step by step onto the paintwork, smoothing with a soft polymer spatula or felt squeegee.
- For fixation, the front part is heated with a hair dryer. The final gluing process should begin from the center of the element, gradually moving to the edges.
Important! Moisture should not be allowed to dry out during the first gluing process, so there is no need to apply the soap solution to too large an area at once.
To properly glue carbon fiber using the wet method, uniform heating must be observed, otherwise both the film and the car’s paintwork will be damaged. The minimum setting of a hair dryer in the range from +50 to +70° C is sufficient.
Instructions for gluing carbon film on a car
Covering a car body with carbon film requires following the instructions. This will allow the coating to last and not lose its properties for up to 5-7 years. This way you can preserve the paintwork underneath the material so that you don’t have to repaint the car after it’s removed.
"Dry" sticker method
Pasting a car with colored carbon film using this method has the following advantages:
- Vinyl adheres better to the surface of the car.
- The material is practically not stretched.
- The sticker will not budge during installation.
Coating a car with carbon film is carried out according to the following algorithm:
- Place the sticker on the part, removing the backing, and smooth it with a spatula and your hands.
- Heat it over the entire surface with a hairdryer and smooth it out.
- Cut off excess carbon.
One of the methods of covering a body with film
The edges of the carbon fiber can be glued with glue.
"Wet" method
Knowing how to apply carbon film to a car at home, you can try to apply it this way, even without such practice. It's much easier than the dry method.
To cover a car with carbon film of any color and texture, you need:
- Treat the surface with a soapy mixture using a container with a spray bottle.
- Remove the backing and apply the coating to the part.
- Press the product and smooth it with a spatula, helping yourself with your fingers.
- Heat the material from the front side with a hairdryer.
- Finally press it to the surface. You need to start working from the center, and then fix the edges.
Pasting a car with a spatula
An adhesive primer can be applied to the edges of the vinyl for better adhesion.
Applying carbon fiber to car plastic
To properly glue a carbon film onto the plastic of a car, you need to prepare it first. Preparation includes wiping and cleaning the surface from dirt with mandatory drying and degreasing. The matte sticker must be cut to the size of the part. For gluing, you can use both dry and wet technology. The work is performed in the same way as on metal body parts.
Since the plastic elements of the interior often have a complex shape, when pasting it is necessary to carefully smooth the coating with your fingers in hard-to-reach places. Otherwise, it will not stick, and the work will have to be redone. Do not overheat the plastic, as it may become deformed.
Features of gluing with carbon-look vinyl film
Even the dry method requires drying for 4-6 hours, and a visit to a contactless car wash will have to be postponed for a couple of weeks. Otherwise, the coating will quickly come off or become covered with bubbles.
If you manage to purchase an inexpensive 2D film, then during the installation process it is better to make perforations in it yourself to remove air. For this purpose, you need to heat a thin needle and make holes in the film in a checkerboard pattern at a distance of 3-5 cm.
Using the dry and wet method, you can glue carbon film to plastic inside the car. The principle and procedure is no different from body wrapping. The difficulty lies in the geometry of the elements. In places where it is difficult to go through with a spatula, you need to roll the film with your finger to avoid uneven tension and tears.
The plastic must be cleaned of dirt and be sure to degrease before gluing the film.
After ironing with a spatula and heating with a hair dryer, it would not hurt to fix the edges of the film on the plastic with heat-resistant glue, because It can peel off when turning.
Important! Do not overheat the plastic with a hairdryer; due to high temperatures, the polymer elements can melt and deform.
Covering with corbon-look film allows you to emphasize the individuality of the car without resorting to repainting. Beginners should choose the wet method of fixing the film - it allows you to easily adjust the position of the part. Craftsmen prefer the dry method, which does not require constantly updating the layer of soap solution. The film is suitable for use both outside and inside the car. The main thing is to thoroughly clean and degrease the surface and expel all drops of air during the smoothing process. The finished tuning will last an average of 5 years.
Interior wrapping process
First of all, it is necessary to completely dismantle all interior elements that will be subject to the pasting process. In this case, you can use a special set of tools designed for removing the casing. It is better to give preference to one made of plastic, as this will reduce the likelihood of damage to car parts.
It is advisable not to use screwdrivers or other tools made of metal during the dismantling process, as there is a risk of seriously damaging the parts.
After this, the procedure is as follows:
- The part is measured strictly along the contour, taking into account allowances, and then the required piece of film is cut out.
- The part that will be glued is thoroughly degreased. It is best to carry out this process with alcohol or gasoline.
- The backing is completely removed from the film and laid on a flat surface, with the sticky layer facing up.
- The initial alignment is carried out, that is, the interior element is carefully placed on the film.
- After careful alignment, you can begin to wrap the part in film, while simultaneously smoothing it out with a plastic card, thereby removing all the bubbles that inevitably appear during this process. A hairdryer is necessary to make the film more flexible. All bends, depressions and bulges should be passed through this heating device.
- All excess film residue is completely removed, leaving only small allowances for wrapping the edge.
- After this, you need to make cuts at all corners of the part, wrap the edges and glue the film to the inner surface. In this case, it is also important to use a hairdryer, and after cooling, the film will hold as firmly as possible.
If there is a place on the workpiece where, for one reason or another, it is not possible to wrap the film over the edges, it should be very carefully cut off strictly along the contour of the visible part of the workpiece. In this case, the edge of the film should be additionally glued with regular glue to prevent it from peeling off.
Material selection
If you decide to apply a film that imitates carbon fiber to the interior plastic or body parts, then you should start by choosing the material.
The range of products is very diverse, which is somewhat inconvenient for some, but gives room for creativity for others.
It is best to navigate by the degree of relief. Here you can divide the material into 4 main categories.
- Two-dimensional coverage. Or 2D film. The cheapest, simplest and most common. A carbon imitation pattern is printed on PVC. From a distance it looks impressive and beautiful, but upon closer inspection it immediately becomes obvious that this is not carbon;
- Three-dimensional products. Also called 3D films. They imitate carbon fiber much better, since they have a special relief. Looks great from any distance, and even to the touch does not differ from carbon fiber;
- 4D films. A new type of vinyl-based coating that comes closest to natural carbon in terms of appearance and tactile sensations. This is achieved due to the relief of the stripes, which bend and intertwine;
- Glossy materials. Externally, the material looks great, and the carbon seems to be under a layer of varnish. It looks especially good under the sun's rays and changes color depending on the viewing angle. Effective and efficient.
You need to choose as carefully as you choose the film for tinting the glass of your car. A lot depends on the quality of the product.
You can choose the color at your discretion. But since we are talking about carbon imitation, black, gray and steel shades are most often used.
Although recently there has been an increased demand for gold and bronze tones. If you wish, you can use acidic, red, purple and any other carbon-look coatings.
What it is
Do you think it is possible to stick carbon fiber onto parts of the interior or exterior of a car? No. Carbon is a special material with a complex structure and multicomponent composition. Individual parts and assemblies are made from it.
Therefore, when it comes to carbon film, it is important to understand that it is not carbon in its pure form. In fact, this is an imitation of a carbon surface and structure, implemented using vinyl and other materials. The film material is made based on polyvinyl chloride (PVC). At the same time, visually and to the touch it strongly resembles full-fledged carbon fiber. Due to its low cost, variety and ease of use, you can carry out an excellent modification of the car, obtaining the full appearance of natural and high-quality carbon fiber.
High-quality films are produced using the calendering method. Due to it, a thin but high-strength material is formed, which has the same thickness along its entire length.
It is the amazing visual similarity, combined with the relative ease of pasting, that makes carbon films so popular.
They can be used for various purposes and for styling various elements of the car. Namely:
- for a torpedo;
- on the bumper;
- on the hood of a car;
- on the surface of the mirror;
- interior details;
- on the roof of the car;
- on the thresholds;
- on plastic in the car interior;
- dashboard;
- glove box;
- center console, etc.
But it is not worth gluing the film on an uneven surface where there are many corners and creases. The result may disappoint you. The smoother the surface, the better the quality of the material placed on it. Therefore, it is not always possible to set straight lines at the corners, create a uniform surface without folds, etc.
Although there are craftsmen who can make high-quality carbon styling on almost any part of the body or interior of a car.
It is also worth recalling this styling method as flocking, which I have previously written about.
Main advantages
If you take good material and apply it correctly, there will be no talk of any shortcomings.
Therefore, in relation to good carbon films, only positive qualities can be highlighted. I would list the main advantages:
- creating a visually attractive effect;
- additional protection from dust, dirt, small stones;
- the ability to smooth out and mask defects;
- frost resistance;
- resistance to heat;
- does not fade over time;
- protects against moisture and corrosion;
- does not require complex care;
- can be applied by hand;
- If desired, it can be easily removed and changed.
The only limitation is high pressure washing at very close range. Therefore, when visiting a car wash, be sure to warn that there are parts on the body covered with carbon film.
How to glue carbon film: instructions
There are 2 ways to cover a car with carbon film - “wet” and “dry”. The first method is suitable for beginners who have no experience working with automotive films, as well as for films without microchannels for removing air from under the film. For novice installers, we recommend using films with microchannels, as they make installation much easier. The advantage of the “wet” method is the elimination of the possibility of overheating of the film, the appearance of glossy spots on the surface of the film, and the possibility of removing trapped sand grains from under the film.
The car wrap is easily shaped when heated, making it easy to apply. Installing the film “wet” using a steam generator is most often used for pasting large parts - hoods, bumpers, car roofs.
The dry method is more complex, requires more time and effort, but is also more effective. If you install the film under carbon “dry”, you should be more careful in preparing the surfaces to be pasted, since the debris that gets under the film is very difficult to remove. It is preferable to install car interior parts, mirrors, door handles and other small parts “dry” using a technical hair dryer. Due to its elasticity, the film can be applied to surfaces of any complexity and curvature - mirrors, handles, and the self-adhesive base makes it possible to glue carbon film to almost any material - metal, plastic, glass.
With any of the methods, the cleanliness and quality of the surface on which the film will be applied is of great importance. The car should be free of rust, deep scratches and unevenness, as this will certainly affect the result. Deep chips (pits) must be puttied, since, despite the large thickness of the film, it is not always able to hide errors in the paintwork. Let's take a closer look at each of the methods.
Wet method of applying carbon film
To install you will need:
• Sharp knife • Forging (optimally with a felt coating) • Sprinkler, into which we pour a 10:1 solution of water and detergent (Fairy works great) • Industrial or home hair dryer (we set the maximum temperature on a home hair dryer) • Primer 3M 94 or 3M edge sealant • Masking tape
Carbon film is much easier to install with several hands.
- The minimum temperature indoors or outdoors, recommended by vinyl film manufacturers, is +5 C. At a lower temperature, the film may not stick, but may peel off over time. If pasting takes place outside, the weather should not be windy, otherwise debris may accumulate under the film. The optimal place for wrapping a car with film is a closed box or garage, and the best room temperature is +18-22 C.
- Thoroughly wash and degrease the surface on which you will apply the carbon film. For best results, it is recommended to treat the surface with a weak solution of white spirit.
- Using a spray bottle, apply a soap solution to the surface to be pasted. There should be no dry areas left.
- Measure out the required amount of film. It would be a good idea to try the film on the intended location for pasting and use masking tape to make marks to record its location. Remember that moldings and curves can complicate the task. Next, separate the film from the backing. It is more convenient to do this on a flat surface. Care must be taken to ensure that no folds form on the film.
- Apply soap solution liberally to the adhesive layer of the carbon film. Plain water is not suitable in this case. A soap solution is good because it makes it possible to adjust the location of the film when pasting and makes it easier to remove bubbles from under the film.
Place the film on the intended location for wrapping the car. Next, use a squeegee (forcing) to expel the water from under the film with smooth movements. Using a hairdryer will make the task easier. You need to move from the center to the edges. Make sure that there are no bubbles or wrinkles in the film. If a crease has formed, carefully straighten this section of the film and re-roll it. The main thing is that the film is well fixed in the center. On the edges the film may be difficult to adhere to. It is necessary to heat the film more with a hairdryer and smooth it over the surface, slightly stretching it.- When all excess moisture has been removed from under the film, dry it with a hairdryer and again go over the surface with a felt squeegee. If you notice bubbles on the surface, you can get rid of them like this: heat this area with a hairdryer, pierce the bubble with a thin needle and press the film against the car. Small bubbles will disappear on their own as the film dries. This process may take up to 2 weeks.
- Treat edges and curved areas with 3M primer and let it dry for 5-10 minutes. This step in the gluing process can be skipped, but it guarantees better adhesion of the carbon film to the surface.
- Warm the film with a hairdryer and press its edges to the primer.
- Using a sharp knife, carefully trim the film along the edges.
- After installing the carbon film, the car should be allowed to dry for 12-24 hours. If necessary, after a day you can again walk over the pasted surface with a felt squeegee.
- It is recommended not to wash the car for 1 week.
Dry method of applying carbon film
The method of installing the film under carbon “dry” will require more skill. If you have never had to install car vinyl before, we recommend using the first method.
In addition to the film, you will need: • A closed room, the temperature in which should be at least +22 C. • A thoroughly washed and degreased car (to enhance the effect, it is recommended to treat the surface with a white spirit solution). • Industrial or standard hair dryer. • Sharp knife. • Forcing • Soap solution. • Magnets for fixing the film (if not available, masking tape will do). • Assistant
- After preparing the surface of the car for pasting, you need to measure out the required amount of film.
- Peel the films from the paper backing and place the film on the car. It is much more convenient to do this with someone's help. Secure the film around the edges with magnets or masking tape.
- Begin to gently smooth the film with a squeegee, moving from the center to the edges. Try to avoid wrinkles and bubbles in the film. If a crease does appear, carefully separate the film from the surface, straighten it and re-glue it. Heat the film evenly with a hairdryer. This is necessary to activate the adhesive layer and improve its adhesion to the surface. It is important not to overheat the film.
- After warming up the film, go over the surface with a squeegee, paying special attention to the edges. For greater effect, we recommend treating the edges with 3M primer or 3M edge sealant, thanks to which the film will adhere more reliably to the edges. The primer should be allowed to dry (5-7 minutes).
- Remove unnecessary parts of the film along the edges with a knife.
- Let the car sit in a warm room for 4-6 hours.
- Do not wash your car in a touchless car wash for 1 week.
How to remove carbon film
At the request of the owner or if the film is damaged, it can be easily removed under heat without leaving any traces on the surface of the car. As with all vinyl films, the service life of a carbon fiber film on external parts of a car (full wrap, graphics) is 5-7 years (3M films, KPMF). If you do not exceed the service life of the carbon film, it can be removed without much effort or damage to the paintwork. It is not recommended to keep the carbon film on the car longer than prescribed, as it does not transmit ultraviolet radiation, and in the future there may be a difference in the color of the body on the pasted and unprotected parts.
Caring for carbon film
Despite the fact that vinyl films are chemically resistant, we recommend promptly removing dirt, bird droppings, and tree resin from the surface of the film. Carbon film is simple and easy to maintain and can be easily cleaned with a soft cloth moistened with a cleaning solution or water. If the carbon-look film is heavily soiled, a hot washing solution (70°C-80°C) is used for cleaning.
How to glue carbon fiber to a car with your own hands?
It’s not difficult to figure out how to glue carbon film. It is important to decide on the color scheme of the material. You can buy the material at any auto store. Prices for film from different manufacturers vary from 1000 to 5000 rubles. per sq.m. Before you start gluing the film yourself, you need to very carefully measure the surface of the pasting. Then you should make the pattern correctly.
Before gluing the film, it is better to make not one, but several fittings of the pattern for the part of the car to be pasted. In this case, all unevenness and roughness should be taken into account, since they will require a certain amount of material. Masking tape will be a great help during the “trying on” process. With its help, it is convenient to leave small marks on the surface of the car.
You can stick the carbon fiber film either dry or wet. On a flat horizontal surface, you need to carefully and accurately, avoiding debris, separate the material from the paper base. You should start gluing from the middle of the area to be pasted and gradually move towards the edges.
Advice! To smooth the coating well, it is recommended to use an elastic band. A hairdryer is also great for warming up and smoothing the surface.
With a carbon fiber-look coating applied, even an old car will look like new. A scratched hood or bumper will look perfectly smooth. A standard color car will turn into a unique one, unlike any other. The car will acquire a stylish, distinctive design.
Carbon removal
If you need to remove carbon fiber, use one of several methods:
- Carbon fiber can be removed from the hood of a car by heating it with a hairdryer. You should not allow the sticker to melt - it is important to remove the carbon fiber slowly, without damaging the car’s paint;
- You can remove the sticker by using appropriate chemicals that are applied to the sticker and dissolve the glue underneath;
- Carbon fiber can be removed from the body using a high pressure washer.
You should not remove the carbon fiber with sharp objects - this will most likely scratch the car's paint, but will not be able to remove the sticker.
Every car enthusiast wants to somehow distinguish his car from the gray row of similar ones. Carbon is ideal for this purpose. Why? Because finishing a car with this material is relatively inexpensive, and the effect can amaze even the most demanding car owner. We’ll talk about how to stick a carbon film on a car with your own hands in today’s article.