The problem with new headlights
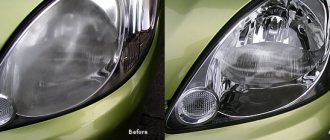
It happens that after installing new headlights, purchased for a lot of money from a reliable, excellent manufacturer, the quality of the glow leaves much to be desired.
Inexperienced drivers attribute everything to a defect or the purchase of a fake disguised as a trusted company. But in reality everything is completely different.
Headlights shine efficiently and efficiently not only depending on the manufacturer. Settings that someone doesn’t know about or simply forgets play a big role.
Headlights that have just been removed from the factory packaging and installed in place of the old optics do not have the adjustment required specifically for your car. You can do it yourself, but this will require a perfectly flat area, a similar wall and the skills of a draftsman. In practice, this is quite difficult to implement, so the optimal solution is to entrust the adjustment to specialists from a service station.
Alas, the VAZ 2110 is not a modern, advanced car in which the headlights are automatically adjusted electronically. Here everything has to be done manually.
VAZ 2110 do-it-yourself installation of fog lights
How to install and connect fog lights with your own hands
Car tuning is a fashionable concept and every car enthusiast wants to transform his car in any way. Domestic cars are no exception. If you decide to carry out external tuning of the VAZ 2110, then, for starters, installing fog lights for your VAZ 2110 car will be an excellent solution.
Fog lights are a useful thing, but domestic manufacturers rarely equip cars with them. In different companies, the cost of installing fog lights varies and ranges from 1.5 thousand rubles. up to 4 thousand rubles If you want to save money, you can install the fog lights yourself.
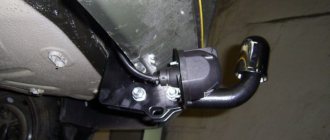
Installing fog lights on a VAZ 2110 car is not difficult, and in this article we will look at how you can do it yourself. The location for the fog lights will be under the bumper.
For type 10 models, there are two types of fog lights: corrugated, which scatter light, and transparent, which shine in spots and are considered more fashionable, although worse to use. To install headlights, purchase additional frames for headlights, a key, a key indicator (yellow), wires, relays, a ground terminal, a wide and narrow male terminal, a wide and narrow female terminal, and plastic blocks.
In connector Ш1 we find yellow and yellow and black wires. In the bundle from connector Ш1 we take 3 wires: yellow, yellow-black and thin yellow-black. Under the hood, disconnect the wires from the washer barrel and the liquid level sensor. Unscrew the nut that secures the washer barrel. We pull out the bundle of wires from under the left side member. We cut off 2 pieces of wire from the yellow wire and stretch them into the car interior. We strip the wires, crimp them with wide male terminals and insert them into the block so that the yellow-black wire joins the marked wire. We connect the block. We press the 2 yellow wires to the harness and put the washer barrels in place.
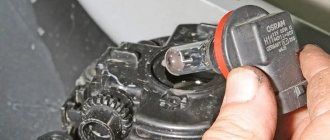
We cut off 2 pieces of wire 50 cm each, crimp the terminals to the ground of each wire and fasten it all on a stud together with the ground from the headlight. We stretch the fog lamp wire in the front side member. We pull both wires out at the place where the fog lights are mounted. A wide ground must be crimped onto each wire. We put brackets on the bumper, we put a block for the wide mother on the wires. Now you can prepare the headlights themselves. We insert light bulbs into them, but do not touch the light bulbs with your fingers, otherwise they will immediately burst when heated. Therefore, if you have already touched the light bulb, you need to degrease it. We connect the yellow wire to the light bulb, and the black wire to the body. We install the headlights. The installation of fog lights on the VAZ 2110 has been completed. This procedure takes about 1.5 hours. The installation of fog lights 2107 is radically different from 2110; a completely different connection scheme is used here.
Tuning VAZ » Tuning VAZ 2110
More news on the topic
Installing a voltmeter with your own hands on a VAZ 2106 Replacing a headlight on a VAZ 2110, 2111, 2112 We install mirror tuning on a GAZ 3110. Replacing a VAZ generator
How to connect fog lights on a VAZ 2110 with your own hands (why they may not light up)
Kirzhach with an H1 lamp
Therefore, today we will talk about how to connect fog lights on a VAZ 2110, what is required for this and what result you will ultimately be able to achieve.
Why are fog lights needed?
The very name “fog” lights already speaks about their essence. Their light penetrates fog, a wall of rain, and contributes to more efficient illumination of the road.
The presence of PTF provides three important advantages.
- PTF or fog lights are characterized by a flatter luminous flux, which literally spreads above the ground, spreading more in width than in height. This was done on purpose, since the temperature of the road surface is higher than the temperature of the air and fog, so it does not fall to the ground itself. Consequently, fog lights provide a certain range of illumination compared to conventional headlights. You will see approximately 10 meters further than with low beam.
- The width of the PTF light beam allows you to see the markings and the side of the road, which will allow you to make a maneuver in time and not end up outside the road surface. Unfortunately, this is a common occurrence in foggy conditions. Moreover, those who do not have fog lights suffer much more often. It is a fact.
- PTF does not blind oncoming cars, but allows them to see you. Only if the headlights are adjusted correctly, of course. Therefore, fog lights on your car have a big impact on safety by signaling oncoming cars that you are approaching.
Question about glass color for fog lights
On old cars, the glass of fog lights was yellow , so many people think that it should be like this now, it is more correct and more efficient.
In reality, everything is different. Today, auto industry leaders use exclusively clear glass for fog lights, which are superior to yellow ones in many components.
Materials and tools
You can easily buy a ready-made PTF kit with all the wires, and then you won’t have to figure out where the fog light relay is located on a VAZ 2110. However, if you purchase spare parts separately, this will diversify the installation options, plus it will allow you to save money.
Connection kit
Therefore, you need to purchase the following:
- Two sets of headlights;
- Plastic pads;
- Headlight frames;
- A key with a yellow indicator for it;
- Relay;
- Wiring. Choose an option with two copper conductors and double insulation, for example ShVVP2. A cross section of 0.5 mm is suitable, but if the lamps are powerful, 0.75 mm is better;
- Ground terminals;
- Female/male terminals - wide and narrow terminals.
It is not worth taking the mother-father complete with wires. It is better to crimp them using pliers when the wiring is already connected.
As for the light bulb, 55V is more than enough power. We strongly do not recommend buying cheap fog lights, since their service life is very short.
Installation
A diagram for connecting fog lights on a VAZ 2110 is always offered with the purchased kit, so there shouldn’t be any special problems. But keep in mind that something may need to be corrected or adjusted to ensure effective operation.
Connection diagram
Before installing fog lights on a VAZ 2110, you need to decide on their location. If the design of the car does not provide space for them, then they will be mounted under the front bumper.
The PTF connection diagram is as follows.
- We install the wiring for fog lights on your car. This is done through the left side under the hood along the fender. The main wiring is approximately the same.
- Now you need to connect power to the button, which is located on the dashboard. According to the factory diagram, power is installed from the fuse on the right dimensions. But you can use the light switch button or the lead from the ignition switch to turn on the head optics. That is, in such a situation, the fog lights will turn on when the ignition is on. Some take power from the output to the dimensions. This can be done, but is not recommended. If you forget to turn off the PTF, the battery will soon run out.
- We connect the plugs to the headlights. If after this the fog lights on the VAZ 2110 do not light up, an error was made in the circuit. Check every element of the circuit. It is not difficult to determine where the fog lamp relay is located on a VAZ 2110, so make sure that the relay clicks. If it is present, then the coil will activate it. It is not uncommon to have to change a relay.
The last stage of installation begins after all the wires have been connected, the power has been turned on, and the light from the fog lights has spilled out. It's about adjustment.
If there are deviations from the norm, be sure to make adjustments. This work can be done independently, but ideal room conditions will be required. Therefore, it is better to trust the specialists from the car service center, who have a special stand, a flat area, and equipment for adjustment.
Features of PTF (difference from headlights)
Installing parking sensors with your own hands
So, the main task of fog lights is to illuminate the road in poor visibility conditions (rain, snow, fog, etc.). However, unlike the head light, there are features.
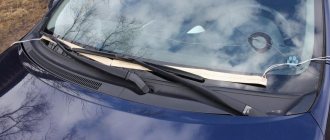
First of all, PTFs must have the clearest possible upper cut-off line, and the beam of light must be strictly below and be as wide as possible. If these conditions are not met, this can become a problem both for the driver of the vehicle and for other road users driving in the oncoming lane.
We also note that even if the headlights have the most powerful lamp, the features, purpose and installation location of such headlights do not allow them to effectively illuminate the road in fog or rain.
The fact is that the head light should illuminate the road as far as possible, not blind oncoming drivers and cover the side of the road. However, in conditions of limited visibility, neither high nor low beam can cope with this task. The reason is that a powerful luminous flux is reflected from moisture particles, causing a cloudy “wall” to appear in front of the driver. This is especially noticeable when the high beams are turned on.
In turn, high-quality PTFs are characterized by lower power, and the optics themselves are made and installed so that the light from the fogs literally “breaks through” moisture and fog. The main secret is that usually the fog does not touch the ground, and the fog lights are as low as possible.
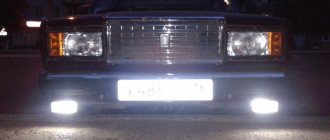
On the one hand, fog lights do not shine as brightly and far as the headlights, but in poor visibility conditions they illuminate several meters of the road in front of the car. The main thing is to follow the rules for installing PTF and setting up such optics.
In a nutshell, there are clear norms and standards that must be adhered to during installation. Additional adjustments allow you to set the fog lights so that the light flux falls on the road, does not blind the driver, does not form a “wall” in the fog in front of the car, etc.
At the same time, it is important to understand that cheap and low-quality PTFs, as well as incorrectly installed fog lights of a VAZ or any other car, will blind oncoming cars, but are not able to fully illuminate the road
For this reason, when selecting fogs, first of all, you need to pay special attention to this optics.
Selection of fog lights for the VAZ 2110
The range of PTFs for the VAZ 2110 today is quite wide: large and small, round and square, yellow and white. Which ones to choose? Everything here will depend on your taste and financial capabilities, but I still dare to give some advice.
- Yellow light is less absorbed by water (and fog and rain are water). This means that yellow PTFs will produce a higher quality light spot than white ones of the same power, and at the same time they will not dazzle oncoming drivers.
- The shape of the headlights does not matter, the main thing is that they should fit the seats of your bumper as best as possible.
- You should not buy very expensive headlights from famous brands. Most often, such companies charge a lot of money just for the fact that they are famous (the so-called surcharge for the brand).
- Before purchasing, take the headlight in your hands and carefully examine the quality of the body and glass. Even by its weight and appearance, you can feel whether it is a worthwhile thing or junk that will fall apart after 100 km of run.
Below I will give some common and affordable PTF models for the VAZ 2110 that really deserve attention.
| Set (2 lights) | Manufacturer | Brand | Peculiarities | Estimated cost at the end of 2021, rub. |
| PL-519DLВ W VAZ | China | DLAA | LED, white glass, smooth | 1 200 |
| PTF VAZ 2110 | Italy | Magneti Marelli Automotive Lighting | Incandescent, white fluted glass | 930 |
| Bosch VAZ | Russia | Ryazan | Incandescent, white fluted glass | 890 |
| Fog lamp VAZ 2110 | Russia | Lada | Incandescent, yellow corrugated glass | 520 |
| Fog lights for VAZ 2110-11-12 | Russia | Stavr | LED, smooth white glass, chrome-plated body | 800 |
| Fog lamp “Osvar” for VAZ car | Russia | Auto Start | Incandescent, white glass, corrugated | 850 |
| HY-174-2LED VAZ | Russia | Auto Key | LED, white glass, lenses | 900 |
| Hella FF 75 VAZ | Germany | Hella | Incandescent, external, white glass, smooth + installation kit (relay, button, etc.) | 5 000 |
| LD-088 | China | DLAA | LED, white glass, lenses | 1 100 |
Self-adjustment
How to make angel eyes headlights with your own hands
Having understood the features and found out the purpose of the fog lights, it’s time to start adjusting them. (See also the article How to install fog lights on a VAZ 2110: features.)
The instructions will look like this:
- Selecting a location and preparing markings;
- Direct adjustment.
Preparation:
- Place the car on a flat surface 3-5 meters from the wall, which will serve as a kind of stand;
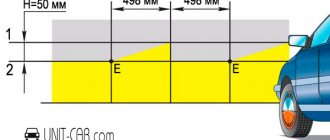
- Measure a horizontal line on the wall, the height of which is equal to the height of the PTF installation on the car;
Marking a homemade screen for adjustment
- Set the headlight range control to position “0”;
- Then turn on the headlights and, alternately closing the left and right, mark the center of each of them on the wall (points “A” and “B” in the photo above).
Start adjusting:
- Using a screwdriver and an adjusting screw, ensure that the centers of the headlights are located at the same distance from each other;
- Then adjust their height - it should be 10 cm lower.
Adjustment process
This completes the adjustment process. A gap of 10 cm will allow the headlights not to blind the driver even when the car is fully loaded. (See also the article Installing a towbar on a VAZ 2115: features.)
Buying what you need
You can, in principle, buy a ready-made set along with wires, but many believe that if you buy everything separately, the number of installation options increases, and it will all cost less. So, we buy:
Kit for connecting fog lights on VAZ 2110
Note: if your VAZ has an old-style dashboard, then it is better to buy a PTF 2110 kit, but for a new, so-called EURO, it is more convenient to connect PTF 2115.
You can, of course, vary it, but we are talking specifically about the convenience of the location of the buttons. Regarding the power of the lamps, 55 W is enough, no more is needed. Also keep in mind that very cheap fog lights will not last long.
The principle of operation of the fog lamp
Before grabbing the tools and adjusting the position of the PTF on the car with your own hands, every car owner must understand the features of their operation.
And for this you need to remember that fog:
- These are the smallest particles of moisture that are in the air;
- The emanating heat from the ground (road surface) does not allow them to sink, causing them to literally hang, which leads to the formation of a milky veil;
- The stream of light, reflected from them like a mirror, returns back and blinds the driver.
Narrow work space
All drivers know that turning on regular headlights in fog leads to poor visibility. This happens because droplets of moisture are located exactly at the level of the headlight of a modern car. After all, their location was determined for better illumination of the road situation - as close as possible to the driver’s organs of vision.
But PTF has another task - to make movement in fog possible. That’s why they are installed on cars as low as possible to the road surface, so that they, as they say, “shine under the fog.”
Correctly adjusted PTF shines “under the fog”
The fact is that moist air close to the ground is drier and, accordingly, does not have glare properties.
Technical feature of the luminous flux
The second point that should be emphasized is that:
- The beam of the fog lights along the top edge has a clear boundary:
- This is done so that when it hits drops of moisture, it does not refract upward and blind drivers.
The peculiarity of PTF operation is the crossed upper limit
Roadside lighting
There is another feature of fog lights that is often forgotten.
After all, it is the same lighting device as the head light, i.e. must:
- Create sufficient visibility of the road situation for movement;
- And illuminate the side of the road to the right of the car in the direction of travel.
Both regular and fog lights should illuminate not only the road ahead, but also the right side of the road
Correct installation and connection of fog lights VAZ 2110 and its modifications
Not all models of the tenth row of VAZ are equipped with factory fog lights. If the driver independently tunes additional lighting, he has three options for solving this problem:
The “tens” model range is equipped with PTFs with corrugated (provide a narrowly directed light flux) or transparent (gives spots of light) glass.
The requirements of the Road Traffic Regulations do not contain a mandatory condition for installing PTF on cars, so domestic manufacturers do not always install fog lights on the assembly line. But there are GOST 8769–75 and GOST 41.48–2004, which regulate the number, location and order of switching on all lighting devices, including fog lights.
Legal requirements
Russian GOST
Currently, GOST 8769-75 regulates the installation and operation of external lighting devices on vehicles operated on public roads.
The photo shows the GOST section on the requirements for installing PTF
According to section 2.3 of the specified GOST, PTF can:
- installed on a passenger car only in pairs;
- located no higher than the headlights, but no lower than 25 cm from the road surface;
- do not protrude beyond the dimensions of the car, and at the same time, be located no further than 40 cm from the dimensions of the front fenders;
- shine the same light for each headlight.
UNECE
Since foreign-made vehicles are used in Russia and the CIS countries, the lighting devices installed on them are subject to UNECE requirements. Accordingly, the products of foreign manufacturers, in particular PTF kits for installation on the VAZ 2110, must meet the specified requirements.
According to UNECE requirements, the shape of the PTF light spot must have a clear vertical boundary (Figure B)
These rules also regulate the shape of the light spot for:
- low beam headlights with a regular or halogen lamp (in Figure A);
- low beam headlights with a gas-discharge light source (B in the figure).
How to Connect Fog Lights to a VAZ 2112 Video
How to properly install and connect fog lights on a VAZ 2110, 2111, 2112
In bad weather, when fog spreads along the road or there is heavy rain, the main lighting of cars does not work well. The reason is that the headlights were designed with clear, clear weather in mind. Fog lights are designed for use in bad weather conditions. That's why they don't change in winter. To install the PTF, you do not need to contact a car service; experienced VAZ owners do this completely without outside help.
Content
What are fog lights for?
Fog. it is a mundane vortex consisting of small drops of water suspended in the atmosphere. With continuous “milky” illumination of the roadway, the lights cause the scattered light rays to be partially reflected from the droplets and blind drivers. Light cannot penetrate long distances through fog, as visibility drops sharply.
The main purpose of fog lights (FTL). formation of the correct direction of light. It can be represented in the form of a parallelepiped. wide horizontal and narrow vertical. This light flux spreads over the road surface, under the fog. Additional PTFs are provided to provide low-light illumination over roadways in adverse weather conditions.
In thick fog, proper additional lighting will mark the side road in less than 10 meters. Yes, and this is enough to ensure safety, since the situation is not very good, cars are moving at extremely low speeds.
In fog or heavy rain, the driver sees a “wall” of reflected rays, through which it is difficult to guess the surface of the road and the side of the road. It has long been noted that fog above the ground freezes with a gap of up to half a meter, because lights installed below and glowing under a smoky curtain illuminate the road even better than the main lights.
Heavy rain and heavy snow fall on the ground to better illuminate the road in bad weather. a concentrated stream of light at a low height (up to 50 cm) is yellow, in other words, white light is important. Myth, the emission range has the highest energy flux intensity compared to the light density of green, blue or violet rays.
Reliable installation and connection of fog lights VAZ 2110 and its modifications
Not all VAZ tenth series models are equipped with factory fog lights. If the driver sets up additional lighting without assistance, he has three options for solving this problem:
- I will buy a bumper with fog lights already installed. All they need to do is connect them to the network.
- Buy a bumper with pre-pressed sockets for installing PTF. In this case, you need to choose the right set of fog lights and install them without outside help.
- Make holes in the plastic for the PTF yourself, repair the fog lights and connect
them to the car network. This option allows an experienced driver to install fog lights from foreign cars on the VAZ 2110 line.
READ Salon VAZ 2107 Do It Yourself
PTF with corrugated (give a narrow directional light flux) or transparent (dotted) gloss will be in the “tens” range.
The requirements of the Road Traffic Rules do not contain mandatory conditions for installing PTF on a car, since domestic Russian manufacturers rarely install fog lights on the assembly line. Unfortunately, there are GOST 8769-75 and GOST 41.48-2004, which regulate the number, placement and order of switching on all lighting devices, including fog lights.
Requirements for installing PTF
Fog lights are installed according to certain rules:
- quantity. 2.4 pcs.;
- no closer than 25 cm from the surface of the sidewalk;
- no more than 40 cm from the outer contour of the headlights;
- the slots of the fog lights are made so that they are located below the top point of the low beam headlight socket;
- PTF line of sight should be: in the vertical plane 5 o 5 o, in the horizontal. 45 o 10 o.
The placement of 2 PTFs in front of the car must comply with the requirements of GOST 41.48–2004 (clause 6.3).
Reduce to fog lights Turn on only immediately with side lights.
Modern automobile brands are equipped with PTFs created by their own domestic manufacturers. For this purpose you have special sockets on the front bumper. If the fog lights are not there, then the holes are closed with plugs that are simply removed.
If PTF installation is not provided by the vehicle's equipment, the factory forged fog light holes are secured with plugs with 2 screws.
1st edition VAZ 2110, 2111 and 2112 were not equipped with holes for fog lights, so the sockets must be marked and cut out yourself in accordance with the above requirements.
Installation and connection of PTZ VAZ-2114. video 29.
Hello everyone, please follow and like the group on Instagram.
as a way to connect fog lights (PTF), running lights via a relay
Video tutorial on how to connect fog lights
In other words, running lights through a relay and an additional button. Column.
Preparing for installation
Independent connection of PTF to VAZ 2110, 2111 and 2112 requires less disassembly of the front part of the car (preferably without removing the front bumper) and the front panel (torpedo). Therefore, when preparing your fog light kit, you should find out:
- what kind of dashboard is on your car;
- Are there any stamped holes for them in the front bumper, what is their shape, or is there a way to attach the PTF.
READ Suspension Bearing VAZ 2107 Which is Better
Care must be taken not to create unnecessary problems. If the plastic bumper does not have fog lamp tubes, they can simply be made using a drill, a heated metal plate, or cut with a handsaw. The main thing is to correctly indicate the size of the finished kit using PTF fasteners, take into account the curvature of the bumper, and the structure of the material (soft, soft, hard).
The general rule must be understood. If stamped sockets for fog lights are found, then we select the shape and size of the headlights for them. If there are no holes, we first buy PTFs, then mark them according to their shape and leave space for installing fog lights.
Abstract about installing and connecting fog lights on a VAZ 2110, 2111, 2112 house
Self-assembly and connection will require the skills of a mechanic, the ability to read and understand electronic circuits, and the willingness to bear some material costs.
Tools and materials
To install PTF you must have:
- multimeter;
- control light;
- combination screwdriver with slotted and cross-shaped working body;
- pliers;
- forceps;
- keys 8x10, 12x14;
- light hammer;
- electrical insulating tape;
- shrink packaging.
Buy ready-made fog lights for the VAZ 2110 or buy everything separately (cheaper):
- PTF. 3.2 pcs.;
- the frames on the right and left are made of plastic fog lights VAZ 2110. 3.5 pcs.;
- button with yellow backlight;
- relay;
- wire with 2.4 copper cores of different colors with a diameter of 0.5 mm (for more massive lamps it is better than 0.75 mm in diameter). 5 m;
- female connecting plugs are narrow (single). 8 pcs.;
- Wide (double) female/male mat for connection to each fog light. 3.5 pcs.;
- Bolts M8x45. 4 things.;
- "Lamb" with M8 bolts. 4 things.
Homemade and tied
Before installing the PTF, remove the plugs on the front bumper and secure it with the fog lights. Ideal: do not use screws, but M8x45 thumb bolts for more secure fastening and faster disassembly.
The fog lamp is inserted into a special frame and, with the help of a passenger, is fixed in the opening of the front bumper
Installation of this method requires installation of PTF at the cinema level:
- Connecting to the electrical network should begin by pulling the wires from under the dashboard into the engine compartment. They should first be placed in a protective corrugation.
- The operation described above requires partial disassembly of the torpedo. On a VAZ 2112, the factory wiring has this option for connecting the PTF, so you only need to find the connecting blocks on the front bumper, which are located next to the plugs.
- Remove the positive terminal from the battery.
- Open the relay assembly and fuses (located in the lower left corner of the control column next to the clutch pedal)
- Remove the screw using a screwdriver and remove the unit.
READ How to Calibrate the Speedometer of a VAZ 2106
The fuse box is located on the left side of the driver's left foot
Then you need to find fuses F4 (protects the right PTF) and F14 (protects the left fog).
The location and purpose of fuses in the VAZ 2110, 2111, 2112 mounting block are indicated on the inside of the protective casing.
Fuse F20 protects the rear PTFs, which were originally included in the rear dimensions of the VAZ 2110 type in the form of two-way parking lights. In adverse weather conditions. Another reason is that the thread is cut by a special button located on the dashboard.
The final step is to apply copper connectors to the end of the wires and connect them to the plug according to the added electronics and wiring diagrams.
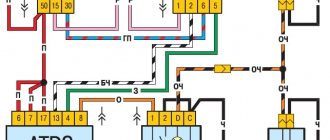
Electronic diagram for connecting fog lights VAZ 2110, 2111 and 2112 using an illuminated button and relay
The location of the fog light power button depends on the type of front panel. Of course, there are certain aspects to combining PTF old and European panels.
Normal connection under the fog lights of the fog lights on a VAZ 2110 and VAZ 2111 with the same front panel without connecting the PTF switch relay
On VAZ 2112 models with a European panel, the plant laid wires for connecting fog lights at the car plant.
Connection diagram of PTZ VAZ 2112 to factory wiring connected to PTF connectors, mounting block, relay and backlit power button (connected without outside help)
A common way to connect and connect fog lights
If you install this order, installing the fog lights will take about 1-1.5 hours:
- The PTF wiring is laid on top of the main wiring, which runs along the left front fender.
- The PTF power button inserted into the socket on the instrument panel must be removed from the right fuse according to factory recommendations. In this case, the PTF will remain on when the ignition is turned off. Disabling them using their own button will quickly drain the battery. However, if the PTF is powered from the headlight power button or directly from the ignition switch, they light up when the ignition key is turned on.
- Insert the plugs into the fog lights and turn them on. If the PTF on the VAZ 2110 and its modifications do not light up, this indicates an error in the connection diagram. So you should check for a new one that is a member of the chain.
video: connect fog lights VAZ 2110
Source
Fog lights VAZ 2110 wiring diagram
Wiring diagram for fog lights.
connection option 1
1) Open the fuse box, then unscrew the screw, pull it out and turn the fuse box over. Wires marked in green do not come from the factory and must be added.
Reverse side of the fuse box.
2) From the bundle of wires included in the kit, cut off two wires, 15 centimeters each. At the ends of both wires we attach female connectors.
The red wire, marked 1 in Figure 2, is positive, you can even check it with a test light. We stretch it to the leg number thirty on the back of the relay.
We connect the first positive wire.
3) The wire labeled number 4 in the figure as 2 is the pole running from pin 87 back to the fuse box.
We connect the second positive wire.
4) We connect the red positive wires to the fuses in Figure 5 (they are intended for PTF), after which they separate one at a time to the right and left headlights.
Fuses for PTF (10 amps each) installed from the factory.
5) We mount the wires as shown in Figure 7. We attach thirty-centimeter wires with “mothers” at the ends to the double-female connector.
We create a convenient installation connection.
6) We insert the wires with single “mothers” into the white plug, in the places marked with circles on the fuse block.
Connection points for single females on the fuse block.
7) We remove the double female connector from the fuse block and connect it to the double male connector, which is located behind the trunk release button.
We connect our connector to the connector behind the trunk release button.
 The black wire numbered 3 comes from pin 86 located on the relay and is a minus. It is best to draw the negative from the top of the fuse block. There are already factory black wires there, inserted under the 10 nut. The wire marked with the number 4 is responsible for turning the PTF on and off.
Negative and PTF switching wire.
Several options for where to run the PTF control wire.
1) From the side lights directly, when the side lights are turned on, the PTF turns on.
2) From dimensions with an additional button. Then turning on the dimensions only supplies power to the button, and the button itself turns on the PTF.
3. We run the wire from the ignition switch through the button, as in method 2. This is the most convenient option.
In photo No. 11, number 1 indicates the PTF turn-on relay, and number 2 indicates the place for the electric lift relay. We take two wires from it, extend them and connect them to the headlight switch button
One of them (pink thin in our case) when you turn on the ignition, a “plus” will appear, and the black wire will be a “minus”. To correctly connect the PTF, it is important to know that the left output is located near the radiator, under the left headlight, and is easily secured with a clamp to the car body. The right exit is located symmetrically under the right headlight.
When is xenon in fog lights allowed?
If the car is equipped with fog lights specially designed for xenon installation (for example, HellaMicroDE lensed fog lights).
If the car is equipped with xenon fog lights from the factory (class D).
Thanks to the usual installation of xenon in the PTF, this modification of the fog light is becoming increasingly popular, and with the correct settings you can drive without fear of fines. If you are thinking about installing gas-discharge lamps in the PTF, then it is important to determine for yourself what goal you are pursuing: to improve the illumination of the road or simply to attract attention?
In the first case, you need to look towards improving the main light. Also check out the test of fog lights, perhaps xenon in the fog lights is not what you need?
In the 2nd case, we must not forget about the other participants in the movement. “Collective farm” xenon in fog lights is not the best choice, because you can also draw attention with the help of DRLs in fog lights.
Instructions for connecting fog lights on a VAZ-2110
To avoid having to redo a lot later, during connection, follow the sequential instructions:
- Open the fuse box cover, unscrew 1 screw and open the power supply.
- Find 2 wires, the length of which reaches 15 cm; the cable connectors are called “mother”. Determine which wire is permanent - checked with a test lamp, the cable should be pulled to the relay on the leg.
How to proceed when installing PTF
- To install fog lights in a car bumper, you first need to remove the plastic plugs from the front bumper. that is, to free up seats for PTF. We carefully lay the wires included in the PTF kit in the area of the front bumper, both on the right and on the left, using the existing standard outputs to the PTF. which are located next to the radiator on both sides, respectively.
- The wires can be attached to the body using clamps. All wire connections must have reliable contact and be thoroughly insulated to avoid contact with the body and moisture ingress.
- The length of the wires must be chosen so that the headlight can be easily removed if necessary. Standard headlights are easy to install and connect. We connect our laid wires to the sockets and screw in the lamps. We mount the headlight in its regular place with two self-tapping screws and close it with a plastic plug. Next, we connect the electrical part using the standard wiring diagram of the car.
- According to safety requirements, when carrying out installation and dismantling work related to electricity, it is necessary to remove the voltage from the current-carrying circuits, which means that first of all you need to disconnect the battery.
- The next step is to work with the fuse block (FB). For your own convenience, you should completely remove the block from the instrument compartment and open it.
- We add two cables approximately 15-18 cm long to the connectors (red and white), with female connectors on both sides.
- One cable in a red plug (BP) is connected to a permanent “” (check), drag it to the thirtieth (30) leg of the relay (look on the back of the relay). The second cable is “” from the relay with the eighty-seventh (87) leg back (BP) in a white plug.
- We turn the power supply over and find fuse links F4 and F14 (10 A each) - they are the ones that protect the electrical circuits of standard PTFs from short circuit currents. The positive wire goes to the fuses and is divided into two wires, respectively, for each fog light according to the “plus”.
- Based on the standard electrical wiring diagram of the car, further wiring of the wires to the fog light connectors is carried out. For ease of installation, some wires can be extended by 20-30 cm.
- The black negative wire, which comes to the eighty-sixth (86) leg of the relay, is the wire that controls the inclusion of the fog lights.
READ Which Engine Can Run on Gas 66
There are several options for where to get the “mass” from:
- You can connect the fog lights directly, which means that when you turn on the ignition or press the side lights button, the fog lights will also turn on.
- Or the option is through a button, that is, the positive wire goes from the ignition switch or the button for turning on the side lights to the button for turning on the fog lights and the PTF is turned on when the button is pressed.
It should be noted that the connection method through the ignition switch is the most effective, as it has a number of advantages during installation and during operation.
There are two modifications of the VAZ 2110: with a standard instrument panel and a Europanel. Their difference is in the location of the buttons. Attention should be paid to this and allowance should be made for the length of the installation wires.
After completing all the installation work, close the fuse box and return it to its place.
We put the terminals on the battery and check the operation of the car's lighting devices. If everything works fine, it means that the installation has been completed correctly, and we thoroughly tighten the battery terminals.
Basic misconceptions
Before giving comparative characteristics regarding certain lighting devices, it is necessary to clearly define the terms found in the automotive environment.
Lensed ones do not have a reflector
So, lensed headlights on the VAZ 2110 mean that the headlight itself has a lens (glass or plastic), which allows you to get a light beam from the smaller surface of the built-in reflector that is superior in power to the traditional one.
The instructions for branded products always contain information about the structure of the lensed headlight
In other words, a reflector (reflector) is an integral part of any headlight, since it is it that collects light into a single stream. But the lens is responsible for its direction, therefore, it is more correct to call such a headlight projection lighting technology.
The main advantage of lensed headlights is their compactness.
Fog lights can be installed in headlights
Another misconception that exists among car owners of the VAZ 2110 and other models of the Volzhsky Automobile Plant. It was formed due to the compactness of lensed headlights and their small dimensions, allowing them to be installed instead of standard lighting equipment.
Factory classic optics VAZ 2110
In fact, any lighting devices will not be effective when working in fog for one simple reason:
- the milk veil contains a high concentration of water droplets;
- they refract light, scatter it and reflect it back, blinding the driver.
This is why PTFs should be located below the standard headlights, because:
- warm air from the ground and road surface dries the air;
- the fog does not touch the surface and remains above it at a distance of 30-50 cm;
- It is in this narrow space that fog lights should work.
Fog lights should only shine yellow
The lenses installed in the headlights of the VAZ 2110 can shine in both white and traditional yellow. There is no violation here, since everything depends on the technical features of the installed lamps. (See also the article Relay for fog lights VAZ 2110: features.)
The photo shows a projection of the dispersion of the light flux. The difference in the illumination distance of high beams and PTF is shown
Xenon can only be installed in lensed headlights
The source of any light beam is lamps, even if we are talking about PTF or traditional head optics. There is also a lot of confusion and misconceptions in this issue, which we will now dispel:
Today, 4 types of lamps are used in headlights:
- traditional incandescent lamps;
- halogen;
- xenon;
- LED
More than 40 types and types of lamps are used in modern cars.
We will not dwell on their technical details, but will only note the fact that the standard for fog lights is lamps with H and HB sockets.
In other words, if, when purchasing a PTF, you want to have the opportunity to experiment with lamps, or purchase lenses for headlights on a VAZ 2110, then you should choose those whose characteristics indicate this standard. (See also the article Adjusting fog lights on the VAZ 2110: features.)
Instructions for connecting fog lights on a VAZ-2110
To avoid having to redo a lot later, during connection, follow the sequential instructions:
- Open the fuse box cover, unscrew 1 screw and open the power supply.
- Find 2 wires, the length of which reaches 15 cm; the cable connectors are called “mother”. Determine which wire is permanent - checked with a test lamp, the cable should be pulled to the relay on the leg.
- The red wire indicates the positive from the relay. To carry out the installation quickly and without complications, it is better to take the connector with the 2nd “mother” and extend them with cables up to 30 cm, marking the “female” connector.
- Distribute the yellow and yellow-black cables into a white plug, it is located on the power supply.
- Connect the connector with the 2nd wire and the “female” connector to the power supply unit and connect it to the 2nd “male” connector, it is also characterized by 2 wires of yellow and black-yellow colors, the latter is located behind the trunk opening button.
- Black wires most often mean negative and are connected to the relay leg.
- It is also important to identify the control wire for turning the fog lights on and off. This can be done in several ways, for example, by marking a wire running from the lights without a power button, so the headlights will light up as soon as the lights are turned on. Another way is to move from the dimensions through the button. The headlights can also depend on the ignition; the PTF power button will indicate a plus and only when the key is pressed will the headlights turn on. The latest option is considered the most convenient.
- To install the PTF, remove the plug and insert the headlights directly into the bumper.
- Secure the headlight cover material.
- Take a Phillips screwdriver and turn a couple of self-tapping screws holding the cladding fasteners.
- Connect the block to the cable. The device is now connected.
Which fog lights for the VAZ 2110 are better to choose and why
Let's start with the fact that there is more than one version of the PTF VAZ 2110 on the market. At the same time, there are both good quality solutions and analogues that are worse. Moreover, sellers offer foglights of different shapes, with different housings, lamps, etc.
First of all, when choosing, you should pay attention to the diffuser, as it can be glass or plastic. You need to remember that the fog lights are low, water gets on them, stones often hit the headlight, etc.
Of course, plastic under such conditions quickly becomes cloudy and cracks. As for the shape of the body, it is better to purchase standard PTFs for the VAZ-2110 bumper. Such fog lights can be installed in their standard place without any problems and will not require any modifications. In this case we are talking about rectangular fog lights with a standard mount.
Taking into account the fact that such PTFs are produced by a large number of manufacturers, it should be noted that headlights can be of different quality of optics, they have different lamps. As for the most popular solutions with halogen lamps for the VAZ 2110, we can highlight the domestic PTF OSVAR and Avtosvet (Kirzhach), as well as Bosch.
- Kirzhach fogs can be presented in two versions: for a lamp with an H3 base, as well as an H1 one. In practice, the version for the H1 lamp allows you to get a more concentrated and dense light flux. The disadvantage is that PTFs come without a lamp, which must be purchased separately.
- OSVAR headlights are of slightly worse quality than Kirzhach; they have a non-removable lampshade, which is glued in with sealant. Replacing such a lampshade is more difficult. However, the optics are 25-30% cheaper than the product from Avtosvet, and are supplied immediately with the lamp. In general, the headlights shine well, slightly inferior to the analogue discussed above.
- PTF Bosch produces a plant in Ryazan, the optics are designed for installation of an H3 lamp. This option is the cheapest, supplied without lamps and the light is quite mediocre and is suitable for rare use in conditions of poor visibility.
Let us also add that in some cases the quality of light can be improved by replacing PTF lamps with other types of lamps (for example, from H3 to H1). This will require modifications, but you still shouldn’t count on drastic changes.
Also, in addition to halogen lamps, you can equip the PTF with a xenon lamp and even a lens. So, high-quality ready-made solutions are quite expensive, and cheap ones are not reliable and have a long service life. If you convert halogen fog lights to xenon, modifications are also needed.
It turns out that in all cases (both for installing xenon in the PTF, and for installing initially xenon fog lights), a whole series of installation work will be required.
Moreover, you need to understand that although the luminous flux of a xenon lamp is more powerful (which is a plus for head optics), excess power is not needed for PTF
It is important that the fog does not cause light to be reflected from moisture particles. It is for this reason that such headlights must be installed and adjusted with extreme precision, and the maximum color temperature of the lamps should not be higher than 3000-4500 K
It is for this reason that such headlights must be installed and adjusted with extreme precision, and the maximum color temperature of the lamps should not be higher than 3000-4500 K.
Ignoring these rules will lead to the fact that the xenon PTF of the VAZ 2110 or the non-standard fog lights of any other car will only dazzle oncoming traffic. You also need to be prepared for the fact that such optics will impair visibility instead of illuminating the road.
The reason is that even expensive, high-quality LED fog lights have reduced efficiency compared to halogen or properly selected xenon. The fact is that the light source (LED) usually creates light with a temperature, on average, not lower than 6000 K.
This is quite enough for a headlight, but such a glow is not suitable for PTF. At the same time, attempts to lower the temperature lead to the fact that the diode is simply not able to properly illuminate the road in rain or fog.
Of course, expensive solutions (for example, Osram LEDriving FOG 101) with LEDs and a temperature of about 3000 K are an excellent solution for PTF, but the price remains extremely high. As for cheap Chinese analogues or attempts to independently install diodes in a fog lamp in makeshift conditions, in this case the results are often unsatisfactory.
In fact, it is better to immediately purchase high-quality VAZ fog lights (for example, Kirzhach) and implement the correct installation, as well as connecting the PTF. This approach will allow you to get a predictable good result at an affordable price.
We connect fog lights on a VAZ-2110 with our own hands (+ diagram)
Good fog lights are a useful and often necessary thing. They come as standard equipment to almost all modern cars, including the most budget models. Unfortunately, the VAZ-2110 was deprived of foglights in the basic configuration, and this inexpensive option is the most popular among us. Today we will increase the level of equipment of our top ten - we will select and install fog lights according to several schemes.
Fog lights on VAZ-2110
If we start only from functionality, then these headlights are designed to illuminate the space only in bad weather.
It is not advisable to use them instead of headlights, since due to their lower location they will blind oncoming drivers . In addition, fog lights collect all the dirt and dust, splashes and winter powder from the road, and this also affects the dispersion of the light beam and interference for oncoming drivers.
Varieties
There are many types of fog lights on sale.
They are equipped with both conventional incandescent lamps and halogen, LED and, of course, xenon lamps.
We will not consider the last option, since it is difficult to think of a more stupid application for gas-discharge light.
There are combined fog lights that have daytime running lights built into them. Not a bad economical option.
Fog lamp combined with daytime running lights.
Of course, there is plenty to choose from in terms of shape - classic round and rectangular, oval and square, eagle and angel eyes. Here only a sense of proportion and an instilled taste in fine arts lessons will be our advisor.
Fog lights are also divided according to the type of diffuser - lensed, corrugated, transparent.
Bosch fog lamps Automotive Lighting LLC (Ryazan) and Osram All Season lamps Super H3.
For fog lights there is not much difference, although everyone has their own preferences, as is the case with the color of the lens. It can be either classic white or yellow. As for prices, for example, here are several sets, imported and domestic:
- a pair of PTF Bosch manufactured in Ryazan, included only headlights, without wiring, price 990 rubles;
- DLAA LA-519 , similar to the previous set, but with a transparent shade, price 860 rubles per pair;
- combined Chinese lights ZFT 162A , 1000 rubles per pair, there are LED daytime running lights, a corrugated lampshade;
- DLAA PL519DB , China, built-in LED backlight, for H1 lamp, price about 1300 rubles.
There are also fog lights for sale from the Avtosvet plant (Kirzhach), as well as from well-known global manufacturers (Hella, Valeo, Sirius, Farren, Sho-Me) with prices ranging from two to five thousand.
What does the market offer?
Such products will have to be installed with your own hands in every sense - drilling, cutting, fastening and adjusting their functionality
Today, two types of lighting devices are available for sale:
- Built-in optics in standard places of the front bumper;
- Fog lamp VAZ 2110, mounted on brackets.
Therefore, we will highlight only the main 4 manufacturers whose products deserve attention:
- from the Vladimir region, which has been producing lighting devices for the domestic automotive industry for more than 70 years. Among motorists, Kirzhach fog lights on the VAZ 2110 have long proven themselves to be the best;
Branded PTF packaging produced by Avtosvet with factory index 3743010
The company's instructions require you to verify the authenticity of the product (protection against counterfeiting)
- The Automotive Lighting company from Ryazan offers products manufactured under Bosch license. In fact, this Russian enterprise is a division of a German and Italian association, having mastered the technology of manufacturing reflectors from synthetic material with a free surface.
The company from Ryazan is a supplier to many domestic automobile companies
- The Luch enterprise, also located in Ryazan. A special feature of this production is its own development of foglights for domestic car models.
The price of Luch products is one of the lowest on the Russian market with fairly high quality
- German automaker Bosch. This brand of products is well known in many countries around the world. For cars of the tenth family, the produced PTFs are ideal - no modifications are required in the bumper or in the standard VAZ wiring.
- Products from Southeast Asia under the common ProSport brand;
- Hella fog lights for the VAZ 2110 are often offered in a version with a bracket. But this is a really high-quality product that can improve the illumination of the roadway and roadside in dense fog. (See also the article Which fog lights are better on the VAZ 2110: features.)
The high quality of the products is confirmed by high-quality packaging
https://youtube.com/watch?v=t0ysCPFw_WA
PTF service
At the same time, many owners of the first ten cars do not know where the fog lamp fuse is located. And if it malfunctions, they don’t know how to replace it.
To get to the PTF fuse, you need to remove the mounting block from the instrument panel niche with your own hands
On models after 2000. fuses are grouped in a single block.
Their technical parameters are as follows:
- The rear PTF fuse is marked F20 and is designed for a current of 7.5A;
- Fuse F4 at 10A is responsible for protecting the front right fog lamp;
- Fuse F 14 at 10A is responsible for protecting the front left fog lamp.
Side of VAZ fuses of the tenth family
The algorithm for the operation of fog lights has also been changed.
In particular :
- The headlights are turned on by pressing a button that supplies power to a relay type 113.3747 installed in the mounting block;
- Turning on the PTF on VAZ 2110 cars is only possible if the headlight switch is set to the exterior lighting position.
In other words, PTFs are activated only with side lights or low beam headlights. At the same time, the activation is indicated to the driver using a light indicator on the button and on the instrument panel.
There are no particular problems with replacing lamps in the headlights, since they were installed in an open position for service. But with the rear lamps we had to struggle a little, since the entire structure of the headlight unit was located in the trunk lid.
To replace a burnt-out lamp, you must remove the entire unit
Instructions for installing and connecting fog lights on a VAZ 2110, 2111, 2112 with your own hands
For independent installation and connection, you will need plumbing skills, the ability to read and understand electrical diagrams, and a willingness to incur certain material costs.
Tools and materials
To install PTF you need to have on hand:
You can purchase a ready-made set of fog lights for the VAZ 2110 or buy everything separately (cheaper option):
Self-installation and connection
Before installing the PTF, you need to remove the plugs on the front bumper and secure the fog lights with frames. The best option: do not use self-tapping screws, but M8x45 bolts with wings, which provide more durable fastening and quick dismantling.
The fog lamp is inserted into a special frame, with which it is attached to the hole in the front bumper
Installing PTF will take a minimum of time if you follow this algorithm:
After this, you need to find the terminals of fuses F4 (protects the right PTF) and F14 (protects the left fog lamp).
The location and purpose of fuses in the VAZ 2110, 2111, 2112 mounting block are indicated on the inside of the protective cover
Fuse F20 provides protection for the rear PTFs, which were originally built into the rear lights of the VAZ 2110 model range in the form of side light lamps with two filaments. In unfavorable weather conditions, the second thread is activated by a special button located on the dashboard.
At the final stage, you need to put copper connectors of the “female” type on the ends of the wires and insert them into the plug according to the attached electrical and wiring diagrams.
Electrical diagram for connecting fog lights VAZ 2110, 2111 and 2112 using a backlit key and relay
The choice of location for installing the fog lamp switch depends on the type of front panel. There are certain nuances in connecting the old PTF and the European panel.
Legal requirements
In auto parts stores you will find a huge selection of fog lights of different shapes and sizes.
But everything depends on the existing GOST 8769-75, according to the requirements of which:
- Fog lights are only allowed to be installed in pairs;
- Each headlight must be at least 400 mm away from the plane of the side marker (measured along the outer edge of the lens);
- The distance from the road to the lower edge of the lens should not be less than 250 mm;
- PTFs should not be installed higher than the head light.
Despite the “menacing appearance”, the connection diagram for fog lights on the VAZ 2110 has been followed
Features of the VAZ 2110
The VAZ 2110 car is not very different from its younger brothers of the following modifications, but there are still some differences:
- This model does not have front fog lights. Moreover, the car bumper may not even have seats for PTF.
- For some reason, the car has rear fog lights, which seems strange: there are rear ones, but no front ones.
- The VAZ 2110 can be equipped with different types of panels: standard (also called old) and europanel. In the first case, there is no space for installing the PTF power button, but there are several slots for installing additional switches. In the case of the Europanel, the PTF button can be installed in a place previously provided for this, and the fuse panel has sockets for connecting fog lights.
Before you go to the store to buy an anti-fog kit (more about it below), carefully examine your car and find out what panel is installed in it, whether there are seats for fog lamps, what shape they are, etc. Otherwise, you may buy the wrong kit or the wrong fog lights.
What does the manufacturer offer?
AvtoVAZ
Initially, a platform was launched into the series, which should already have fog lights in the front bumper. But due to various circumstances, among which the lack of rhythm in the supply of high-quality PTFs played an important role, the plant in Togliatti produced cars in different configurations.
Fog lights 2110 “received” at the design stage
And, nevertheless, the company prefers a classic rectangular headlight with a reflector and specially selected glass lenses that perform the following functions:
- Devices that distribute luminous flux;
- Protecting internal components from moisture and dust.
Bulbs for this headlight are suitable with socket H1 and H3
Bogdan
Ukrainian assembly of VAZ 2110 cars is carried out at the Bogdan enterprise. It was organized to reduce the retail price on the Ukrainian market and offers cars from imported car kits.
VAZ 2110 comes off the assembly line with standard PTF
The Ukrainian automaker gives preference to Russian suppliers:
- "Autolight";
- "Automotive Lighting" (Ryazan);
- "Ray".
In the photo - xenon in PTF from the Ryazan manufacturer
How to turn on low beam on a VAZ 2110
Lighting for the VAZ 2110 car. Headlight adjustment.
Design Features:
. Cars use side lights that combine running lights, low beams (single beam lights) and turn signals. In addition, the lights have parking lights. The long and long beam beams are activated by auxiliary relays K4 and K5 located in the mounting block. The control voltage to the relay coils is supplied by the headlight switch when the exterior lighting switch is fully pressed. When the flasher is on, the low beam comes on, and when it is on, the high beam
, all lamps (passage and movement) are illuminated.
turn on
as soon as possible by pulling the light switch lever toward you.
In this case, the voltage at terminal “30” of the switch is supplied directly from the power sources. In wiring harnesses B for connecting wires when installing low beam headlights with double hood. In this case, the wire with the gray/red stripe in connector B must be connected to the same color wire as the "56b" switch switch. Then, when the beam is on low beam
, the low beam lamp flashes in the two brake lights and, when the main beam is on, the intermediate light of the two lamps and the lamp light up.
. For VAZ 2110 cars, fog lights can be installed as an option on the front bumpers. The headlights are switched on by switch 27 (see Instrument panel) using an additional relay type 113.3747 installed in a block attached to the rear of the mounting block. The fog lights can only be turned on when the exterior lighting
26.
Turning on the headlights and low beam.
Accelerated driving training for novice drivers: registration for lessons.
Scandinavian light on vase 2110 Including medium light from the hands of the generator
HOW TO CONNECT YOU AUTOMATICALLY WITH MORE LIGHT
,CONTROL OF TREATMENT WORK I.
. The ambient light is turned on by the external light switch 26 (in positions “I” and “II”). The side lights and brake lights are powered through the lamp control relay K1. If any indicator is on, the relay is turned on by the corresponding LED in block 5 (see Instrument panel) of the on-board monitoring system.
. The starboard or starboard turn signals are activated by a switch. In emergency mode, switch 42 turns on all direction indicators. Flashing of the lamps is ensured by the KZ relay switch in the mounting block.