How to check the radio for functionality
The radio makes time spent in the car more interesting and fun. Since it allows you to listen to your favorite musical composition, news on the radio station, etc. In addition, it can be used to solve other problems. For example, used as a navigator. Many modern radios have a number of additional functions that are necessary for the driver while driving a car.
This device can be installed by both the manufacturer and the owner of the vehicle. Sometimes the latter is not satisfied with the standard version of the device and decides to replace it with newer equipment. You can purchase a radio in many stores that sell auto parts.
They have a huge selection of devices. Many manufacturers offer different models. Despite the fact that they provide a guarantee for their product, it is necessary to check its functionality yourself. As practice shows, it is much more convenient to do this before it is installed in the car. Because this process is labor-intensive. And if the radio tape recorder malfunctions, you will need to dismantle it. This will take a lot of time and effort.
Check the output on the radio
The first thing you should do after purchasing a radio is to check the output on it. Their role is very important for the entire device. Since these outputs provide its connection to external audio amplifiers. The latter can be used as a subwoofer, acoustics, etc. They help to enhance and improve the sound that the car radio produces.
The number of linear outputs is determined by the device model. So, there can be from one to three pairs inclusive. Moreover, the more, the better. Three pairs of outputs will allow you to create a complete system that will have amplifiers for all channels. It will provide clear and high-quality sound in the car.
Checking the output on the radio is not difficult. Just look at the device itself. There must be at least one pair on it. Of course, it's better if there are three of them. Although you don't plan to use additional amplifiers today, this may change over time. Then you will definitely need additional outputs. Therefore, think about this course of events in advance. At the same time, you can check their serviceability at home. Just connect it to the speakers.
Adapters for ISO connectors
Cutting off a non-standard standard plug and connecting the wires directly is not recommended, because over time the connection will become loose, may oxidize, you will have to solder not only the wiring, additional repairs will be required, replacing blown fuses. Sometimes there are acoustics with three outputs, but they have standardized markings and electrical circuits that allow you to connect standard cables to the device using pinouts. You can buy any type of adapter for ISO connectors from one model to another.
How to check the radio for operation?
Checking the radio for functionality is not a difficult task. To solve it, you can seek help from specialists. They have everything they need for this. If you want to save your money, you can do it yourself. Using our advice, you will certainly succeed.
The easiest way is to check the functionality of the radio after installing it in the car. To do this, insert the key into the ignition and turn it to the ACC ON position. Then turn on the low beam and radio. In this case, the backlight on the device should turn on. It's quite easy to notice. All radio buttons are illuminated, which makes them easier to see in the dark. If this does not happen, then the device, or rather its connector, is faulty. Replacing it will help correct the situation.
As for checking the functionality of the device, this can be done before turning on the ignition. To do this, you will need to press the start button on the device. Then look at his reaction. It should work. Then turn off, start the car and turn on again. If the radio does not work, you should check whether it is connected correctly and whether its fuses are intact.
In addition, it is necessary to determine the sound quality. The corresponding handle is responsible for this function. You can use it to turn up and down the volume. If defects are noticed in its operation, a complete replacement of the device will be required.
Also, do not forget about the other buttons that are on the radio. It is necessary to check their performance. This can be done using the device's operating instructions.
Another important point is the reading of discs by the radio. Since this is, perhaps, its main function. To check, you will need a disk. At the same time, it must be in perfect condition and open on other devices. It is inserted into the radio and the play command is selected. It should arrive without delays and with high quality. This procedure should be repeated several times, with the ignition off and on.
The presence of additional connectors also requires checking them. To do this you will need a flash drive with music compositions. It is better to check it first on other devices. This will allow you to be sure that the flash drive is working. It is inserted into the appropriate connector and turned on. If it fails to work, the reason may not be in the radio, but in the wire responsible for connecting the device and the connector.
How to check the radio at home?
Quite often there is a need to check whether the radio is working before installing it in the car. This is more difficult to do, but quite possible. To do this, it is necessary to create certain conditions.
So, the first thing you need is a 12 volt power supply, with 3 amperes. You can use a car battery, rectifier, charger as it. It can be tailored based on what you have on hand. Its appearance is not particularly important. The main thing is that the device meets the requirements placed on it.
The second thing you need are speakers or speakers. After all the devices have been assembled, they are connected to the radio itself. It must be done correctly. The diagram located on its cover will help with this. Having studied it, you can see that an antenna is needed. Any piece of wire is perfect for this. This procedure will be quite enough for the radio to start working. Don't forget to turn on the sound on it. But you shouldn’t do this at full capacity. Everything will be clear from the first seconds.
Malfunctions and ways to eliminate them
Before you remove the radio from the car and begin repairing it, read the list of faults typical for audio systems. Removing and repairing a car radio from a car is not such a problem, but before you take it out, you need to know exactly what to repair.
There is no display backlight or the system does not turn on
- Perhaps the problem is the lack of power at +5. If you decide to get the device out and repair it yourself, first of all you need to pay attention to diagnosing the second contact of the CN701 connector. It should have a positive voltage of 14 volts, this voltage should be transmitted to the collectors of the transistors. If there is no voltage, repairing car radios involves replacing transistors or a zener diode.
- There is no power activation signal. Before repairing car radios, you need to check the voltage of + 4.8 volts on the fortieth pin of the IZ901 controller. You should also check for the presence of a pulse on the third contact of the controller.
Testing the multimedia system with a multimeter
The car radio turns on, but there is no sound or noise
Car radios need to be repaired independently or by a specialist if there is no sound volume or if the volume is increased and tracks are played, the sound becomes loud.
There may be several options:
- There is no sound when starting the engine. If the sound disappears even when you increase the volume or there is no sound, this is usually due to the absence of the Stand.By signal. In this case, when the sound has disappeared and is not there, you should check the high-level pulse at +4.8 volts. We are talking about the fourth pin of the IC901 controller. If the sound disappears and there is no pulse, then car radio repair involves replacing the controller. If the sound disappears when you start the engine and increase the volume, you need to diagnose the four contacts of the power amplifiers.
- When starting the engine the sound is loud. If the sound is loud when the volume is increased, check for voltage at the bases; the resulting parameter should not be equal to zero. It often happens that the sound becomes loud when the volume is increased due to zero voltage - if this is the case, then car radio repair will be based on replacing transistors. Also, the sound sometimes fades when the volume is increased due to the Mute button not working - there is a possibility that the problem lies with the controller. If there are problems with sound volume, you need to diagnose transistor Q802.
- Volume problems may be caused by one or more circuits in the amplifier not working properly. If there is no sound, you need to diagnose the entire “path” from the input to the output of each circuit. Repair of radio tape recorders comes down to replacing transition capacitors or circuits.
Does not read disks, flash drive or disk is stuck
Why doesn't the radio read a flash drive or disk after starting the engine? The disk is stuck, stutters, the system does not see the flash drive?
The reasons may be the following:
- The radio does not read the flash drive, does not see the disk, or the disk stutters or gets stuck after starting the engine. Perhaps the device simply does not understand the recording format. In this case, repair of the radio is not required, you just need to burn the disc in a different format.
- If the system does not see the disk when the engine starts, the disk is stuck, stutters or heats up, this may be due to contamination of the optical lens. As mentioned above, problems in the operation of the buttons and the device as a whole after starting the engine can be associated precisely with dirt. In this case, the problem is solved by using a special cleaning disc. The operation of such a disk is carried out in accordance with the requirements specified in the instructions. You can clean the system yourself by blowing out the elements or cleaning it with a cotton swab.
- Another reason may be the lack of laser current; you can get rid of such a malfunction by adjusting it.
- Inoperability of loops and wires. It is possible that during the operation of the car, the screws inside the structure simply became loose, or it could be a leakage of resistors.
Buttons don't work
The buttons don't work - there are several reasons. Firstly, there may be mechanical damage to the buttons. To restore the functionality of the buttons, you need to disassemble the front panel and check the condition of the contacts. Perhaps the contacts from the buttons are simply coming off and need to be re-soldered. If the button is inoperative, it will have to be replaced.
Secondly, the problem with the buttons may be due to a software glitch. The problem can be resolved by rebooting the audio system and returning its functionality to the factory configuration. All settings will be erased from memory. After returning to factory settings, the device must be turned off for a few minutes.
The device is heating up
If the radio gets warm and turns off randomly, there may be several reasons:
- The system heats up and turns off as a result of poor power supply. Lack of power will lead to the radio turning off randomly, or this is due to power failures. When the radio gets warm and turns off, you need to check the power cable - perhaps it is just coming off or broken, then it will have to be replaced.
- The device heats up due to poor ventilation and turns off when it overheats. If the system gets hot, this indicates insufficient ventilation. This malfunction is relevant for Pioneer radios and, as car owners of such systems assure, there is nothing to worry about. But if the system constantly heats up and then turns off, you need to consider additional ventilation.
- Sometimes the device turns off due to software glitches. You can try to solve this problem by resetting the radio to factory settings.
Typical radio connection errors
1. Trying to connect the car radio using the random method
. This especially often happens when the original cover is missing, or if the pinout on the cover is difficult to make out. As a result of this connection technique, you can burn out the amplifier chip or the power path on the board.
2. Connecting the radio power supply to the cigarette lighter
. If the radio is loud enough, then at high power the sound may be distorted, the audio will stutter, and the radio itself may turn off. Actually, during such emergency shutdowns, the radio settings will be lost, which makes the operation of the device quite inconvenient.
3. Selection of very thin wires
. Do not connect thin wires to power the radio, as this also has a significant impact on the sound quality. The wires should have a cross-section of 2-4 sq. mm, and it is best to connect them directly to the battery terminals. You can put the “plus” on the battery terminal, and the “minus” on the car body. This does not apply to thin wires located around the radio connector, since there will not be large current losses.
The wires should have a cross-section of 2-4 sq. mm, and it is best to connect them directly to the battery terminals. You can put the “plus” on the battery terminal, and the “minus” on the car body. This does not apply to thin wires located around the radio connector, since there will not be large current losses.
4. Do not install a fuse
into the break in the positive power wire. When connecting the “plus” to the battery terminal, you must immediately install a fuse of 12-15 A, and if there are amplifiers, then a fuse of 40-200 A (it is better to look at the instructions for the equipment).
5. Power wires and others are twisted into one twist
. Do not twist the power cable and the radio power cable together. The red wire must be connected separately, after the ignition switch, when the key is pulled out, the radio should turn off. It is better to connect the yellow one directly to the battery, as it allows you to store all the settings.
If you twist the yellow and red wires together
and connect it to the lock or even to the positive terminal of the battery,
the radio will drain the battery
even when it is turned off.
You can protect yourself from loss of charge by adding two shield diodes to the target, but this is not recommended!
With wires, everything is simpler than at first glance - the standards for color marking of wires are supported even by manufacturers of cheap Chinese radios.
6. The wires just get tangled up
. During installation, the polarity of the wires with which the speakers are connected is confused. There may be capacitors on the tweeters, but that's not all - when using the lowest sound frequencies, a so-called acoustic short circuit may occur, which the subwoofer may not tolerate.
Remember a simple rule: all wires with a stripe on the insulation are positive, the rest of the wires painted the same color are negative. White and black-and-white to the left speaker, and gray and gray-black to the right. Green ones go to the rear left speaker, and purple ones go to the rear right one.
Be careful and don't rush!
If the information was useful - PRESS THUMBS UP! And in order not to lose, SHARE on social networks. SUBSCRIBE , the next articles will also be interesting!
How to test wires with a multimeter
The most convenient, understandable and safe way to diagnose wires for continuity or short circuit is to check with a multimeter. There are a large number of multifunctional devices with different parameters and prices: from the simplest and most affordable to the more expensive, accurate and functional. But with almost any multimeter you can check the integrity of the conductors; you don’t have to have expensive equipment for this.
What should the multimeter readings be?
There are two methods of checking using such a device: in resistance measurement mode and in continuity mode.
The dialing mode is the most convenient testing method. Here you do not need to have any knowledge of the instrument readings. It is enough to connect the probes of the device to the ends of the cable and hear the sound. In order, the procedure is as follows:
- Turn on the multimeter, set the dialing mode (an icon of several brackets of different sizes, similar to the Wi-Fi designation);
- Connect one probe to one end of the conductor being tested, the second probe to the other end of the same wire;
- If you hear a sound, it means the cable is intact. If there is no sound, there is a break in the line (or the probes are connected incorrectly).
It should be noted that in this way the presence of a short circuit in adjacent conductors is also checked. The only difference is that one probe is connected to the first conductor, and the second probe to the second: if there is sound, there is a short circuit.
The resistance measurement mode is somewhat more complicated. But if you remember what readings should be on the multimeter in different situations, it will be much easier. Moreover, many multimeters do not have a continuity mode, but there is almost always a resistance measurement mode.
How to check if your radio is working at home
Most modern car devices can perform several functions simultaneously. This simplifies people's lives and makes new opportunities available. In some cases, the device may be faulty, so before making a purchase, you need to check the radio at home.
Connection diagnostics
In order for the device to work well, it must be properly connected to the speakers and amplifiers (if any). It is recommended that you perform connection diagnostics before performing this operation. It is done as follows:
- Take the speakers that will be used in the car and connect them to the radio. The wires must be connected according to the instructions, which are individual for each device model.
- After this, turn on the device and check the sound quality.
- The remaining connection options are tested in the same way.
- At the next diagnostic stage, amplifiers are connected.
- Turn on the radio and check the effectiveness of all devices in various operating modes.
Home inspection
After the connection diagnostics have been completed, be sure to check the radio for operation. This operation will only take a few minutes, but will accurately determine the quality of the device.
How to check sound quality
Testing at home should begin with checking the sound quality. To do this you will need a battery from the battery. If it is not there, then a rectifier or charger would be a good replacement. In any case, it is important that the output voltage does not exceed 12 V and the current does not exceed 6 A.
Correct sequence of actions:
- The yellow and red wires of the radio are connected to each other and then connected to the positive pole of the power source.
- The black cable is attached to the negative pole.
- After this, connect the antenna.
- Press the power button on the radio.
- Then turn the volume knob and test the operation of the device at its extreme positions.
- Check the operation of all buttons on the control panel of the radio. The operating instructions will help you cope with this task.
If the sound quality remains high with various settings, then you can be confident that the radio is working.
Testing music sources
During diagnostics, it is necessary to check the quality of operation of the device when connecting various music sources. Thanks to this testing, it will be possible to identify any existing problems.
- The first step is to check the ability of the radio to read information from disks. To do this, insert a new CD or DVD and turn the device into playback mode. If the sound comes through without any delays or noise, then you can move on to the next testing step.
- Connect a flash drive on which audio files are saved to the radio. After turning on one of them, the quality of the reproduced sound is checked.
- At the very end, they check the operation of the radio. To do this, search for the radio station whose frequency can be found out from any sources of information. In this case, the sound should also be “clean”.
Before purchasing, be sure to check the car radio in action. Otherwise, the device may not work correctly and cause many problems for the car enthusiast. If you know how to test, you can avoid not only buying a low-quality product, but also wasting money.
Help me check my car radio at home
Most drivers place serious demands on the quality of the multimedia system. And for good reason, because a modern radio is the minimum comfort that should be in almost every car. Favorite musical compositions can brighten up prolonged downtime in traffic jams, or add new emotions to traveling behind the wheel of your car.
But, like all components and mechanisms, the elements of the audio system are subject to natural wear and tear during operation. Japanese cars are famous for their high service life and reliability of structural elements. But even in such machines, where everything works like a clock, various types of breakdowns occur. When problems arise with music, qualified help is not always required.
To eliminate a malfunction, the owner of the car often has enough strength, if he has the necessary set of tools at hand. We will discuss below why the radio in a Toyota Corolla most often does not work, and what to do in such a situation. One of the most common reasons why music stops playing in a car is the inability of the radio to read information from the disk. But don’t rush to blame the drive itself for everything.
Over time, the optical side of CDs wears out, so the reason for the lack of music may be hidden in a fairly scratched surface of the media. The likelihood of a drive failure increases if the disk itself is new and its surface is absolutely clean. The way out of this situation is as follows: disassemble the radio yourself and replace the drive itself if it has stopped functioning, or entrust this work to a professional technician.
In some cases, it is enough to clean the drive and its contacts from accumulated dust and dirt, after which the device will again fill the car interior with notes of musical compositions. But, if the procedure performed did not bring the desired result, it is necessary to continue searching for the cause in the power system. Recently, drivers, owners of Toyota Corolla in particular, have increasingly resorted to purchasing players capable of reading data from a flash drive.
Checking the correct functioning of the power system element is also relevant for this type of audio device. Owners of Toyota Corolla are often faced with situations where the radio and cigarette lighter do not work. This picture says one thing - there are problems with the car’s electrical network. An incorrect connection or power surges leave their mark on the operation of the car radio: it may turn on, but not turn off. There may also be problems with the functionality of the device: the display is on, but the music does not play.
In such cases, the first thing to check is the fuse and the protective diode. The first element of the network protects the car radio from voltage surges, since the device does not have its own protective mechanism.
It is necessary to check both fuses - under the hood and inside the car. If a burnt part is found, replace the protection with a new one. It is also important to ensure the integrity of the printed circuit boards located inside the audio system. The amplifier is one of the most sensitive elements in an audio system to voltage changes.
Any surge in the network can throw this extremely important mechanism out of action. In most cases, the board burns out or the fuse stops working correctly. The radio may function fully, but the driver will not hear the sound of musical compositions. Also, the microcircuit can burn out due to incorrectly connected speakers. If the radio works, but there is no sound, you need to disassemble the amplifier and check its microcircuit.
If, after the work has been done, the mechanism still refuses to fulfill its duties, there is nothing left to do but buy a new one. Panel buttons not working? There may be several reasons. One or several buttons may not work due to mechanical damage.
It is necessary to disassemble the front panel and ensure the integrity of their contacts. In some cases, the contact simply moves away from a button, which deprives it of its simplest functionality. If there was no damage, the contacts are in order, there is only one way out - replacement.
Sometimes one of the buttons gets stuck, thereby causing strange behavior in the car radio. For example, if the power key is stuck, the device will turn on spontaneously. It is enough to carefully pry it off with a flat screwdriver and the problem will be solved. A software failure is also possible, which can largely be resolved by resetting the settings. You need to reboot the audio system and reset the configurations to factory settings.
What to pay attention to
You should check the availability of a connector suitable for the selected radio. With its help, the device is connected to the on-board network and speaker wiring. The instructions will help you understand the setup and purpose of the controls. The connection diagram and main parameters are also printed on a label on the top wall of the radio.
It is worth paying attention to the power of the car radio. For a passenger car, 10 to 45 W per channel will be enough, and for a truck, over 60 W per channel. Each wire has its own color.
According to generally accepted markings, power is supplied to the radio from the on-board network via the red and yellow wires, and from the radio to the active antenna - via the blue wire.
For additional protection, you should also install fuses on the car with a rating of at least 5 A. To make Bluetooth on the radio, you can install an FM modulator equipped with this function in the car.
Causes and consequences
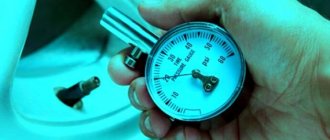
First you need to understand what a car battery is. Like any other battery, it is a chemical current source that has an electrical capacity, the value of which is usually printed on the battery label. It is measured in ampere hours (Ah).
Battery capacity is measured in ampere-hours and shows how much current the car battery will be discharged with.
In fact, capacity determines the amount of electrical energy that a fully charged battery can deliver. Leakage current represents the current drawn from the battery. Let's say we have a serious short circuit in the car wiring, and the leakage current is 1 A. Then the 77 Ah battery given as an example will be discharged in 77 hours. During use, the battery life and its effective capacity decrease, so the starter may not have enough starting current even when the battery is half discharged (in cold weather up to 75%). With such a leak, it can be assumed that in a day it will become almost impossible to start the car with the key.
Check output
For this stage, a speaker that will be installed in the car is suitable. You can use another known-good speaker that you have available. To connect the car speakers, you need to refer to the diagram on the top label. For example, the left front channel is output to white and white with a black wire stripe. After this, the radio is turned on and the presence and quality of sound is checked.
It is recommended to set the level to medium. The remaining pairs are checked in the same way. The wires for connecting them are gray, green and purple.
The wire with a strip is a common wire connected inside the radio to its body.
The wire without a strip is supplied with audio frequency voltage from the output microcircuit.
Home Inspection Options
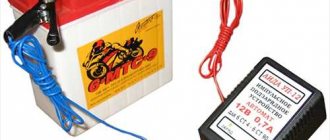
There are several possible options for testing functionality. First of all, you need to prepare the power source. To check the radio at home, a fresh battery from the battery, a charger or a rectifier will do. The output voltage in all cases must be 12 V, and the current must be at least 6 A. The negative pole of the source is connected to the black wire. To make a positive connection, the red and yellow wires are connected together and connected to the positive terminal of the source.
You also need to prepare the antenna. For this, a piece of wire of sufficient length is suitable - at least 40 cm. To check the serviceability of the player section, you should prepare a flash drive with music files. The latter must be created in accordance with general requirements:
- format - MP3;
- bitrate - 128 or 320;
- sampling rate - 44.1;
- encoder - LAME;
- channels - stereo.
If you have a floppy drive, you should burn a CD-RW disc. Before testing both media, you should ensure they are readable by testing them on multiple devices. One end of the antenna wire is attached to a wall, ceiling, or other point in the garage or home that is isolated from the ground. The other end is carefully inserted into the socket. After all connections have been made, turn on the power by pressing the button. If the device does not respond, then the fuse built into the radio has blown.
After turning it on, you should figure out how to check the car radio at home. For example, you can evaluate the quality of a tuner by performing an automatic or manual search. The sound of a precisely tuned radio transmission must be of high quality, without noise, and the sensitivity of the tuner must be sufficient to receive stations located 30-60 km from the test site.
Next, the players are checked. Carefully insert the CD or flash drive into the appropriate slot on the radio. If the drive is working properly, it will pull the media into the device; reading will take a few seconds. The sound should be played smoothly, without pauses or jumps.
How to check the radio for battery functionality
The radio makes time spent in the car more interesting and fun. Since it allows you to listen to your favorite musical composition, news on the radio station, etc. In addition, it can be used to solve other problems. For example, used as a navigator. Many modern radios have a number of additional functions that are necessary for the driver while driving a car.
This device can be installed by both the manufacturer and the owner of the vehicle. Sometimes the latter is not satisfied with the standard version of the device and decides to replace it with newer equipment. You can purchase a radio in many stores that sell auto parts.
They have a huge selection of devices. Many manufacturers offer different models. Despite the fact that they provide a guarantee for their product, it is necessary to check its functionality yourself. As practice shows, it is much more convenient to do this before it is installed in the car. Because this process is labor-intensive. And if the radio tape recorder malfunctions, you will need to dismantle it. This will take a lot of time and effort.
Typical car radio malfunctions: how to find and fix them?
A car radio, like any other device or mechanism in a car, can fail. As practice shows, car radio repairs are usually carried out in the event of improper operation of the device or when malfunctions occur that are not related to use. In this article, we propose to familiarize yourself with the main causes and methods of eliminating audio system breakdowns.
Check the output on the radio
The first thing you should do after purchasing a radio is to check the output on it. Their role is very important for the entire device. Since these outputs provide its connection to external audio amplifiers. The latter can be used as a subwoofer, acoustics, etc. They help to enhance and improve the sound that the car radio produces.
The number of linear outputs is determined by the device model. So, there can be from one to three pairs inclusive. Moreover, the more, the better. Three pairs of outputs will allow you to create a complete system that will have amplifiers for all channels. It will provide clear and high-quality sound in the car.
Checking the output on the radio is not difficult. Just look at the device itself. There must be at least one pair on it. Of course, it's better if there are three of them. Although you don't plan to use additional amplifiers today, this may change over time. Then you will definitely need additional outputs. Therefore, think about this course of events in advance. At the same time, you can check their serviceability at home. Just connect it to the speakers.
How to check the radio for operation?
Checking the radio for functionality is not a difficult task. To solve it, you can seek help from specialists. They have everything they need for this. If you want to save your money, you can do it yourself. Using our advice, you will certainly succeed.
The easiest way is to check the functionality of the radio after installing it in the car. To do this, insert the key into the ignition and turn it to the ACC ON position. Then turn on the low beam and radio. In this case, the backlight on the device should turn on. It's quite easy to notice. All radio buttons are illuminated, which makes them easier to see in the dark. If this does not happen, then the device, or rather its connector, is faulty. Replacing it will help correct the situation.
As for checking the functionality of the device, this can be done before turning on the ignition. To do this, you will need to press the start button on the device. Then look at his reaction. It should work. Then turn off, start the car and turn on again. If the radio does not work, you should check whether it is connected correctly and whether its fuses are intact.
In addition, it is necessary to determine the sound quality. The corresponding handle is responsible for this function. You can use it to turn up and down the volume. If defects are noticed in its operation, a complete replacement of the device will be required.
Also, do not forget about the other buttons that are on the radio. It is necessary to check their performance. This can be done using the device's operating instructions.
Another important point is the reading of discs by the radio. Since this is, perhaps, its main function. To check, you will need a disk. At the same time, it must be in perfect condition and open on other devices. It is inserted into the radio and the play command is selected. It should arrive without delays and with high quality. This procedure should be repeated several times, with the ignition off and on.
The presence of additional connectors also requires checking them. To do this you will need a flash drive with music compositions. It is better to check it first on other devices. This will allow you to be sure that the flash drive is working. It is inserted into the appropriate connector and turned on. If it fails to work, the reason may not be in the radio, but in the wire responsible for connecting the device and the connector.
How to check the radio at home?
Quite often there is a need to check whether the radio is working before installing it in the car. This is more difficult to do, but quite possible. To do this, it is necessary to create certain conditions.
So, the first thing you need is a 12 volt power supply, with 3 amperes. You can use a car battery, rectifier, charger as it. It can be tailored based on what you have on hand. Its appearance is not particularly important. The main thing is that the device meets the requirements placed on it.
The second thing you need are speakers or speakers. After all the devices have been assembled, they are connected to the radio itself. It must be done correctly. The diagram located on its cover will help with this. Having studied it, you can see that an antenna is needed. Any piece of wire is perfect for this.
This procedure will be quite enough for the radio to start working. Don't forget to turn on the sound on it. But you shouldn’t do this at full capacity. Everything will be clear from the first seconds.
Without a radio in the car, it’s like having no hands; you immediately feel that something is missing. Thank God, all of my husband’s and my radio tape recorders were in good working order and were installed without any problems!