07/17/2021 1,773 Alarms
Author: Victor
According to the KGB FX 7 instructions, ease of use of the alarm is achieved through the presence of two-way communication and auto-start of the engine, implemented using the SmartKey function. The anti-theft reliability of the system in the event of a car robbery is ensured thanks to the safe shutdown of the engine in the Anti-HiJack mode.
[Hide]
Description and technical specifications
Review of the main properties of the car alarm model KGB FH7:
- The frequency range at which information is transmitted between the anti-theft system control module and the key fob is 434 MHz.
- The operating range of the main pager varies around 1.2 km. This is allowed if the area is open and there are no obstacles. When receiving notifications, the radius is about 600 meters.
- The range of the additional pager is approximately 15 m.
- Protection of all power lines of the installed alarm system on the car is carried out using safety devices. Depending on the purpose of the circuit, their rating will be from 7.5 to 30 amperes.
- Current consumption when the protection mode is turned off varies around 15 mA.
- To arm the security system, a time delay can be used, which can be adjusted in the range from 5 to 45 seconds.
- The maximum number of alarm cycles is 8, each duration is 20 s.
- Number of security zones - 7.
- The car is protected by using triggers for door locks, trunk, hood, and handbrake lever. The system also controls the operation of the ignition input and sensitivity sensor.
- It is possible to connect up to four communicators to control the car alarm.
- Protection of transmitted pulses is carried out by using different combinations when sending them. The total number of options can be more than 100,000,000,000.
- The operating temperature range of the microprocessor device is from -45 to +85 degrees.
The Yaroslav540 channel spoke in detail about the technical characteristics and configuration of the KGB FH 7 systems.
Functions
Functionality of the security complex:
- The presence of cursor command selection, which allows you to configure basic system parameters using the main key fob. Some options cannot be used using the cursor method.
- The KGB security complex has an automatic engine start option, which allows you to start the unit when the voltage drops to a certain threshold. The KGB FX 7 alarm system can monitor the voltage level in the vehicle’s on-board network, promptly detecting a low battery.
- The system implements the possibility of feedback. This means that KGB FX 7 monitors the operation of the machine and alerts the user of any events by sending messages to the remote control.
- Current time, alarm clock. The second function will allow you to activate the car’s power unit automatically.
- Sound and silent warning to the user about events related to the operation of the alarm. In the second case, you can set vibration for notification.
- Protection against robbery on a vehicle. The essence of this function is to block the car's engine when the car is grabbed by force. If the driver is forcibly kicked out of the car, the car's engine will stop after a certain time when the attackers leave the crime scene. This is done in order to ensure the safety of the car owner - so that the car thieves move a sufficient distance away from the car owner. The function is automatically triggered when receiving signals from the brake pedal and handbrake controllers.
- Possibility of installing and connecting auxiliary sensitivity and shock sensors.
- Silent protection mode. Its essence is that when an alarm is triggered, the siren signals do not turn on. Alerts are sent to the display communicator only. This is done so that a criminal trying to steal a car does not realize that it has an alarm installed.
- Possibility to select the type of alarm signal. The siren belongs to the category of six-tone devices, so the user can configure the operation of one of 6 pulses.
- Monitoring the functioning of the car engine based on readings from engine and interior temperature sensors.
- Availability of an immobilizer option - the function is activated automatically when the security system is turned on. When it is triggered, the main electrical circuits of the ignition system are blocked in the event of an unauthorized attempt to start the power unit.
- Ability to enable alarm modes without using a sensitivity sensor. The controller turns off and the alarm goes off when you try to open the door or start the engine.
- The presence of an LED indicator allows you to determine the alarm status by flickering the light bulb.
- The ability to control the lighting system in the car interior, a function called “Polite lighting”. Its essence lies in the fact that the lamp turns off after a certain time after the security is activated. This will allow the user to collect their belongings in the cabin at night.
- Warning the car owner about unlocked doors when arming.
- Possibility of connecting a horn to an alarm system. When the system is triggered, not only the siren will turn on, but also the steering horn.
- Alarm activation memory when power failure occurs. Re-activating the battery will cause the system to inform the car owner about events that occurred before it was turned on.
- Possibility of additional connection of GPS/GSM modules. Their presence will allow you to control the location of the vehicle.
The World of Electronics channel presented a detailed description of the capabilities and functions of the KGB FX 7 systems in a video.
Installation instructions for KGB FX-7
Arming the system without using a transmitter If the automatic arming function is disabled, you can arm the system without using a transmitter. This may be necessary if, for example, the transmitter is lost, faulty, or if the transmitter battery is low. To activate the security mode without using a transmitter: 1. With the ignition on, open the car door. The KGB FX-7 system LED will flash quickly to indicate that the door limit switch is working properly. 2. Press and release the Valet service button 3 times. The KGB FX-7 system LED will go out for approximately 5 seconds. 3. While KGB FX-7
does not light up - turn off the ignition.
The siren will sound 1 beep and the direction indicators will turn on 1 time, confirming the start of the 20-second countdown before the subsequent automatic arming. 4. Get out of the car and close the car doors with the key, make sure that the hood and trunk are also closed. 20 seconds after the confirmation signals of the siren and direction indicators, the security mode will be automatically turned on, regardless of the state of the doors, hood and trunk. The direction indicators will turn on once and the system LED will begin to flash slowly, confirming that the security mode is armed. ATTENTION: If, at the time the security mode is turned on, the doors, hood, trunk are poorly closed, or the foot brake is pressed (or the parking brake is turned off) or one of the corresponding limit switches is faulty, then the system will automatically bypass this active zone without any additional signals alerts. Alarm mode (system activation) a) When the security system is turned on, the KGB FX-7 system will immediately work and turn on the alarm mode when there is a push or blow to the car body, or when one of the doors, trunk or hood is opened, or when you try to turn on the ignition or press the pedal brakes During this time (or until you turn off the alarm mode from the transmitter), the turn signals, interior lighting (if this option is installed) will flash and the siren of the KGB FX-7
. The transmitter's built-in 2-way speaker will emit audible alarms and the transmitter's LCD display will display the symbol for the zone that triggered the system (see security zone table below). As long as the system siren is working, the “Horn” symbol will flash on the LCD display of the transmitter, and as long as the vehicle’s turn indicators are flashing, the vehicle’s headlights will flash on the LCD display. The duration of one cycle of the alarm mode and the maximum possible number of cycles for various alarm zones are indicated in the table below......
Notes: — If the “silent” security mode is turned on, then when the KGB FX-7 system is activated, the siren and direction indicators will not turn on, but only the direction indicators and interior lighting (if this option is connected) and warning signals on the 2-way transmitter will turn on communication — After the end of the 30-second alarm mode, the security mode will automatically turn on again if the cause of the system operation has been eliminated. If one of these circuits remains open (or faulty), then this open or faulty circuit will be bypassed by the KGB FX-7 system. When the “bypassed” circuit is closed or corrected, the system will immediately put it under protection. — If the alarm mode was disabled from the transmitter, then the countdown of the number of alarm cycles when a sensor or trigger is periodically triggered begins again.
Equipment
Devices included in the KGB FX 7 alarm kit:
- Control element.
- Basic communicator equipped with a screen.
- Replacement key fob without display and two-way communication function.
- Transceiver module with built-in antenna. This device is equipped with a button to call the car owner, as well as a temperature sensor. The adapter is equipped with a cable for connecting to the on-board network.
- Siren with a wire for connection and a block, as well as a bracket for mounting.
- External temperature sensor, intended for installation on a car engine.
- LED with cable for connecting to an alarm system.
- Button for activating the service mode.
- Limit switch designed for installation on the hood or tailgate.
- Set of cables for connection with blocks.
- Two batteries for installation in the main and additional communicators. The batteries differ in standard among themselves - the main key fob is powered by “finger” batteries, and the spare one is powered by “disk” batteries.
- Detailed service manual.
- Warranty card.
- Box.
The KGB FX 7 alarm package does not include door limit switches; these devices must be purchased separately.
What to do if you lose your key fob?
In order for you to be able to properly control the KGB TFX 5, the kit comes with a pair of key fobs, one of which is capable of ensuring the correct operation of the device at a distance. It is worth considering that the signals are saved exactly on those key fobs from which they were transmitted; there is no synchronization.
The key fob, which is designed to transmit signals at a distance, has 5 keys and a screen for displaying messages. The additional key fob has only 4 keys; it is usually used only in case of loss of the main gadget.
The system is capable of controlling up to 4 gadgets simultaneously, that is, if necessary, you can additionally purchase a pair of key fobs.
Advantages and disadvantages
Advantages of the KGB FX 7 model:
- Reliability and high quality vehicle protection achieved through the use of a unique encryption algorithm.
- A price affordable for most consumers.
- Ease of installation and programming. The service manual includes operating and configuration instructions that allow you to install the security system correctly and without difficulty. The connection diagram should be highlighted separately - it describes in detail the purpose of each contact.
- Fast alarm response.
After analyzing user reviews, we can highlight the following disadvantages of KGB FX 7:
- High cost of the main key fob. If the device breaks or does not work correctly, the buyer will have to pay at least 2 thousand rubles for a new remote control.
- False positives. The system may trigger an alarm for no reason. Usually this drawback is due to incorrect settings of the shock sensor and sensitivity.
- Incorrect operation of the engine warm-up option. Users note that this function may fail at low temperatures. In addition, if the car is equipped with a standard engine blocker, the alarm may conflict with the immobilizer. To solve the problem you will have to install a bypass module.
- Rapid wear of the main key fob. During intensive use, the keys on the device may become stuck and functions may not function correctly. Car enthusiasts note that the vibration alert option on their communicator often fails.
User Danil Abramchik showed what disadvantages and problems the owner of a KGB FX 7 car alarm may encounter.
Programming
Options related to autorun are configured programmatically. They are collected in the table that is given in the instructions:
To access the settings, follow these steps:
- The ignition is turned off;
- The Valet button is pressed 6 times, then the ignition is turned on;
- 6 signals follow;
- Press the Valet button to select the option number.
By taking the key fob and pressing the key, you set a new value.
To select number 4, do this: press button 1 long and short.
You don't need reviews to understand the following:
- It is not recommended to change the value of function 11;
- For function 9 the prohibition will be stronger;
- Option 12 is assigned a value of 2 or 3 to eliminate problems that occur when the ignition assist is activated.
In general, the KGB signaling of the model in question is a modified copy of the Starline B9. There are no complaints about these systems, with the exception of the slowness of the key fob. However, the effect only appears during setup. We will leave the choice to the user.
How to install an alarm?
Before installing the KGB FX 7 anti-theft system, the user must turn off the power to the on-board network. To do this, you need to disconnect the negative clamp from the battery; the terminal should be loosened with a wrench.
Procedure
KGB FX 7 Installation Guide:
- All elements of the security system are assembled and connected to the battery. This will allow the user to verify that the alarm is working.
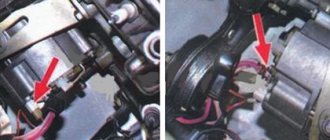
- The control unit is installed in the most hidden and protected from external influences place in the cabin. It is best to install the device behind the instrument panel, there is free space there, so the length of the wires coming from the anti-theft device will be minimal. Fixation is carried out using a special sticker, self-tapping screws or plastic ties. It is recommended to place the block with the block down, which will prevent possible drops of water from flowing down the wires into the device. The device must not be exposed to moisture or high temperatures at the installation location.
- The transceiver module is placed in the car, in the passenger compartment, on the inner surface of the windshield or rear window. Do not install the antenna near electronic devices or metal parts of the body, as this will lead to poor communication. The surface is cleaned and degreased before installation. If there is a tint film on the top of the glass, you cannot install the transceiver on it.
- A siren is installed under the hood. To do this, you need to drill holes in the metal part of the body to fix the bracket. The device should not be placed near the cylinder block, exhaust manifold or other sources of high temperatures. The siren's horn turns downward to prevent moisture from collecting in it.
- A shock and sensitivity sensor is installed in the central part of the body. For installation, you can use a partition separating the engine compartment from the passenger compartment. The controller must be placed so that the user has easy access to its adjustments. In this case, the sensor must be installed secretly; the cable from it is laid under the cladding to the control unit.
- An external temperature sensor is placed directly on the motor or other metal surface adjacent to it. The reliability of the device’s performance will depend on the correct installation.
- The status LED is installed in the vehicle interior, on the center console. The lamp must be positioned so that its flickering can be seen from the street.
- The emergency mode entry button is installed hidden. The user must have access to the key from the driver's seat.
- Limit switches are installed on the hood and doors of the car. The wires from them are routed to the control module.
Connection diagram
General connection map of the KGB FX 7 microprocessor module
Features of connecting the 18-pin block of the KGB FX 7 control unit are presented in the table:
| Contact color | Purpose |
| Gray-orange | Goes to the negative output of the hood trigger |
| Black and blue | Connects to the negative terminal of the door limit switch |
| Orange-violet | Connects to the sensor on the brake pedal or on the handbrake |
| Black and yellow | Output of the first additional channel. Can be connected to the trunk door release relay or to auxiliary equipment. |
| Yellow-white | Output for connecting a third additional channel |
| Grey | Goes to the positive contact of the siren |
| Black and white | Alarm status output, connect to negative LED input |
| Yellow-green and black-green | Contact elements for connecting the electrical circuit of turning lights or marker optics. The maximum current value at each terminal should be 7.5 amperes. |
| Black | Machine ground or grounding. Must be connected to any standard bolt screwed into the body. Connection directly to the negative terminal of the battery is allowed. |
| White-orange | Negative output of the luggage compartment lock trigger |
| Red-blue | Connects to the positive contact of the door limit switches |
| Black-gray | The contact element is connected to a generator device or tachometer electrical circuit if it is necessary to implement a motor control system. Negative conclusion. |
| Red-yellow | Second additional channel output |
| Black cable loop | Contact for selecting manual or automatic transmission |
| Pink | Input for the status of the anti-theft system when the power unit is running. Designed to bypass the standard alarm system or central locking. |
| Blue | Additional programmable output. Used to control the interior lighting system or closing car windows. The latter is possible when using electric windows. |
| Red-black | Connects to starter lock relay |
User guide
The KGB FX 7 instructions indicate that before use, a working power source must be installed in the communicator. To complete the task, the back cover of the device is opened and the battery is inserted into a special compartment. When installing, you must take into account the polarity of the element.
Designation of buttons and symbols on the key fob
Correspondence of controls on KGB FX 7 communicators:
Key numbers on the main and additional KGB FX 7 remote controls
Description of the buttons on the KGB FX 7 communicators and their purpose:
| Number | Pressing | Designation |
| 1 | 0.5 s | Activation of the protective function, closing the door locks when the ignition is on or in service mode |
| 1, 1 | Double click within 0.5 s | Disabling the Sensitivity Controller Warning Zone |
| 1, 1 | Press twice within 0.5s after the warning zone is deactivated | Deactivating both shock sensor zones |
| 1, 1 | Same as with turning off both zones, only when the device is turned off | Enabling the Sensitivity Controller |
| 1, 1 | The button is pressed until a melodic signal is heard, then it “clicks” briefly | Activating protection mode without sound |
| 1, 2 | Same as for launching the option | Enabling silent security |
| 1+2 | The keys are pressed simultaneously until a melodic signal is heard, the ignition is turned off | Activating the Panic function |
| 1+2 | The principle of pressing is the same as for activation, but the ignition system must be turned on | Enabling the Anti-Robbery mode |
| 2, 2 | Double short-term “click” | Disabling the “Anti-robbery” option |
| 2 | 0.5 s | Turning off the protection mode, opening door locks with the ignition on |
| 2 | 0.5 s | Deactivating the alarm mode |
| 3, 1 | The third button is pressed until the signal is heard, then key 1 is briefly “clicked” | Controlling the output of the first additional channel |
| 3 | 0.5 s | Diagnostics of the state of the anti-theft complex, monitoring of temperature in the car interior |
| 1+3 | Simultaneous pressing | Activating button lock on your communicator |
| 2+3 | 0.5 s | Disabling the key fob locking function |
Designation of indicators on the screen of the KGB FX 7 remote control
Description of the indicators on the KGB FX 7 device display:
- Function of autostart of the power unit on an alarm clock, at a time set by the user.
- Automatic engine start in accordance with timer readings.
- Automatic engine start mode based on air temperature.
- Anti-theft system service.
- "Turbo timer" option indicator.
- Icon for automatic activation of the protective function.
- Auto engine blocker mode.
- Option to block keys on the communicator.
- Indicator of one of the sensitivity controller zones being triggered.
- Charging symbol of the power source in the key fob.
- Powertrain temperature detection icon.
- The “Anti-robbery” option is enabled or disabled.
- Symbol of a running car engine.
- Indicator of an additionally connected search and security module.
- Icon to bypass the warning zone of the main or auxiliary kick controller.
- Indication of temperature in the vehicle interior.
- Symbol of the switched on ignition system.
- Indication of the current time.
- Bypass the warning zone of the regulators.
- The countdown timer is activated.
- The alarm function is enabled.
- Indication of the presence of communication with the transceiver.
- Icon of locked or open door locks.
- Security mode with or without sound alarm impulses. In the second case, the horn is crossed out.
- The function of disabling the alarm using a password is activated.
- Manual transmission mode is activated.
How to set up and program the key fob?
Full use of all system functions is possible only after linking the communicator to the KGB FX 7 alarm control unit.
Instructions for programming a new device:
- The security mode is disabled; if it was turned on, the ignition must be deactivated. The service mode entry button is pressed 7 times.
- Within 5 seconds after the last “click” the key must be inserted into the lock and turned to the “ON” position.
- The siren should sound seven times. This confirms entry into the programming menu.
- Within 10 seconds, the user must simultaneously press buttons 1 and 2 on the communicator. If the key fob is successfully linked, the siren will emit one beep.
- Over the next 10 seconds, similar keys are pressed on the additional remote control. The device will be registered in the memory of the control unit. The same actions are performed with other key fobs.
Setting up and disabling autorun
Features of controlling automatic start on command from the KGB FX 7 key fob:
- Key 1 of the communicator is pressed and held until the device plays a melodic signal. Then you need to briefly “click” on the third button. The car's lighting devices (side lights or turn signals) will blink three times, the key fob should play a melodic signal. This indicates the successful launch of the power unit.
- An icon in the form of smoke from a muffler should appear on the remote control screen. The engine will run for a certain time programmed in advance by the user. To increase it, first press the first button until a melodic signal is heard, and then briefly “click” key 3.
- Remote stopping of the power unit is carried out by holding control element 2 and then briefly pressing 3.
If autostart is required at a set time or temperature, the user performs the following steps:
- First you need to make sure that the clock on your pager is set correctly.
- The car owner presses and holds the third button on the remote control for several seconds. The device should beep twice. When the indicators on the screen flash, the driver uses key 3 to select the desired icon. The cursor is moved to the position of the symbol with the inscription “Clock Start” or “Temp Start”. In the first case, autostart is configured by an alarm clock, in the second - by air temperature.
- The selected function is activated by pressing the first button, and disabled by pressing the second. When determining the position of an option, the cursor moves to the corresponding indicator. As confirmation, the vehicle should display light signals.
Setting the time
Guide to changing time parameters in the KGB FX 7 key fob:
- The third button of the communicator is pressed and held for several seconds. The key fob should emit a series of beeps.
- The key is released. The device screen will display the current time setting mode and the corresponding indicator will blink.
- To increase the readings, use the first button of the key fob, and to decrease the readings, use the second. If you hold down the control, the values will change faster.
- Key 3 is pressed again. This will activate the minute selection menu. The procedure for changing parameters is carried out in a similar way. After the desired values have been set, the third button is pressed and held until a melodic signal sounds.
Setting up security functions
Features of changing KGB FX 7 alarm parameters:
- The protective mode is activated by pressing the first button on the remote control. To disable security, use key 2.
- The Anti-Robbery function is activated by simultaneously holding controls 1 and 2. The ignition in the vehicle must be activated. The keys are pressed until the key fob plays a melodic signal. Disabling the option is done by pressing the second button.
- To enable the silent protection mode, the first key is pressed and held until the signal sounds. After it appears, you need to “click” on it additionally. The car's turning lights will blink once and the LED indicator will flicker slowly.
- Activation of protection when the engine is running is done by pressing the second key while the engine is running. When the corresponding indicator appears on the remote control screen, the user must remove the key from the ignition and lock all doors. Then the first button of the communicator is pressed. This will activate the security system when the engine is running.
User Karabas Barabasovich spoke in detail about the implementation of anti-theft options, including the “Anti-robbery” mode of the KGB FX 7 alarm system.
How to use service functions?
Features of KGB FX 7 options control:
- The “Panic” mode is activated by simultaneously “clicking” on buttons 1 and 2. The siren should emit a triple beep and the car’s headlights will blink three times. If the function is turned on when the protection is disabled, the alarm will automatically close all the door locks of the car.
- To search for a car, press button 3 twice within one second. This will activate the car's siren and headlights. The communicator should emit a melodic signal.
- The “Turbo” mode is activated by pressing the third key on the remote control. It is held until the melodic signal is played.
- After the indicators on the device’s display begin to flicker, the cursor must be moved to the position of the icon that says “Extra Run”. Then the first key on the remote control is pressed, the function is enabled.
Programming a personal alarm code
To set a password for KGB FX 7, perform the following steps:
- The ignition in the car turns off.
- The “Valet” button is pressed four times to enter emergency mode. Each time you click, the alarm status LED will flash.
- The ignition system is activated. The siren should sound four times.
- Within five seconds, the user presses the “Jack” button again. If the siren goes off, this indicates that the car alarm is ready to program a personal password.
- Within the next 5 seconds, you must press one of the communicator keys to assign a code number. Buttons 1-3 correspond to the meanings of symbols 1-3. To enter character 4, press key 1 twice, the first time for a long time, the second time for a short time. For 5 - control element 2 is used, for 6 - 3. The principle of assigning a sign is similar.
- The emergency mode entry button is pressed and released for five seconds. The siren will sound twice. This indicates that the alarm is ready to specify the second digit of the password. After assigning it, the “Jack” button is pressed again. The steps to enter the remaining characters are repeated.
- To exit the programming menu, you must turn off the ignition system or wait ten seconds. The turn lights should blink five times to confirm.
Reset
Guide to resetting operating parameters to factory settings on KGB FX 7 communicators:
- The “Valet” service mode entry button is pressed 9 times with the ignition off.
- The key in the lock is turned to the “ON” position. The siren should sound three times.
- The "Jack" key is pressed once.
- Button 1 on the communicator is “clicked” and released. If all settings are reset to factory settings, the siren will emit one beep. To exit the programming menu, the ignition is turned off.
“Manual” or “automatic”?
Let's say the alarm was installed on a car with a manual transmission. Then the display should show “Manual” constantly. If this is not done, do not use autorun under any circumstances.
Let the installation be carried out without errors and the inscription on the display is present. Then during operation you will need to prepare:
- When leaving the car in the parking lot, apply the handbrake.
- The key is taken away, but the engine is running. If this does not happen, add a new action to the sequence: before “step 2,” press and release key 2.
- After removing the key or after pressing the button, if this was done, you must leave the cabin within 30 seconds and close the doors.
- You can turn on the security mode by pressing button 1.
Carry out the specified sequence so that the engine can be started by autostart.
So, let’s repeat what to do in different cases:
- If the installation was performed on a car with an automatic transmission, the inscription should be absent, and no preparation is required;
- For cars with a manual transmission, two options are possible: there is an inscription - the preparation is carried out, if there is no inscription - they do not use autostart.
During the preparation procedure, the “smoke” icon appears on the display. Its appearance means that the ignition support has turned on. Let us repeat that for cars with automatic transmission this information is not relevant: there is no need to maintain the ignition, since “preparation” is not carried out in principle.
There are reviews where owners say that after pressing button 2, the “smoke” icon does not appear, but instead a signal and blinking “dimensions” follow. This means that ignition support will be turned on when the key is removed - this is how the settings were made in this case (parameter 12).
Possible malfunctions and their elimination
Reasons why the KGB FX 7 system does not respond to commands:
- The battery in the remote control is low. To fix the problem, you need to replace the communicator's batteries.
- Pager malfunction. The device may have failed as a result of being dropped or exposed to moisture. It is necessary to disassemble the communicator body and clean it from blockages. Damaged contacts on the board must be re-soldered. If the reason is exposure to moisture, then the circuit must be dried.
- Failure or incorrect installation of the transceiver module. You need to make sure that the antenna adapter is installed correctly. If the device is broken, it must be replaced.
- Damage to wires. The reason may be deterioration of the insulation, which leads to current leakage. Failed power lines must be replaced. Cables should not be laid in places where moving elements and structures are located.
- Failure of the control unit. If the breakdown is due to exposure to moisture, then similar actions are performed as in the case of a communicator. Software malfunctions can be resolved by flashing the device.
Video
User Alexander Shkurevskikh spoke about independently checking the control unit and other components of the KGB FX 7 car alarm.
Do you have any questions? Specialists and readers of the AUTODVIG website will help you ask a question
Was this article helpful?
Thank you for your opinion!
The article was useful. Please share the information with your friends.
Yes (100.00%)
No
X
Please write what is wrong and leave recommendations on the article
Cancel reply
Rate this article: ( 2 votes, average: 5.00 out of 5)
Discuss the article: