Home » Repair tips » Headlights do not light - low beam does not work, diagnostics and repair 263
If your headlights are not on and your low beam lighting is not working, then driving at night with a faulty car is not only prohibited by traffic regulations, but also extremely dangerous. However, sometimes situations arise when the headlights go out during a trip. It is not always possible to spend the night in the car and finish the trip in the morning. We will tell you how to repair the exterior lighting of a car and how to get to the repair.
Content
- Lamp burned out
- Fuse blown
- Non-standard reasons
The easiest way, without a doubt, is to entrust everything to the reliable hands of a trusted auto electrician, but it is not too difficult to cope with some problems on your own - if you have the smallest amount of free time and a primitive acquaintance with the basics of electrical circuits.
The low beam of the headlights does not light up, but the high beam is on - this phenomenon can be due to several reasons. And most of them are quite easy to fix. Moreover, this can happen to your car at a completely inopportune moment: on the highway, for example, when you need to switch to low beam so as not to blind oncoming drivers with headlights
Let's try to deal with all the flaws one by one, and consider: what may be the most common options for repairing and troubleshooting such an important segment as low beam
What to do if the low beam is not on but the high beam is on
How many meters should low beam headlights illuminate?
The problem may be caused by faulty low beam lamps or wiring problems. First of all, you need to check the low beam lamps. Usually such a malfunction is easy to determine, since usually only one lamp out of two burns out. But what to do if the low beam is not on completely and the high beam is on. The operation of the high beam indicates that the headlight unit is working properly, a problem with the contacts has been ruled out, and it is necessary to check the rest of the wiring.
Also read: Tax deduction when buying an apartment with a mortgage, list of documents
Chevrolet Niva is a joint production product of two automobile concerns - AvtoVAZ and GM. The car belongs to the crossover class, but the presence of permanent all-wheel drive makes it a good option for those who like to conquer off-road conditions
Therefore, it is very important that all components of the car work reliably, because when you find yourself far from a populated area, you need to feel confident that you will be able to get to your destination
What to do if the light stops
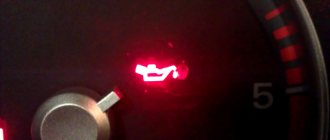
The oil pressure light comes on at idle: troubleshooting and troubleshooting
If the problem occurs on the road, you should first try to solve the problem on your own.
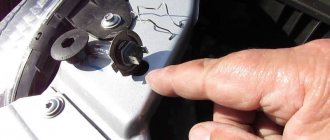
- If only the right or left headlight does not light, the light bulb is checked. To do this, you need to carefully remove it and look at the spiral; if it is intact, put the lighting element in place.
- Next you need to inspect the fuse. If the thread is damaged or looks bad, it needs to be replaced with a new one. Ideally, carry a small supply so that you can simply change the questionable element and check if this is the cause.
- All connections and connectors in the headlights are checked, you can remove each one and then carefully put it in place, making sure that the chip snaps into place. You should also inspect them: you can often notice oxidation or carbon deposits, which can worsen the contact and cause the headlight to not work.
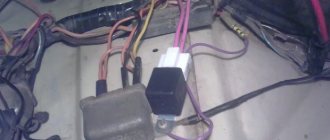
- If everything is in order, the relay is checked. When you turn on the light, you need to listen to see if it clicks. If not, you should try another relay, usually there are similar ones in the block, you need to remove the one that will not affect the operation of the machine and move it to the right place. If the light works, the relay will have to be replaced.
- Testing wiring in the field is difficult, but if you have a test light or multimeter, you can quickly determine if power is being supplied to the light bulb connector. A simpler solution is to supply plus directly from the battery; if the light comes on, there is a problem with the wiring.
If self-diagnosis does not produce results, you will have to go to a service station to have professionals look for the cause. To do this, it is better to choose the nearest service, move at low speed and turn on the hazard warning lights. Fixing the problem can take from 10 minutes to several hours, it all depends on how quickly the problem is identified and what needs to be done to solve it.
Replacing lamps
Causes, consequences of the presence of oil in antifreeze and troubleshooting
The process of replacing lamps on a VAZ 2110 is extremely simple. However, before you begin this operation, you must purchase new lighting elements.
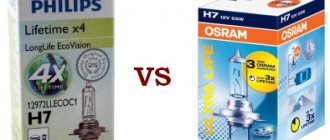
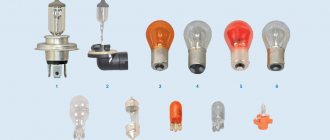
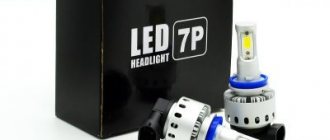
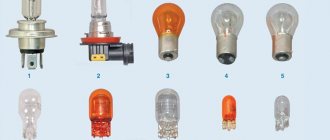
This vehicle is factory equipped with H7 standard halogen bulbs. Today there is a large selection of lamps on sale, not only halogen, but also other types - xenon and LED.
The photo shows a H7 standard halogen lamp
Their features, advantages and disadvantages have been discussed many times on car enthusiast forums, so below we provide only a comparative table with the main characteristics of these lamps:
Note! The most optimal color temperature of the light flux is in the range of 4300 - 5000 K. It must be said that in addition to the data from the table, when choosing, you should also take into account the penetrating ability of the light flux
Halogen lamps are the leaders in this parameter - they illuminate the road much better in rain, fog or snow.
It must be said that in addition to the data from the table, when choosing, you should also take into account the penetrating ability of the light flux. Halogen lamps are the leaders in this parameter - they illuminate the road much better in rain, fog or snow.
In addition, installing xenon or LEDs in the fog lights of the VAZ 2110 will require electrical intervention, in particular the installation of additional equipment (ignition units). Therefore, it will not be possible to perform their high-quality and safe installation with your own hands.
Note! Experts recommend changing light bulbs in pairs so that both headlights shine equally. In addition, their service life is approximately the same, so if one of them burns out, the second one will soon fail.
Each car owner must choose for himself which light for the VAZ 2110 will be better based on his own financial capabilities, weather conditions of the car, etc.
How to replace the lamp
Instructions for replacing light bulbs look like this:
- First of all, you need to open the hood and disconnect the terminal from the battery.
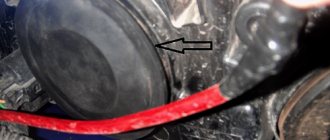
- Then you need to remove the plug. located closer to the wing.
- Next you need to unfasten the spring clip. which presses the light bulb to the headlight housing.
Disconnecting the block from the contacts
- After this, you should carefully disconnect the block from the contacts and remove the light bulb itself. since nothing else bothers her.
- Now you need to insert new light bulbs in the same position in which the old ones were located, connect the block to the contacts and secure everything with a bracket.
- At the end of the work, you should install the plug in place.
Note! When replacing lamps, it is important not to touch the glass with your fingers. Otherwise, grease stains will remain on the surface, which will lead to overheating and failure of the lighting element.
The lamp replacement is now complete. As a rule, this operation takes several minutes even for beginners.
Advice! Many car owners are interested in how to improve headlights? The easiest way is to disassemble the headlights, wash them, replace the glass if necessary and adjust the light beams. As a rule, these simple procedures give good results.
The main reasons why there is no spark
- problem with spark plugs (flooded or faulty);
- breakdown of high-voltage wires or loss of contact;
- the reason is the crankshaft sensor (requires checking with a multimeter);
- malfunction in the ignition module;
- failure of the ignition coil;
- problem in the switch;
- Distributor malfunction (burned contacts, loss of clearance);
- poor ground wire contact;
- failure or malfunction of the ECU;
How to correctly change a low beam light bulb on a grant
Low beam does not work on one headlight
If for no apparent reason one low beam bulb stops working, then the reason may be directly in it. The filament coil often burns out.
In such cases, the only solution is to replace this optical element. Therefore, it is better to always carry spare lamps with you.
Another reason that should always be taken into account could be a blown fuse, which simply needs to be replaced. In addition, it is often enough to wiggle the fuse box and everything will start working. This is due to the fact that the contacts can oxidize over time, become loose, and their connection quality is impaired. To correct this problem, you need to carefully clean all contacts using fine-grit sandpaper or a file.
Due to poor contact quality, the switch button may also function poorly, so you should also pay close attention to its performance. To identify them, you need to check all the electrical blocks through which the connection occurs.
If poor-quality connections are identified, the deficiencies should be corrected immediately
To identify them, you need to check all the electrical blocks through which the connection occurs. If poor-quality connections are identified, the deficiencies should be corrected immediately.
The malfunction may be caused by a lack of contact with the light bulb itself, when the negative pole is poorly attached to ground. Incorrect headlight adjustment can cause these symptoms. For example, if the voltage regulator setting is weak, the beam of light will be almost invisible.
Why the car's low beam light doesn't light up: 4 reasons!
Firstly, if the low beam bulb does not light up when the high beam is working, you need to check whether it has burnt out. In this case, the lamp may have two separate filaments, one of which lights the high beam, and the other lights the low beam. Therefore, there is nothing surprising in the fact that they can turn on autonomously from each other.
Replacing a halogen lamp on a headlight is not difficult, even if you are not an auto electrician. Let's consider a simple algorithm for this procedure:
- the hood of the car must be opened and secured;
- the protective cover must be removed from both sides of the headlight;
- disable contact group;
- remove the spring clips;
- remove the burnt out light bulb;
- put a new one in its place;
- return all removed elements to their place.
It is important to know a few rules for working with lamps:
- it is necessary to degrease the surface of the bulb before installation, otherwise there is a high risk that the lamp will immediately burn out due to contamination;
- It is not recommended to work with a glass flask with bare hands. This may leave traces of grease on it that cannot be removed and the lamp will be damaged. The best option is to use cotton gloves, and if you don’t have them on hand, you can wrap the flask in a cloth or napkin.
The fuse is broken
This is the second common reason why the low beam light of one of the car headlights does not light up. Let's look at how to fix it yourself:
- the fuse box for electrical circuits must be opened;
- if one of the fuses has blown, it needs to be identified (usually this is not difficult) using a diagram;
- The faulty fuse must be replaced with a new one.
Let us clarify that if fuses on your car often burn out, you need to look for a breakdown in the wiring. Then, using a special device, it is necessary to ring the wires to determine where their integrity is compromised. If it is impossible to do this yourself, you need to contact an electrician who can find the cause of frequent breakdowns. In fact, this is a rather serious problem, in which repairs cannot be put off for a long time, since breakdowns in the wiring can lead to a short circuit and fire of the machine.
Wiring is damaged
What if the low beam light doesn't come on because of a wiring problem? Then you need to check the blocks through which the relay and fuse box are connected. The reason may be a poor connection, or the contacts may oxidize, which leads to increased current, overheating of the wiring and failure of the lamp. To repair this damage, you need to tighten all the pad fastenings, but before doing this, do not forget to clean all contacts with an abrasive material.
In addition to the pads, you need to check the headlight switch, since the contacts on it may also be oxidized, or there may be a poor connection in this place. Any experienced technician will start searching for the cause of non-working headlights from the button to turn them on, and only after making sure that it works properly will he continue to search for the answer to the question: “Why don’t the low beam lights light up?”
Non-standard reasons
Sometimes the headlights don't come on for very unusual reasons. For example, one car enthusiast’s Niva car stopped turning on its low beam after dismantling faulty headlight cleaners. Of course, he was not immediately able to determine that the breakdown was caused by his actions. But, as it turned out, the low beam went out due to the lack of motors that were necessary for the normal operation of the headlights. To solve the problem, the car owner created an imitation of the presence of motors, shorting the wires in the places where they should have been, only after that the problem was solved.
The example given above shows that if you have checked both the wires and contacts, but the low beam lights do not light up, remember what manipulations you recently carried out with your car. Perhaps after the last “pumping” of the car the problem appeared. After all, by making any changes to the design of the car, you can automatically disrupt the operation of the complex system of its functioning, designed at the manufacturer.
If you are sure that nothing has been changed in the car, you need to contact a service station for help in repairing headlights. After all, you can spend an indefinite amount of time and effort searching for the cause of a breakdown.
Knowledge of how to find the cause of the low beam not working and fix this breakdown yourself will also help in the opposite situation, when the high beam does not light up, but the low beam turns on without difficulty. In this case, in addition to the problems listed above, there is a malfunction of the steering column switch, due to which, by the way, only one of the headlights may be on. The best solution in case of such a breakdown is to replace it.
Useful materials about cars
here:
Source
Low beam does not work: reasons
So, proper lighting of the road while the car is moving is a very important factor that ensures the safety of the driver, his passengers and other road users.
While driving a vehicle, the driver needs to clearly see the road along which the car is moving.
High/low beam headlights are very important because they provide good visibility both at night and in cloudy weather conditions. Today there are several types of car headlights, which can be divided into the following categories:
- Main headlights using halogen, xenon, high-intensity discharge lamps, diodes, etc.;
- Fog lights - the main purpose is additional illumination of the road while driving in thick fog (most often, the manufacturer already supplies cars with a set of fog lights);
- Spotlight headlights - powerful headlights provide the driver with good visibility, especially when driving on unfamiliar roads (headlights are not intended for city driving, as they can blind other drivers);
At the same time, for low and high beams, as well as for fog lights, halogen lamps are most often used, designated by the type of base as R2, H1, H3, H4, H7, HB3, HB4.
As for the problem itself, if the low beam does not work, the reasons may be different. It is important that the cause of the malfunction of the low beam or high beam headlights is accurately determined. Here are some of the main reasons why the low beams do not light up:
- low beam lamps have burned out;
- the fuse threads have melted (since basically the power circuits of the left and right headlights are not interconnected and are protected by separate fuses, a failed one of the fuse elements can lead to the failure of one headlight), the malfunction is diagnosed visually. In case of difficult access to the mounting block, check the operation of devices receiving power from circuits protected by the same fuses;
- faulty headlight relay (lighting systems stop working, there is either low or high beam). The malfunction can be detected by ear, by turning on the headlights and listening to the sounds that arise; if short, loud clicks are heard, the relay is working properly; if there are no clicks, the relay is faulty;
The connectors of the electrical wires going to the headlights are not connected correctly or are not connected at all (for example, they forgot to connect them after repairs). In this case, only one of the two headlights does not light up.
- water entering the engine compartment of the car (oxidation of the “chips” at the junctions of the wires, as a result of which the “chips” cease to perform a conductive function). Diagnose the malfunction by checking all the named wires and connections suitable for the headlights;
- voltage surge in the on-board network (both lamps burn out at the same time);
- other non-standard reasons (for example, a crack in the headlight through which water gets in and moisture condenses).
Please note that if a malfunction is not identified, additional diagnostics of the electrical wiring are carried out using the procedure of “testing” the electrical circuits of the car with a multimeter. By the way, to quickly determine the cause, you need to make sure that there is power at the terminals
Of course, the lack of current at the terminals supplying the low beam headlight bulbs will result in no low beam.
By the way, to quickly determine the cause, you need to make sure that there is power at the terminals. Of course, the lack of current at the terminals supplying the low beam headlight bulbs will result in no low beam.
To diagnose such a malfunction, you must do the following:
- insert a working lamp into the socket and “strike” the plus wire against the minus wire;
- a spark jumping between the wires or the lamp turning on indicates the presence of current in the network and, accordingly, indicates a malfunction in the headlights or lamps themselves;
- if there is no spark or the lamp does not light up, there is a break in the headlight power supply.
Please note that this method of checking is only suitable for simple cars where the ECM system is not complex. In turn, an attempt to short-circuit the plus and minus wires on many modern cars can lead to serious failures, errors in the ECU memory, etc.
No. 5 – Nissan Almera
Price: 590,000 rubles
The developers of Nissan Almera did a great job, the result is a car that perfectly combines an elegant appearance and an attractive price. As a result of restyling, the model did not receive any major changes, so the differences from the previous generation sedan are only cosmetic. Despite being classified as a budget car, the Almera’s interior is very comfortable and fresh. There are no pretentious elements in the interior design, but everything is done very high quality. The only engine that the Almera can be equipped with is a 1.6-liter gasoline engine with 102 hp. and manual or automatic transmission. However, it doesn’t drive badly, and in a large city you can’t dream of anything more.
Why don't the low beams come on?
In a Priora, the low beam may not light up for several reasons: the fuses have blown, the light bulbs have burned out, or the light switch (MUS) is faulty. Let's look at each of the reasons in more detail.
Headlight fuse
The possibility of failure of the low beam headlight fuse is possible, since with frequent use of the car, the load that the headlights take on heats up the fuse link and thereby disables it even without any current surges in the circuit.
It should be noted that the fuse protects each headlight individually, that is, failure of two fuses at once is unlikely. But it is recommended to start checking with them. These fuses are located in the prior mounting block under numbers F6 and F7 and have a fuse current of 7.5A.
If they are working properly, move on to the next point.
Burnt out low beam lamps
Burnout of lamps is possible due to long-term use and thermal overload. In the summer, when operating a car in the city with the headlights on, it does not provide proper cooling of the lamp, which often leads to burnout of the lamp filament. But, as in the case of fuses, failure of both lamps at once is unlikely.
All Lada Priora, regardless of the year of manufacture, are equipped with H7 type low beam lamps. But the high beam lamps will be different, namely with and without DRLs. Models with running lights are equipped with a high beam lamp of type H15, and those without running lights are equipped with type H1.
Light control module
Quite often, the MCC is the main culprit of this problem due to burnout of tracks on the board or oxidation of contacts. This can be treated by replacing the module with a new one or troubleshooting the old one with your own hands. You can understand that the reason is in the module by blinking the high beam; if the high beam is blinking and the low beam is not on, then in most cases the light control unit is faulty.
Why do low beam bulbs often burn out?
According to traffic regulations in force in the Russian Federation, low beam headlights must be on when operating a vehicle, regardless of the time of day. If the headlights on your car work properly, then there will be no problems following this simple rule. But what to do if low beam bulbs often burn out?
Let's look at the main reasons why headlight bulbs can burn out:
Lamps have a limited service life. This applies not only to the time of constant illumination, but also to a limited number of switchings. In addition, when you replace factory lamps with cheap analogues, you need to understand that their service life is shorter. Moisture gets inside the headlight. If the headlight is cracked, or the rubber seals no longer fit tightly between the glass and the headlight housing, there will inevitably be moisture inside. This is easy to diagnose yourself: a headlight whose integrity is compromised constantly fogs up. Errors during installation. If you do not follow the basic rules when installing halogen lamps, for example, not using gloves, then greasy marks remain on the headlights, which leads to a reduction in their service life. The power of the installed lamps is too high. It is better to choose lamps with reduced power, but with increased brightness, this way you can ensure excellent visibility on the roads in any lighting conditions. It is not recommended to install lamps with a power of 100 W. Manufacturing defect of the lamp. If a defective lamp is initially selected for installation - with a displaced spiral or a tilted bulb, it is not surprising that it does not last long and quickly burns out. Battery low. If the machine is used for many years, the old unit begins to quickly discharge. As a result of constant recharging of the unit, an overvoltage occurs in the on-board network of the machine. To diagnose this reason, you need the help of an auto electrician. Wiring problems
If the car was purchased from another car owner, it is important to check the wiring, as it can be damaged as a result of careless operation of the car. It must be remembered that if the wiring is faulty, it threatens to break not only the headlights, but also any electrical appliances of the car. Low resource lamp
Unscrupulous manufacturers put on the market lamps that initially have a short service life, and accordingly, they quickly fail.
How do lights work on a car?
Malfunctions that arise may be in the nature of a complete failure of the headlights or their periodic inoperability; there may be cases when your light will burn dimmer than usual and intermittently. High beam is usually adjusted for night driving on the highway, in contrast to the fact that low beam is often used during the day, in combination with fog lights. The easiest way to troubleshoot a complete failure of the VAZ 2110 light. In this case, there is a specific breakdown or malfunction that you can simply methodically identify and eliminate. In the case of periodic failures, and at the time of elimination, when everything is working, this malfunction is much more difficult to determine, since it can hide anywhere.
Before searching for the reason for the failure of the low beam or high beam headlights, you should understand the mechanism of operation and the principle of operation, which is as follows:
Power from the battery is supplied to the ignition switch - then power goes to the side light switch - from which it goes to the light switch located on the steering column - then control goes from it to the corresponding relay in the fuse box, the steering switch turns on a certain relay, supplying voltage to his contacts.
Thus, if the lighting fails, you need to understand and find out in which part of the circuit the circuit break or voltage loss occurred. Or determine that the malfunction lies in the failure of the lighting lamps. On this car, the low and high beam are divided into two lamps in each headlight.
- Headlight unit
- Fuse box
- Light switch
- Side light switch
- Ignition switch
- Dashboard
- K4 - Low beam headlight relay
- K5 - High beam headlight relay
- F12 - Right headlight fuses, low beam
- F13 - Right headlight high beam fuses
- F3 - Left high beam headlight fuses, high beam CL
- F13 - Right high beam headlight fuses
Let's consider the case when the right high beam does not work. Do not forget that the light is turned on by a relay, and in the event of a failure of the low or high beam of one headlight and at the same time the functionality of the other, this means that the light switching circuit before the relay is functioning normally and the cause should be looked for after the relay, starting with the fuses. Almost all circuits are protected by fuses, even installed additional accessories - navigator, video recorder, radar detector, receive power from the cigarette lighter, which is protected by a fuse
Fuse F13 is responsible for the far right fuse; we take it out and check for functionality; if by visual inspection it is not clear whether it works or not, replace it with a known-good fuse of the same power. When replacing it, two options are possible: the light will not light up or the fuse will blow. In case of short circuit. We need to look for its cause. Next, open the headlight and replace the high beam bulb. All this can be made a little easier if you have a test light at your disposal, which you can use to check whether voltage is supplied to the headlight itself, since removing the light bulb requires a little skill.
If you determine that when you turn on the high beam, the voltage approaches the headlight, then you can safely remove its pot from the back of the headlight and replace the bulb. There is one more malfunction, this is a break and loss of “mass” on the paw, take this point into account and do not rush to immediately spend money buying a new light bulb. Perhaps this wire is simply disconnected and when power comes to the lamp, there is no ground power.
Checking and adjusting the operation of the mechanism
Regular preventative examinations will help you avoid sudden breakdowns. According to the manufacturer's recommendations, these are carried out at least once every 3 months. Unscheduled, you will need to look under the hood if the Priora's light has become dim. Regardless of the reason, a key at “6” is required for operation.
The car owner must check the air pressure in the tires. Even a slight deviation from the norm will negatively affect the efficiency of lighting devices. After this, the vehicle is installed on the most level surface of the garage. Lada Priora is placed at a distance of 5 m from a smooth wall. The further procedure is as follows:
Direct adjustment is carried out in the vertical and horizontal plane. In order to adjust the position of the light spot as accurately as possible, you should first turn on the low beam. The setting is made for each headlight separately. In order to comply with technical recommendations, when adjusting one of the headlights, the second one must be covered with material that does not transmit light.
If you don’t have one at hand, then you just need to turn off the power. Only after this does the transition to high beam adjustment take place. The lighting adjustment process ends with a mandatory check. A vehicle rolls out of a garage onto the street at night.
The high beam turns on, and then the low beam. A visual inspection is carried out. If asymmetry of the light spots is noted, then the adjustment is made again. In some cases it is necessary to visit a service station.
Problem No. 2: one of the xenon phases does not work
Diagnostics: Xenon headlights, unlike halogen incandescent lamps, do not have a tungsten filament, therefore, if the lamp does not light up and voltage is properly supplied to it, then most likely there is a crack in it through which xenon gas passes.
The xenon element requires a high and working voltage, so if this device does not work, first of all you should check the electronics - test the contact with a multimeter. In some cases, the bulb and igniter are connected together and are one device. In such cases, they can only be replaced as a whole.
Xenon headlight bulbs are quite expensive (from $50 to $100), and igniters are even more expensive (the price can be about $200!). Therefore, before you start replacing, make sure 100% that the problem is in the xenon.
There is a reliable way to test this: replace the "good" lamp that works on the other side with a headlight that does not work. If the headlight now works, then you can know for sure that the light bulb you removed was faulty and needs to be replaced. Better yet, swap the headlights, then the picture will become completely clear.
Replacing light bulbs when the headlights don't shine well
Imported cars usually come equipped with high-quality lamps from the factory. On domestic cars, on the contrary, they install those that are cheaper, and they usually shine poorly. Most buyers are forced to somehow solve this problem. One possible way out of the situation is to replace the lamp with a higher quality model.
We recommend the following options:
- Philips X-Treme Vision +130% - the model can be equipped with different bases, there are variations in the color of the light beam, and is durable. This white light bulb is suitable for halogen headlights.
- Osram Night Breaker Unlimited - belongs to the new line from Osram, has almost perfect light, the only bad thing about this model is its service life (I would like it to be longer).
- KOITO - these Japanese lamps have the best combination of brightness and lighting efficiency, they shine well and do their job.
- Philips +30%, made in Holland and packaged in cardboard packaging - this line is no longer produced, although in terms of quality and light performance it is not inferior to the more expensive X-Treme Vision.
How well or poorly the headlights shine depends largely on the lamp installed in them. With a standard model from even a well-known manufacturer (for example, Osram Standart), the light will still not be ideal, although this is not the worst option. To achieve maximum lighting quality, you will have to invest financially in devices with high light performance and a quality guarantee.
Methods for diagnosing headlights on a VAZ-2114
The right low beam bulb is burnt out
Actually, diagnostics comes down to checking the integrity of the filaments on the lamps, the presence of reliable contact, and checking the switching relay. However, in addition to this, it is worth checking the wiring from the headlight to the fuse box.
To diagnose the circuit, you need to use an electrical diagram and find both wires on it that are responsible for the operation of the low beam threads.
Depending on the year of manufacture of the VAZ-2114, the color designation may be different.
Our task is to ring each section of the circuit step by step and determine the location of the break or short circuit. The damaged section of the wire is replaced with a new one, the circuit is checked and put back into working condition. Good luck to everyone and bright lights!
Burnt out filament in a lamp
If you notice that one headlight in your car has failed, then the problem may lie in the light bulb. The device of this element includes two filament coils, one of them is responsible for the operation of the low beam, and the second for the high beam. One of these threads can easily burn out, which is why the high or low beam will not work.
In this case, it is impossible to repair the failed spiral and the only way out is to replace the light bulb. You can do this yourself.
Healthy! When replacing a lamp on a car, do not touch it with your bare hands, as if there is grease or dirt on the bulb, it may burn out immediately. It is also recommended to wipe the light bulb with alcohol before installation.
Why don't the low beams come on?
In Priora, the low beam may not light up for several reasons: the fuses have blown, the light bulbs have burned out, or the light switch (MUS) is faulty. Let's look at each of the reasons in more detail.
Headlight fuse
The possibility of failure of the low beam headlight fuse is possible, since with frequent use of the car, the load that the headlights take on heats up the fuse link and thereby disables it even without any current surges in the circuit.
It should be noted that the fuse protects each headlight individually, that is, failure of two fuses at once is unlikely. But it is recommended to start checking with them. The fuse data is located in the Priora mounting block under numbers F6 and F7 and has a fuse current of 7.5A.
If they are working properly, move on to the next point.
Wiring is damaged
What if the low beam light doesn't come on because of a wiring problem? Then you need to check the blocks through which the relay and fuse box are connected. The reason may be a poor connection, or the contacts may oxidize, which leads to increased current, overheating of the wiring and failure of the lamp. To repair this damage, you need to tighten all the pad fastenings, but before doing this, do not forget to clean all contacts with an abrasive material.
In addition to the pads, you need to check the headlight switch, since the contacts on it may also be oxidized, or there may be a poor connection in this place. Any experienced technician will start searching for the cause of non-working headlights from the button to turn them on, and only after making sure that it works properly will he continue to search for the answer to the question: “Why don’t the low beam lights light up?”
Fuses and relays in Lada Priora, electrical diagrams
Lada Priora is another car in the line of new VAZ cars, which is gaining popularity among segments of the population
External similarities with the 10th model attract the attention of young people; the relatively low price is also a reason for purchase for most car enthusiasts
Along with the growth in popularity, the owners of this model are gaining experience in repair and maintenance, which is becoming more and more every year.
If your Priora has electrical problems, do not rush to get upset; first, check the fuses and relays in your Lada Priora. These are the ones that will be discussed in this article.
Fuse box in the passenger compartment of VAZ-2170, -2171, -2172
The fuse box in Priora is located at the bottom of the dashboard, on the left side of the steering wheel. To get to it, you need to open the cover, which is held on by three latches. Rotate each locking knob 90 degrees and pull the lid down and it will snap open.
Fuses in the interior mounting block
F1 (25 A) - radiator cooling fan.
- If your fan does not work, check its motor by applying 12 V directly to it from the battery. If the engine is working properly, then most likely the problem is in the wiring or connectors. Check the serviceability of relay K1.
- The fan in the Priora usually turns on at a temperature of 105-110 degrees. Do not allow the engine to overheat, watch the arrow of the temperature sensor.
- If the fan runs constantly and does not turn off, check the coolant temperature sensor located on the thermostat.
- If you remove the connector from the working sensor, the fan should turn on. Check the wiring to this temperature sensor, as well as the contacts of relay K1, move this relay, clean the contacts. If this is the case, replace it with a new relay.
F2 (25 A) - heated rear window.
F3 (10 A) - high beam, right headlight.
F4 (10 A) - high beam, left headlight.
If the headlights do not shine on high beam, check the K7 relay and the headlight bulbs. The steering column switch, wiring or connectors may also be faulty.
F5 (10 A) - sound signal.
- If the signal does not work when you press the steering wheel button, check relay K8. The signal itself is located under the radiator grille; you can get to it by removing the plastic casing from above. Test it by connecting 12V voltage.
- If it doesn't work, try turning the adjusting screw, or replace it with a new one.
F6 (7.5 A) - low beam, left headlight.
F7 (7.5 A) - low beam, right headlight.
- When replacing lamps, be careful; there are separate lamps for the low and high beams, so they can be easily confused. It is better not to install lamps in high-power headlights; the reflectors may melt and the desired effect will not be achieved.
- Most low beam headlight problems that cannot be corrected by conventional means can be related to the light control module (LCM).
- The low beam relay is only available in cars equipped with a light sensor, it is located in the place of relay K1; on most cars this relay is not in the mounting block; the low beam circuit goes through the MUS block.
- It happens that the tracks in the block burn out; if there are problems, it is better to replace it with a new one.
- If the windshield wipers turn on spontaneously when the low beam is not working correctly, the problem is most likely in the windshield wiper control unit, located in the center of the dashboard, the topmost block, next to the radio, is best reached from the glove compartment, or by hand through the removed console covers at the feet.
Why doesn't the low beam headlight light up? Troubleshooting
Almost every car owner has encountered a problem when the headlight does not light up “halfway”, that is, the low beam does not work. In this case, a situation arises in which the high beam lights up as if nothing had happened. At least a third of motorists have encountered this, and almost all of them had the idea that the problem was in the “headlights”, that is, the problem was in the optics, although in reality this is not always the case.
This malfunction is very familiar to VAZ car owners, who from time to time encounter this problem, even when they buy a completely new car. Often this problem affects the right headlight of the car, while the headlights on the left side of the car are not affected as often as the right.
But it would be a mistake to say that this only applies to Russian cars and their manufacturers; cars from foreign manufacturers are susceptible to the same problem. The difference is that each optical element, depending on the manufacturer, has its own shelf life and durability.
So, what should a driver do when there is a problem with the low beam? Every motorist has two options - contact a service station with a specialized specialist to solve the problem, or, saving money and sometimes time, fix the problem yourself
If you decide to fix the problem yourself, then you need to have the necessary tools for this and, most importantly, knowledge of the car's structure, including knowledge of the principles of the electrical circuit. If your low beam does not work, but there are no problems with the high beam, then the reasons for this may be several problems:
- The light bulb doesn't work.
- Broken, worn or shorted wires.
- The fuse that supplies power to the low beam lamp has blown.
- Other reasons.
You can fix this damage yourself. Moreover, knowing how to solve a breakdown related to headlights will be a help for every motorist, especially in a situation when the problem overtakes you on the road, and the nearest service station is several dozen, or even a hundred kilometers away. We will show you how to fix this problem yourself and present options for resolving it.
The lamp burned out
If your low beam does not work, then the first thing that comes to the car owner’s mind is that the filament has burned out. This is indeed possible, since the headlight design has two spirals, each of which has its own function. The peculiarity is that if one thread fails, the second one works normally. This applies to halogen lamps, which are more reliable and provide greater safety.
To replace the lamp, perform the following procedures:
- Open and lift the trunk of the car.
- Carefully remove the protective housing from both sides of the headlight.
- Disconnect the headlight supply wires.
- Disconnect the spring fasteners.
- Disconnect the failed light bulb and install a new one.
- Reinstall all removed parts in reverse order.
When installing the lamp, consider some features:
Before installing the lamp, use a clean cotton cloth soaked in alcohol to wipe the lamp. If you install a lamp that has greasy stains or dirty handprints, the lamp will burn out very quickly. Try to avoid contact of your hands with the lamp bulb, even if your hands are washed and clean. Wear cotton gloves or use a clean rag or tissue
This is very important for the life of your lamp.
Repair
If the fuses are intact, but the lighting still does not turn on, you need to find the cause of the malfunction. To do this, you will need a test lamp, or even better, a multimeter.
It must be said that repairing the low beam on a VAZ 2110 is not difficult - you just need to ring the circuit and find a break in order to fix it.
Below is the optimal procedure:
- Since the low beam relay on the VAZ 2110 is often the cause of a low beam malfunction, you can start checking with it. Using the device, you need to determine whether voltage is supplied to it and whether it is at the output. If there is no voltage at the output, then the relay needs to be replaced.
- If there is no voltage supplied to the relay and there is no voltage at the fuse terminals, then you should check the VAZ wiring from the switch to the fuses, as well as the switch itself.
- If there is voltage at the output of the relay, you need to check whether it is supplied to the lamp connector. Often the cause of the malfunction is burnt or oxidized contacts. If the low and high beams disappear at once, then the ground wire in the headlight may have come loose.
Thus, by checking all the main components along the circuit, you will definitely find the cause of the malfunction. The low beam diagram for the VAZ 2110, which is shown above, will help to simplify this work.
Wiring problems
If you notice that the low and high beam headlights do not light up, then it is likely that the problem is related to the wires. In order to determine such a malfunction, you will need to check all the terminals through which the connection is made, as well as the fuse box. It is quite possible that oxidation of the contacts occurred somewhere or a poor-quality connection was made. This causes increased current in these nodes, causing them to become very hot.
To correct the problem, simply clean all pad contacts with sandpaper or a file. It is also worth checking the headlight switch; the button contacts could also have oxidized.
Healthy! It is better to start searching for such a malfunction with the button, since it is the damaged switch that most often causes problems with the operation of the headlights.
No low beam on both headlights
Situations often arise when problems arise with both light sources during movement. Here, not a local, but a general problem arises. Each specific case must be examined individually.
Problem with steering column switch
To get to the internal parts:
- You need to unscrew two screws behind the steering wheel, three screws below.
- Then remove the soft covering of the space under the steering wheel, which is secured with latches.
- After unscrewing two more screws, access to the switch itself opens, which can be removed by pressing special latches.
If the contacts have melted, then this electrical unit will need to be replaced. This switch can be purchased at an automotive store at a reasonable price.
Simultaneous burnout from overheating
Potholes and potholes under wheels negatively affect the spirals of switched on light sources. They are simply torn apart by sudden shocks. If such a nuisance occurred while driving in the dark, then the driver will be able to clearly see the cause-and-effect relationship between falling into a hole and the loss of low beam. During the day, identifying the cause is much more difficult, since the extinguished light cannot be visually identified immediately. To fix the problem in such situations, you only need to replace the lamps.
During the operation of the car, each owner inevitably faces problems with settings and operation of optics. To reduce the risk of serious troubles, it is better to study the approximate causes of problems and how to eliminate them.
Why doesn't the low beam light come on?
Owners of LADA cars often contact service centers with a complaint that even on practically new cars that have recently rolled off the assembly line, the above-described breakdown of the right headlight occurs, while the left one lights up with both low and high beams in normal mode. However, you should not think that such a nuisance can only affect cars from a domestic manufacturer. Naturally, any breakdown can easily occur on foreign cars.
The fact is that over time, the parts of any used machine wear out, regardless of the brand and country of the manufacturer. If it happens that the low beam on one headlight on your car does not light up, of course, the easiest way is to contact a car repair shop, where an electrician will quickly fix any malfunction. But in this article we will tell you that having minimal skills in working with electrical equipment, as well as free time, it is quite possible to carry out repairs yourself.
Why does it happen that the high beam is on, but you can’t turn on the low beam? Let's look at the main reasons:
- the low beam lamp has burned out;
- the fuse is broken;
- wiring is damaged;
- non-standard reasons.
In each of these cases, you can correct the situation on your own.
If you drive a car, you just need to know how to fix broken headlights yourself, because a situation may arise when you won’t be able to go to a workshop or the lights go out in the middle of the road at night. Therefore, we will consider all the main problems with car headlights and ways to solve them.
