Those who were interested in replacing the rear lights could see that it is difficult to find other rear lights for the VAZ 2110; only different models for the sedan or hatchback are sold. If you are satisfied with the appearance of the rear optics, then you can simply modify them.
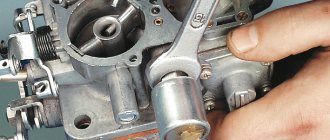
We take out the headlights and remove the windows. I used a hair dryer, used a screwdriver, and used a knife to “pass” around the perimeter of the headlight. You need to heat it carefully, you may melt the glass!
1st revision of rear dimensions
— we cut out rectangular holes in the “black corners” of the lanterns on which the partition is fixed. We install another 5W light bulb there. To make a socket for the lamp, we disassemble the license plate light from the “nine” and take out 2 spring sockets.
We will cut out a platform from two millimeter fiberglass, a little larger than a light bulb. We make a cut for the contacts. Remove the middle part of the foil. We solder contacts and wires to the remaining pads. We collect. We put it all in the lantern and secure it with a screw.
The 2nd revision of the rear lights will improve the light output of the headlights
To do this, you can paint the inside of the taillight of a VAZ 2111 with chrome paint or cover it with foil. I painted it.
For turn signals, you can use 5W lamps without base. Cut holes according to the size of the lamps, and secure it to a piece of fiberglass. For earlier, it’s not bad to get the output. Don't use acid!! I didn't, but I checked. The gain is no greater. It’s easier to install a “yellow” lamp at 25W.
The 3rd modification concerns the headlight lenses. For filters, I used "corners" that are available in office supply stores. I chose red color and uniform transparency. The stencil was made from masking tape. I applied it to the glass and cut it out with a stationery knife.
After that, I glued this “pattern” onto a thick piece of paper and cut it out.
Let's check the converted dimensions (dimensions, brake lights and turn signals):
Thus, reworking the rear dimensions of a Russian station wagon turns dimly lit headlights into a worthy specimen.
By the way, if we talk about tuning the rear optics, then you can look at the LED rear lights.
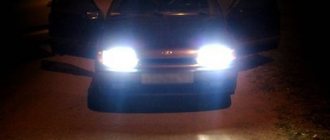
Today we will talk about the most attractive option for tuning headlights on a VAZ 2110 with your own hands in terms of effectiveness - angel eyes . This is an invention of the BMW company, which is actively used by owners of other brands to achieve a similar external result.
To carry out such modifications yourself, you will need ingenuity, some available materials and LEDs.
We will consider the option of installing angel eyes on standard Kirzhach headlights. You will see that there is actually nothing complicated in such tuning.
Tuning
Taping with film
The installation procedure is as follows.
- Remove the Kirzhach headlights. You will need to remove the glass. To do this, insert a flat screwdriver into the corner of the glass, and insert a sharp stationery knife into this gap with your other hand. This will remove the layer of sealant, allowing the glass to be removed. If you can't, just break the glass and buy a new one. It's quite cheap.
- Handle the optics carefully, do not touch the reflectors, and remove any remaining debris. If this is not done, you will soon have to completely change your headlights. And these are already significant expenses.
- Let's try out the tuning option. To do this, attach an LED ring to the lens.
- We correct inaccuracies. Decorative inserts can interfere with, or rather partially block, the glow from the LEDs. They can be trimmed and filed a little. A completely natural procedure for such tuning.
- Installing angel eyes. They are usually glued to the lens. Use super glue or high quality silicone caulk.
- Connect the power. Power to the LEDs must come from the side lights. Another option is to use a fuse and a separate switch.
- Reinstall the headlights. We put the glass back, just use a simple silicone sealant or liquid nails. The main thing here is to prevent the presence of cracks, due to which the inside of the glass will begin to fog up and condensation will be deposited on it. Over time, this leads to a short circuit.
- There is another option for mounting LEDs - not around the lens, but on the mask using silicone. Then the tape needs to provide the shape of a ring. For this, available means are suitable - a bottle, a glass. You just need to fill it with silicone in the selected place on the mask. The connection is similar to the previous installation option.
Available offers
Unfortunately, you cannot find LED rings that are suitable for the VAZ 2110 to create the angel eyes effect in regular auto parts stores. But they are available in numerous online stores. Therefore, there should be no problems with the search.
LED
Just remember that the inner diameter of the ring is 54 millimeters, and the diameter of the outer ring is 70 millimeters. These parameters are suitable specifically for installation in Kirzhach.
Although you may well go the other way - make your own rings from LEDs. You will need a transparent rod filled with LEDs. You will find similar components...in a building materials store. Just keep in mind that they need to be bent into a ring. To do this, use a hair dryer. It will soften the rod. The procedure requires precision handling, but it is quite possible to do it yourself.
The third option is to purchase at least 8 LEDs for each headlight and buy a plastic rod separately. This is the most complex approach and will require bending the rod, connecting the LEDs evenly and getting them to work.
The choice is yours. Go for it! And if you don’t want to take risks or waste time making your own LED rings a la angel eyes, then order them online. There are more than enough offers there now.
Rear optics
When tuning optics, do not forget about the rear lights of the VAZ 2110. For them, using an LED strip or ring . It's amazing how much one small element can really change the perception of a car.
Led lights
In addition to the already discussed option with angel eyes, which can also be installed on the rear lights, some resort to alternative solutions. We offer you one of them.
- LED strip or finished ring;
- Round reflectors, suitable in size for VAZ 2110 headlights;
- High-quality glue or silicone sealant;
- Cylinders for LED rings.
Buying a ready-made set
The fairly strong distribution of the car in question has become the reason that many optical manufacturers are creating special tuning kits. The advantages of this tuning method include the following points:
- Only high-quality materials and modern equipment are used in production.
- The created headlight sets are ideal for installation on a car. In other words, you don’t have to modify the car - installation takes no more than one hour, and you can get by with a standard set of tools.
- The next important point is the fairly large selection. There are several hundred sets of optics that are suitable for installation on the vehicle in question. The choice can be made quite simply - the type of light source, as well as the design, are taken into account.
- The service life of most offerings on the market is quite long.
The above points can be called the main ones. Headlights for a VAZ 2110 tuning cost relatively little, but still creating the design yourself can significantly reduce costs.
Types of light sources for rear headlights on a VAZ 2110
When going to the store to change a burnt-out taillight bulb from a VAZ 2110, a motorist is often faced with the difficulty of choosing what to install. On the counters are the well-known incandescent and halogen lamps. And right there next to the same base it is proposed to buy LED light bulbs. Or you can get confused and even install xenon on the VAZ. So which is better and more profitable?
Replacing lamps in the rear light
There is no clear answer to the question posed. On the one hand, incandescent lamps in VAZ cars, as well as their samples with the bulb space filled with halogen gas, are considered outdated technologies. Such light sources are characterized by unsatisfactory reliability, high heating levels and extremely low efficiency.
On the other hand, the price of such light sources is relatively small in comparison with LED and xenon samples. The advantages include low cost and absence of counterfeits. But the disadvantages caused by high energy consumption and low service life still outweigh.
Types of tail lamps
Therefore, it would be more correct and rational to install LED bulbs in the taillights of the VAZ 2110. The easiest way would be to simply buy a ready-made proposal for the base of the existing lighting. Or you can spend a certain amount of effort and upgrade the taillights with individual tuning.
Content
Optics are necessary to illuminate the road or indicate a vehicle on the road, indicating the direction of movement. Every year, more and more modern equipment and technologies are used, which increase the amount of light emitted, reduce the amount of energy consumption, and significantly increase service life. This is why tuning headlights for the VAZ 2110 are quite often purchased. This car is quite common in Russia and is popular among tuning enthusiasts.
Sidebar: Important: Standard optics are significantly inferior to modern ones: over time, the brightness decreases, the protective glass wears down significantly, the seal is broken, which leads to rapid failure of the lamp.
That is why we will consider all the features of changing car optics to more modern versions.
Tuning rear lights with LEDs on a VAZ 2110
Upgrading the standard lighting system of a VAZ is extremely simple. We will need:
- a set of 5 mm spot LEDs and resistors for them for automotive supply voltage. They can be bought at almost any lighting store;
- plexiglass, from which in the future a blank for mounting LEDs will be made;
- transparent glue moment and superglue;
- silicone, transparent or black.
When purchasing LEDs, do not forget about the concept of color differentiation. This means that, according to technical standards, VAZ rear lights must be red, and turn signals must be bright yellow or amber. Thus, the color of the LEDs is selected based on their intended purpose. The glow should be as bright as possible.
LEDs in the taillights for the “two-wheeler”
To begin, remove the stock lighting system from the VAZ 2110. Using a utility knife, we pass it around the perimeter of the rear headlights, separating them from the car body. Next, separate the outer diffuser of the lampshade from the reflector.
Cut out a blank from plexiglass to the size of the VAZ headlight, where LEDs will later be installed in the drilled holes. You can set a round shape for the new design, or place the backlight over the entire area of the taillight. It all depends on your imagination.
In order to give the finished product a stylish look, the outer part of the glass can be tinted with a special film or varnish. Plexiglass, in order to hide the glue deposits and the wiring hidden behind it, is matted from the front and painted, for example, silver. The finished product is attached back to the car body with Moment glue and sealed with silicone.
Advantages of modern diodes
Recently, diodes have been increasingly used in the production of optics. These light sources have the following advantages:
1. Service life is at least 5-10 years. The design of the diodes is quite simple, and the features of their operation determine the possibility of operation for more than 5 years. 2. Low energy consumption. The design of the car determines that by reducing the amount of energy consumed, fuel consumption is significantly reduced. Also, do not forget that when the internal combustion engine is not running, the lights are powered by a battery. The less energy they consume, the longer the battery will last. 3. Resistant to environmental influences. If ordinary lamps are quite susceptible to high humidity, then LEDs are not 4. When creating complex structures from several LEDs, a rather beautiful look is created.
In general, we can say that there are quite a lot of advantages of diodes. That is why they are used to create modern structures.
Table with technical characteristics
Brand and modification
Other useful modifications to the rear optics of the VAZ 2110
Let's briefly look at what other modifications exist for the stock rear lights on the VAZ 2110. For example, it is possible to move the fuel tank hatch under the rear light cover. In this case, finishing and welding work will be required, as well as work with abrasive tools.
There are a considerable number of ready-made offers for the VAZ 2110 directly from store shelves. For example, branded sports optics from Street Storm or Kirzhach taillights, beloved by the general public. Often, along with the optics, the reflector is also modernized, the brake light is modified and daytime running lights are installed.
Independent design modernization
You should pay attention to the fact that you can independently change the original optics, make it more effective and beautiful. Headlights on VAZ 2110 tuning are quite often painted or covered with a special film. Let's look at the features of optics coloring:
1. You can use paint that does not react to environmental influences. 2. Work should be carried out at positive temperatures. 3. First, you need to decide on the color of the paint - as a rule, it is selected according to the color of the car body. 4. Painting of the protective glass can only be done when the optics are dismantled. Dismantling work can be completed quite quickly: the design of the 2110 car is quite simple; to remove the optics, minor dismantling must be performed. 5. After the optics have been removed, they should be disassembled. First you need to remove the protective glass, which will be painted. 6. The next step can be called covering with masking tape those elements that should not be painted. 7. When applying paint, remember that the protective glass must transmit quite a lot of light. Therefore, paint is usually applied in a small layer. 8. After completing the painting work, you can assemble the optics and install them.
The above points should be taken into account in order to carry out the work efficiently and quickly.