I was inspired by the Chief's panel, but I wanted to build something of my own. The following requirements were presented to the future design: a tape recorder in the usual place, a shelf near the windshield to put cigarettes or, if necessary, put glasses, a tachometer and speedometer in front of your eyes, an ashtray somewhere.
At first, like Chief, I wanted to make it from plywood, but it is difficult to join at oblique angles. That’s why I chose polystyrene, since it sticks easily and firmly, and it’s easy to get free scraps from advertisers. Advertisers recommended Cosmofen+ glue. Expensive of course, but half a tube was enough for everything. Plastic glued at the end breaks anywhere, except at the gluing.
I started by blowing the windshield - I cut two tees into a plastic sewer pipe the width of the car, and drilled 8mm holes every 20mm approximately. The dashboard itself was fenced off so that there was a gap for air near the glass.
I immediately became convinced that the standard motor was not enough for the increased airflow area. The motor from the M2141, as well as the motor from the radiator fan of the Japanese washroom, did not save the situation; there was not enough rotation speed. I found a Japanese snail motor. Rotation speed 5200 (by eye 1.5-2 times higher than the original one). I installed the impeller from Moskvich, iron, with bent blades. It blows brutally. But at maximum speed it is very loud. I had to install the Gazelevskaya pump at the same time, otherwise the stove would immediately cool down.
Then I placed the tape recorder at such an angle that it could be clearly seen. An ashtray with a cigarette lighter from Nissan (150 rubles for disassembly) fit under it successfully. I had to cut a hole in the original panel.
The next stage is the steering column instrument panel. The devices there are those that need to be looked at more often.
The tachometer is a Gazelle type in a KAMAZ body, the speedometer is original, I added a blue LED for high beam (it didn’t turn out well - the LED is too bright, it’s blinding, the diode sticks out far, the needle rests on it at 80 km/h, I’ll redo it in the summer), pressure and temperature indicators . The light bulbs in them are replaced with LEDs, and each of them is duplicated by a buzzer. Very helpful. With a nasty squeak you won’t miss overheating or abnormally low oil pressure. The buzzers are turned off by toggle switches located there. On the same panel there is a green LED for the turn signal, a yellow one for the handbrake, a red one for the brakes, and another yellow one for the headlights indicator (for symmetry). Bibikalka is a button on the turn signal. This is familiar to me from Discovery, and it will be easier to replace the steering wheel. Bibcals from GAZ-24, 2 LF and 1 HF.
On the original instrument panel, the vacated space was taken by an ammeter and a second fuel indicator. As they wrote in the conference, I installed sensors from GAZ-53 and LEDs in the display meters. And in vain. When is it left? tank, they blink on bumps, it's distracting. It will be possible to install relays so that it lights up and stays on until you turn off the ignition. Next to the voltmeter there is a small toggle switch for switching the voltmeter between the main and additional batteries. About them below.
I glued the panel itself piece by piece, trying each one in place. The task is long and tedious. The finished structure turned out to be flimsy; it was reinforced at the back with aluminum corners. Then I covered it with polyethylene foam and vinyl leather. The right side is not finished yet. Overall I'm happy with the result, but in cold weather it creaks and is annoying until it warms up.
I bought the toggle switches at radio goods, 15A. Bottom row: 1.dimensions/headlights 2.heater/heater with gazelle pump (via BMW solenoid valve) 3.heater fan fast/slow 4.reserved for the fan of the 2nd heater 5.radiator fan automatic/manual (I install the fan for the winter , summer native)
Top row: 1. headlights 2. front fog lights 3. rear fog lights 4. backup fuel pump from ZAZ 5. second radiator fan (installed in front of the radiator). Reversible just in case. Suddenly, for example, you need to blow heat on the garage lock.
Bottom 2nd cigarette lighter. The choke handle also had to be redesigned; now it can be unscrewed, so when removing the panel you won’t have to pull out the entire cable. The cable, by the way, comes from the gas pedal from the Japs.
UAZ 469 Constructor › Logbook › Installation of panel 31029 in 469 and stove 2108
Hello to all friends.
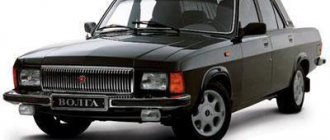
Here is the first entry. And straight to the point. The panel from the 29th Volga had been lying around for a long time and seemed to be asking for a place in the Constructor salon. But there was one thing - time and the need for a car in the summer (there are all sorts of mushrooms and berries), but now it’s the off-season and there’s a lot of time to get things done. I'll tell you a little about the past. The original engine carried it very well, did not overuse oil, and the consumption was enviable for UAZs. But it did not please with the stability of the XX at all, it constantly stalled, then on the contrary, the speed soared (((Besides, the clutch was dying and the transfer case was howling, the output flanges (especially the rear) were hanging out and the units needed bulkheads urgently. And the idea to install The 406th engine appeared along with the acquisition of the donor 105th Volga. A new bellhousing from the 409th was purchased and everything was waiting for installation. Oh yes, before dying, the donor Volga made a revolution, after which it tried to drive again. But due to a leaked coolant, the engine soon boiled and stopped running, and then completely stalled. Subsequently, after disassembling it, it turned out that there were small scuffs on the cylinder walls and the cylinder head was misaligned. They sent it for grinding. 0.9 mm was removed. Just the day before yesterday, they took away both the cylinder block and the crankshaft for boring and grinding plane. We are waiting for the block, but the grinder returned the knee because after 170 thousand mileage of the donor Volga, not only were there no visual signs of wear, but measurements showed that all the journals were within factory tolerances and did not have an ellipse, which could not help but to please. For boring, we bought a Kostroma piston for the 406 engine with pins and rings, and looking ahead, we bought standard ZMZ liners and a set of gaskets for assembling the internal combustion engine. So, what am I talking about?! We've gone a little far from the topic of the panel. In general, the installation began with removal. Removing instruments, removing all old wiring and all sorts of buttons and switches. I even removed the steering wheel for convenience. Now, using a grinder, we cut out the original panel, the stove body and, in general, everything unnecessary. And we get the following. Now let's put the panel in place. So - the width is a little smaller, but it’s good, but the depth is too big. We turn on the grinder and saw, saw, saw. Only sometimes we use it for trying on. And now we get something similar to a panel for an UAZ. When everything is adjusted, you need to figure out how to secure it. The decision came quickly. From the corner we cut out 4 blanks 1-1.5 cm wide and attach them to the windshield frame with the shelf up at the level of the future position of the panel. Now, on top of the passage through the panel, we drill small holes in the corners and screw in the first 4 self-tapping screws securing the panel)))
Let's start with this first. Now we need to adjust the stove to the installation location and then just assemble a rigid frame under the panel to which we will attach the bottom of the panel, the stove and the fuse box. Since there was a stove from 2108 lying in the garage, we’ll try to install it. The first fitting showed that it is very deep and sticks out strongly from the panel, resting against the engine shield. Having studied its design, we come to the conclusion about changing the upper air supply to the lower one just before the radiator, which makes it possible to cut off excess from the stove. On the image
shows a cross-section of the stove with its operating principle. I used a red line to cut off what was unnecessary, a black line to add to the stove body, and a blue arrow to indicate the direction of air supply to the stove. It is clear that this does not fundamentally change anything about her.
Technical tuning: engine
There are several ways to modernize a car engine, and here are some of them:
- Tuning the UAZ engine is a necessity since it is carburetor. An ideal replacement would be the injection ZMZ-409.10. The characteristics of this engine allow you to travel long distances. Volume 2.7 liters, power 128 hp, which means a reduction in fuel consumption: from 15-17 liters per 100 km with a standard engine to 11-12 with an injection engine.
- If the goal of tuning is to reduce fuel consumption, then it is recommended to disable the front axle. Please note that if you turn it off, you will lose the ability to travel off-road. But do-it-yourself modification of the UAZ 469 does not end there; to reduce consumption, you can equip it with a gas-cylinder operating mode.
- To reduce the cost and time spent on the engine, it is recommended to install a diesel engine, which is common in UAZs. It has a power of 90 hp, enough for off-road travel.
But changing the engine to a foreign one is not recommended. This will require dismantling the front part of the car, investing a lot of money and time, with the exception of the Polish-made Andoria 4 CT 90 engine. But it is better to use domestically produced parts.
Chip tuning
Having replaced the engine with an updated version, you need to move on to a new stage of modernization - chip tuning, in other words, software adjustments. To do this, we connect the electronic control unit to the computer to install the necessary programs.
When connecting, adapters with diagnostic connectors are used. To avoid burnout of computer ports, it is recommended to use adapters with optical isolation. The result of tuning will be improved vehicle performance and correction of factory errors.
Carrying out chip tuning requires considerable experience and skill, so if you have not previously done such a reinstallation, you should contact a service specialist.
Chassis tuning
UAZ Patriot needs tuning of the chassis and suspension. But at this stage difficulties arise. When replacing standard wheels with larger ones, the front axle will need to be shifted. Without doing this, you will get damaged rubber that will rub off on the metal of the body.
When tuning a UAZ with your own hands, be careful when trimming the arches, this will weaken the strength of the body and suspension. But when carrying out lifting, you will have to work hard to find a suitable kit. The minimum lift is 75 mm, with this lifting size 33 wheels will fit perfectly.
Instead of wheels, tracks for driving on snow
But if you do not have experience in tuning UAZ, it is recommended to take the simple route. Instead of the lift, place spacers under the spring earrings. It is necessary to replace the cardan shafts to reduce vibrations and noise; shafts coated with polymers are suitable for this. Their advantages: long service life, no need for lubrication, reduced backlash.
To improve the chassis, the tuned UAZs have eight shock absorbers instead of the usual four. This helps eliminate pitching when driving off-road, and will also prevent damage to the suspension when driving fast. Having completed all the chassis modifications, you will receive an improved car, ready for serious travel.
Stove (heater) UAZ Hunter 3151
By ordering tuning of your UAZ at our Autotechnical Center, you are turning to professionals and fans of their craft! We love this brand of car just like you, and we also know how to improve this car for you. On our website you can read about tuning options for UAZ cars and see what we can do. With us you can do tuning of any UAZ model . Call us right now if you already know what you want to do with your car or check out the popular UAZ tuning .
| UAZ Hunter | UAZ Patriot | |||
| Job | spare parts | Job | spare parts | |
| Body lifting | 10050 | 5000 | 10000 | 4000 |
| Suspension lifting | 7050 | from 10000 | 7000 | from 17000 |
| Installing the steering damper | 2550 | from 5500 | 2500 | from 5550 |
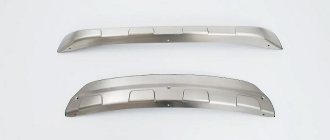
| Installing the front power bumper | 4500 | from 20000 | 4200 | from 20000 |
| Installing the rear power bumper | 4500 | from 20000 | 4000 | from 20000 |
| Installation and production of thresholds and protection of the gas tank with reinforcement | X | X | from 20000 | 6500 |
| Body sound insulation | 25000 | 15000 | 30000 | 17000 |
| Installing a reinforced front axle cover | 1000 | 5500 | 1000 | 5500 |
| Winch installation | 2100 | 4000 | 2000 | 4000 |
| Winch connection | 2550 | from 28000 | 2500 | from 28000 |
| Breather output | 3500 | 3000 | 2500 | 3000 |
| Snorkel installation | 6000 | 7000 | 5100 | 7000 |
| Installation of steering rod protection | 2100 | from 4500 | 2100 | from 4500 |
| Changing the caster angle | 5100 | for spring car + 2100r | 5100 | for spring car + 2100r |
| Front axle strengthening | 13500 | 1000 | 13500 | 1000 |
| Reinforcement of the rear axle | 13500 | 1000 | 13500 | 1000 |
| Self-block installation | RZM/RPM 11500 | 18000 | RZM/RPM 7000/9000 | 18000 |
UAZ car tuning includes the following services:
Installing the dashboard on a UAZ loaf
The website UAZ-Buhanka.ru is dedicated to UAZ loaf or tablet cars, as the car is popularly called.
UAZ Bukhanka enters the 21st century
Not long ago, European automobile publications conducted tests of manufactured vehicles. The result was not entirely reassuring, since studies showed that the Russian UAZ-452 is one of the most poorly assembled cars in the world.
Ford Kuga American car for Ukrainian roads
We can talk for a long time about the advantages of the Ford Kuga car. He has a charismatic appearance, clear, chrome stampings. Pleasant appearance of the front end with a massive radiator grille, stylish lighting with bi-xenon and LED filling.
Large wheel arches with 18-inch wheels in a new style.
UAZ Patriot: features, pros and cons
The new UAZ Patriot was created on the basis of the UAZ-3162 Simbir. The updated model received all modern advantages: air conditioning system, updated design, heated windshield, heated seats, multimedia parking system.
Around the world trip in UAZ Bukhanka
Fans of the legendary UAZ Bukhanka received what is called the “red day” of the calendar. The date October 16, 2021 stands out from the gray everyday life in that it was on this day that the adventures known as “Around the World on a Loaf” began.
UAZ Bukhanka 2021 (UAZ-390995)
By 2021, Bukhanka (officially a cargo-passenger UAZ) has already been retired several times.
However, the demand for an unpretentious, cheap, domestic car in the vastness of our Motherland, especially in the outback, is so great that every time the Loaf was reborn like a Phoenix bird.
UAZ car lift (UAZ body lift, UAZ suspension lift)
One of the basic elements of tuning a car, especially an SUV, is lifting, i.e. lifting the car relative to the road surface. There are two types of lifts: body lifts (body lifts) and suspension lifts. Below are more details about these options. The simplest and safest way of tuning is body lifting or UAZ body lift , which is performed using spacers between the body and frame of the car. The main way to increase the vehicle's cross-country ability is to lift or lift the UAZ suspension . There are many ways to adjust suspension play, depending on the design of the vehicle. But suspension play affects the stability of the car, increasing its center of gravity, thereby reducing roll and making the car prone to rollover. To eliminate this problem, a method of widening the track using wheel spacers is used. And most importantly, when lifting the suspension, the angles of the driveshafts change.
How to strengthen
Many car owners strengthen the springs by installing additional sheets. It is performed to increase the vehicle’s carrying capacity, improve driving performance and cross-country ability. Some craftsmen install reinforced parts after old suspensions are deformed and cracks appear when lengthening or lifting the body.
Reinforcement may affect stiffness.
The problem is eliminated by additional springing the springs and installing shock absorbers on the UAZ. When the body is raised higher, the throttle of the gas pedal is adjusted.
Blueprints
When lifting the body and lifting the suspension, in order not to damage the design of the springs, spacers are installed between the axle and the spring. They must be installed correctly, so first determine the installation location, calculate the distance between the middle part of the spring and the support point on the front or rear axle. Before carrying out work, it is better to design a drawing of the spacers.
Strengthening procedure
To repair a spring, you must follow the instructions:
- Raise the rear of the car so that the wheels are free. For insurance, install a beam, support or jack.
- Remove the wheel.
- Unscrew the block cups and stepladders.
- Remove the shock absorbers.
- The bridge is being lowered.
- Dismantle the old assembly, freeing it from the clamps and center bolt.
- When repairing spring gaskets, they are disassembled into separate sheets. The elements are sorted taking into account the size of the inserted plates - from small to large. To avoid distortions, the sheets are tightly pulled together and connected with a center bolt.
- When replacing a rear or front part with a new one, first try it on, place it in technological bowls on the frame, and support it with a wooden beam so that it does not hang down or jump out during installation. The overlay is secured with stepladders, and the bowls are positioned. The bridge is raised so that the knot sits on the cushions. The wheels are flanged, the bowls are mounted back.
To check the correct installation of the new unit, load the rear of the car, so it will settle into place better. Testing of reinforced parts is carried out at low speed.
Interior trim
This is the most common way to improve the interior decoration of a UAZ Hunter. Craftsmen apply new cladding instead of the old one or just the standard factory one. The most common way is to purchase ready-made sets of sheathing blocks. But more interesting is the method of cutting and adjusting skins from different materials yourself. This is done like this:
This is interesting: Installation of electric windows on a VAZ-2107: 5 stages of assembly, tips for choosing a device
Important! When removing old trim blocks, it is better to number and mark them similarly on the body! When making new ones, mark them accordingly.
Another option is to stretch new elements over the old ones to increase sound insulation and retain heat when traveling in cold weather. In general, sound insulation is one of the main problems of this model. Just like the previous UAZs. Therefore, when installing the sheathing, it is better to add an extra layer of sound insulation. She will never be a problem here. And since the UAZ Hunter is in no way classified as a “racing” model, the extra weight of a couple of kilograms will not play a role.
The materials most often used are leather, leatherette and dense fabrics. Each of these materials looks very impressive in the interior of this car.
Features of the modification with multifunctional control
Variations with the car body did not greatly affect its technical equipment. But when changes affected the governing bodies, they underwent modernization:
Reason for modernization
For reference: according to pan-European safety requirements, when activating light and sound devices while driving, the driver of the vehicle must not remove his hands from the steering wheel. Based on this principle, the wiring diagram for the VAZ 2112 and other models of the Tolyatti Automobile Plant is built.
On cars of the UAZ family, the windshield wiper control unit was located on the instrument panel. And since this did not meet safety requirements, then on all subsequent modifications:
Self-upgrade
Cars of new releases already have a multifunctional control unit in the database. But owners of early editions can re-equip the car with their own hands to meet modern safety requirements.
To do this you will need:
Advice: the cost of doing it yourself is low, so you should not neglect it when operating UAZ vehicles in dynamic road conditions - on city highways or public roads. As a matter of fact, independently replacing the UAZ wiring on older models will also eliminate its failures.
The work algorithm will be as follows:
Redesign of the instrument panel and beard
Well, here the fantasy just plays out with might and main. The fact is that there is quite enough free space in the interior of the UAZ Hunter, and therefore Russian “homemade cars” are practically unlimited. Instrument panels are given different shapes. It can become softly rounded, as in elite models of executive sedans, and harshly angular, as in military jeeps of Western armies. The photo shows options for such alterations. A similar effect is achieved with the help of skillful hands and the availability of materials such as:
This is interesting: How does a car battery work?
Otherwise, accurate calculation and neat work.
Attention! When selecting the coating for the new UAZ Hunter instrument panel, you need to immediately calculate it so that it is in harmony with the interior trim!
Colored wiring diagram for UAZ 452 with description: Loaf Loaf friend, comrade and Tablet
The 12V network has a fuse box (Fig. 1, 3).
After use, the sound system, lighting, directional light, supply and exhaust ventilation, as well as additional equipment from the cigarette lighter should be turned off to avoid discharging the standard battery.
The following are powered from a 220V network:
| Current strength, A | F1 | Switch for electric washbasin cistern and interior ventilation |
| 15 | Cigarette lighters | |
| 5 | Directional light switch | |
| 5 | Interior lighting switch and switch block button illumination | |
| Reserve |
| Contact designation | Protected Circuits |
| I | ABS power system |
| II | ABS power system |
It is strictly prohibited to start the car engine when an external 220V electrical network is connected.
On UAZ cars of the wagon layout models UAZ-374195, UAZ-396295, UAZ-396255, UAZ-390995, UAZ-390945, UAZ-220695, UAZ-330395 and UAZ-330365, all important electrical circuits of the on-board electrical equipment system are protected using fuses of various types. denomination All fuses are collected in a single fuse block.
Fuse and relay block for UAZ wagon layout, circuits protected by fuses.
The fuse box is installed in the cab, on the front panel rail extension under the instrument panel to the left of the driver. In addition, on UAZ-396295 ambulances, UAZ-396255 utility vehicles and UAZ-220695 minibuses equipped with an ABS anti-lock braking system, an additional ABS system fuse block is installed. It is located on the bulkhead behind the driver's seat.
Electrical circuits protected by fuses on a UAZ wagon layout with a ZMZ-4091 Euro-3 engine.
F1 at 10 amperes, pin I - Warning lamp unit, hazard warning lights, speedometer, instrument cluster, ABS system sensors, if installed on the vehicle. F1 for 10 amperes, contact II - Reserve. F2 10 ampere, pin III - Alarm, sound signal. F2 at 10 amps, pin IV - Recirculation pump, heater switch, reverse light switch. F3 10 amp, pin V - Integrated microprocessor engine control system, ignition switch. F3 10 ampere, pin VI - Ignition switch, thermobimetallic fuse.
Electrical circuits protected by fuses on a UAZ wagon layout with a ZMZ-40911 Euro-4 engine.
F1 at 10 amperes, pin I - Warning lamp unit, hazard warning lights, speedometer, instrument cluster, ABS system sensors, if installed on the vehicle. F1 for 10 amperes, contact II - Reserve. F2 10 Amp Pin III - Turn Signal Switch, Hazard Light, Plug Socket. F2 at 10 amps, pin IV - Recirculation pump, heater switch, reverse light switch. F3 10 amp, pin V - Integrated microprocessor engine control system, ignition switch. F3 10 ampere, pin VI - Ignition switch, thermobimetallic fuse.
UAZ hunter tuning for Gelendvagen
The connection is made using a transfer case, which also houses the reduction gear and differential lock. The suspension, both front and rear, is dependent. The rear is on two springs, the front is spring, with telescopic shock absorbers.
The car was adapted for urban use - the interior became less spartan. The dashboard became “soft”, new seats appeared, the windows in the doors became sliding (in previous versions they did not go down). The car received new bumpers. Front bumper with PTF installed.
The UAZ plant has repeatedly announced the withdrawal of Hunter from production, but each time this only contributed to increased sales. There are currently 2 versions of Hunter available: Classic and Trophy, which is distinguished by pre-installed steering rod protection, gearbox and transfer case protection, and 16″ alloy wheels (“Trophy” design).
Exterior
The car is equipped with a station wagon with five doors and a hard metal top. The appearance, compared to the prototype, has not undergone fundamental changes. This is a military SUV, adapted for work in the city and rural areas.
It is distinguished by characteristic rectangular contours and minimal external creativity. But considering that the car is designed to travel on difficult terrain, external modesty is justified.
The body structure has five doors. The radiator grille is made in the form of two stripes, on the sides of which there are round, slightly protruding headlights. On top, behind the hood, is an air intake cover that is adjustable from the cab. Tow hooks on stamped steel front bumper. On the side, to the left and right of the windshield, there are repeaters made of yellow plastic.
Narrow doors open 90 degrees. External door awnings. Side mirrors at speeds over 100 km. per hour they sometimes try to change the position on their own. The presence of windows along the perimeter creates panoramic visibility.
The rear part of the body is vertical with one door on which the spare wheel is mounted. Above the rear bumper there is a block of vertical rectangular headlights. External minimalism, however, opens up new horizons for tuning enthusiasts.
External tuning of the “Hunter”
The advantages and disadvantages are inherent to the machine. Therefore, “Hunter” is suitable for modeling and interesting modifications. For this vehicle, a necessary modification will be the installation of a sunroof in the cabin roof. This will help eliminate the problem of ventilation and the problem of reducing temperature in hot weather.
It is better to buy a finished aluminum hatch in a store and make markings on it for cutting out the metal. It is better to cut a steel roof with a grinder, not forgetting to cool the seam with water, and first remove the sheathing. It is better to perform the work of installing the hatch with an assistant, using sealant and sealant.
Body kits that expand additional functions can be made independently, if you do not strive for a presentable appearance. Otherwise, it is better to buy professionally designed body kits. The requirement for body kits is to be durable and not bulky. Power body kits are designed taking into account the installation of a winch and an increase in the wheel format to improve cross-country ability.
The specifics of the SUV require it to be equipped with a special expedition luggage rack. To do this, a frame is welded from the profile and reinforced with metal mesh. Then the fasteners are welded for installation on the roof of the car. Additional lighting equipment is installed on the trunk.
Installing and connecting music in the cabin
To one degree or another, it is difficult to do without this with any approach to improving the interior (starting from ascetic options and even more so in the case of serious alterations). Car audio and multimedia in the UAZ are real, although in most cases it is extremely irrelevant, taking into account the peculiarities of off-road operation. Therefore, during internal tuning, in any case, you will have to deal with the installation of music. Moreover, not only the head unit of the system itself, but also all the accompanying car audio components - amplifiers, acoustics, subwoofers and other “bells and whistles”. Usually a simple UAZ gets by with a minimum of such equipment, but there are exceptions that amaze with the originality and power of the equipment.
A simple way to mount broadband acoustics in doors.
Various aspects of this type of modification can be found in the Car Audio section of our article catalog.
Video on tuning the interior of the 469th UAZ / Hunter
Video selection on internal tuning in UAZ showrooms. Work of varying degrees of complexity and material costs (cost of materials, spare parts and additional accessories).
We will collect more videos, and not only on the topic of salons, in the sectionVideo on tuning UAZ 469, 3151 and Hunter.
And the latest photos with descriptions can be viewed in the UAZ Tuning section, or in the UAZ 469 tuning category of our photo album. Enjoy watching!
Real photos of internal tuning
You can find other useful materials using the links below.
You can view all articles on the topic Car tuning - photos online on one page by clicking on the link Photos on tuning UAZ models 469, 3151 and Hunter. Even more useful information
Popular improvements
Stylish interior of UAZ
Standard tuning of the interior of the UAZ Patriot and UAZ Hunter involves replacing the factory seats with more comfortable ones. With such modifications, the steering wheel is changed and sound insulation is carried out. If necessary, install an additional interior heater, since the standard one is not capable of heating these SUVs well.
More expensive tuning of the interior of the UAZ Patriot and UAZ Hunter includes:
- body lift;
- replacement of the cooling system radiator;
- installing a new battery;
- transmission replacement.
A necessary and important procedure for this car is to carry out insulation work. It should be taken into account that the cabin filter of any UAZ model needs to be replaced, since the standard one is not able to fully perform its functions. The heating unit can only heat the front part of the SUV, so it is being replaced with more modern devices.
Replacing or altering the dashboard
How to make a dashboard with your own hands?
This instrument panel can be purchased from sellers of tuning parts and accessories. It seems that the choice of alternative plastic dashboards for the UAZ-469 in online and online stores is relatively large. And if you search, you can find some pretty decent panels.
Additional or alternative devices
Usually, when it comes to tuning the dashboard and dashboard , quite often the installation of additional auxiliary sensors and instruments takes place. Moreover, these can be not only purchased tuning devices, but also instrument indicators from other car models. And not necessarily foreign cars. Spare parts from domestic cars are often used.
You can read about what to choose and how to install it yourself correctly in articles on the topic Additional equipment.
Modern modernization
The higher the better
Initially, the dimensions of the future structure and the distance at which the frame will be located from the body are determined. This figure should be within 50-100 mm. The next step involves making a spacer based on the selected elevator height. For this purpose, a special square profile is used. The dimensions of its sides should be 100 mm.
12 blanks are cut from the profile. The height of each product is 120 mm. 24 squares measuring 100x100 mm are cut out of a metal sheet 2-3 mm thick. They are welded onto profile sections. The resulting cubes are irregular in shape. At the ends of each spacer, through holes with a diameter of 10 mm are made. The UAZ 469 frame, like the UAZ 3303 frame, acts as the main element of the manufactured structure. Bolts, nuts and washers are used to secure parts. You can buy them at an auto store.
To prepare the body for upcoming work, you will need to disconnect the battery by placing chocks under the wheels. Unscrew the bolts securing the radiator to the frame. If the UAZ 31514 is carburetor, then disconnect the drive rod. Then unscrew the bolts that secure the body to the frame. To lift a UAZ 469 or UAZ 3303, you will need a jack and wooden stands.
UAZ 469 interior reupholstery
Also among owners of a popular domestic SUV, a fairly popular area of internal tuning is changing the upholstery of some interior elements or the entire upholstery, including the ceiling, side panels and doors (sometimes the dashboard and steering wheel). In this case, various modern and classic materials are used for upholstery: fabric, Alcantara or leather.
We recommend reading more about the intricacies and details of this type of work in the section Reupholstering the interior.
Source
troubleshooting
On any domestic car, problems periodically arise in the operation of electrical equipment. If you notice that the UAZ wiring is not working correctly, you need to diagnose it and check all the elements. If there are any malfunctions in the operation of electronic devices, first of all you need to check whether the fuses in the mounting block have burned out. If everything is fine with these elements, but the equipment still does not function, for example, if we talk about optics, then you need to check whether the light bulbs are working. If the lamps themselves are working, it is necessary to test the electrical part using a tester (the author of the video about testing car wiring is Ramil Abdullin).
If the Loaf refuses to start at all, you need to do the following: