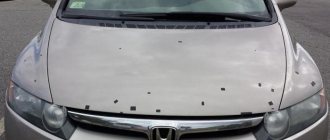
Over time, the environment does not have the best effect on the car, which is why it loses its visual appeal. Painting the body of your car will help fix this. Let's try to figure out how difficult it is to do this on your own.
The process of successful painting depends on whether you have the necessary materials, tools and, of course, experience.
The technology of work includes certain stages, which we will discuss below.
It all starts with preparing the room and tools. The place where painting will be carried out must be clean, as dust can affect the quality of the result. The hose from the paint gun connecting to the compressor must be clean, otherwise dirt from it can ruin the painted body.
The next preparation step is setting up the spray gun and thinning the paint.
Before starting work, we advise you to practice using the spray gun on any unnecessary part. Since for successful painting you need to have the skill to work with it, be able to hold it correctly, direct it and maintain a certain distance.
Tips for working with a spray gun
During painting, the torch of the tool should always be perpendicular to the surface at a distance of 15-25 cm. In order not to constantly calculate these centimeters, we suggest holding the spray gun at a distance of an outstretched palm from the body.
The hand moves freely. The trigger is pulled while the gun is not yet on the surface to be painted. An already formed torch falls on it. If you are painting a pair of adjacent parts, then during the painting process you need to release the trigger at the end of each pass.
Keep the trigger pressed while spraying. The gun moves in one long motion to the opposite side of the part. The trigger is then released, which stops spraying, but you must continue to move the gun about 5 cm. After this, the movement is carried out in the opposite direction with the trigger pressed. Half of the torch moves downwards.
Hold the gun in the correct position and at the correct distance from the surface. Move it at the same speed. This will allow you to achieve the highest quality results. The compressor must produce a certain amount of air for the same amount of paint. A change in pressure will affect the uniformity of paint application (this will be especially noticeable when using metallic or pearlescent paints).
Do not turn the spray gun at the end of the passage. This method is used only in the case of transition painting. In other cases, this will lead to excessive pollination.
Abrasive grinding
So, let's move on to the next stage - abrasive grinding. To understand what its essence is, you need to understand what an abrasive is in general.
Abrasive substances are a material that has high hardness and density, which allows it to be used for polishing and grinding, honing, cutting materials, and finishing. In addition, it is widely used in blank production, as well as final processing of a variety of non-metallic and metallic materials.
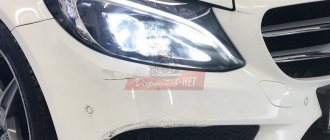
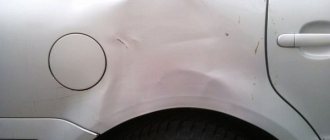
For complete car painting, abrasive grinding is an extremely important step. Among experts, it is generally accepted that the success of the entire campaign to change the appearance of your car depends more than sixty percent on the quality of the polishing stage using abrasives. After all, if you do not take this process seriously enough, the consequences can be extremely unpleasant. So, for example, after a couple of months, having arrived at the car wash with a good paint coating, you can leave with entire “islands” of fallen off coating.
[goo2]
Therefore, the old coating must be removed right down to the metal. First, you need to remove layer by layer with circular movements, without pressing hard: varnish, paint, primer. During the process, it is also necessary to use a sanding machine for particularly inaccessible parts of the coating, as well as to ensure that the sanding is performed at a high quality level. As soon as there is no old coating left on the car that requires painting, you need to move on to the priming stage. But first you need to putty the problem areas of the body.
Abrasive grinding
https://youtu.be/vXeeMOPVouk
Painting process
Corners and edges are always painted first, as they are the most difficult areas. It is better to paint them from a closer distance (3-5 cm less). This will reduce the width of the torch. You should also move the spray gun faster to avoid the formation of smudges.
When painting raised surfaces, hold the gun perpendicular to the surface. In this case, the gun must follow the shape of the bends to achieve uniform painting.
Painting the edges and corners is followed by painting the main surface of the body. Each spray pass overlaps the next by approximately 50%. With this approach, the paint will be distributed more evenly. A smaller percentage of overlap may result in visible streaking.
Let us separately consider how painting a vertical surface occurs. You need to start from the top. In this case, we aim the middle of the torch at the edge of the panel, that is, the nozzle is at the level of the upper edge of the panel. Some of the paint from half the torch will fall onto the masking paper.
We make the second pass in the opposite direction, the nozzle is directed towards the lower edge of the already sprayed paint. So, 50% of the second pass overlaps 50% of the first, while the second part of the torch covers the unpainted surface. Then the work continues according to the same pattern, releasing the trigger at the edges of the body and gradually lowering the gun down. The final pass is made halfway outside the surface of the part.
Do not fill the tank of the spray gun completely with paint (it is better to do it half or 1/3 full). Otherwise, it will make it more difficult to control the spray gun, as it will become heavier and less maneuverable. In the future, this will affect the quality of coloring. Plus, there is a risk of spilling paint from the barrel.
Tips and tricks on how to paint a car yourself
It is not always possible to paint a car correctly with your own hands right away, since experience plays an important role. Professional painters highlight some additional tips:
- Car painting is carried out only after careful treatment of the body;
- body repair and car painting are interrelated concepts; without preliminary repairs, the paint will not be able to hide imperfections and defects on parts;
- A worthy replacement for car enamel is rubber paint for cars, which prevents mechanical damage and is resistant to moisture penetration. It is a relatively new direction, but it is gaining momentum;
- It is important to choose the right degreaser for your car;
- polishing paste comes with different characteristics: removes scratches of various depths, used for plastic, metal or rubber, used for aluminum or metal bodies, etc. When choosing, you should take into account all the features of the composition, then you will be able to create the best look for the car;
- the ideal and attractive appearance is formed from many parts: interior design, quality of the body paintwork, type and condition of the wheels. The easiest way to restore a car's exterior, besides painting the body, is to paint the wheels.
The painting procedure requires experience, otherwise it will take a little longer, but even beginners can create a high-quality paint job with the proper level of care and careful preparation.
Why do you need to release the trigger at the end of the passage?
The trigger is released before the panel border in order to avoid the formation of smudges on the edges of the part (as a result of the overlay of layers of paint). This also helps prevent paint from getting onto the adjacent panel.
Release the trigger at the end of each pass and when the gap between panels is reached. This method will help avoid smudges, minimize over-pollination and save materials.
The spray gun must be in motion before the trigger is pulled and when the trigger is released.
- If we consider this process in more detail, the algorithm of actions is as follows:
- We begin passing beyond the boundary of the part, press the trigger halfway, so that only air comes out (this will prevent a sharp release of paint when pressed fully).
- When the spray gun reaches the edge of the panel, press the trigger completely to spray paint.
- We release the trigger halfway, stopping the flow of paint when the gun reaches the other edge.
- Continue moving about another 5 cm.
- We repeat the sequence.
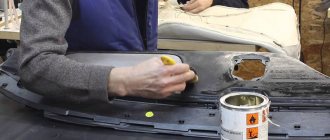
High-quality surface degreasing
This process is one of the most important stages of painting. After all, the durability and reliability of a complete car paint job depends on high-quality cleaning of the car surface from various greasy stains and dust. Therefore, we carry out cleaning very carefully and slowly using compressed air and a special solvent. But don’t get too carried away and rub, as they say, ad infinitum. The result of such excessive zeal can be the dissolution of the surface to a terrible state, from which even complete painting of the car will not save.
Surface degreasing
How many coats of paint should I apply?
Depending on the color of the car and the type of paint itself, the number of layers will vary. When using varnish and two-component paint, which is applied without varnish, 2-3 layers are usually applied with drying between layers.
Low coverage colors and metallic colors are usually applied in more layers.
First comes a thin binder layer, which provides a good base for subsequent layers and reduces the likelihood of smudges. It will be better if it remains a little sticky. It usually dries in 1-2 minutes. Thicker wet layers are then applied.
Tools and materials for painting work
Before you paint the car yourself, you should prepare the tools and materials that will be necessary for the work. Walking or driving to buy individual materials is inconvenient and impossible to create a high-quality layer.
Bosch PFS 55 spray gun
Before starting work prepare:
- spray gun with compressor;
- Bulgarian;
- grinding and brush attachments for a drill, preferably for a grinder;
- sandpaper for manual sanding;
- surface degreasing agent;
- metal putty, especially if there is damage to the body;
- primer;
- auto enamel;
- varnish;
- solvent for preparing paint;
- finishing polish.
Painting a car of decent quality is possible only with a high-quality spray gun and a compressor unit. Do-it-yourself auto painting without a specialized tool with an electric spray gun for household use requires a considerable level of skill and experience. The best option is to borrow or rent professional equipment.
HYVST pneumatic spray gun with top tank for painting cars
The grinder is on the list due to the need to remove the old paintwork, remove pockets of corrosion and polish. If you have a choice of tools, it is better to take a lightweight angle grinder that supports rotation speed adjustment.
Paint, varnish and primer must be combined in the best way; products from the same brand will help improve quality, otherwise there is a risk of unwanted chemical reactions. When using metallic paint, the most attention is paid to the shade of the base paint.
Interlayer drying
After each coat of paint, it is necessary to take breaks to allow the solvent to evaporate. If you wait insufficient time, the solvent will remain in the bottom layer. Once dry, this will cause it to start to come out, forming defects.
Manufacturers of paints and varnishes usually indicate the required drying time at a certain temperature. If the ambient temperature is lower or there is poor air circulation in the room, the interlayer drying time should be increased.
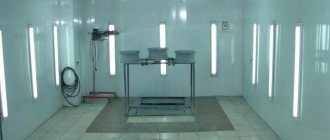
Tuning and repair is a complicated matter
We strictly follow the technological chain, ensuring thorough leveling of the surface and subsequent uniform application of paintwork. We also offer an urgent painting service. It becomes possible thanks to the use of modern drying equipment.
All work performed is provided with a long-term guarantee, and both preparation and painting of the car are carried out in a special painting and drying chamber.
Technology for painting a car with full paint (and tips for its execution)
The sequence of actions should always be planned in advance. This will help eliminate the formation of dust on the surface, as well as minimize the number of unnecessary movements and time during the painting process.
As mentioned above, first of all we paint over all existing edges and corners.
There are a large number of different paint schemes used. Let's look at two of the most popular ones below.
1. Painting, starting with the roof with pillars, then the front door and then all the way around.
Large parts, such as the roof or hood, should always be painted entirely at once. Do not leave the painted half on for a while. Otherwise, this will lead to the formation of dust on the dried surface and visible streaks at the junction of the two parts.
Some people leave the front door open so they can circle around and end up next to it. In this case, dry dust will not fall on the already dried door paint.
To make painting the roof easier, you can use a stand (a stool, for example).
2. Paint the entire side of the car and then move along the body, using long passes with a paint gun.
With this method, you don't have to constantly press and release the trigger, and the paint layer is the same everywhere. This is the fastest and most productive way of dyeing. When using it, the spray gun is used with maximum paint supply.
The room in which you are painting must be of sufficient size. After all, you need to have access to free movement along the machine without any delays, since the gun needs to be moved at the same speed.
This method of painting is not suitable for everyone, since for it you must have the skill of painting in this way, exactly blocking half of the passage with the other.
Varnishing and polishing
Creating an attractive appearance after covering with base paint is not a complete procedure, since varnish is applied on top of it. They cover bodies in 2 layers to create a better look and protect the paint from damage. A transparent composition is more difficult to level, because unevenness and errors are difficult to see, so you have to check the result by touch.
Car varnishing and polishing
After crystallization of the varnish, it is better to polish the paintwork, then the car will get a finished look. To perform the procedure, abrasive paper with fine grain is used. Manually or using grinding equipment, the coating is brought to a glossy state. During the polishing process, a special paste is used.
Incorrect spray technique
- Too narrow a torch will result in streaking when painting with metallic paint.
- Poor positioning of the spray gun while applying paint can also cause visible streaks.
- Improper overlap of passages will cause uneven thickness of the paint layer, leading to streaks and smudges
- If the distance between the spray gun and the body surface is small, the speed of the air leaving the gun can affect the freshly applied layer of paint. In addition, this can lead to shagreens, smudges and visible streaks when using metallic paint.
- If the distance is too large, the paint will reach the surface already dry, which can cause a change in color shade. This will also affect the loss of paint during dyeing due to over-pollination.
- Slow thinner allows the distance between the spray gun and the panel surface to change, but this can lead to smudges if painted too close.
- Turning the gun over at the end of the pass will cause uneven application and dusting along the edges of the panel. In addition, 65% of the paint and varnish material is lost.
If you follow the technology and have the necessary materials, painting your car yourself will not be a difficult task. You just need to get used to using a paint gun and follow the above tips.
About the selection of paint
When ordering a full painting and polishing of their car, many are faced with a choice: which color to choose – “original” or new? Let's not forget that a radical change of color with this approach to painting the body is possible; in order for absolutely all surfaces of the body to receive new shades, it is necessary to get to all the most secluded and hidden places. To do this, you need to dismantle the part.
Another common question is the procedure itself for selecting colors to match the “native” paint. Some determine the type of enamel by eye, others trust this procedure to special computer programs. The most reliable option is to obtain first-hand information, that is, from the technical documentation for the car. If there is none, it is better to use modern computer technologies.
Metal painting methods
Large tuning centers offer a whole range of painting services for individual parts of the car, and the application of coloring compounds can be done using a variety of technologies. It is customary to distinguish the following methods of painting metal surfaces:
- Using a special paint brush - this method is suitable for painting small metal products with a flat surface;
- Dipping – used for small metal parts of arbitrary shape;
- Using a roller - this technology is most effective when painting large metal objects with a flat surface;
- Spraying of paint and varnish substances (air and airless) is carried out using a spray gun when painting large areas of a metal surface;
- Powder painting with subsequent polymerization of metal objects - due to its unique technological and operational properties, can be used on various types of metal surfaces (the most effective and easiest to implement painting method).
Painting external corners and ends
Another feature of such an element as a wing is the presence of a sharp break in its surface at the point of transition to the horizontal section. There are a couple of rules that must be followed when painting such areas. This also applies to all other parts that have similar sharp bends, breaks, or stiffeners.
Firstly, make sure that along with the corners, part of the front side is also painted. The torch should cover both here and there - this way we will create a “transition”. After the corners are painted, we finally paint the front surface.
Secondly, coating in such areas must be done only with the peripheral zone of the torch, and not with its central part, as this leads to the formation of smudges. Therefore, at first, especially if you lack experience, it is worth mentally planning the route in such a way that it complies with this rule.
Painting long (wide) surfaces
If the surface to be painted is so long that the arm span is not enough to cover it in one pass without leaving the spot, such surfaces must be painted in segments that are convenient for manual reach, each approximately 50-90 cm wide. The segments should overlap each other by about 10 centimeters.
Such surfaces can also be painted with vertical movements, but the painting process is better controlled with horizontal passes - they are more natural for the painter.
Distance to surface to be painted
The distance from the spray gun to the object to be painted should be:
- for high-pressure spray guns (conventional) - at least 20-25 cm;
- for HVLP - 10-15 cm;
- LVLP/RP - 15-20 cm.
The shorter distance for low-pressure guns (HVLP and LVLP) compared to conventional ones is due to the fact that at high pressure a “triangular” shaped torch is created, and it can become sufficiently wide and uniform only if the spray gun is sufficiently removed from the surface.
In addition, high spray pressure causes a high speed of movement of paint particles in the spray, which means that at a short distance to the surface, losses of paint materials during spraying will be very large.
Modern spray guns are characterized by lower spray pressure, a different torch shape (tulip-shaped) and, accordingly, a shorter distance to the surface.
Your own palm will help you visually estimate the distance to the surface to be painted - its width with fingers clenched is approximately 12 cm, and with fingers spread out - 20 cm. With experience, you will feel and automatically select the correct distance.
Failure to maintain distance when painting can result in the following troubles.
- If you hold the sprayer too close, the concentration of paint per unit area to be painted will be higher, and the layer, accordingly, will be thicker. In this case, smudges, distortions of layers and an “orange peel” effect are possible.
- If you hold the gun too far away, the degree of fogging increases and the transfer of paint to the surface decreases. This leads to excessive consumption of material, and the coating turns out to be excessively “dry” and rough.
Violation of the recommended distance to the surface to be painted
Summary of painting techniques
- The spray gun should be held at right angles to the surface to be painted.
- The distance to the painted surface for conventional sprayers is 20-25 cm, for low pressure sprayers (HVLP) - 10-15 cm, for LVLP/RP system guns - 15-20 cm.
- The speed of movement of the spray gun along the surface to be painted is on average 40-50 cm/sec. That is, one pass from edge to edge of the middle part takes about 2 seconds.
- Painting is done by applying horizontally oriented stripes to the surface, formed when the gun moves from left to right and back.
- The sprayer must be directed parallel to the surface to be painted. The hand should not describe any additional circular movements.
- The movement must begin and end slightly away from the surface to be painted.
- The optimal degree of flame overlap is 2/3.
Spray gun movement speed
The recommended speed of movement of the spray gun along the surface to be painted is approximately 40-50 cm/sec. That is, on a medium-sized part, one pass from edge to edge takes about 2 seconds (you can remember the musical “one and two”