Useful tips for sanding walls after puttying
The puttying process, no matter how well it is performed, does not allow obtaining a perfectly flat surface.
There are traces left on the wall from the spatula, transitions between layers, small irregularities, bumps and depressions are visible. You can't do it without sanding the surface. Sanding is the final process that prepares the surface for final finishing.
Any person with the desire, patience and perseverance can perform sanding after puttying. The main thing is to choose the right tools, consumables and accessories, and know the technology for doing the work.
Sanding is performed dry or wet. Wet sanding is advisable on plasterboard, normally plastered walls. The main advantage of wet grinding is the relative purity of the process. You will not be bothered by the dust that is necessarily present during dry sanding. The subsequent cleaning process is forgiven.
Dry sanding is more commonly used in home renovations.
Rule 1 Sanding after puttying is carried out no earlier than 24 hours after applying the putty layer.
What is the result?
So, the grinding process is the most important task during painting work. If everything is done correctly, the paintwork will adhere well and retain its attractive appearance.
We hope our set of rules will help you choose the appropriate abrasive, as well as carry out high-quality sanding of the putty before applying paint to your vehicle.
Video advice on what sandpaper to use to sand putty on a car:
Source
Tips for choosing tools, abrasives and accessories
Without the right tools and devices, it will not be possible to perform high-quality sanding of walls after puttying.
You must have:
- sandpaper and sanding mesh;
- Sanding sponge with angled edges for sanding in hard-to-reach areas.
Let us immediately note that the sanding mesh does not become clogged with dust during operation, but it costs slightly more than sandpaper.
You will need to purchase a sanding block or mandrel to secure the sandpaper or sanding mesh. This device is properly called a manual skinner.
Rule 2 Sanding paper has different grain sizes and this is important for sanding walls and ceilings for painting. Numbers from 20 to 220 indicate a coarse-grained structure of the material, numbers 250-2500 correspond to fine-grained sandpaper.
In terms of equipment, you will definitely need a stepladder, a lamp or spotlight, and a wide spatula. A wide table or trestle will also work if their height allows for work on the ceiling.
To ensure safety when performing grinding work, be sure to buy safety glasses, a mask or respirator, a cap, a beret or a scarf.
Let's move on to the process of grinding the surface after puttying. Sanding walls and ceilings after puttying is done in a well-lit, ventilated room on a completely dry surface.
Choice of abrasive material
Grouting of putty can be done using mechanical means or manually. When manually sanding, two types of abrasive materials are used: mesh and sandpaper for putty. Each of them has a number of advantages and disadvantages.
Sandpaper for grouting putty
This is the most common material, which is a fabric or paper-based tape on which an abrasive coating is applied. Sanding paper is sold in rolls and formatted strips and differs in grain size. Coarse-grained paper is used for stripping old paint and varnish coatings and sanding layers of plaster applied to walls. A tape with fine abrasive particles is used for finishing surfaces.
Sandpaper for grouting putty can be produced in several colors, but its quality depends only on the composition and grain size of the abrasive.
Advantages: low cost, the tape does not stretch and is available in a wide range.
Disadvantages: low strength and wear resistance.
Abrasive mesh
The mesh for grouting putty is made of fiberglass, coated on all sides with abrasive shavings, which is most often used as silicon carbide.
Enlarged image of the grid:
The material is sold in sets of formatted canvases of different sizes, as well as in rolls. The main characteristic of the mesh, like sanding paper, is its grain size. But in use it has a number of advantages over sandpaper.
Advantages: the cellular structure of the material allows dust resulting from grinding the finishing layer of putty to freely come out without clogging between the grains of the abrasive coating. Using mesh saves time because it is more wear-resistant than paper, which means it needs to be changed less often. This is a waterproof material that is suitable for grouting all types of building materials. It makes it easy to sand surfaces in hard-to-reach places.
Disadvantages: Can only be used with additional accessories. Since the mesh has a double-sided abrasive coating, it is almost impossible to hold the blade in your hands, so it is better to secure it correctly.
Thus, the answer to the question of how to rub putty is obvious.
Wall grinding technology
At the first stage, use a spatula to go over the entire surface of the wall. Remove tubercles, all kinds of protrusions, and swellings. If you find large depressions or pits, fill them with putty, do not try to remove them by sanding.
Rule 3 Start sanding only on a completely dry surface.
Rule 4 High-quality lighting should be installed on one side at an angle to the surface. Its position must not be changed during the entire grinding cycle.
The second stage involves treating the surface with coarse sandpaper or sanding mesh. The consumable material is attached to the sanding block.
Surface grinding is carried out from top to bottom, processing small areas with rotational movements. The size of the plot should not exceed 1×1 m.
It is better to grind from top to bottom in strips no wider than 1 m. When grinding, hand movements are made in a circle, but you can also move up and down or left and right.
Do not press hard on the tool or grind for a long time in one place. You can erase the entire layer of putty.
After going through the entire surface with a coarse abrasive, continue sanding with fine sandpaper. When using finer sanding material, be sure to bring the light source as close to the wall as possible.
Rule 5 Finish grinding is performed with less sweeping movements and with less pressure on the tool.
Hard-to-reach places are sanded using sanding sponges or the old-fashioned method of adding sandpaper in several layers.
Never use a skinner to clean corners and hard-to-reach places. You will only ruin the surface.
Rule 6 Choose the right grit size of consumables. Properly selected sandpaper should not leave deep scratches on the plaster.
If the abrasive material leaves scratches, choose a finer sandpaper. Under the wallpaper, minor scratches are allowed on the polished surface after puttying. But before painting, the surface of the walls must be absolutely flat. Read how to prepare a wall for painting.
The grinding process is labor-intensive and requires considerable effort to complete. It can be mechanized if you use a special grinding machine. Grinding machines are available that can be connected to a vacuum cleaner, which makes the grinding process virtually dust-free.
Do not use belt sanders. They are suitable for working with wood. An eccentric or orbital sander will work.
Although the use of a grinding machine speeds up the grinding process, it is very difficult for a novice builder to obtain a high-quality sanded surface without special skills.
It is necessary to feel the tool not only to move it correctly, but also to regulate the force of pressing the tool on the plane being sanded. And such a tool is quite expensive.
After sanding, remove the dust layer, do a wet cleaning and check the quality of the surface. Before finishing, a layer of primer must be applied.
Tip 1 For a novice builder, it is better to use hand-held grinding devices.
Sanding a ceiling is no different from sanding walls. The process is more labor-intensive and requires patience and accuracy.
Once again about abrasive material
Sanding mesh is more convenient than sandpaper because it does not become clogged with debris and dust during operation. But the right sandpaper also gives good results, and it is much cheaper. When sanding walls after puttying with your own hands, it is best to use sandpaper numbers 120...180 (coarse-grained), and finish sanding with abrasive numbers 220-280 (fine-grained).
Tip 2 Sand the first layer of putty using a coarse abrasive with a grain size of No. 120-180. For the second layer of finishing putty, use an abrasive with a smaller grit No. 220-280.
Sandpaper and mesh are marked the same way, on the back of the material.
Step-by-step instructions for sanding walls
It is better to sand the wall while wearing a respirator or a bandage that protects the face. Putty dust does not contain toxic substances, but its quantity makes staying in the room extremely uncomfortable. It will be difficult to breathe without protective equipment. You will also need glasses and clothes that you don’t mind getting dirty.
It is advisable to prepare a stepladder. The ceiling and the top of the wall can be processed by standing on a chair or stool, but in this case you will have to constantly reach for hard-to-reach areas at the very top. The hand in this position gets tired quickly.
To ensure that all irregularities are clearly visible, side lighting will be required. A table lamp or night light located in the corner will do. In this position, it will create a stream of oblique rays, causing the irregularities to cast shadows. If you shine the light directly, they may not be visible. The shadow creates the necessary contrast and reveals even minor defects.
If you work with sandpaper, it is better to use sheets with different grain sizes. For finishing, it is not advisable to use paper larger than P150 - it will leave marks. It is more convenient to remove large irregularities remaining after drying with a spatula. The material behaves differently depending on its composition. To figure out which paper to use, you need to try it on a small area. It is possible that scratches will remain even with P220 grit. In this case, you need to switch to P240.
When sanding, you should never put pressure on the tool - otherwise it will leave a mark in the soft coating. If large depressions have formed, they can no longer be leveled using a dry method. You will have to fill them with plastic mass, wait for it to dry and start all over again.
In corners it is more convenient to work with an abrasive sponge in the shape of a trapezoid. By leveling one edge, it will be impossible to damage the other. For hard-to-reach places, sandpaper wrapped around a pencil or finger, or a special mesh is suitable. Its advantageous difference is that it is easier to clean.
How to sand walls after puttying without dust
When grouting joints between sheets of drywall, you can use a wet tool. This method is not suitable for a large area, since the grains will immediately become clogged with wet mass. There are sanders with electric pumps and dust collectors. This device filters out particles perfectly, but a small amount remains in the air, so it is better to work with a respirator.
How to control the grinding quality?
At the beginning of the article it was stated that the grinding process must be performed under good lighting, constantly directed from one place. Properly configured lighting allows you to constantly monitor the grinding process and its quality by looking at reflections on the surface or in the light, applying an even ruler or building level. There should be no gaps between the control tool and the wall.
When it comes to the ceiling and it is being prepared for painting, the ceiling needs to be sanded better. Illuminate the grinding area with light, this will allow you to see surface defects. Visible scratches are puttied and cleaned after drying.
Sanding work ends with thorough cleaning of the surface and room and applying a primer to the dry and sanded surface. In addition, we recommend watching a video on sanding walls and ceilings. Good luck in this dusty business!
Levelness control
The main ways to check the quality of a ground surface are touch control and control using developing coatings.
Control using developing coatings
There are two types of developing coatings: dry, which are applied using applicators, and aerosol, in cans.
Before sanding, apply a developer coat to the filled area. As you sand, the development coating will disappear and you will see lower spots where the development coating remains. All you have to do is fill in these “black marks” and repeat the sanding. Remember to thoroughly remove sanding dust before each filler application.
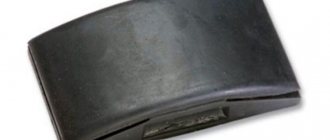
Working with dry developing coating
Control by touch
The most sensitive areas of the palm
Run your palm over the sanded surface and the sensations will tell you where and what defects remain. If the sensations do not change, then the surface is flat; if they change, then there is still something to work on.
There is nothing special to describe here, you will feel everything yourself. In the painting business, trained fingers are highly valued. There is something to train!