The simplest thing is the rear axle hub
We will remove the brake drum (you can remove it without a puller). For this:
- We fix the car on the handbrake and remove the protective cap with a screwdriver. Then, using a 30mm socket wrench, unscrew the nut in the center;
- Loosen 4 screws, jack up the body and remove the wheel. Release the handbrake (required!);
- All that remains is to remove the drum, in the center of which there is a bearing.
Before step 2, you can lock the front wheels. To do this, first gear is engaged. The main thing is not to press the brake pedal until the drum is installed and secured.
Bearing replacement
To remove the old bearing, you must first remove the retaining ring. Use tongs.
Remove the ring and knock out the bearing
The bearing itself can be knocked out, for which the drum is placed with the flat side down. Use, for example, a board with a round notch. The diameter of the mandrel that will be needed here is 49 mm.
The seat for the new bearing is cleaned and lubricated (litol, cyatim). The drum should be facing up. Pressing is carried out using a mandrel. In this case, it can only touch the “outer” ring of the bearing.
How to change the rear wheel bearing. First, let's prepare for repairs
To perform all operations you need a standard set of plumbing tools:
- Set of keys and sockets;
- Puller;
- Vise;
- An attachment with a diameter of 48-50 mm (or a head) or the same ring;
- Pliers for removing locking rings;
- New bearing;
- Jack;
- Torque wrench for tightening the hub nut.
Place the car on a flat surface, place chocks under the wheels, and select first gear. Now lift the car with a jack and familiarize yourself with the device according to the diagram presented; the main component of the unit is the drum:
Step-by-step instruction
1. While the car is on wheels, tear off the wheel nut on the side where you will change the bearing. Thirty head nut. The tightening force is quite large, so take a more powerful wrench.
You can also spray the nut with penetrating lubricant before unscrewing it.
2. We tear off the wheel bolts, jack it up, unscrew the bolts and remove the wheel.
3. Completely unscrew the hub nut.
4. If you have a car with ABS, then you need to disable the sensor. We take out the sensor; it is attached to a spring.
For convenience, bend the ABS wire mounting bracket slightly upward.
5. Now we need to unscrew the steering tip and move it to the side. We showed this earlier.
6. Now we need to remove the brake caliper. We spread the pads using a flat screwdriver (do not press the screwdriver into the working surface of the pad).
7. Unscrew the two bolts securing the caliper bracket from the rear and remove it. Eighteen head bolts.
After removing the caliper, we tie it to the rack with a wire.
8. Unscrew the two screws securing the brake disc and remove it. Fasteners for Torx T40.
The screws must first be tapped with a hammer through the adapter and sprayed with penetrating lubricant.
9. Often, after unscrewing the brake disc mounting screws, it does not come off. In this case, gently tap with a hammer and it will come off.
10. Unscrew the nuts securing the knuckle to the strut. We hold the head of the bolt with an eighteen key, and unscrew it with a wrench with a head.
We don't remove the bolts yet.
11. Unscrew the bolt securing the ball joint. We hold the head of the bolt with a sixteen key and unscrew the nut using a wrench with a head.
After unscrewing the nut, remove the bolt. Often the bolt gets very stuck. Spray with penetrating lubricant, place the socket and knob on the bolt head and twist back and forth for several minutes. After such manipulations, the bolt should come out.
12. Remove the ball pin from the fist. We hammer the wedge into the cut where the ball pin is inserted, and then, by hitting the lever with a hammer, the pin should come out.
13. Remove the drive from the hub. If it gets stuck, spray it with penetrating lubricant and lightly help with a hammer.
14. We take out the bolts securing the hub to the rack and we have it in our hands.
15. It is advisable to unscrew the protective casing; it is secured with three bolts. When unscrewing, these bolts often break, so if you can press out the bearing without removing the casing, do not remove it.
16. Next are two options. First, take the hub to a service center and the guys at the press will change the bearing in ten minutes and not for a lot of money. Second, try to press and press the bearing in a vice yourself.
If you choose the second option, I want to tell you a few nuances. You will need to select various spacers and mandrels to replace the bearing in a vice. First you need to press out the hub. After pressing out, usually the inner race of the bearing remains on the hub. You can carefully trim it with a grinder and split it with a chisel.
The bearing must be pressed out and pressed through the outer part. There are also nuances to pressing the bearing if you have a Logan with ABS. I recommend watching the video lesson from 8 minutes in more detail.
When you press the hub, you need to focus on the inner race.
After replacing the bearing, reassemble in the reverse order. If you have any questions, please ask them in the comments.
The Ministry of Internal Affairs has come up with new combinations for region codes for license plates. If the document is approved, codes on numbers in Russia will begin with all numbers from 1 to 9, and not just from 1 and 7 read all news
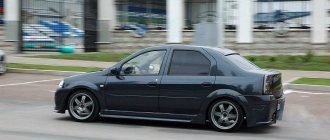
Dacia Logan
- the first Dacia model developed by Renault group engineers on the common Renault-Nissan corporate platform. The dimensions of Logan, performing in the C segment, are 4170x1640x1440 mm.
At first, Dacia Logan will be produced as a sedan, which has a spacious 5-seater interior and a large trunk with a volume of 510 liters.
Over time, Logan will be produced with other types of bodies, and the range of engines will also be expanded.
Dacia Logan has all the basic qualities of a modern car, with technical characteristics and safety at the level of European standards, as well as an attractive design.
Dacia Logan went on sale at the end of 2004. At the beginning of 2007, modifications of the model will appear on the same platform with other bodies - a station wagon and a van. This offering is designed to better meet customer needs for personal and work vehicles.
Logan shares its platform with Renault Clio 3, Renault Modus and Nissan Micra. True, this platform has increased in size, which allowed Dacia Logan to compete in class C. The length of its base, for example, is 11.5 cm longer than that of the VW Bora.
The Dacia Logan heating module is similar to that used on the Renault Modus. Its monobloc design makes the installation very reliable and allows for savings in the design phase without compromising the performance of the best-in-class heater.
The Dacia Logan has similar engines to the Clio, front suspension (modified), steering and rear brakes, as well as an LCD instrument panel, door handles, steering wheel and paddle shifters.
The Dacia Logan warranty against corrosion is 6 years. The steel sheets are protected by filling the cavities with wax, systematically sealing the exterior seams of the interior and enhanced anti-gravel protection of the underbody.
Dacia Logan is adapted to difficult road conditions. Its ground clearance is 155 mm, which is 20 mm more than the average car intended for use in Western Europe.
In addition, Logan is suitable for driving on poor roads, and at moderate speeds on dirt roads and rough terrain.
Dacia Logan engines can run on fuel of very different quality. The main fuel is 92 octane petrol, but Logan engines are also suitable for 87 octane petrol.
Despite the low octane requirement of Dacia Logan gasoline engines, they comply with Euro 4 environmental standards.
As for external noise, the Dacia Logan is below the threshold required by the European directive (74 dBa).
The design of the Dacia Logan was carried out by the Renault Style Center in Paris under the leadership of chief designer Patrick le Queman, who considers the Logan his most complex and most successful development.
The Logan style expresses strength, quality and harmony. The main exterior features are a sculpted hood, clearly defined round wheel arches, intense sidewalls and wide, sloping rear roof pillars.
The memorable design of the front of the car expresses the new “face” of the Dacia brand. The V-shaped radiator grille, integrated with the front bumper, features a new branding. The modern character of the front of the car is emphasized by the sharp-angled headlights. The V-shaped motif in the style is also visible in the characteristic stampings on the hood and trunk lid.
Dacia Logan is equipped with reliable and economical Renault K7 series gasoline engines of 1.4 and 1.6 liters, with a power of 75 and 90 hp, respectively. With. The cars are equipped with a Renault JH 5-speed manual transmission. In 2005, this offer was supplemented by a 1.5 dCi turbodiesel with 65 hp. s, equipped with a common rail injection system, as well as a 107-horsepower 1.6 16V gasoline engine - the most powerful in the Dacia Logan range.
8-valve engines (K7 family) have proven themselves well in many Renault cars, and now also in Symbol and Kangoo.
The 1.4 liter engine produces 55 kW (75 hp) at 5500 rpm and 112 Nm torque at 3000 rpm. The 1.6 liter engine achieves power of 64 kW (90 hp) at 5500 rpm and torque of 128 Nm at 3000 rpm.
In modifications 1.4 l 75 l. With. and 1.6 l 90 l. With. the first three gears are short, giving priority to starting and accelerating or when the car is very loaded. The last two gears optimize fuel consumption and acoustic parameters. With 1.6 l engine 90 l. With. Dacia Logan has a top speed of 175 km/h and accelerates from 0 to 100 km/h in 11.5 seconds.
Despite his large size, Logan watches his weight. Its basic modification weighs only 975 kg. This favorable ratio makes Dacia Logan the leader in terms of efficiency in its class. With 1.4 l engine 75 l. With. the car consumes 6.8 liters of fuel per 100 km in the combined cycle.
Basic versions of the Dacia Logan have mechanical steering, while higher versions have power steering. The steering gear is designed to provide an optimal compromise between comfort and driving precision. Hydraulic power steering, together with a frame-mounted front anti-roll bar, creates additional driving comfort and improves vehicle agility. The turning circle of the Logan is as small as that of the Megane II - only 10.5 m.
The Dacia Logan has a Pseudo-McPherson wishbone front suspension, derived from the Clio's. The rear suspension, a reinforced version of that used on the Renault Modus, consists of an H-axle with programmable deformation, connected to coil springs and vertical shock absorbers.
The front brakes of the Dacia Logan are disc, the rear are drum, which not only increases the service life and durability of the brake system as a whole, but also contributes to better maintainability. More advanced versions include a front anti-roll bar for added comfort and improved handling during active driving at high speeds. In this case, Dacia Logan is equipped with 15-inch alloy wheels, ABS and EBV systems, as well as a full equipment package.
Depending on the configuration, Dacia Logan is equipped with an ABS Bosch 8.0 anti-lock brake system, an EBV electronic brake force distribution system, front airbags, power steering, air conditioning, power windows and mirrors with heating, 15-inch alloy wheels, central locking with immobilizer, on-board computer, stereo system, including a CD player.
The main passive safety system of a car is seat belts.
On the Dacia Logan, the restraint system consists of three-point belts and head restraints on all seats, both front and rear, depending on modifications. The front seat belts are height adjustable according to the body size of the driver and passenger. The vehicle may be equipped with driver and passenger airbags that adapt to the force of the impact. These airbags have a vent that regulates the internal pressure in the bag and limits the force applied to the driver and passenger.
How to choose bearings?
If unpleasant extraneous noise that occurs when driving begins to be heard in the Renault Logan interior, then the first and immediate action should be to check the condition of the wheel bearings
When choosing a part, we pay attention to quality aspects, and also do not forget about the manufacturer. We recommend purchasing the original product
You should not succumb to the temptation that torments you to buy a cheap analogue, since the quality of this element directly affects safety while driving. To select a bearing that matches the parameters of a specific Renault Logan car, you will need to use a special reference book.
The parts under consideration, intended for the front axle, have a number of differences in their design from those components installed in the rear hubs. The technology for replacing them is also distinguishable.
Replacing the front wheel bearing
- jack;
- a set of keys;
- hammer;
- tension heads;
- screwdriver;
- mandrel 49 mm;
- caps;
- lubricant;
- other components.
Set of tools
The best option is to work on both wheels, since at high speeds a roll will occur due to worn out old material
Let's get to work
- After a series of preliminary manipulations with the wheel, we remove the steering knuckle, fix it in a vice and knock out the Renault Logan hub with a selected mandrel. The procedure at this stage usually does not raise any questions.
- When you remove the hub, you may find part of the inner ring. This is natural because the ring consists of two parts. But, even with its overall condition, it is already considered unusable, because pressing is carried out until the front bearing and hub are completely connected.
- Using a puller, we remove the rest of the inner ring if it is stuck. This can be easily done with a flat-blade screwdriver and pliers.
- The element is knocked out of the fist. If there is no puller, then use a suitable mandrel. We apply blows with a hammer to knock out the part from the inside (it is still advisable to use a special puller).
- We apply the sharp tip of the core to the groove and hit it with a hammer from the other end.
- We thoroughly clean and lubricate all the components, the surface and the socket of the fist (more details in the video).
- Before installing the part, we place a ring with a rotating wheel speed sensor in the hole, the same thing that is available on the version with ABS. Therefore, if the installation is carried out without it, we skip the step. We insert the ring so that the holder fits into the groove of the fist. We fix the cup remover screw, after which we place the wheel bearing in the hole. We attach it so that the protective washer (magnet) faces the ring with the sensor. After pressing, we mount the ring into the groove of the steering knuckle and press the hub.
- All other assembly with the wheel is carried out as well as disassembly. We fix the hub with the same devices, making support on one ring inside and the axle.
Short recommendations
When choosing a new part to replace the front wheel bearing for a Renault Logan car, carefully study the condition of the packaging and the presence of conservation lubricant
It is important that the part does not jam when rotating. There should be no traces of corrosion on the body; the same recommendations apply when changing the Logan support ball bearing
It is better to purchase spare parts in certified stores, and a price below 1,500 rubles should be alarming.
During repairs, it is worth checking the condition of all elements of the front suspension. Socket heads can be used as mandrels. If you have doubts about your abilities, then it is better to entrust the stage of pressing the ball bearing to the masters. After the repair, the wheel alignment needs to be adjusted at a service center.
- zamena-podshipnikov.ru
- topmekhanik.ru
- autobann.su
Replacing the rear wheel bearing on Renault Logan
The process of replacing the Renault Logan rear wheel bearing is quite difficult and requires some skills. It is best to carry it out together so that you can help with dismantling and installation. So, let's look at the process itself:
- We put the car on the parking brake and install wheel chocks.
- Now release the parking brake.
- Remove the rear wheel.
- In order to remove the bearing, you will have to dismantle the brake drum (Removing the rear drum without a puller is described in detail here).
- You can inspect the condition of the rear brake pads and replace them if necessary.
- Unscrew the nut and remove the bearing retaining ring, which is located on the drum.
- Now let's press out the bearing. There are three options on how to do this. The first is a cup puller. The second is to knock it out using a head and a hammer. The third or most reliable is to press it out using a press.
- The inner surface where the bearing was located should be cleaned and a little lubricated with lithol so that the new part fits in without problems.
- Let's put everything back together.
The rear wheel bearing was replaced with a Renault Logan. Don't forget to also check that the brake system is installed correctly.
Tuning and modification
Some Renault Logan car owners install rear disc brakes. It is worth considering that the hub bearing must be installed the same as in front, but this is impossible due to the fact that the sizes are different. There is only one way out - to change the trunnion. On Renault Logan you can find an original rear part that supports the installation of the front bearing. The cost of such a part is about 10,000 rubles.
Also, it is worth considering that when tuning the Renault Logan suspension, the wheel bearings must be installed of a sports type. They are less susceptible to wear and can withstand loads, and their service life has been increased from 30,000 to 50,000 km.
Also, when installing disc brakes with ABS, you will have to replace the speed sensor itself, since the standard one will not fit the new design. Therefore, when performing tuning, it is worth thinking about the costly and cost-effective part, although the effect pays for itself completely, since the resource is increased.
Front wheel bearing: features of choice, prices, sizes, articles
The main feature of choosing a front or rear wheel ball bearing is the fact that for Renault Logan there are products with and without ABS. What is the difference between bearings with ABS and without ABS? The answer is simple, in the first case, a special magnetic strip (ring) is applied to the parts, located in place of the rubber seal at the end of the product. In the second case, this magnetic stripe is not present.
Wheel bearing with ABS:
Wheel bearing without ABS:
Important to know: If you put a spare part for a car without ABS on a car with anti-locking, then a signal will light up on the panel that the ABS is faulty and it will not work
Renault Logan wheel bearing number
At the factory, SNR brand products are installed in the hub. Accordingly, it is recommended to buy this brand.
- Bearing number with ABS (from 03.07) - R155.75;
- Number with ABS (until 03.07) - R155.80;
- The bearing number without ABS is R155.16.
Original factory part number of the bearing:
- without ABS - 771205779.
- with ABS - 6001547686.
Price of a new Renault Logan hub element
A reliable manufacturer is the FAG plant, whose products cost from 2,500 rubles. up to 5000 rub. The next price segment is from 1,700 rubles. up to 2500 rub. For this price you can buy a high-quality or poor-quality bearing, depending on your luck. Better manufacturers: SNR, SWAG, NTN. As a rule, bearings with ABS are 1.5-2 times more expensive.
Recommended manufacturers of front wheel bearings for Renault Logan 1.4-1.6
No.Manufacturer / CountryArticle (catalog number)Price 2019, RURFeaturesSnap ringBearingHub mounting boltsInstructions
| 1 | FAG Germany Analog | 713 6300 30 (without ABS) 713 8013 10 (with ABS) | 1400, 3800 | + | + | — | — |
| 2 | FEBI Germany Analog | 24315 (with ABS) | 3000 | + | + | — | — |
| 3 | SKF Sweden Analog | VKBA 3596 (without ABS) | 1400 | + | + | + | — |
Wheel bearing size for Renault Logan
The last selection criterion is checking for sizing. If the bearing is cheap, the dimensions may not match the original ones. The dimensions of the part are as follows: 37 mm – inner diameter of the ring (under the landing diameter), 72 mm – outer diameter (under the landing diameter), 37 mm – width. An extended list of technical characteristics is presented in the table.
WHEEL BEARING SIZE TABLE
ParameterUnit measurementsValue
| Hole diameter | mm | 37 |
| Outside diameter | mm | 72 |
| Nominal height | mm | 37 |
| Dynamic load capacity | kH | 41,0 |
| Static load capacity | kH | 34,0 |
| Nominal speed | rpm | 3700 |
| Axial clearance | mm | 0,05-0,09 |
| Steel type | — | SHH-15 |
| Hardness of steel and rollers | H.R.C. | 61-65 |
| Raceway contact angle | hail | — |
| Torque | kN*M | 190 |
| Ring roughness | Ra | 0.32 |
| Number of balls | PC. | 30 |
| Weight | G. | 310 |
We recommend: Why does fuel consumption increase in cars with a diesel engine?
Replacing the rear wheel bearing
Lubricating the seat
To change the rear wheel bearing of Renault Logan, you need to do the following work:
- Loosen the hub nut by removing the cap first. Next, lift the car on a jack and remove the wheel.
- Unscrew the hub nut.
- Remove the hub using a puller, tapping it with a hammer and separating it from the casing with screwdrivers.
- Remove the retaining ring and press out the bearing.
- Reinstall the new bearing and install the retaining ring. Once in place, the ring will turn easily.
- Reassemble everything in reverse order.
Most often, the wheel bearing on a Logan fails due to natural wear, and this process can be accelerated by strong impacts when driving on bad roads. Operate your machine carefully and your bearings will last a long time.
Video:
Video:
Video:
Video:
Diagnosis of Renault Logan wheel bearing failure
The steps to diagnose a wheel bearing are as follows:
- Raise the front end with a jack, alternately on the right and left.
- While rotating the wheel with your hands, listen to the noise.
- If you hear some kind of grinding and extraneous knocking (noise), most likely this is a failed bearing.
- You can manually move the chassis in the axial direction; if there is significant play, then the cause is most likely a failed bearing.
- Perform all operations directly on the brake disc by removing the wheel, then it will be easier to determine the breakdown.
Video of bearing replacement for Renault Logan
A more accessible process can be seen in the video. The entire repair is shown in detail, from removing the hub to pressing in the bearing. Operations are carried out with comments from a specialist: Renault Logan: replacing the wheel bearingReplacing the front wheel bearing Renault LoganNote:
In order to replace the front bearing and not perform a wheel alignment after that (without a wheel alignment), it is necessary to remove the Renault Logan front strut assembly with the steering knuckle, additionally unscrewing the swing arm and the upper support bolts under the hood. For information on how to remove the front strut from a Renault Logan, read the article on replacing the upper support. Another way to avoid a wheel alignment is to replace the bearing directly on the car without removing the steering knuckle; you will need a small threaded wheel bearing puller.
Replacing the front wheel bearing of Renault Logan
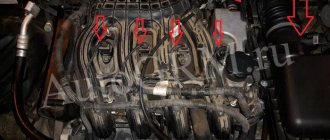
We replace the front wheel hub bearing when it fails or when dismantling the hub, since the bearing elements will be damaged during this operation. The work is shown on the wheel bearing of a vehicle equipped with ABS. On a car without ABS, the operations for replacing the bearing are almost the same. The difference is the absence of a mounting ring for the wheel speed sensor, which on vehicles with ABS is located in the steering knuckle socket under the bearing. The operations for replacing the right and left wheel bearings are similar. Apply the parking brake, engage first gear and place chocks under the wheels.
The wheel bearing nut is torque-tight, so the head and driver must be strong enough to transmit the required force.
Using a 30mm socket, unscrew the wheel hub bearing nut. If it is not possible to unscrew the nut in this way (the car wheel turns), then you can brake the car by pressing the brake pedal and holding it - you will need an assistant for this. We hang and remove the wheel. Remove the front wheel speed sensor (see “Removing the front wheel speed sensor”). Remove the brake disc and shield (see “Replacing the front wheel brake disc”). Disconnect the tie rod end from the steering knuckle (see “Replacing the tie rod end”). We remove the ball joint pin from the steering knuckle hole (see “Removing the lever”). We disconnect the shock absorber strut from the steering knuckle (see “Removing the shock absorber strut and disassembling it”)...
...and remove the steering knuckle assembly with the hub from the splined shank of the outer wheel drive joint housing.
When dismantling the left steering knuckle, do not apply force to the wheel drive directed along its axis to the outside of the vehicle, as this may cause the three-pin rollers of the drive internal joint to come out of the grooves of the gearbox side gear. We rest the steering knuckle on the jaws of the vice.
By striking the end of the hub through a mandrel or head of a suitable size...
...press out the hub. In this case, the inner bearing ring, located closer to the hub flange, remains on the hub.
Use a screwdriver to pry off the protective washer covering the bearing seal...
...and remove the puck. We clamp the hub flange in a vice. We insert the chisel between the ends of the inner ring of the bearing and the hub shoulder.
By striking the chisel with a hammer, we move the inner bearing ring along the hub. Then we insert the puller grips into the resulting gap...
...and finally press the inner bearing ring off the hub.
Using snap ring pliers, remove the bearing snap ring from the steering knuckle groove.
Use a cup puller to press the bearing out of the steering knuckle. The bearing can also be pressed out by impact. To do this, rest your fist on the jaws of the vice.
By striking the end of the outer ring of the bearing through a mandrel or head of a suitable size, we press the bearing out of the fist. Before installing a new bearing, clean the mounting hole in the steering knuckle and the groove for the retaining ring. Using a needle file, we clean out the nicks from the chisel on the hub. Before pressing the bearing...
...we put the mounting ring of the wheel speed sensor into the hole of the steering knuckle (with the paws centering the ring, inside the knuckle).
We orient the ring in the hole of the knuckle so that the speed sensor holder on ring 1 is located in the groove of knuckle 2 (for clarity, shown on the assembled hub assembly). By installing the cup puller screw with the support washer...
...insert a new bearing into the hole in the knuckle
The bearing should be installed so that its dark colored protective washer (made of magnetic material) faces the wheel speed sensor mounting ring.
Elements of the hub assembly
: 1 — steering knuckle; 2 — mounting ring for wheel speed sensor (on a car without ABS it is not present); 3 — hub bearing; 4 - retaining ring; 5 - wheel hub
We press in the bearing by applying force through the puller cup 1 to the end of the outer ring of bearing 2, while the puller washer 3 should rest on the steering knuckle. After pressing the bearing, install a retaining ring in the groove of the knuckle. Then we press the hub into the bearing.
When pressing the hub, the puller cup should rest on the end of the inner ring of the bearing. We carry out further assembly and installation of the hub unit in the reverse order.
Appendix 1. Tightening torques of critical threaded connections, N m Renault Logan 2004-2015
- Repair manuals
- Renault Logan 2004-2015
- Appendix 1. Tightening torques of critical threaded connections, N m
*Install new bolts.
**Cm. "Replacing the cylinder head gasket."
Repairing auto parts yourself is a responsible task that should be taken as seriously as possible. Sometimes a faulty spare part takes the driver by surprise, forcing him to spend a lot of time and money searching for a good service station, but there is an alternative solution to the problem; this requires a small amount of knowledge and a set of tools.
When repairing the tightening torques of critical threaded connections, h·m Renault Logan 2004-2015, you need to be extremely careful and not neglect the little things. To get acquainted with the issue, car enthusiasts often use various Internet portals dedicated to auto parts. Some of them use narrowly focused forums. But, as a rule, only generalized information is provided there, which is known initially. Where can you find a reliable source that offers really useful things? Our portal is open for this 24 hours a day. Online mode allows us to help clients at any time convenient for them. Moreover, a mobile version has been developed that is available to everyone.
A detailed description of such a unit as the tightening torques of critical threaded connections, h·m Renault Logan 2004-2015 has a good structure with thematic headings. In addition, there is always the opportunity to familiarize yourself with the intricacies of installation. There are often situations when a driver is confident in his abilities, but when he gets down to work, questions begin to arise. Thanks to our portal, such moments can be easily avoided. The site is a database that is updated regularly. By using it as a support during repair work, the car enthusiast receives a serious advantage. Each of the articles has reliable support, tested in practice.
In addition to the repair manual, the owner of a personal car will be able to prevent a lot of breakdowns that occur due to the human factor, thanks to the information located on the site. Users are presented with a lot of useful recommendations for proper operation, which will help significantly extend the life of the unit and avoid many negative consequences.
Online support is an excellent and most convenient way to obtain the necessary information. Another significant plus is that articles are written for people. We understand that the reader will do everything with his own hands, and we try to make it as convenient and efficient as possible. Use the resource at any time of the day and find the answer to any question you may have regarding cars.
↓ Comments ↓
Section 1. Vehicle design
General information about the vehicle Vehicle registration data Vehicle keys Controls Heating (air conditioning) and interior ventilation Doors Seat belts Seats Rear view mirrors Interior lighting Hood Gearbox control lever
Section 2. Recommendations for use
Safety rules and recommendations What you need to have in your car Running in the car Operating the car during the warranty period Preparing the car for departure
Section 3. Problems along the way
The engine will not start Malfunction of the fuel injection system Idle has disappeared Interruptions in the engine The vehicle moves jerkily The vehicle does not accelerate well The engine stalls while driving The oil pressure has dropped The engine is overheating The battery is not recharging The engine is started from external power sources Faulty electrical equipment Extraneous knocking noises Problems with the brakes Punctured wheel
Section 4. Maintenance
General provisions Daily maintenance (EO) First maintenance (MOT-1) Second maintenance (MOT-2)
Section 5. Engine
Design features Removing and installing mudguards and engine crankcase protection Replacing the suspension mounts of the power unit Installing the piston of the first cylinder to the TDC position of the compression stroke Replacing and adjusting the belt tension, replacing the tension roller of the gas distribution mechanism drive Adjusting the clearances in the valve drive Removing, installing and troubleshooting the flywheel Replacement engine seal parts Cylinder head Removal and installation of the engine Engine lubrication system Engine cooling system Exhaust system Power supply system
Section 6. Transmission
Clutch Gearbox Front wheel drives
Section 7. Chassis
Front suspension Rear suspension Checking and adjusting wheel alignment angles
Section 8. Steering
Design features Possible malfunctions of steering without hydraulic booster, their causes and methods of elimination Possible malfunctions of steering with hydraulic booster, their causes and methods of elimination Steering column Steering rods Steering mechanism
Section 9. Brake system
Features of the device Possible malfunctions of the brake system, their causes and solutions Bleeding the hydraulic drive of the brake system Checking and adjusting the brake pedal Master brake cylinder Vacuum brake booster Brake force regulator in the hydraulic drive of the rear brakes Replacing hoses and pipelines of the hydraulic brake drive Brake mechanisms of the front wheels Brake mechanisms of the rear wheels Parking brake
Section 10. Electrical equipment
Design features Diagnostics of malfunctions of on-board electrical equipment Mounting blocks Battery Generator Starter Ignition switch (lock) Engine control system Lighting, light and sound alarm Windshield wiper Removal and installation of the windshield washer Removal and installation of the electric motor of the radiator fan of the engine cooling system Electric heating of the rear window Removal and installation cigarette lighter socket Instrument cluster Immobilizer Instrument panel switches Car audio system Replacement of sensors and switches
Section 11. Body
Design features Possible body malfunctions, their causes and solutions Removal and installation of bumpers Removal and installation of radiator lining Removal and installation of wheel mudguards and fender liners Removal and installation of the front wing Hood Removal and installation of the air intake box grille Doors Trunk lid Removal and installation of the fuel filler hatch cover tank Seats Removal and installation of floor tunnel lining Passive safety system (SRS) Rear view mirrors Instrument panel Heater and air conditioner Interior fittings Removal and installation of interior linings Removal and installation of trunk lining Replacement of fixed body glazing Body care
Section 12. Wheels and tires
Technical characteristics Marking of rims Marking of tires Replacing wheels Tire break-in Tire storage Wheel balancing Snow chains Spare wheel Checking tire pressure Checking tire profile Checking valve Checking radial and lateral runout of rims
Section 13. Purchase of spare parts
Engine oil Lubricants Coolants Brake fluid Fuel filter Air filter Engine oil filter Spark plugs
Section 14. A trip to the service station
Section 15. Winter operation of the vehicle
How to prepare a car for winter Recommendations for starting the engine in severe frost What is useful to buy for winter Useful winter tips
Section 16. Preparation for technical inspection
Recommendations List of malfunctions and conditions under which the operation of vehicles is prohibited Changes to state standards regulating the maximum permissible content of harmful substances in the exhaust gases of motor vehicles
Section 17. Tips for a novice auto mechanic
Safety precautions when carrying out repair work Tools Before starting work Restoring threaded connections Tips for body repair
Applications
Appendix 1. Tightening torques of critical threaded connections, N m Appendix 2. Lamps used on a car Appendix 3. Spark plugs used on a car Appendix 4. Air pressure in tires
Electrical circuit diagrams
Diagram 1. Battery charging circuit: 1 – starter; 2 – generator; 3 – electrical wiring connector for the engine compartment/interior (monoblock); 4 – instrument cluster Diagram 2. Fuel pump and fuel level sensor: 1 – instrument cluster; 2 – electrical wiring connector for the engine compartment/interior (monoblock); 3 – electrical wiring connector for the instrument panel/left rear part of the body; 4 – fuel pump and fuel level sensor; 5 Diagram 3. Engine control system: 1 – 597V fuse box in the engine compartment (see Fig. 10.2a and 10.2b); 2 – relay block 784 in the engine compartment, relay 700 (see Fig. 10.2a and 10.2b); 3 – injector of the 1st cylinder; 4 – fuse box in the passenger compartment (see fig. 4. Engine starting system: 1 – battery; 2 – starter; 3 – engine compartment/cabinet electrical wiring connector (monoblock); 4 – ignition switch (lock) Diagram 5. Turn indicators and alarm system: 1 – interior switching unit; 2 – electrical wiring connector for the instrument panel/left rear part of the body; 3 – right rear light; 4 – right front turn signal; 5 – right indicator repeater Diagram 6. Side light: 1 – fuse box in the cabin (see Fig. 10.1); 2 – electrical wiring connector for the instrument panel/left rear part of the body; 3 – side light of the left headlight; 4 – left rear lamp; 5 – license plate lamp; 6 – Diagram 7. High beam : 1 – fuse box 597A in the engine compartment (see Fig. 10.2a and 10.2b); 2 – switch lever for external lighting and direction indicators with a button for turning on the sound signal; 3 – fuse box in the passenger compartment (see Fig. 10.1); 4 Diagram 8. Electrically heated rear window: 1 – fuse box in the passenger compartment (see. rice. 10.1); 2 – instrument cluster; 3 – electric heating of the rear window; 4 – electrical wiring connector for the instrument panel/left rear part of the body; 5 – electric heating switch for Scheme 9. Electric fan of the heating and ventilation system of the cabin: 1 – fuse box in the cabin (see Fig. 10.1); 2 – relay 233 (see Fig. 10.2a and 10.2b); 3 – wiring connector for the electric fan of the cooling system/instrument panel; 4 – electric fan Diagram 10. Front fog lights: 1 – instrument cluster; 2 – switch lever for external lighting and direction indicators with a button for turning on the sound signal; 3 – fuse box in the passenger compartment (see Fig. 10.1); 4 – relay block 299 in the engine compartment Diagram 11. Electric mirror drive: 1 – fuse block in the passenger compartment (see Fig. 10.1); 2 – control unit for external rear view mirrors; 3 – electric drive of the left outside rear view mirror with heating; 4 – electric drive of the right outside rear mirror Diagram 12. Low beam: 1 – fuse block 597A in the engine compartment (see Fig. 10.2a and 10.2b); 2 – switch lever for external lighting and direction indicators with a button for turning on the sound signal; 3 – fuse box in the passenger compartment (see Fig. 10.1); 4 Diagram 13. Front door power windows: 1 – front passenger door power window switch; 2 – electric motor for window lift of the front passenger door; 3 – driver’s door window lift motor; 4 – block before Scheme 14. Electric fan of the heating (air conditioning) system and interior ventilation: 1 – fuse box in the passenger compartment (see Fig. 10.1); 2 – relay 233 (see Fig. 10.2a and 10.2b); 3 – electrical wiring connector for the engine compartment/interior (monoblock); 4 – electric fan Diagram 15. Sound signal: 1 – lever of the switch for external lighting and direction indicators with a button for turning on the sound signal; 2 – fuse box in the passenger compartment (see Fig. 10.1); 3 – sound signal; 4 – fuse block 597A in the engine compartment (see Diagram 16. Central locking system: 1 – interior switching unit; 2 – electrical wiring connector for the instrument panel/left rear part of the body; 3 – electric drive for the right rear door lock; 4 – electric drive for the left rear door lock doors; 5 – electric drive Diagram 17. ABS control system: 1 – fuse box in the passenger compartment (see Fig. 10.1); 2 – fuse box 597C in the engine compartment (see Fig. 10.2a and 10.2b); 3 – ABS ECU ; 4 – electrical wiring connector for the instrument panel/left rear part of the body; 5 – speed sensor Diagram 18. Windshield wiper and washer, headlight washer: 1 – windshield washer pump; 2 – instrument cluster; 3 – interior switching unit; 4 – electric motor windshield wiper; 5 – wiper and washer switch lever Diagram 19. Interior lamp: 1 – interior switching unit; 2 – electrical wiring connector for the instrument panel/left rear part of the body; 3 – interior lamp; 4 – driver’s door limit switch; 5 – limit switch of the right front door; Diagram 20. Connecting the speakers of the acoustic system: 1 – car radio; 2 – electrical wiring connector for the engine compartment/interior (monoblock); 3 – fuse box in the passenger compartment (see Fig. 10.1); 4 – cigarette lighter; 5 – vehicle speed sensor; 6 – right front Diagram 21. Rear fog lamp: 1 – fuse block 597A in the engine compartment (see Fig. 10.2a and 10.2b); 2 – switch lever for external lighting and direction indicators with a button for turning on the sound signal; 3 – fuse box in the passenger compartment (
Fault diagnosis
Signs indicating a Renault bearing replacement:
- a hum is heard in the front of the car at speeds over 60 km/h;
- when driving over small potholes and hummocks, a characteristic tapping sound is heard, signaling the destruction of the bearing;
- due to play and rolling resistance, the car begins to “scour” along the road, and it becomes difficult to keep it on a straight path.
In order not to be mistaken that the hub bearing has failed, it is better to make a diagnosis. To do this you need to do several operations:
- Raise the front wheel, from which the noise is coming, with a jack, after placing the skid pads under the rear wheels and setting the gear to neutral.
- While rotating the wheel by hand, listen to the noise; if there is a knocking or grinding noise, the problem is in the bearing.
- If you move the wheel in different directions and you find play, this is another sign of a malfunction.
How to identify a wheel bearing fault on a Renaut Logan
And so, you have a vibration in the front wheels when driving, an incomprehensible hum has appeared that disappears when you turn the wheels, your hub has probably fallen apart, but is this really so?! Let's check for this:
- Raise the front of the car with a jack
- Rotate the wheel forward and backward with your hands. Listen for any emanating noise.
- If there is still grinding and noise, then I can say with 90% confidence that the wheel bearing has failed
- Also move the axle in the steering direction and look for any play.
Varieties of front wheel bearing for Renault Logan
Therefore, when choosing, it is worth knowing whether the car has this function. In addition to the factory bearing, there are a number of analogues that can be used for installation on Renault Logan.
Original part number
- The article number of the original bearing looks like this - 6001547686. This is the catalog number with the ABS function and its cost is 3,400 rubles.
- If the car is not equipped with an ABS function, then the article number looks like this - 771205779. The average cost is 2250 rubles.
Analogs
There are a number of analogues that can and are recommended to be installed on Renault Logan instead of the original factory bearing. As for quality, those listed below are in no way inferior to those made at the manufacturer.
So, first, let's look at analogues of the wheel bearing for Renault Logan with ABS function:
| Manufacturer's name | Catalog number | Average price in rub. in the Russian Federation |
| Dello | 30600105470686 | 900 |
| Denckermann | W413279 | 1200 |
| Master-sport | 6561-SET-MS | 1350 |
| Automotor France | ABR5580 | 1400 |
| Breckner | BK26004 | 1500 |
| Bta | H1R026BTA | 1650 |
| Asam | 30454 | 1750 |
| SCT | SCP 6561 | 1750 |
| Mapco | 26150 | 1800 |
| Hans Pries | 700 546 755 | 2000 |
| ABS | 201127 | 2100 |
| SNR | XGB.41371.R00 | 2100 |
| Kraft Automotive | 4105029 | 2600 |
| Optimal | 701 837 | 3000 |
| Stellox | 43-28402-SX | 3000 |
| Febi | 26887 | 3300 |
| Ruville | 5584 | 3600 |
| SWAG | 60 92 6887 | 6300 |
Thus, it can be seen that there are quite a few analogues that can be installed in place of the factory front wheel bearing with ABS.
Now, let's look at the list of analogues that do not have ABS:
| Manufacturer's name | Catalog number | Average price in rub. in the Russian Federation |
| Kamoka | 5600006 | 850 |
| Bta | H1R006BTA | 860 |
| Febest | DAC37720037-KIT | 875 |
| Dello | 30770102050779 | 880 |
| N.K. | 753910 | 900 |
| Cx | CX 101 | 960 |
| Denckermann | W413235 | 1000 |
| Kraft Automotive | 4105125 | 1000 |
| Starline | LO 03596 | 1100 |
| Breckner | BK26001 | 1200 |
| Master-sport | 3596-SET-MS | 1300 |
| Meyle | 16-14 309 0353 | 1300 |
| ABS | 200002 | 1300 |
| Febi | 05528 | 1300 |
| Outlog | RS1041 | 1300 |
| Optimal | 700 310 | 1300 |
| Ashika | 44-11001 | 1400 |
| Denckermann | W413088 | 1500 |
| Ruville | 5516 | 1600 |
| SWAG | 60 90 5528 | 1600 |
| Coram | CR016ZZ | 3000 |
There are also a lot of analogues of the factory front wheel bearing without ABS and plenty to choose from. As can be seen from the table, the main pricing policy fluctuates around 1,300 rubles, which is cheaper than the original part.
Front wheel bearing dimensions
Sometimes there are cases when it is impossible to buy a bearing and sellers offer to name the size in order to choose the right one. 90% of motorists do not even know how it is calculated and that such a criterion exists.
Also, some manufacturers offer hardened bearings, which have a significantly longer service life. A standard part can travel up to 30,000 km, but the hardened version can last up to 50 thousand km.
Thus, you can find and select an analogue for installation on Renault Logan.
How hard should you tighten the wheel nut on your car?
For each car, torque standards are established, since the tightening force for the locknut depends on the following factors: - Bearing dimensions; — Regulated axial clearance; — Diameter and thread pitch; The following are the force indicators for properly tightening the nut. The database will be gradually replenished.
If you have not found the tightening torque values for your car (Skoda Octavia, Subaru models, Toyota Corolla), find the bearing you have installed and the same thread diameter or ask a question in the comments.
Tightening torques for the front wheel bearing on a VAZ (LADA)
Authorization
No.Automobile modelForce, N•mHub nut diameter/thread sizeBVG1VAZ 2101 - 2107, OKA19.6 - 19.9M18x1.52 NIVA VAZ 21213 and 2121419.6 - 19.93 Kalina, Granta, Priora, Largus, Vesta 22.6-24.7M20x1.54VAZ 2108, VAZ 2109 - 2110, 2111 - 211522 .6–24.7Tightening torques for the front wheel bearing on Ford
ABVG1Focus 145 (then tighten another 90 degrees)M18x1.52Focus 23Focus 34Mondeo35 (then tighten another 90 degrees)5Fusion35 (then tighten another 90 degrees)6Transit53M20x1.5Tightening torques for the front wheel bearing on a Chevrolet
| A | B | IN | G |
| 1 | NIVA | 19,1 – 19,5 | M18x1.5 |
| 2 | Lanos | 18.4 - 20.4 (then weakens and tightens 15.3 - 18.4) | M20x1.5 |
| 3 | Aveo | ||
| 4 | Lacetti | 25,4–30,0 |
Tightening torques for the front wheel bearing for Renault
| A | B | IN | G |
| 1 | Logan | 175 | M20x1.5 |
| 2 | Megan 1, Megan 2 | 280 | |
| 3 | Sandero | ||
| 4 | Duster 4x4 | 280 | |
| 5 | Duster 4×2 | 175 |
Tightening torques for the front wheel bearing on Daewoo
| A | B | IN | G |
| 1 | Nexia | 100 | M20x1.5 |
| 2 | Matiz | 210 | M18x1.5 |
| 3 | Daewoo Lanos | 100 | M20x1.5 |
Tightening torques for the front wheel bearing on Opel
| A | B | IN | G |
| 1 | Astra H | 150 (15.0) (then unscrew 45˚ and tighten to 250 Nm) | M22x1.5 |
| 2 | Astra G | ||
| 3 | Astra J |
Which tool should I take?
We recommend starting the repair process only after being fully equipped with the tool indicated below.
- A lift is preferable, but in its absence, a rolling jack will do.
- An elongated wrench, in addition to which we stock up with socket heads.
- Regular key set with standard sizes: “10” - “22”.
- Screwdrivers: Torx and ordinary.
- Press, but if it is not available, we use a vice with flat jaws.
- Pliers or other device that allows you to remove cotter pins.
- Hammers.
- Mandrels for removing and pressing bearings.
- Tool for removing and installing retaining rings.