All elements of the car wear out over time. This applies not only to the mechanical components that power the car, but also to the finishing, including the interior and body parts. Due to the high temperature inside the cabin, the accumulation of dust and dirt, the upholstery loses its original appearance. Fabric elements become elastic, which in the case of the ceiling leads to its sagging. Covering the car ceiling with fabric can solve the problem. This work is performed by service center technicians, but drivers are in no hurry to give them their car. The main reason is cost. A good alternative is to reupholster a car's hard ceiling with your own hands. You can cope with the work, but if you understand the specifics of its implementation.
Material selection
It's easy to get confused in car stores. On its shelves there are offers made from different materials - leather, artificial leather, chintz... However, auto velor is the most practical. Give preference to cellular stretch with a natural look.
The color palette is also amazing. Here you also need to approach your choice responsibly. You should not give preference to shades that are too light - they will still quickly become unusable. And too dark, on the contrary, will make the pollution invisible. On the one hand, this is good, on the other hand, it will come out sideways at the most inopportune moment.
When choosing fabric, do not be lazy to smell and touch the material. Delamination, unnatural color or smell should alert you. After all, the interior of a car, especially a workhorse, is a second home for the driver. And the trip should offer fellow travelers only joy, not a gas chamber.
It is advisable to create harmony in the salon. When constructing the same color scheme, it is necessary to build on the colors of the chairs and rugs. It is better to choose a pastel and discreet tonality.
The process of re-upholstering the ceiling
Among the alternatives to auto velor, the following should be highlighted:
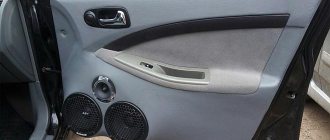
- Car carpet. Originally created for covering speakers and subwoofers. It differs in acoustic and design solutions. Recently it has become water-repellent and is actively used for ceiling finishing.
- Alcantara. Ultramicrofiber in its structure. Possesses the properties of genuine leather. Easy to clean, withstands long-term use. For the interior ceiling, the elasticity inherent in the material is important.
- Flock. This is an infrequent guest on the shelves of auto stores. But it can also be processed independently. Among the advantages are wear resistance, ease of maintenance and design solutions. But the complicated technology of re-upholstering the ceiling is holding back the victorious march of flocking among car enthusiasts.
Lifehack from AUTOVETOV. We recommend purchasing material with a reserve of a third, or even 40%. This will allow you to eliminate errors without unnecessary hassle. The remainder of the material can later be used to discreetly correct defects and worn areas.
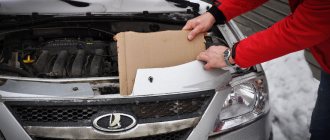
Why does the ceiling sag in my car?
Repairing a sagging ceiling in a car may be necessary if:
- upholstery material sagged;
- the casing is damaged;
- The upholstery material is heavily soiled and requires cleaning/replacement.
The reason for the sagging ceiling is the destruction of the inner layer of foam rubber on which the fabric is glued. If the ceiling has come unglued, there is no point in repairing the trim: it will not give a long-term effect. The correct solution to the problem would be to completely replace the entire ceiling structure with a new one.
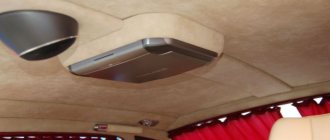
Note! Most often, problems arise in cars that have a sunroof.
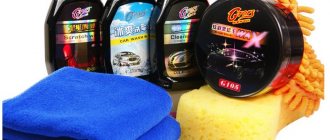
Glue selection
The first and most important quality of the glue is compatibility with the selected coating. You need to purchase it exclusively in official car stores or on the manufacturer’s website. But refuse offers from private traders in spontaneous markets online. The purchase is fraught with toxicity, expired or counterfeit. And this is money thrown away.
Information from the manufacturer’s website and the official price list (if available) will give a clear idea of the correct spelling of the name, place of production, glue composition and the minimum possible price. Is there something wrong? Pass by.
Removing the headliner
To properly repair a car's ceiling trim, it must be dismantled. To do this, you need to remove all the plastic trim parts that are adjacent to the ceiling trim and interfere with its removal. It is also necessary to remove the interior lighting lamps (in the front part), sun shields, plastic handles and all the clips that hold the trim. The lampshade, which is located in the middle part, should be removed last, as it will keep the casing from falling down while you unscrew and dismantle all other parts. Each car has its own characteristics of removing various elements, so if difficulty arises, it is better not to apply excessive force, but to find instructions on the Internet. Sometimes it is enough to know in which place you need to insert a flat-head screwdriver to make the part give way.
To remove the removed trim from the interior, it may be necessary to remove the front passenger seat.
So, when all the edges of the ceiling trim are free from fastenings, you need to unscrew the interior lamp and pull the trim out of the cabin to the workplace where it will be repaired. On cars with a fifth door this will be easier to do, but on sedans you will have to contrive to stick the headliner through the door. To remove the removed trim from the interior, you may need to bend (or twist) it a little. Here you need to be careful not to bend it too much.
It may be necessary to dismantle and remove the front passenger seat from the passenger compartment so that it does not interfere with the removal of the headliner from the passenger compartment.
Padding
We chose the material and the glue too. You can start re-upholstering. The ceiling needs to be removed. The most convenient way is to remove the front seats and pull out the ceiling through the rear door.
Car ceiling removed for reupholstery
It is removed from the worn-out coating. Carefully work through the remaining glue, remove centuries-old dirt that may have clogged into the cracks. Use a hard sponge for this purpose.
In the next stage of preparation, sand it with sandpaper. Along with the elimination of irregularities, the surface will become rough, improving the adhesion of the glue.
Reupholstering the ceiling involves gluing a new coating onto the matrix. But this task is for two people - the process of applying the adhesive and gluing will go much faster. For better adhesion, the material must be pulled from the center to the edges on both sides simultaneously.
The covering is applied according to the principle of a football match. The first strip is placed exactly in the center of the matrix. Then stick strips of 10 centimeters towards the edge. Having reached the corresponding edge, the upholstery is folded to the opposite side. As you progress, the sheathing is smoothed to remove glue and air bubbles.
After drying, if necessary, cuts are made in the fabric for ceiling fastenings. The finished matrix is installed in the reverse order of dismantling.
Features of flock wrapping
If we are talking about upholstery with flock fabric, the process is lengthened in time. For reliability, this material requires a preliminary primer. The composition is applied in several layers, most often 3. They use automotive primer in cans. Each new layer provides for a twofold reduction in soil volume - 3.5; 2 and 1 kilogram respectively.
Flock fabric
The day before, you also need to level the surface, since this material follows the surface topography and defects automatically attract attention. Sanding is carried out once before applying the primer with coarse sandpaper and sanding is repeated if necessary after applying the final layer of primer.
After completely covering the ceiling surface with glue, grounding points for the adhesive layer are established. To speed up the process, use a wide brush. About a liter of the composition is enough to cover the roof.
For upholstery with material, a special tool is used - a flocker. The features of the work are as follows:
- The first layer of flock is applied at maximum power. After 2-3 layers the speed is reduced.
- The mesh in the bunker should be slightly larger than the size of the flock. For example, for 1 mm material you need a 2 mm mesh.
- Excess can be blown off with a technical hair dryer. Be sure to place it in cold air, otherwise the glue will begin to dry out prematurely.
Ways to restore a sagging ceiling in a car
If the ceiling is sagging, you can try the simplest thing - restore the fixation using a household hair dryer. If this does not help, then repairs should be performed in one of two ways:
- Complete dismantling of the ceiling with reupholstery.
- Local repairs of individual areas.
You can contact car service specialists who will quickly solve your problem for money, or you can try to restore the ceiling in the car with your own hands.
Professional car workshop
If the fabric of the ceiling lining has come away from the ceiling panel, the service station technicians will restore it using professional equipment, materials and technologies. But repairs will not be cheap.
Solving the issue yourself
You can restore a sagging ceiling in your car on your own. To do this, you will need to purchase the necessary materials: fabric, adhesives, foam rubber, as well as prepare tools and study step-by-step repair technology.
How to make a banner with your own hands
There is no need to give the car to the service center technicians. Reupholstery is not complete without:
To hide the fasteners of decorative elements, you will have to break out the plugs. So buy them in advance.
Step-by-step instruction
A complete reupholstery consists of ten stages.
The repair is considered complete after reinstallation along with lighting and decorative elements. The naked eye will see how well the interior will be transformed.
Basic mistakes
The main mistake is using Moment glue instead of the compositions indicated earlier. In summer, the car gets very hot, which is why the glue will not be able to hold the fabric on the frame.
You need to start from the center. If you start re-upholstering from the edges, it will be difficult for the owner to align the fabric in places with sharp transitions.
Do-it-yourself car ceiling reupholstery: procedure and technology features
For some, cars are a means of transportation, while for others, they are a means of self-expression. The reasons why you decide to reupholster the ceiling can be different: the desire to change the interior to your liking, a coating that has become unusable, persistent dirt, an accident and expelled airbags, loss of shape, peeling of fabric. Before deciding to reupholster the interior, it is advisable to understand in detail the issues of technology and choice of materials. At first glance, there is nothing complicated about reupholstery, but there are a number of features that need to be taken into account. If you decide to entrust this operation to a professional, then knowledge of the nuances will help you control the work of the master.
Additional tips and tricks
If reupholstering the ceiling is being done for the first time, it is recommended to practice gluing on a small area using the selected adhesive and material. Eco-leather, the leather must be glued with a partner to achieve good tension and adherence to the base. You should work with gloves to avoid leaving marks on the casing. If you do the work yourself and have no experience, you should not use adhesives with a high setting speed.
Source
What not to do when gluing the ceiling in a car
If the ceiling lining is sagging and you are doing the work yourself, remember a few important rules:
- Pasting the ceiling panel should only be done in a well-ventilated area.
- Adhesives must be non-toxic, sufficiently fluid, suitable for gluing fabric, metal and plastic, and not leaving marks after drying.
- A black ceiling should not be glued with a white compound.
- For work, it is better to attract an assistant who will help stretch the fabric when gluing it onto the matrix.
- It is necessary to work in personal protective equipment: a respirator, safety glasses, and overalls.
In conclusion, it should be noted that sagging of the upholstery fabric on the ceiling after dry cleaning the car interior is a common phenomenon associated with low-quality materials or manufacturing defects. However, eliminating the problem that has arisen is not difficult - it is no more difficult than ordinary wallpaper gluing.
The main thing is to choose high-quality velor to replace the old upholstery, reliable and non-toxic adhesives, and then carefully replace the fabric, following our recommendations.
Operating rules
Before starting reupholstery, it is important to remove the ceiling. The old tissue is completely removed. Dismantling is carried out through the passenger compartment door. For convenience, the seat is removed. Technicians often recommend removing the windshield.
Before removing the ceiling, the elements are dismantled - handles, canopies, lampshades, plugs, etc. The old coating, remnants of glued decor, and foam rubber are removed. Small contaminants are washed out with a soap solution using an abrasive sponge. The surface is carefully treated with a solvent, removing any remaining adhesive. It is recommended to sand the ceiling.
Apply glue along the central part of the ceiling with a short length of 10 cm. Press down the material and move to the sides, retreating 10 cm, to apply the glue. Pay special attention to the curves of the ceiling, carefully attach the fabric. Poorly treated areas will sag and peel off over time.
It is recommended to glue the fabric with an assistant. For better adhesion, one person pulls the material, while the other smooths out the folds and presses it to the surface. Any unevenness in the ceiling must be ironed out more actively. Along the edges, the material is folded under the ceiling, glued, and the extra centimeters are cut off.
At the final stage, special holes are made for bolts for fastening the interior elements. Upon completion of the work, the ceiling is returned to its place.