Not only the appearance of the car, but also the corrosion resistance of the body, and therefore its durability, depends on the quality of the paintwork.
Most of the work associated with full or partial painting is carried out today in specialized workshops, where pneumatic spray guns make it possible to distribute the layer of substance as efficiently and evenly as possible.
How to spray paint a car at home? Obviously, such a service costs a lot, so many car enthusiasts who want to save money prefer home painting. The main tool in it is a spray can.
Let's try to figure out what advantages and disadvantages this method has, and what factors influence the final characteristics of the paintwork.
I saw it on TV and it became interesting
In some car television programs you can see how the presenters themselves paint individual elements, and sometimes the entire car, using primer and paint in spray cans. Every time I saw such a repair, I had a desire to test with my own experience what could come of it.
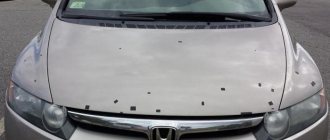
The 21-year-old Lancia Delta HPE was completely repainted about three years ago. During this time, defects appeared on some body elements, in particular, “bugs” on the trunk lid, and the paintwork on one of the moldings peeled off.
I have some experience in the field of auto body repair; I could easily remember my student years and eliminate existing shortcomings using professional equipment. But in this case, I would never have received an answer to a question that has long interested me. So I took a risk.
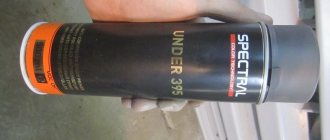
Spray cans of car paint are sold both in regular large supermarkets and in construction stores, and in some of them you need to pay less than 10 rubles for 500 ml of paint. “Suspiciously cheap,” I thought and went to buy paint at a specialized store that sells everything needed for car body repairs.
Types of varnish
Among the large number of car varnish, the main types can be distinguished depending on its distinctive properties. According to the structural structure:
- One-component composition. It is found in the bottle in dissolved form. After spraying, the solvent quickly evaporates and the varnish hardens. The paint layer has weak mechanical strength and is susceptible to solvents. Mainly used for repairing chips and scratches.
- Two-component composition. Before application it is mixed with a hardener in a certain proportion. As a result of mixing, a chemical reaction occurs and the varnish hardens. A durable surface is created that is not susceptible to mechanical stress, solvents, or atmospheric temperature changes.
Depending on the chemical content:
- Contains organic solvents with an unpleasant odor. They are not environmentally friendly.
- water-based compositions. They are an environmentally friendly material, they do not emit toxic substances into the air and are odorless.
Taking into account texture components:
- HS – hard varnishes. This type is quite thick, which allows minimizing the phenomenon of smudges. In addition, its use implies the absence of a solvent in the aerosol (or its insignificant presence), which makes car painting environmentally friendly. The composition is applied in two layers:
- basic, thin, almost invisible;
- main, more solid 40–50 microns.
- MS – soft varnishes. It has a more liquid consistency, which increases the fluidity of the composition. The application technique consists of spraying an aerosol in a thin layer. It will take 2-3 applications. Drying time for each layer is from 10 to 15 minutes. If all requirements are met, the result is a shiny and smooth surface.
Color classification:
- Transparent compounds. They retain the basic color of the surface and are suitable for coating rims and headlights.
- Colored varnishes. They are distinguished by a large selection of colors, have increased strength, improve appearance, and add gloss.
- Glossy palette. Provides original shine, emphasizes contrast, looks good on a black or dark car surface. The disadvantage is that it does not hide the simplest defects (for example, scratches).
- Matte spray. Creates a durable protective layer, does not require subsequent polishing, maintains a natural appearance, and simplifies cleaning the car surface (just wipe with a damp cloth).
Please note: Painting a car with chameleon paint
There is another systematization of car varnish, taking into account the substances included in its composition: metallized, acrylic, polyurethane, acrylic-polyurethane, cellulose, glypthal varnish, etc.
Polyurethane
Polyurethane products are popular among car enthusiasts. They form an excellent protective layer from water, mechanical, atmospheric and chemical influences, are easy to apply, dry quickly, shine, have good performance properties, and abrasion resistance. Aerosols are sold in both single-component (high-drying speed) and two-component forms (environmentally friendly, odorless). Disadvantage: Spraying is only possible at temperatures above +20° C.
Polyurethane varnish
Acrylic
Acrylic varnishes create an excellent decorative coating and are among the safest products. The treated surface of the car dries due to the evaporation of water, which is part of the varnish. Fast drying and hardening makes it possible to save time and consumables. Drying time 2 hours. You can reduce the drying time by increasing the room temperature to + 60. The resulting shiny film has good adhesion and is not subject to mechanical stress. Disadvantage: cannot be used in rooms with high humidity.
Acrylic lacquer
Nitrocellulose
The main advantage of nitro varnishes is their ease of use and drying speed. It can be applied at any temperature and humidity, and chromium-containing compounds contain an additional reflective effect. Disadvantages: strong solvent smell, not very good adhesion, toxicity.
Nitrocellulose varnish
First troubles, but thanks to the spoiler
We apply the paint in several layers so as to prevent the formation of sagging and smudges, as well as “lack of dust.” Already on the second layer it becomes clear that in some places the paint begins to react with old materials. Fortunately, this happened in those places that are covered by the spoiler, and in one place on the molding. Therefore, despite the nuances that have appeared, we continue to paint.
After applying four layers, at first it seems that the result is not so bad, the experiment was a success. But if the reaction appeared in places where the spoiler could not hide it, one could talk about the failure of the “operation” to save money on painting.
It didn’t turn out that bad, so we ventilate the garage and leave the car until tomorrow until the paint dries.
When the paint finally dried, the result, to put it mildly, was no longer pleasing. The shine completely disappeared, many nuances became noticeable that were not visible immediately after coloring.
It was impossible to leave the trunk like this - it looked simply terrible. I had two options: completely redo the whole job and paint the trunk with primer, paint and varnish for professional use, or try to remedy the situation by sanding and polishing the trunk.
Preparatory procedures, how to paint correctly
If you decide to carry out all the repair work on your own, then you should do everything as soon as possible. Once you discover damage, do not delay the process, as the problem may get worse.
Once the scratch reaches the metal, the oxidation process begins, leading to rust and corrosion. Because of these defects, more serious work will be required.
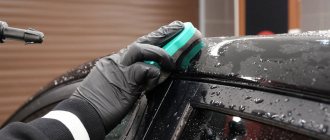
Before painting, the car is cleaned using conventional detergents. You need to wait until the surface is dry and then degrease it.
For this, special wipes and solvent are used. After saturating one napkin with it, wipe the surface dry with the second. To ensure greater comfort, you need to remove the part that will be worked on.
All other areas of the body that cannot be painted are covered with protective film and masking tape.
To prevent painting defects from appearing, a special chamber is needed; the room must be completely clean of dust and other contaminants. Lights, like devices, should be directed toward the work surface to avoid glare.
Work should not be carried out outdoors, as exposure to sunlight will negatively affect the result. At high temperatures outside, only the first layer is subject to drying out; it will take longer to wait for complete drying.
Therefore, before applying a new layer, wait until the previous one dries.
Before spraying the can, you should shake it well. Try not to go overboard and cover up the rest of the components.
If you are not sure of the result, then you can try your hand at an old part that you have.
Don't forget to follow the existing instructions and stock up on the following tools:
- paint,
- sandpaper of different levels,
- putty and primer,
- antisilicon,
- polyethylene,
- masking tape,
- elements for protection.
When doing all the work yourself, be sure to consider hand protection; use a rubber or silicone spatula so as not to cause unnecessary damage to the surface.
The work of the aerosol begins only after the primer has been applied, dried and polished.
Let's save the situation
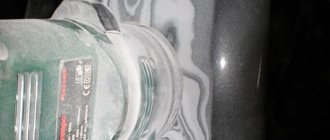
In my understanding, sanding and polishing the surface after painting goes beyond the scope of “budget” DIY repairs. To do this, you need to have a polishing machine, wheels and polish, but the vast majority of ordinary car enthusiasts have nothing of the kind. Therefore, in fact, the mission to save money on painting can be considered a failure - of course, if you do not want to put up with the disgusting appearance of your car.
Nevertheless, four layers of paint gave me the opportunity to try to correct the situation.
P2000 sandpaper with water and two types of polish using wheels of varying hardness helped in this matter.
Almost all the imperfections have disappeared, and a more or less normal shine has appeared. Painted, albeit with nuances, the molding began to look much more presentable.
In general, after all the procedures, the rear of the car looks a little better, because the “bugs” on the trunk lid did not decorate the car at all. The final quality of painting is no worse than what some garages can offer. But don’t forget that there are places under the spoiler where the paint reacted.
In addition, you can notice the difference in shades.
Application Features
Spraying a can onto the surface of a car begins with preparing the surface. Preliminary manipulations:
- if the coating is new, it must be thoroughly dried and checked for the presence of foreign particles;
- if the base is old, you will need to conduct a comprehensive inspection not only for the presence of dust, dirt, but also problematic rusty areas. Next, eliminate the defects, carry out repair work if necessary, clean the surface, sand and degrease.
Please note: Rubber car paint and its use
Aerosol application:
- Select a room according to the stated requirements. It should be closed, well ventilated, illuminated and with an air temperature of at least 20 degrees.
- Check the surface for dirt, dust, and other foreign particles. Carry out preparatory work.
- Wear a respirator and safety glasses.
- Shake the can before spraying. Practice in an inconspicuous area.
- Varnish 1 layer from a distance of approximately 25 cm. Large areas are painted crosswise, small areas - in a spiral.
- Let dry for 10-15 minutes.
- Shake the can and spray the aerosol, keeping a range of 35–40 cm. Do not linger in one place.
- Allow the product to dry, avoiding contact of any kind of contamination with the painted area.
Varnish spraying process
Our verdict
You can paint a car with a spray can, but achieving a really good result is almost impossible. And with a complex color, it will be even more difficult to hit it. It was possible to give the painted surface a more presentable appearance only after additional sanding and polishing.
The materials, excluding the purchase of polish and wheels, took about $20, as well as three evenings. I definitely wouldn’t risk painting the hood this way, for example. In three words - so-so pleasure. You can only spray paint thresholds made from construction foam and putty to pass inspection.
Body parts in the Automotive Business ad database. Almost 210 thousand offers!
Description and characteristics
In fact, the cans contain all the same types of primer for cars that are produced in metal containers, namely:
- acrylic
- epoxy
- acid.
The difference is that it is customary to produce two-component formulations in metal containers. They must be properly prepared before use. A hardener and solvent are added, and only after that the product is ready for use.
Epoxy primer in a can
An aerosol is always a one-component composition that is completely ready for use and does not require additional preparatory manipulations. This is the absolute convenience of the spray.
In terms of its properties and characteristics, the aerosol is no different from soil in jars. The only difference may be the density. It is logical that the aerosol should spray well and provide an even, high-quality coating on metal or plastic. Therefore, it should have appropriate fluidity. If you want to get a dense, viscous primer for your car, buy the product in a can - a spray will not suit you.
But it is suitable for application to the following types of coating:
- black metals;
- chrome steel;
- galvanized steel;
- light alloys;
- plastic.
Primer in a can for plastic
Local body painting with metallic silver color
The local painting of the car, the color of which is metallic silver, deserves special attention. Restoring the wonderful appearance of such a car is not an easy task. So, here's what you'll need to do:
- Initially, it is necessary to cover the repair area with a covering material: film, paper and a roller;
- Using gray scotch-brite and matting paste, you need to apply a matte mark to the part of the surface of the part that will need to be repaired;
- After the entire part has been dried and degreased with alcohol-containing products, you need to apply a binder - a colorless binder for the base coat. It must be applied to the area to be repaired so that the border extends beyond the boundaries of the next application of the sprayed base. By the way, you need to use a binder only when working with a metallic coating, because without it, when you spray paint on the old one, a dark border will immediately form. And the binder layer perfectly creates the necessary transparent base in which the particles of aluminum powder “sink”, and such local painting of the body will make the reflection uniform and natural;
- Now you can apply paint. There will be three layers in total, and each subsequent one must go slightly beyond the boundaries of the previous one. But some metallic colors sometimes require five layers. In any case, the principle of operation is this: each layer needs to be stretched, as it were, by only lightly spraying it onto the old factory coating, but at the same time always remaining in the binder zone. Only in this way will the transition ultimately be completely invisible. Between layers you need to maintain a time interval of 20-30 minutes so that the previous layer has time to matte;
- After the last layer has matted, you can apply varnish. In general, this option is called “with a transition over the varnish.” Moreover, if the surface to be painted occupies more than a third of the area of the entire part, it must be varnished entirely.
To simplify the process, the varnishing itself can be divided into three stages:
- Preparing the varnish and applying the first matte layer to the area is a half-coat.
- After a few minutes, a second coat of gloss is applied, and it should cover both the paint area and the binder area. To understand exactly how such local painting is done, there are videos and photos on the website.
- All the varnish that remains in the spray gun must be diluted with solvent in a ratio of 1:1 and covered with it the area where the new varnish ended and the factory one began - in this way, the step that was formed due to the new layer of varnish is smoothed out. You need to pour clean solvent into the spray gun and cover the transition from the new varnish mixture to the factory one. After which you can cover the transition with it.
Selecting soil in aerosols
Mixtures of soils are produced in jars and cans in the form of an aerosol. Aerosol cans are one-component formulations; immediately after purchase they are ready for use without additional preparation.
Using an aerosol in cans is most convenient for use.
Aerosol is a product whose identifiable qualities are not much different from primers made from an aluminum container. After applying this component, the surface turns out to be very smooth, where the difference between the painted and untreated part is completely invisible.
Criterias of choice
When choosing a primer you need to consider:
- release date and expiration date;
- manufacturer's reputation;
- description and application features;
- compatibility with car body material.
Cases of application of transition painting
Spot painting with a smooth transition is used for restorative repair of a separate part of the car body or a small area on its surface. This technology is used to paint the hood, roof or other area of the car body in order to make adjacent areas of the old and new coating the same in tone.
The most important aspect of this type of car body repair is the correct choice of paint shade. But even with modern computer equipment, achieving similar coverage can be quite difficult. The reason for this is the service life of the old coating and its degree of wear. This can also include the settings of the painting equipment, the skill of the painter and other factors associated with painting with acrylic or metallic.
Acrylic is not so capricious in this regard, and it is usually quite easy to even out the tone of adjacent areas of painting. This is described in more detail below. But painting a metallic car body part causes difficulties with a smooth transition even for experienced painters.
Advantages of aerosol packaging
The use of epoxy primer in the form of an aerosol has certain advantages and benefits over other forms of applying a protective layer.
It doesn’t take much time to prepare the soil for use: you just need to vigorously shake the can several times and warm it up to about 20-25oC. When working with an aerosol, you need to spray with a very thin stream, slowly treating the surfaces of the most complex shapes and even closed profiles.
If not all of the epoxy primer in the can has come out, then the spray head must be tightly closed, and the mixture can be used again.