Articles
The gasket costs pennies compared to the labor of replacing it.
Before you start replacing the gasket, you should purchase this gasket. Although any car store will select a suitable spare part for you, it is better to know its part number. The most suitable gaskets for the VAZ-2110 are:
- The original VATI gasket, which has the article number 21083100302021.
- Part VICTOR REINZ. This item is of higher quality than the original. Its article number is 613666000.
- TRIALLI gaskets, which have the article number GZ.
It’s better to immediately buy a better quality spare part than to bother with disassembly again later.
Changing the cylinder head gasket on an 8-valve VAZ-2110 engine
Some owners of domestic cars do not know that the cylinder head gasket needs to be changed every time the cylinder head is removed. You should never install an old part, since this spare part is disposable.
Replacing the cylinder head gasket on an 8-valve VAZ engine is almost the same as the same work for a 16-valve engine, so this article will also be useful to owners of cars with more modern engines.
When is replacement required?
The primary issue that concerns car owners is the frequency of replacing the element. Even if the unit is not disassembled, the seal has a certain service life.
In general, the lifespan of a gasket directly depends on the quality of the material used in its manufacture. Also, the frequency of replacement is affected by the intensity of use of the vehicle.
As we have already noted, replacement should be performed when disassembling the BC head, or when primary signs of wear appear.
Replacement intervals for the cylinder head gasket on the VAZ-2110
It is very difficult to predict the exact service life of a gasket.
The most important thing that interests owners is the replacement interval for this part.
It is very difficult to say how long a particular gasket will last.
It depends on the:
- Manufacturer of the part.
- The quality of the material from which the gasket is made.
- The conditions under which these parts were stored.
Since the gasket is made of rubber, storage conditions directly affect its service life. For example, a part purchased at the market, which was stored for a long time in a damp and unheated container, will be worse than the same spare part purchased in a store.
The main function is to ensure maximum sealing of the cylinder block with the cylinder head. If you do not monitor the condition, the engine life will be significantly reduced.
Signs of wear
If your old gasket is worn out, it won't be difficult to determine. There are several characteristic signs of loss of elasticity of a rubber element:
- White steam starts coming out of the exhaust;
- Traces of coolant or engine oil leakage appear at the cylinder head joints;
- Traces of oil appear in the coolant;
- An impressive amount of lubricant accumulates in the pan;
- Foam forms around the filler cap.
To check for the presence of steam in the exhaust gas, you need to remove the cap from the expansion tank with coolant and put the bag on the neck. If after a short period of operation of the power unit the bag inflates quickly, the gasket is worn out and therefore needs to be replaced.
When is it time to change?
Many owners of VAZ 2110 cars are interested in the question of how long it takes to change the gasket. In many ways, the frequency of replacement depends on the quality of the gasket itself; the better the material, the longer it will last. The frequency of replacement is affected by the intensity of use of the car. The cylinder head gasket is a rubber product that over time loses its elasticity, hardens, cracks and ceases to perform its main function - sealing the connection of the cylinder head with the cylinder block.
The quality of the gasket is of great importance for the proper operation of the engine. If you do not monitor its condition, the motor will quickly exhaust its service life. There are signs by which we can conclude that it needs to be replaced:
The presence of vapors in the exhaust gases can be checked by unscrewing the cap on the expansion tank and placing the bag over the neck. If it inflates after a short period of engine operation, it means that the gasket has become unusable.
What is needed to replace the cylinder head gasket of a VAZ 2110 (8 valves)
Required tools :
- ratchet with 10mm socket heads; “at 13”, “at 17”, “at 19”;
- wrench with Torx bit;
- screwdriver;
- torque wrench;
- wrench for removing spark plugs.
This is interesting: Instructions for adjusting engine valves on a Gazelle Next car
Suitable components :
- the TRIALLI gasket set has the article number GZ1017022, its price is 500 rubles >;
- The VICTOR REINZ cylinder head gasket has article number 613666000, its price is 280 rubles >;
- The original VAZ (VATI) cylinder head gasket has article number 21083100302021, its price is 140 rubles .
The price of gaskets is relevant for the summer of 2017 for Moscow and the region.
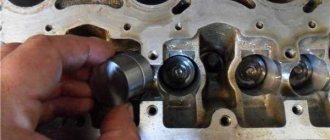
Set the piston of cylinder 1 to the TDC position on the compression stroke. We fix the camshaft toothed pulley from turning with a clamp. We unscrew the candles.
A) Using a 10mm wrench, unscrew the two nuts securing the throttle drive cable bracket to the receiver and remove it. B) Remove the crankcase ventilation hoses and the supply hose from the valve cover fittings. C) Using a 10mm wrench, unscrew the two nuts securing the valve cover and remove it.
Using a 10mm wrench, unscrew the bolts of the front timing cover: two on the side and one in the center. Remove the timing cover.
We check the coincidence of the mark on the camshaft timing pulley with the installation antenna on the rear cover of the timing drive. Using a 17 key, unscrew the pulley.
Using a 10mm wrench, unscrew the nut securing the protective casing and bend the casing.
We see that the timing belt also requires replacement.
Disconnect the oil level pressure sensor connector.
Using a 10mm wrench, unscrew two nuts and one bolt securing the plug. Evenly, using a 13mm wrench, unscrew the six nuts securing the rear camshaft bearing housing. Remove the rear camshaft bearing housings from the studs.
Then, also evenly and using a 13mm wrench, unscrew the four nuts securing the front camshaft bearing housing and remove it.
Unscrew the four nuts securing the muffler to the exhaust manifold.
Using an E14 Torx head, unscrew the 10 bolts on the cylinder block and remove the block.
A number of repairs to the car’s power unit involve removing the cylinder head. Dismantling the cylinder head does not cause any particular difficulties, but fitting the unit into place when assembling the engine requires full compliance with the installation technology, in particular the tightening of fasteners.
Replacement process (for 8 and 16 valve cars)
Replacing the cylinder head gasket on a VAZ 2110 with 8 and 16 valves is not much different and can be done independently. Therefore, it is enough to understand in general how to perform the replacement. It is more convenient to carry out work on an inspection groove or overpass. You should stock up on a set of tools and consumables in the form of a new gasket in advance.
New consumables for cylinder head
Selecting a cylinder head gasket
Before you start choosing a head gasket based on the catalog number, you need to consider what types of gasket materials there are. Let's look at the main types of cylinder head gaskets:
- Asbestos . The main advantage: minimal shrinkage and excellent recoverability.
- Metal . These are some of the most reliable and high-quality consumables.
- Non-asbestos . Used as repair kits. Main advantages: elasticity, heat resistance, elasticity.
Metal cylinder head gasket
So, now you can consider the original gasket, as well as the substitutes that are used. Basically, all manufacturers label gaskets according to the original.
2112-1003020 is the original and analogue catalog number of the cylinder head gasket for the VAZ-2112. Also, the manufacturer Ajusa (10144200) produces a range of gaskets for the 2112 model.
Stages
- First, we de-energize the car: remove the negative terminal on the battery.
- Then disconnect the exhaust pipe from the muffler.
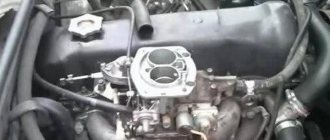
- Next, we dismantle the carburetor on the VAZ 2110.
- At the next stage, we deal with the electrical wiring: disconnect the wires from the spark plugs, disconnect the connectors of the temperature and oil level pressure sensors.
- Disconnect the vacuum booster pipe from the intake manifold.
- On a VAZ 2110 we disconnect the ignition distributor sensor.
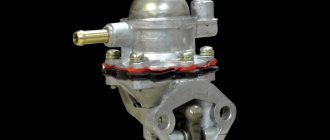
- Together with the fuel pump, we dismantle the housing of the auxiliary units.
- Next, loosen the tension roller mounting bolt and remove the timing belt and roller.
- Having secured the camshaft toothed pulley from turning, unscrew the bolt and remove the pulley using two screwdrivers.
Removing the camshaft pin - Unscrew the nuts holding the rear timing cover and remove it.
- Using a Phillips screwdriver, loosen the clamps and disconnect the hoses going to the exhaust pipe of the cylinder head.
- Using a hexagon, unscrew the 10 mounting bolts of the block head.
Sequentially unscrew all the bolts - The screws are removed with washers.
- We dismantle the cylinder head along with the gasket.
Remove the cylinder head to replace the gasket - The screws are reusable parts, but if they become longer than 135.5 mm, they should be replaced with new ones. Before screwing into the head, the bolts must be lubricated with engine oil.
- The contact surfaces of the cylinder block and head must be smooth, free of defects, dry and clean, so they must be thoroughly cleaned of dirt and remnants of the previous gasket. If there are any obvious defects, they need to be removed. The threaded holes must be free of oil and coolant residues.
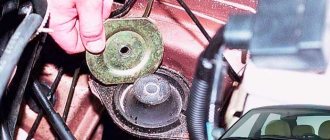
- The installed gasket must also be in a dry and clean condition. When installing, make sure that the hole through which the oil passes is located between the 3rd and 4th cylinders.
- Before installing the cylinder head, you need to check that the valves of the first cylinder are closed.
- Tighten the bolts in accordance with the diagram in four stages.
We tighten the bolts according to the diagram.
At each stage, the bolts are tightened with a certain torque:
- on the 1st - 20 Nm;
- on the 2nd - 69.4–85.7 Nm;
- on the 3rd you need to turn it 90 degrees;
- on the 4th they turn completely 90 degrees.
- Next, assembly continues in reverse order. In this case, the camshafts and crankshaft must not be rotated until the timing belt is installed. The camshaft pulley must be installed so that the protruding part of the hub is turned towards the power unit.
- After final assembly, you need to check all the valve clearances and adjust the timing belt tension.
Thus, using these instructions, replacing the cylinder head gasket on a VAZ 2110 is not difficult to perform, both with units with 8 valves and 16 valve engines.
Tightening torques for 8-valve engine
The bolt tightening torque is as follows:
- First they are tightened to 20 Nm .
- Then up to 69.4–85.7 Nm .
- At the third stage, the bolts are turned 90 degrees.
- At the last stage, you need to turn the bolts completely 90 degrees.
The rest of the assembly process occurs in the reverse order of disassembly. A prerequisite is to check the valve clearances and adjust the timing belt tension.
Some nuances
The tightening torque is one of the main factors for the normal fit of the block head. But this criterion is influenced not only by the applied force, but also by the fasteners themselves:
- General condition of the bolts – new or used;
- Presence of lubricant on the threaded part;
- Thread condition.
The type of power plant (petrol, diesel), as well as the number of valves, does not affect the cylinder head tightening technology. But this does not mean that the force and tightening procedure are identical for all motors, and before seating the head, you should definitely study the conditions for performing the operation and all its features.
How to change it yourself?
Replacing the cylinder head gasket on a VAZ 2110 with an injector or carburetor engine requires certain knowledge and skills.
To change the head mechanism on an 8 or 16 valve engine, you must carefully prepare for this task.
Tools and materials
If you change the cylinder head gasket yourself, you will need:
- star key;
- a set of ratchet wrenches with socket heads;
- Phillips and flat head screwdrivers;
- torque wrench for tightening cylinder head bolts;
- spark plug key.
Channel Sdelaj Sam! Pljus interesting! published a video that will help you understand how to correctly determine the burnout of the cylinder head gasket between the cylinders of the power unit.
Step-by-step instruction
A detailed guide on how to remove and change the cylinder head gasket on a VAZ 2110 is given below:
- Drive the car into a garage with a pit or onto an overpass; if possible, it is better to use a lift, since some of the work will be done under the bottom of the car.
- Open the hood and loosen the bolt securing the battery terminal, disconnect it. This is necessary in order to prevent voltage surges during repairs.
- Then disconnect the intake line from the exhaust pipe.
- If the car is equipped with a carburetor engine, then the carburetor itself must be removed.
- Disconnect the lead cables from the spark plugs. A wire with a connector is connected to the power unit temperature controller; it also needs to be removed. After this, disconnect the plug from the pressure and engine fluid level controller.
- Loosen the fastening and disconnect the vacuum booster tube that is fixed to the intake manifold.
- Disconnect the connectors and disconnect the ignition distributor controller.
- Remove the gasoline pump with all its components. Loosen the clamps and disconnect the pipes connected to the pumping device. Some fuel may come out of it, so use a rag when dismantling it.
- Using a wrench, loosen the screw securing the timing belt tension roller. This will allow you to remove the wheel along with the belt.
- Next, secure the camshaft toothed disk to prevent it from turning during further repair work.
- Unscrew the fixing screw and remove the pulley from its seat. To perform this task, you need to use two screwdrivers at the same time.
- Next, locate the nuts securing the rear timing cover. You need to unscrew them and remove the cover. Using a Phillips head screwdriver, loosen the clamps to disconnect the pipes connected to the cylinder head exhaust pipe.
- Using a hex wrench, remove the cylinder head mounting screws, there are ten in total. The bolts are removed along with the washers. Assess the condition of the latter. If washers or bolts are damaged, they must be replaced with new ones. The screws themselves are reusable parts, but they often wear out, leading to the need for replacement. You can tell how worn the bolts are by their length. If it is about 13.55 cm, then purchase new clamps in advance.
- Then the cylinder head with the failed seal is dismantled.
- During further installation of the GB, new screws must be lubricated with engine fluid. This will ensure simple and reliable fixation of the parts. In addition, lubrication will prevent accelerated wear of the bolts.
- The contact surfaces of the head and the block must be thoroughly cleaned of wear and contaminants. These elements usually show signs of an outdated gasket. Thoroughly clean and dry the surfaces before further installation of the service seal.
- Perform a visual inspection of the mounting screw holes. Often when repairs are carried out, they contain residues of the sealing element, engine fluid or antifreeze. Any dirt in the holes must be removed.
- A new seal is being installed, which must first be cleaned and dried. During installation, make sure that the hole used for the passage of engine fluid is located between the fourth and third cylinders. Also, when installing the gasket, make sure that the valve elements of cylinder 1 are closed.
- When the installation procedure is completed, you need to correctly tighten the cylinder head bolts, taking into account the sequence and torque. First, the two middle bolts are tightened - the bottom and the top, and then all the rest. On the first tightening circle, the torque should be 20 Nm, this indicator is controlled using a torque wrench. On the second lap the torque should be about 69.4-85.7 Nm. On the third circle, all the bolts are rotated 90 degrees in the prescribed order, and they are turned by the same amount on the fourth circle.
- Further assembly is done in reverse order. When performing the task, it is not allowed to rotate the crankshaft and camshaft until you install the timing belt. The camshaft pulley is mounted in such a way that the protruding part of the hub is directed towards the car engine. When the repair procedure is completed, check the correct assembly and make sure there are no gaps on the valves. Also adjust the timing belt tension.
Consequences of untimely replacement
If the cylinder head gasket on the “Ten” is damaged or worn out, this will lead to the following malfunctions:
- The engine fluid will begin to get into the antifreeze, and the coolant, accordingly, into the oil. This problem will cause the engine to overheat and the coolant to boil.
- Steam will come out of the exhaust pipe, and the power of the power unit will be reduced to a minimum.
- The engine may stall at idle and when driving uphill, and failures may occur when you press the gas pedal.
- The coolant that gets into the lubrication system will make it difficult for the oil to work due to the fact that when mixed, the substances will lose their original characteristics.
As a result, regular use of a car with a worn gasket will reduce the service life of the car’s engine.
When should you change?
The need to replace the cylinder head gasket on a carburetor or injection car arises when, during use and due to natural wear, the seal loses its elasticity. This leads to a decrease in the quality and efficiency of fulfilling the main purpose - reliable sealing of the cylinder head connection with the cylinder block itself.
It is necessary to replace the cylinder head gasket on a VAZ 2110 in the following cases:
- If oil drips appear at the junction of the head and the block. There may also be a refrigerant leak in this area.
- The presence of light-colored foreign impurities or foam in the motor fluid. This can be detected by removing the dipstick from the inspection hole. The formation of a foam emulsion and the appearance of impurities occurs as a result of mixing engine and coolant fluids.
- Change in color of exhaust gases. A more saturated white-blue gas comes out of the car's muffler. This indicates that water has entered the combustion chamber of the cylinder block.
- The appearance of oil stains in the expansion tank with antifreeze.
- Increase in power unit temperature. As a result of exhaust gases entering the cooling system, the antifreeze heats up much faster. This leads to an increase in engine temperature.
User Sergei Tsapyuk showed in his video the consequences of a burnt-out head gasket in a VAZ car.
Consequences of incorrect cylinder head installation
Correct tightening of the cylinder head is very important, since the performance of the motor directly depends on it. The cylinder head acts as a cylinder cover, and any violations in its fit affect the processes occurring inside the power unit.
Insufficient tightening of the head leads to a drop in compression due to loss of tightness at the junction of the cylinder head with the cylinder block, burnout of the gasket, breakthrough of working gases from the cylinders and their entry into the channels of the lubrication or cooling systems, penetration of technical fluids into the combustion chambers, which in turn is negative affects the functioning of the power unit and can cause very serious damage.
Excessive tightening also does not bring anything good; in this case, damage to the head often occurs - cracks appear, or fasteners are destroyed - bolts break, threads break, etc.
Uneven or incorrect tightening often causes warping of the head, due to which gaps appear at the junction of it with the block, which leads to the same consequences as insufficient tightening.
Features of repairing the cylinder head of the Lada Granta
The engine of the Lada Granta car has differences with the Kalina engine. The block head, in comparison with the Kalinovskaya one, has been increased in height by 1.2 mm. This is due to a change in the combustion chamber. Lightweight pistons installed. The timing belt has been modified and operates in a temperature range from minus 40 to plus 40 degrees. The declared belt mileage is up to 200 thousand kilometers.
The main feature of Granta cylinder head repair is the use of metal-ceramic seats. By car Kalina, 2114, etc. Cast iron saddles are used, which can be processed manually using a set of domestic cutters.
Machining cermet seats requires wear-resistant cutting tools. In order to successfully process them, the head is installed on the NEWENContour-BB machine, designed specifically for the rapid processing of seats and guide valves with digital control or manually with a Neway tool.
The Oka car engine is literally half the VAZ-2114 engine and has only two cylinders. All operations to repair the cylinder head of the engine of this machine are carried out identically to a full-fledged four-cylinder engine. A special feature of the head repair is that the standard hours are reduced by almost half.
Tips for replacing the cylinder head gasket
Removal and installation of the cylinder head gasket is carried out with the crankshaft set to TDC. It is also necessary to ensure that both valves of the 1st cylinder are closed.
After unscrewing the mounting bolts from the cylinder block, it is recommended to replace them with new ones, since with repeated use the bolts are pulled out, “metal fatigue” occurs and the bolt breaks under the influence of tension forces. Bolts need to be replaced if their length exceeds 135.5 mm.
It must be remembered that the cylinder head gasket must be changed after each removal of the engine head, even if this is not due to its unsuitability.
The bolts must be tightened in two stages with the sequence shown in photo 16. The first tightening stage is done with a torque of 20 N•m (2 kgf•m), the second with a torque of 69.4–85.7 N•m (7.1– 8.7 kgf•m), the second and third are the final adjustment of the bolts to 90°.
The procedure for replacing the cylinder head gasket on a VAZ 2110 on a 16-valve engine is generally similar to how to change the cylinder head gasket on an 8-valve engine, but has several nuances :
- The receiver must be dismantled.
- When removing timing belt pulleys, a mark is placed on two pulleys and two pulleys are removed.
- The fuel rail is removed.
- The order and tightening torques are carried out in accordance with the requirements for a 16-valve engine.
Common Mistakes
Despite the fact that automakers clearly indicate the procedure and nuances of tightening the cylinder head, many car enthusiasts make mistakes when assembling the engine. The most common of them are:
- Pouring oil into the mounting holes to lubricate the threads (the liquid is incompressible, so poured oil will not allow the head to be properly tightened);
- Over-tightening (exceeding tightening forces leads to damage to the cylinder head and the fasteners themselves);
- The use of damaged or inappropriate keys (the edges of the bolt heads may be torn off, after which it will be problematic to tighten or unscrew them normally);
- Use of unsuitable bolts as replacements (fasteners from different engines may differ in length, thread spacing, head height and diameter);
To avoid problems in the future, you should use only fasteners designed for a specific engine and fully comply with the work conditions.
Sources
- https://www.vazzz.ru/kak-pomenyat-prokladku-golovki-bloka-tsilindrov-vaz-2110-8-klapanov/
- https://luxvaz.ru/vaz-2110/218-zamena-prokladki-gbc-2.html
- https://AVSU-pitanie.ru/info/porjadok-zatjazhki-golovki-vaz-2110-8-klapanov/
- https://avtozam.com/vaz/2110/kak-pomenyat-prokladku-golovki-bloka/
- https://carfrance.ru/zamena-prokladki-gbc-golovki-bloka-cilindrov-na-vaz-2112-16-klapanov/
- https://carfrance.ru/prokladka-gbc-na-8-mi-klapannom-dvigatele-vaz-2110/
- https://autodvig.com/blok-cilindrov/zamena-prokladki-gbts-vaz-2110-37079/
- https://etlib.ru/report/1394-zamena-prokladki-gbts-vaz-2110-8-klapanov
- https://AutoTopik.ru/remont/1417-kak-zatyagivat-gbc.html
[collapse]