The engines of the Volzhsky Automobile Plant are quite reliable, but sooner or later they need repairs. Often, various internal combustion engine breakdowns occur due to the fault of the car owners themselves; replacing the VAZ cylinder head gasket is required in case of engine overheating.
If the gasket (cylinder head) burns out, the engine sputters and loses power, and it becomes impossible to operate the car with such a malfunction.
Signs of a malfunction of the cylinder head
There are several reasons for the head gasket to burn out on VAZ cars:
- motor overheating;
- poor tightening of cylinder head bolts;
- crack in the block head;
- deformed surface of the cylinder head or cylinder block.
The main cause of burnout of the cylinder head is overheating; the engine temperature is determined by the sensor on the instrument cluster. The engine can overheat due to various factors:
- insufficient level of antifreeze (antifreeze) in the cooling system;
- the ignition is set incorrectly (too late);
- the main cooling radiator is clogged;
- Intake and exhaust valves are jammed.
If there is severe overheating, the cylinder head may fail and the piston rings may become stuck. If, after replacing the cylinder head, the gasket burns out again, it is necessary to carry out more serious repairs and deal with the cause of the recurring defect.
- 1 Signs of a malfunction of the cylinder head
- 2 Features of replacing the cylinder head on rear-wheel drive VAZs
- 3 Replacing the cylinder head gasket of a VAZ 2106
- 4 Replacing the cylinder head gasket of a VAZ 2107 (engine 2105)
- 5 Replacing the cylinder head gasket VAZ 2109 (21099)
- 6 Replacing the cylinder head gasket VAZ 2114 (2115)
- 7 Replacing the cylinder head gasket VAZ 2110 (2112)
Features of replacing the cylinder head on rear-wheel drive VAZs
VAZ classic cars are equipped with engines of models 2101, 2103, 2105 and 2106, and VAZ 2106/2107 cars can be equipped with any of these engines. The principle of replacing the cylinder head on all “Classics” is almost the same, with one small difference - the ICE 2105 has a belt drive, while a timing chain is installed on all other VAZ power units.
If the sensor on the instrument panel shows a temperature above normal, it may not necessarily be a broken cylinder head gasket. Overheating also occurs for the following reasons:
Currently reading
How to maintain and charge a maintenance-free type of battery for...
ZIL 130 engine: a legend of the Soviet automobile industry
- the water pump is faulty (the impeller is torn off);
- the generator belt is not tensioned or is broken;
- The thermostat does not work properly;
- The radiator cap valve does not open.
There are signs by which you can determine that the PGBC has burned out:
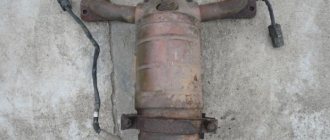
- when the engine is running, thick white smoke (steam) comes out of the muffler pipe;
- Antifreeze leaves the radiator, but does not leak anywhere;
- the engine oil in the crankcase has turned white, that is, coolant gets into the oil;
- the engine troits, runs on two and three cylinders;
- antifreeze “throws out” from the radiator.
Cylinder head gasket VAZ 2107
The cylinder head gasket is a one-time use item, since its physical properties and geometry change during installation.
What is the cylinder head gasket used for?
The cylinder head gasket is designed to seal the connection between the cylinder block and the head. Even taking into account the fact that these engine components have perfectly flat mating planes, it will not be possible to achieve complete tightness without it, because the pressure in the combustion chambers reaches more than ten atmospheres. In addition to this, the seals also require connection of the oil channels, as well as the cooling jacket channels. Tightness is achieved by uniform compression of the gasket while tightening the connecting elements.
The gasket serves to seal the connection between the head and cylinder block
What are cylinder head gaskets made of?
The cylinder head gasket can be made of different materials:
- metal (copper and aluminum alloys);
- asbestos;
- combinations of metal and asbestos;
- combinations of rubber and asbestos;
- paronitis.
The main requirements for the gasket are resistance to high temperatures and ability to compress. Each of the listed materials has its pros and cons. Products made from multiple layers of metal or asbestos, for example, better withstand high temperatures, but may not provide the best seal. Parts made of rubber and paronite, on the contrary, maximize the connection between the head and the block, but their temperature stability is lower.
Metal cylinder head gaskets for VAZ 2107 are made from copper and aluminum alloys
When choosing a gasket, it is better to give preference to a combined product, for example, made of asbestos and metal. Such seals are made of sheet asbestos, but the holes for the cylinders are reinforced with metal rings. Holes for fastening elements are reinforced with the same rings.
When choosing a gasket, it is better to give preference to a combined product
What to consider when choosing a cylinder head gasket
If you are going to replace the gasket, you need to know exactly the characteristics of the engine. The fact is that the “sevens” were equipped with three types of power plants: VAZ 2103, 2105 and 2106, which have different cylinder diameters. For the first it is 76 mm, for the last two it is 79 mm. Gaskets are manufactured according to these dimensions. Therefore, if you purchase a cylinder head seal for a 2103 engine and install it on a 2105 or 2106 power unit, the pistons will naturally tear the edges of the product with all the ensuing consequences. If a gasket with a cylinder hole diameter of 79 mm is installed on a VAZ 2103 engine, the seal will not provide the necessary tightness due to the fact that the part will not completely block the cylinder holes.
Causes and signs of cylinder head gasket failure
The destruction of the seal is characterized by its breakdown or burnout. In the first case, there is slight damage to the part, which in some cases cannot even be seen with the naked eye. When a product burns, the scale of damage is significantly greater. The part is deformed and loses its integrity, leaving joint areas without sealing.
Causes of destruction
The main reasons why a cylinder head gasket fails prematurely include:
- overheating of the power unit;
- incorrect order or tightening torque of the mounting bolts during installation;
- factory defects or low quality materials used to manufacture the part;
- use of low-quality coolant;
- engine malfunctions.
Engine overheating most often causes gasket failure. It usually occurs due to interruptions in the operation of the cooling system (malfunction of the thermostat, radiator fan, fan switch sensor, clogged radiator, etc.). As soon as the driver drives a car with an overheated engine for half a kilometer, the gasket will burn out.
When installing a new seal on a power unit being repaired, it is important to follow the order of tightening the bolts that secure the head to the block. In addition, it is necessary to adhere to the specified tightening torque of the fastening elements. If the bolts are not tightened or overtightened, the gasket will inevitably become deformed and subsequently be punctured.
Most often, the gasket burns out due to engine overheating.
When choosing a replacement seal, you should pay attention not only to its parameters, but also to the manufacturer. Under no circumstances should you buy cheap parts from unknown companies. The result of such savings may be unplanned engine overhauls. This also applies to coolant. Low-quality refrigerant can cause corrosion and damage not only the gasket, but also the head itself.
As for disturbances in the operation of the power plant, processes such as detonation and glow ignition also have a destructive effect on the seal. Therefore, it is worth monitoring the quality of the fuel and the correct adjustment of the ignition timing.
Signs of cylinder head gasket damage
A breakdown or burnout of the gasket can manifest itself in the form of:
- rapid heating and overheating of the engine;
- unstable operation of the power unit;
- oil or coolant leaks from under the cylinder head;
- traces of coolant in the oil and grease in the refrigerant;
- steam in exhaust gases;
- an increase in pressure in the cooling system, accompanied by the appearance of smoke in the expansion tank;
- condensation on the spark plug electrodes.
Symptoms will be different in each individual case. It depends on where exactly the integrity of the seal was damaged. If the gasket is damaged near the edge of the cylinder bore, then, most likely, the power plant will overheat with an increase in pressure in the cooling system. In this case, hot exhaust gases under pressure will break through the seal damage into the cooling system. Naturally, antifreeze or antifreeze will begin to heat up quickly, increasing the temperature of the entire engine. This will increase the pressure in the system, and gas bubbles will appear in the expansion tank.
When a gasket burns out, refrigerant often gets into the oil.
There will definitely be a reverse effect. If coolant enters the combustion chambers, it will disrupt the normal operation of the engine. The engine will begin to stall due to the fact that the fuel-air mixture, diluted with coolant, will not be able to burn. As a result, we will get a noticeable malfunction of the engine at idle, accompanied by exhaust gases in the cooling system, coolant in the combustion chambers and thick white smoke with a characteristic odor from the exhaust pipe.
If the gasket burns out somewhere between the windows of the cooling jacket and the oil channels, it is possible that these two process fluids will mix. In this case, traces of grease will appear in the expansion tank, and antifreeze or antifreeze will appear in the oil.
Oil may get into the cooling system
If the gasket is damaged along the edge, oil or coolant leakage is usually observed at the junction of the cylinder head and the cylinder block. In addition, a breakthrough of exhaust gases between the main engine parts is also possible.
If the gasket is damaged and coolant is leaking into the cylinders, thick white smoke will come out of the exhaust pipe.
Self-diagnosis
Diagnosis of gasket failure must be approached comprehensively. In other words, you should not immediately start removing the head when you see white smoke from the exhaust pipe or oil leaks from under the head. To verify that the seal is faulty, follow these steps:
- Inspect the junction of the head and cylinder block around the perimeter. If you find oil or coolant leaks, make sure that it is leaking from under the head.
- Start the engine and notice the color of the exhaust and its smell. If it really looks like thick white steam and smells like antifreeze or antifreeze, turn off the engine and carefully unscrew the expansion tank cap. Take a sniff. If exhaust gases enter the cooling system, the smell of burnt gasoline will come from the tank.
- Without tightening the cap of the expansion tank, start the engine and look at the condition of the refrigerant. It should not contain any gas bubbles or traces of lubricant.
- Turn off the power plant and let it cool. Remove the oil dipstick, inspect it and determine the oil level. If there are traces of a white-brown emulsion on the dipstick, or the oil level has suddenly risen, mixing of process fluids is taking place.
- Let the engine run for 5-7 minutes. Silence it. Unscrew the spark plugs and inspect the electrodes. They must be dry. If there are traces of moisture on them, most likely, refrigerant is entering the cylinders.
Video: signs of cylinder head gasket damage
Replacing the cylinder head gasket of a VAZ 2106
Replacing the cylinder head gasket of a VAZ classic on an engine with a chain drive is generally a fairly simple job; the main difficulty is aligning the crankshaft and camshaft marks during assembly. If the marks are set incorrectly, the engine will not work normally, or may not start at all.
You can change the cylinder head on a “Classic” without a pit or a lift; before performing work, you should prepare the necessary tools and a container for draining the coolant. From the tool you will need:
- a set of car keys;
- slotted and Phillips screwdrivers;
- pliers;
- knob with extension;
- head 19 (for old style bolts) or multi-faceted head 12 (for new type bolts);
- hammer;
- mount.
We replace the PGBC on engines 2101/03/06 as follows (on a carburetor engine):
- turn off the ignition, put the car in neutral gear and on the handbrake;
- remove the terminal from the battery;
- drain the antifreeze from the radiator, also from the cylinder block. Even if the coolant is gone, there is still some left in the radiator;
- unscrew the nuts securing the air filter housing, remove the housing to the side;
- disconnect the gas rod and choke cable from the carburetor;
- free the block head from the water pipes (radiator and upper stove);
- discard the vacuum brake booster hose;
- unscrew the four nuts securing the exhaust pipe of the muffler;
- disconnect the high-voltage wires from the head;
- remove the distributor (you don’t have to dismantle it, but it will get in the way);
- disconnect the gasoline hose from the carburetor;
- remove the valve cover and place it aside;
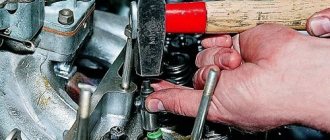
- unscrew the 13 mm bolt with edges securing the cylinder head;
- remove the chain tensioner, unscrew the camshaft gear fastening;
- we throw the chain off the sprocket (gear), the chain can be dropped down, and then it will not be difficult to get it;
- unscrew the camshaft nuts (key 13), remove the shaft,
- pull off the cylinder head mounting nuts, unscrew the bolts and remove the cylinder head. In order not to lose the rocker, it is better to remove them from the head.
After dismantling the head, we carefully protect the surfaces of the block and the cylinder head itself; there should be no irregularities on them. During assembly, all parts are installed in place, but there are some features:
- so that the installed gasket does not slip on the surface of the block (if there are no guides in the block), the gasket can be carefully spread over the entire surface with lithol;
- before installing the cylinder head, install the piston of the first cylinder at TDC (at the top point);
- in order not to remove the chain from the pallet, you can fasten the chain to the shoe;
- Having installed the cylinder head, we place the rocker, making sure that they are all in their places;
- Tighten the cylinder head bolts evenly, from the middle, in several steps, in the order as in the figure below;
- We adjust the camshaft so that it is aligned with the fourth cylinder (the pin on the flange is located almost opposite the upper bolt on the body, picture below);
- after installing the camshaft, a sprocket with a chain is installed, and then the marks are aligned exactly, but first you need to tighten the chain with a tensioner;
- Before installing the tensioner, it should be recharged - loosen the central cap nut, recess the plunger, and tighten this nut;
- after assembling and tensioning the chain, the timing marks must match - the mark on the crankshaft pulley is located opposite the large mark of the chain cover;
- the alignment of the camshaft marks is indicated by arrows below in the figure;
- Having completed the assembly, fill in antifreeze and start the engine, check how it works.
How to change the plug on the VAZ 2109 block
Plugs in the VAZ engine block
The plugs in the cylinder block are integral elements of the unit. If liquid begins to leak from the cooling system, the root cause may be plugs that have become unusable. The occurrence of holes is facilitated by rust that forms during the use of the car. Changing the plugs on a VAZ engine often eliminates such problems, and installing new ones yourself takes a lot of time compared to engine repair.
How to eliminate a coolant leak in a VAZ engine
If a leak appears in the engine due to bad plugs, they simply need to be replaced with new ones. For older VAZ cars, the set of engine cup plugs includes: one plug of small diameter - 20 5 mm and 5, large diameter - 40 mm. There is an annotation on how to change the plug for a VAZ block.
Materials and tools for work
Before doing this, the hole must be thoroughly cleaned and degreased.
Preparatory work before changing plugs on a VAZ car
First, you need to free up access to the stubs, remove elements and nodes that interfere:
- The battery is disconnected - the negative terminal is removed.
- Cooling fluid is connected from the radiator and cylinder block.
- It is determined whether it is likely to change the plug in the VAZ block without additionally removing the engine head.
If it is necessary to remove the head, do the following:
- The muffler pipe is disconnected from the exhaust manifold.
- The bracket for fastening the pump pipe supplying coolant is removed.
- The hoses through which the system is ventilated are disconnected from the cylinder head cover and the carburetor, which is locked with a special cover.
Disconnecting the ventilation hoses from the air filter
- The air filter is removed.
- The wires from the ignition distributor sensor, carburetor, and spark plugs are disconnected.
- The ignition distribution sensor is removed.
- The hoses are disconnected from:
- fuel pump through which gasoline is supplied;
- carburetor, which serves to drain fuel;
- outlet pipe, which is installed on the engine cooling jacket;
- vacuum brake booster.
- The cables connecting the throttle and air damper drives of the carburetor are removed.
- The protective cover is removed from the timing belt. The nut securing the tension roller is unscrewed, which is then removed immediately with the axle and spacer ring.
- The belt is removed from the camshaft pulley.
- The bolt is turned out and the pulley is removed with the key.
- The motor head is released from the mount and removed.
Tip: Changing the small or large plug on the cylinder block on the flywheel side must be done with the car engine disassembled
Changing plugs for VAZ cars
- Using a bit or chisel in one hand and a hammer in the other, gently tapping the edge of the plug, the part is turned in the motor block.
Turning the cylinder block plug using a screwdriver
- Then it is pryed with pliers and removed from the nest. In a very warped plug, when it cannot be turned, a hole is made, a wrench is inserted into it and removed.
Drilled hole in a very worn plug
Tip: If a part falls inside the motor, you can drag it to the hole with a magnetic pointer and remove it with pliers.
- Clean the edges of the holes with sandpaper to remove rust. For reliability, the edges of the new plug are lubricated with sealant before installation in the socket.
The photo clearly shows the difference between the old and new plugs.
New and ancient plug for VAZ
- The plug is put in place.
- Using a hammer and a mandrel, the plug is carefully pressed into the designated hole in the engine cylinder block.
How to change the plug on the VAZ 2109 block
Pressing the plug into the motor housing
- The block head is put in place. If necessary, before installation, the plugs on the heads of the VAZ block are replaced. The procedure for performing the work is similar to that for the cylinder block.
You can see in detail how the plugs are changed on a VAZ 2108 in the video.
Installing the block head
After the VAZ engine block plugs have been replaced, its head is attached to the cylinder block. So:
- It is necessary to clean the head of deposits and dirt. To do this, you can use diesel fuel or kerosene.
- Residual cooling water and oil are removed from the threaded holes.
- The old gasket is cleaned and then the mating surfaces of the head and cylinder block are degreased with a solvent.
Tip: When installing the cylinder head, use a new gasket. You need to make sure that no oil gets on it.
- The head is installed on the cylinder block.
- The fasteners are immersed in engine oil with threads, drained for approximately 30 minutes and installed on the head.
- The belt is installed. To do this, it is put on a pulley located on the crankshaft. The belt is tensioned counterclockwise.
- Without tightening the bolts at all, the belt drive protection is attached. The crankshaft rotates smoothly two turns, while the belt must be under constant tension and not weaken when the shaft rotation stops.
- Check the alignment of the mark on the middle cover and the crankshaft pulley, as well as on the cylinder head cover and the camshaft pulley. When they match, all the bolts securing the tension roller bracket are tightened. First - right, later - left.
- The cables for driving the throttle and air dampers of the carburetor are installed.
- The previously removed hoses are connected.
- The ignition dispersion sensor is connected.
- The ignition timing is set correctly, otherwise interruptions in engine operation may occur, fuel consumption will increase, and the engine will overheat.
- The top dead center is set according to the marks located on the scale of the crankcase hatch and the flywheel. To do this, remove the rubber plug from the crankcase hatch. The crankshaft rotates as it rotates until the marks on the flywheel and the middle mark on the hatch body coincide. In this case, the pistons of the first and fourth cylinders will be in the TDC zone.
- Wires are connected to the carburetor and sensors.
- An air filter is installed.
- The car's cooling system is refilled with water, preferably antifreeze.
- The battery is connected.
- The operation of the motor is checked.
Ignition installation
This is how the plugs for VAZ engines are changed. A water leak from the engine cylinder block or a malfunction in the cooling system on the roads causes a huge number of mechanical car breakdowns. The elevated temperature that occurs in the cooling system leads to the formation of scale, which contaminates the internal walls of the motor housing. In addition, scale clogs the channels of the cooling radiator and cylinder block, and this leads to overheating of the engine, which can fail.
All this shows that changing the VAZ engine plug must be done on time.
VAZ 2109 | removal and installation of cylinder block plugs | Lada Samara
Rice. 67. Front part of the cylinder block: 1 — spring tension pin; 2 — chain guide support pin; 3 - metal ball with a diameter of 17 mm; 4 - oil spray nozzle; 5 — cylinder block plug; 6 — support pin of the chain tensioner boot; 7 — support pin of the oil pump drive chain tensioner
Rice. 66. Rear part of the cylinder block indicating the location of the iron ball (1) blocking the main oil line and the plug (2) of the cylinder block
— drain the coolant;
— remove parts and assemblies that may interfere with access to the plugs;
Rice. 69. Installing a screwdriver or chisel to remove the cylinder block plugs
Rice. 70. Removing the plug from the block
— carefully clean the mounting hole of the plug in the cylinder block. There should be no traces of grease left on the sealing surface;
- coat the mounting hole with Loctite fixing agent and insert the new plug using a special mandrel (specification number 00) or another suitable mandrel so that it is flush with the surface of the cylinder block;
— install all the removed parts in their places and after a pause of 45 minutes, pour coolant into the engine if it was not removed from the car;
— then start the engine and check it for leaks.
Replacing the cylinder head gasket of a VAZ 2107 (engine 2105)
The 2105 engine has a timing belt drive, so replacing the cylinder head gasket differs only in removing and installing the gas distribution mechanism parts. The marks are set as shown in the figure below.
The cylinder head 2105 itself is slightly different, but the work is done in the same order as on other VAZ classic engines.
Replacing the cylinder head gasket VAZ 2109 (21099)
On all carburetor cars of the 2108-09-099 family, replacing the head gasket is quite simple, first remove the cylinder head:
- disconnect the battery terminal (ground wire) and drain the antifreeze;
- remove the air filter housing;
- We pull off the crankcase ventilation hose from the valve cover, having first unscrewed the clamp;
- as on the “Classic”, we disconnect from the carburetor: the gas cable, the choke cable, the gasoline hose from the fuel pump;
- remove all pipes from the cylinder head - vacuum booster, radiator, stove hose;
- unscrew the nuts securing the exhaust pipe; you can get to them from above, from under the hood;
- remove the timing belt cover;
- dismantle the valve cover (2 nuts);
- unscrew the cam gear mounting bolt;
- loosen the tension roller, remove the belt and the gear itself;
- unscrew the bolt securing the iron timing case to the cylinder head;
- we unscrew ten cylinder head bolts, the rest need not be removed (the carburetor, distributor and intake manifold remain in place).
At this point, the removal of the cylinder head is completed, we change the gasket, thoroughly cleaning the surfaces of the cylinder head and block. Labels are set as follows:
- the camshaft marks are aligned along the left edge of the cylinder head (as in the picture);
- The crankshaft marks are aligned on the flywheel (in the gearbox housing window).
After replacing the VAZ 2109 cylinder head gasket, fill in antifreeze and start the engine; as the engine warms up, add coolant to the expansion tank and monitor the engine temperature.
What to consider when choosing a new product
In order for the gasket to perform its functions, it must be resistant to elevated temperatures and have the ability to compress. These properties depend on the material of manufacture. There are several options for making gaskets: from asbestos, paronite, metal and their combinations.
This is interesting: Checking diesel engine injectors, malfunctions and cleaning
Combined options, layers of which are made of different materials, combine several properties. Gaskets made of asbestos and metal alloys have increased resistance to high temperatures, but do not strengthen the seal between the head and the cylinder block. Products made of paronite and rubber provide high-quality sealing, but their limit for high temperatures is lower. When choosing a gasket, preference should be given to products of a combined type.
In order not to make a mistake when choosing a seal, it is necessary to take into account the characteristics of the power unit that is installed on the car. The VAZ 2107 can be equipped with one of three types of engines. They differ in cylinder diameter. The power unit 2103 has a diameter of 76 mm, while the 2105 and 2106 have a diameter of 79 mm. If you install a gasket of the wrong diameter, the edges of the seal will be damaged. Naturally, the seal will be broken.
Which cylinder head gasket is the best?
The sealing gasket serves to strengthen the engine cooling channels and well preserves the oil channels in the cylinders that have the gas distribution function. Therefore, it is not worth saving on the cylinder head gasket. If the part is of poor quality, a breakthrough may occur between the cooling system channel and the drainage channels of the lubrication system. There is a breakthrough located at the junction of the cooling system channel and the cylinder.
By the way, the same thing happens when the cylinder head is loosely tightened, but in any case the gasket will have to be changed.
Automotive stores sell the following types of cylinder head gaskets intended for installation in the VAZ-2107:
- Asbestos - involves associated engine repairs. The advantages of the material are heat resistance, increased elasticity, and good elasticity characteristics.
- Non-asbestos products are also easy to use, and all thanks to minimal shrinkage and excellent restorative properties.
- Metal ones are considered the best among all other cylinder head seals. The point is that the pressure is distributed evenly throughout the block.
A video of how to replace the cylinder head gasket of a VAZ-2107 with your own hands can be seen below:
Replacement of cylinder head gasket VAZ 2114(2115)
On VAZ models 2113-14-15, injection 8-valve engines are mainly installed, so replacing the cylinder head gasket of a VAZ 2114 (2115) is slightly different from replacing the cylinder head gasket on a “nine”.
Unlike 2109 on the “fourteenth” and “fifteenth” models:
- the air filter housing is removed differently, and along with it you also need to disconnect the injector corrugation (pipe) and the plug from the air flow sensor;
- otherwise the fuel hoses are disconnected;
- there is no distributor on the engine, but the pipe goes behind the cylinder head;
- it will be necessary to remove the high-voltage wires, and it is better to remember their installation order (sometimes they are not numbered);
Otherwise, there are no fundamental differences in replacing the cylinder head gasket 2114 from 2109.
How is the tightening torque of VAZ 2109 bolts adjusted?
If it is necessary to tighten the cylinder head of a Nine engine, it is important to observe not only the strength and degree of tightening of the bolts, but also other conditions. Below we will look at how to correctly stretch the cylinder head on a VAZ 2109.
What will you need?
The procedure for tightening fasteners after removal and repair, as well as when installing the cylinder head, is carried out exclusively with a torque wrench.
A dynamometer is a tool designed to tighten the cylinder head screws of various engines.
In addition to the key, you will also need a caliper or a regular ruler.
User Marat Ibatullin made a video in which he clearly showed how the task of tightening the screws is performed.
Scheme of work
The order of tightening the bolts on cars with an injector or carburetor engine is determined by the manufacturer and is indicated in the service book for the car. According to the diagram, the pulling procedure begins with the central two cylinder head bolts.
The cylinder head bolts must be tightened as follows:
- First, you need to twist the screws with a force in Newtons of 2.0 kg/cm.
- Then the bolts are tightened to a torque of 7.5-8.5 kg/cm.
- After this, all screws must be tightened 90 degrees.
- At the end, each bolt is rotated 90 degrees again.
How to tighten the head screws of a VAZ 2109 block with your own hands:
- The torque wrench holder is placed in the zero position. This indicates that the instrument data corresponds to the moment of the initial position.
- Evaluate the indicators on the key before starting the tightening procedure.
- The tool holder can now be rotated. Monitor the readings as you complete the task.
- If it happens that the torque does not change during tightening, then the head mount may be stretched. This is quite normal, as it should be. First, use a wrench to tighten the screws to 2 kg/cm. Follow the tension sequence shown in the diagram.
- At the next stage, the covering is performed again in the same sequence. Only now the bolts need to be pulled to approximately 8 kg/cm.
- At the end of the procedure, the screws must be tightened once 90 degrees in a circle, and then again 90 degrees.
Channel RUS13 in its video showed how to install the cylinder head on a VAZ 2109 engine and tighten the bolts.
Tightening rules
What nuances should be taken into account when carrying out this procedure:
- Observe the appropriate tightening torque for the VAZ 2109 cylinder head.
- The use of wrenches and other tools is not allowed, since the degree of tension can only be determined using a dynamometer.
- To perform tensioning, only working screws are allowed. The bolts must meet the requirements of the power unit installed on the machine.
- Before completing the task, make sure that the holders are in good working order.
- If the cylinder head has been replaced or repaired, then the old bolts cannot be used for tension; new ones must be purchased. On sixteen-valve power units, it is allowed to re-use screws to fix the block head, but only if the length of the parts is no more than 9.5 cm. It is necessary to measure the length of the screw only with a washer. If the bolts are larger than 9.5 cm, they must be replaced.
- If the vehicle is equipped with an aluminum head, then the cylinder head is fixed with TTU type screws. They cannot be tightened because they are screwed into a thread with a certain degree.
- When purchasing a cylinder head gasket, you need to pay attention to the manufacturer's specifications. They often prescribe a certain tightening ratio required for specific gaskets. Please note that the indicated moment of force should not diverge much from the one applied during the work process.
- In power units equipped with aluminum cylinder heads, the tightening procedure is carried out on a cold engine. As for cast iron engines, in such internal combustion engines it is necessary to perform the tightening while it is hot.
Replacing the cylinder head gasket VAZ 2110 (2112)
On VAZ 2110 and 2112 cars, a 16-valve four-cylinder engine is often installed; it has almost the same cylinder block, but the cylinder head is different - it is two-shaft. It is somewhat more difficult to remove such a cylinder head; the timing marks are also installed differently.
We replace the PGBC as follows:
- We prepare everything for dismantling the cylinder head (remove the battery terminals, drain the antifreeze);
- completely disconnect the air filter housing with pipes;
- remove the oil filler cap, dismantle the decorative cover of the cylinder head (4 fasteners);
- disconnect the high-voltage wires, remove the ignition module;
- dismantle the upper timing belt casing, the most difficult thing to get to is the lower bolts;
- unscrew the tension roller, remove the timing belt;
- dismantle both camshafts, unscrew the bolts of the iron timing case to the cylinder head. You should immediately remove the dowels carefully, otherwise you may lose them. Before removing the gears, it is recommended to rotate the crankshaft and immediately set the timing belt to the marks;
- remove the intake manifold; after unscrewing the nuts, you need to pull it out of place;
- dismantle the valve cover by unscrewing all its fastening bolts;
- We disconnect all the existing wires and cylinder head fastenings, as well as the fuel rail, gasoline hoses (we unscrew the fittings with two horns and wrenches). When unscrewing the fittings, it should be taken into account that there is pressure in the fuel system, so it is better to bleed it off first;
- remove the protective cover of the exhaust manifold, disconnect the exhaust pipe of the muffler. It is inconvenient to get there; it is better to unscrew the nuts from below;
- unscrew the thermostat bolts (3 pcs., 5mm hexagon);
- twist the cylinder head mounting bolts (10 pcs.);
- Having disconnected everything that can hold the cylinder head under the hood, remove the cylinder head.
We clean the surfaces, install a new gasket, and mount the cylinder head in place. Before installing the cylinder head, it is necessary to set the piston of the 1st cylinder to TDC, and on the head itself you should check the installation of the camshafts by placing the gears on them - the marks should face up. Having replaced the cylinder head gasket of the VAZ 2110, we start the engine and, as the engine warms up, add antifreeze to the cooling system.
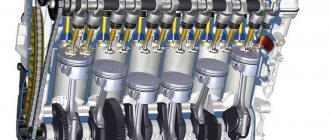
Cylinder head
Essentially, the head is the cylinder block cover that covers the cylinders. It contains the upper parts of the combustion chambers, spark plugs, intake and exhaust ports, as well as the entire gas distribution mechanism. The VAZ 2107 cylinder head is a monolithic part cast from an aluminum alloy, but inside it there are channels where oil and coolant circulate.
The head is the housing for the timing mechanism
Are there any differences in the design of the cylinder head for the carburetor and injection engines of the VAZ 2107
The cylinder heads of the carburetor and injection engines of the “seven” are almost the same. The only difference is the shape of the intake channels. For the former it is round, for the latter it is oval. A manifold from a carburetor car without modifications will not be able to completely block the intake windows. Therefore, if there is a need to replace the head, this point should be taken into account.
The device of the cylinder head of the VAZ 2107
The main task of the cylinder head is to ensure the operation of the gas distribution mechanism. It serves as a housing for all its elements:
- camshaft assembly with “bed”;
- levers;
- valves;
- valve seats;
- guide bushings;
- oil seals;
- springs;
- "plates";
- "crackers";
- retaining rings;
- adjusting bolts with bushings, etc.
The valve mechanism is part of the cylinder head