It's no secret that domestically produced cars, although superior to their foreign counterparts in cross-country ability and endurance, are inferior to them in driving comfort. Yes, domestic off-road vehicles are much cheaper and were originally intended for military, medical and other special services. However, this does not mean that you need to be content with the same type of interior without taste and style. This requires high-quality tuning.
A little history of UAZ Hunter
UAZ Hunter is an all-terrain vehicle for use on roads of any category and on elevated terrain. Produced since 2003 by the Ulyanovsk Automobile Plant, where the initial models were UAZ-469 and UAZ-3151. Hard seats, mechanics, rough instrument panel, boring upholstery, it was created more for official purposes. But fans of the domestic automobile industry know where to use this wayward car.
Do-it-yourself UAZ Patriot interior tuning
To fully realize all the capabilities of the car, it is necessary to modernize its main characteristics. For a UAZ Patriot car, tuning yourself will not cause much trouble, the main thing is to know the basic rules and highlight the most important measures.
On a UAZ Patriot, interior tuning is necessary to ensure a comfortable ride and replace older components such as the dashboard, seat covers, audio system, etc. The interior of this UAZ model is very large, but it definitely lacks sophistication. A dull gray color scheme can be transformed into a stylish and modern interior with a little effort.
If it is not possible to carry out full tuning, there is a set of tuning spare parts, consisting of strips and overlays for door panels made of wood. They are attached using screws mounted on the inner door trim.
The set includes a steering wheel made of genuine leather or varnished wood, switch knobs and gearboxes. This set of parts will transform the interior of the car.
In order to improve driving performance, off-road tuning is vital for a UAZ Patriot car. The main factor in increasing the capabilities of a car is improving the properties of the engine.
Initially, the manufacturer provided a 2.7-liter gasoline engine with a power of 128 hp. The main activity is equipping the engine with a gas turbine or turbocharger.
This increases the power to 170 hp. and torque increases to 290 Nm. The turbocharger is also designed to increase power, but not as much. It is advisable to carry out tuning if the car is used in severe off-road conditions.
Tidy
And let's start with the tidy, this is perhaps the most dreary task if you want a plastic one with equipment. To disassemble, for safety reasons, you need to turn everything off, be sure to label and label all the wires, disconnect all the cables, and remove the stove to pull them out, in general, remove everything.
Tidy tuning
Next, we wash and degrease, if there is a gap between the panel and the windshield, then silicone will help perfectly so that the moisture does not linger there, but flows into the drain along the edges and drafts are no longer a problem.
We cut a hole for the steering wheel with a 50th bit and see what devices will be installed and where. When the silicone dries, we tighten the air ducts. On the panel itself we cut out holes with a 60th crown for emergency lights, speedometer, radio, clock. All this is done using a compass, a jigsaw and paper tape, with a 29 mm crown. Using a 60 mm crown, we cut out holes on the decorative trim, with it all the devices will be in their places. We apply it, screw it into the original holes, and drill through all the remaining devices. The advantage is that the bevel hole itself catches the crown, which means you can do without a drill. To drill a hole for the speedometer in a solid cover, turn it over, mark it on the reverse side with a marker, cut it out with a jigsaw and process it on a machine with circular sandpaper.
Refinement of the instrument panel
We hide the starter button under the steering column, the ignition switch on the side, and put everything in its place. Next, fill it with fireproof foam and wait for it to dry completely. There will be the main UAZ instruments: a clock, two additional switches for the pneumatic system, an ignition switch, a starter, emergency lights, a turn signal, a button block for the window lifts.
Below you can put three switches: fog lights - rear and front, headlight finder, parking light, in general, everything your soul desires. To connect everything, it is better to do this in a garage or other room, since it will be inconvenient and much longer in the car. We pass one of the cables through the stove, put on the steering wheel and see where the foam will interfere.
We bring some of the wires on the left side to the hood; here there is wiring for headlights, brake lights, reverse gear, low and high beams. We drill a standard hole in the panel with an 8 mm drill and secure it. We put the speedometer on the reverse side and tighten it with the original fastener. After installing all the devices, replace the panel cover.
Features of external tuning
A body kit can change a vehicle almost beyond recognition. All body kits can be divided into three groups:
- Decorative. Often a new bumper and side skirts are installed to make the car more attractive. The kits available on sale only slightly change the exterior style. In order to make the UAZ look like another car, you will have to make a body kit yourself.
- Aerodynamic. This type of design is installed on UAZ extremely rarely, since the car is not intended for driving at high speed.
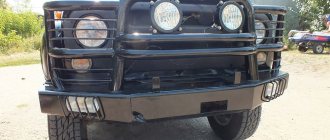
- Power. If the vehicle is to be used in difficult conditions, a power body kit is installed. It is characterized by the fact that durable metal is used in its manufacture. In most cases, the power body kit is made by hand, since there are no attractive design options on sale.
All-wheel drive, square body shape and high seating position of the car determine that UAZ is often modified to improve cross-country ability.
Sound insulation and interior insulation
For noise insulation and insulation of the interior, you will need approximately 5 m2, that is, 11 sheets of self-adhesive vibration - 50 * 100 cm with thin aluminum, one might say, this is an imitation of foil. To save money, it is better to buy it at the market than at a car dealership. It is necessary to muffle extraneous sounds in the car, the main thing is to never glue it to rust, then all the work will go down the drain.
Before this, degrease the areas to be glued with acetone; do not glue the entire sheets because of their rigidity, but in parts.
Remove the protective film and press tightly. To insulate the floor, you can put bitumen - corrugated foil, bitumen base and protective film.
We also remove the film and, using a 2 kW hair dryer, heat the sheet itself and apply it in small parts; it fits perfectly on uneven surfaces. In areas with large transitions, slopes and edges, we take two sheets for this.
We cut it, heat it more strongly so that the bitumen comes out, apply it in halves and press down. The most difficult part is the front part under the driver's seat, there should be a whiplash from all sides. We also lay it out, start from the steering wheel, remove the protective film, pull it under the bottom and heat it in pieces, also press down and remove the paper completely.
We push the credenza, in the places of the holes, here we bend the sheet, press it, look on the other side how it fits, mark it for the cutout and use a through screwdriver to pierce these marks, and on the back side they are clearly visible, put a screwdriver in place of the hole and punch it with a hammer, so they not covered with a sealed film.
Tools and materials
Manufacturing a power bumper for a UAZ 469 car does not require specialized education. The work can be performed by a person with minimal technical knowledge and experience in welding metal parts. During the manufacturing process, the following tools and materials may be required:
You can make a power bumper on a UAZ 469 car yourself. This will require technical skills and the availability of tools and materials. After completing the work, you will be able to obtain a unique product that meets the functionality of the car owner.
Arch extensions
When installing arch extensions, you need self-tapping screws around the perimeter of the arch and inside it; you don’t need to press too hard. Pull one edge so that the entire arch fits like a cast one, screw it in with a self-tapping screw. Then we hold this edge and screw the arch in the middle. The arch bordering the interior, you need to use a drill on it so that there are holes and also fasten the arch with self-tapping screws. With them your car will be frighteningly fashionable. If you need to widen the wheel arches, then cutting the fenders will help.
Arch extensions
When choosing wheels, the question is which ones to use, what will fit best and how it will look in one picture. To install them, if you want a large diameter, then it is better to replace some parts:
- Choose the right main pairs;
- replace standard axle shafts and CV joints;
- change the set of reduction gears in the transfer case.
For fans of extreme driving, it is better to install locks with pneumatic or electric drive, and you can install wheels of any diameter.
Features of the tuning carried out
There are simply a huge number of different ways to tune an SUV. Typically, the following improvements are made:
- Optics are being replaced. Standard light sources are characterized by relatively low efficiency; over time, the protective glass may become damaged. Recently, diode light sources have become very popular. It is characterized by high efficiency and long-term operation. At the same time, such head optics look attractive.
- New wheels can make a car more attractive and passable. For an SUV, tires with a pronounced tread are installed. When driving over rough terrain, these wheels provide good grip on the road surface. However, such wheels are not suitable for long-term driving on asphalt roads.
- The interior is often reworked. Standard finishing and equipment do not provide a high level of comfort. New seats or a multimedia system may be installed in the cabin, and insulation may be installed to suppress noise.
- A body kit is installed that increases the mechanical protection of the body or changes the appearance of the car.
- Suspension tuning is in progress. As a rule, car enthusiasts increase ground clearance and increase vehicle stability.
- Technical tuning includes chip tuning or replacement of basic elements. It is worth considering that driving on low-traffic roads requires a high-power engine.
In this case, we will consider the features of installing an external body kit.
Engine tuning
The engine is the foundation. It is better to move the engine radiator upstairs, because in a deep puddle or mud it will clog, and being left without a motor or with an overheated motor is an off-road disaster. Many people try not to make major modifications to the chassis, but use factory settings. Another important part for off-roading is the chassis and suspension.
The box can be changed for comfort, you can also install a timing system, a lever transfer case, all this ensures excellent off-road performance. In both axles it is possible to install electrical locks, change the suspension and body lift and suspension lift. To ensure that your car glides well and smoothly, it is better to change the shock absorbers. To increase the efficiency of the braking system, it is recommended to install disc brakes, which, moreover, are quite resistant to moisture and dirt.
A real SUV should be able to move absolutely everywhere and even pass through water obstacles. The motor must “breathe” when operating under water, and this ability requires reliable waterproofing of all critical structural elements. When tuning a UAZ Hunter with your own hands, a special air intake is installed on the roof of the car, the neck of the dipstick is sealed, and all the electrics are raised as high as possible.
Tuning UAZ Patriot for off-road
UAZ Patriot is still more intended for rural roads and off-road conditions, and not for urban conditions. The main ideas of the developers are just asking to be seen, and they have shown themselves to be no worse than their foreign counterparts.
The only drawback is the poor quality of the cars, so they often fail. The factory knows about the problems of their product, but is in no hurry to fix them. For a true off-road connoisseur and an avid motorist, it is possible to carry out the modifications yourself.
To improve performance properties, off-road tuning is required for the UAZ Patriot. We should start by increasing the ground clearance; we replace the standard rubber with tires specialized for SUVs and the car rises by 25 mm, and the ride becomes smoother.
Drive axles should be equipped with pneumatically controlled locking differentials. We install a mini-compressor with a receiver in the trunk. We strengthen the gearboxes with reinforcements by turning the places where the stockings are sealed. Gussets are attached to the front axle on the left and right, and a box is attached to the rear axle.
For more effective interaction between the wheels and the surface on which you will have to drive, we remove the factory clutch and replace it with a copper-plated disc with ceramic adjustments, thereby ensuring the durability and reliability of the units when operating in water and mud. We also replace native shock absorbers with foreign ones.
Bumper
When reconstructing a bumper, you should pay attention to its weight. The rear bumper is made of 3 mm steel, and the power elements are 5 mm thick. The bumper has 10 mm thick towing eyes with stainless steel eyelets that protect the cable from damage from the sharp edges of the eyes. You can also install a swing gate with a large selection of removable brackets that can be installed on it. Also install a bracket for the spare wheel on the gate; the attachment to the gate was made in the form of a girth and could be easily adjusted horizontally. The gate stopper can work both for opening and closing.
The thresholds are attached to the frame via a removable bracket, which simplifies installation and allows for additional adjustments. A mesh can be placed on top of the threshold to prevent slipping and to prevent corrosion from the accumulation of dirt.
The front bumper and the rear bumper are designed in the same way. There is an option to add space for the Hijack jack to rest. Provide a place for fastening the state. numbers. And if the platform for the winch is horizontal, then it does not allow you to install and remove the winch without removing the bumper.
There are still many options for tuning the UAZ Hunter, as they say, for every taste and budget, and everyone will be able to modernize their favorite swallow.
DIY front power bumper UAZ 469
Self-production of a power bumper requires a detailed drawing. You can make it yourself or find a ready-made version. Some motorists use specialized computer programs to create a drawing. When making a drawing, you must consider:
To manufacture a power bumper, welding will be required. You can use devices of any type designed for joining workpieces made of a specific metal. If you have no experience in welding metal parts, it is better to contact a specialized workshop. Specialists will manufacture a power bumper according to a pre-prepared drawing.
Before starting work, according to the created drawing, parts are cut out from thick cardboard. After this, they glue the model together and try it on the car. This procedure allows you to identify shortcomings and eliminate them as soon as possible, and prevents damage to the material if there are errors in the drawing. The car owner can evaluate the appearance of a car with a power bumper and, if necessary, make changes to the design of the product.
After preparation, they begin to manufacture the power bumper. For this, prepare the necessary materials. The power bumper can be made from a metal channel, profile pipe, or corner. The amount of material is selected according to the prepared drawing. Assembly of the front power bumper of the UAZ 469 car is carried out in the following sequence:
The instructions for manufacturing a power bumper for a UAZ 469 may differ. Depending on the personal preferences of the car owner, mounts for attachments are additionally manufactured.
Decorative design of bumpers
In fact, the craftsman is engaged in the decorative design of the car bumper even at the manufacturing stage. Painting the product in the desired color can be considered such “decor”. It can match the color of the car body tone-on-tone or be contrasting. Remember that the drying time of paint directly depends on its chemical properties and can be several hours or even several days. The same applies to anti-corrosion agents.
Pay attention to the always winning black color. It can even be suitable for decorating a car whose body is painted in light colors. This combination will emphasize the peculiarity and uniqueness of the car. If the color of the car itself is also dark, consider a color called metallic. It will even help hide minor defects and scratches.
One of the modification tools is covering the bumper with film. It's economical and beautiful. Another advantage of film is the ability to replace a boring background with another in a couple of hours: film is a thin and pliable material. At the same time, it is not recommended to consider covering only part of the bumper; special film should be used over its entire surface.
Making a car bumper for an UAZ, in addition to having the necessary material and tools, also requires some skill, several hours (at best) or days of free time. The design stage (production of drawings and models) cannot be neglected, since it is when creating a sketch that an error in calculations or measurements can be noticed and corrected in time.
Making a bumper yourself
In order to make a bumper for an UAZ with your own hands, you should decide on the material for its manufacture, draw a diagram, prepare tools and materials. Don't forget to remove the old bumper. The main thing is not to miss anything and do everything according to plan.
Preparatory work
To produce a homemade bumper you will need:
Having collected materials and tools, you can proceed to drawing a drawing on paper or making sketches using a computer. You should also get rid of the previous, old bumper in advance.
Drawing and layout
First of all, look at several options for making a homemade bumper and choose the shape that would suit the complexity of production and would appeal to you in appearance. Anyone who is strong in a discipline such as drawing can create bumper diagrams with his own hands, having first taken the dimensions of the car using a tape measure.
An alternative option is a symbiosis of other people's experience and your own thoughts about the design of the future bumper. If you are an adherent of modern computer technologies, use one of the programs for drawing and 3D layout: AutoCAD, Solid Works, Katina, Compass.
The drawing, which was made by hand or printed using a personal computer, should become the basis for creating a layout. Use tape and pieces of cardboard cut out according to the markings to create a three-dimensional model of the future car bumper. Attach a model to the car to check the correctness of the calculations. If necessary, correct the drawing according to the actual overall dimensions of the car.
Manufacturing and installation process
You need to start making the bumper from the central part. Cut a piece of metal of a given shape and size according to the drawings. If metal profiles were chosen as the material, the following method should be used to bend them: you need to make slots at the places where the expected bends are, and then carry out manipulations to give the car bumper the desired shape.
At the second stage of manufacturing, you need to make each wing separately. If your car bumper will be made from pipes, bend each of them at the desired angle. After this, use a welding machine to weld the side parts to the central one. If sloppy seams are obtained, they should be additionally processed with a special grinding machine or any suitable available material to give the product an aesthetic appearance. To weld U-shaped components, for example, radiator protection, you must first burn holes of the required size in the base of the frame. Such work can be performed using a gas torch.
When the bumper product is ready, you should degrease it with an alcohol-containing liquid and let it dry. After this, immediately begin painting and polishing the product, not forgetting to pre-treat it with an anti-corrosion agent. If stainless steel was used, painting and polishing are skipped. At the installation stage, install the device on the car using welding, bolts, and screws.
Why is this necessary?
Before you buy yourself a power bumper and install it yourself, you need to clearly understand why the car owner would do this at all. The question is quite logical, since not everyone understands the essence and need for such hanging structures.
To begin with, I advise you to read the material about power bumpers for Niva. I'll leave the link here. As is the case with the lift kit for this car, such solutions are created to increase the practicality and cross-country ability of the vehicle.
The all-terrain characteristics of the standard Patriot are not bad, but still not ideal. The power bumper will allow you to perform several functions simultaneously:
- protects the suspension;
- prevents damage to the body from mechanical influences;
- the subframe takes the brunt of the impacts, which helps on any road;
- gives the car an aesthetic appearance;
- minimizes damage to cars and people in accidents;
- the bumper allows you to place additional equipment, including a winch;
- creates a more terrifying, but at the same time attractive image of the Patriot;
- makes it possible to install an additional jack;
- The rear bumper serves to house a gate with a spare wheel.
I’m more than sure that these arguments are enough to install an excellent reinforced bumper on your 2021 model year Patriot, or on the earlier 2015 version.
Yes, if you operate your car purely in urban conditions, such protection will be more decorative. Therefore, here you can use conventional body protection, which prevents the formation of chips and scratches. But is this what the UAZ Patriot was created for?!
One piece bumper
The first option for working with a bumper is to make it from a single piece of metal.
In order to give it volume and the correct appearance, it bends. It is best to give credit to this option, as the product will look attractive, the corners will not be too sharp and you will not have to make a lot of seams during welding. There is no need to sand problem areas, and during heating there is a danger of damaging the base.
There are some disadvantages to making a rear power bumper from one piece. Firstly, you will need a fairly large piece. While this isn't a problem, some metal bases don't sell these pieces, so you may have to look around. But the second disadvantage is more serious - you need a strong unit to bend the sheet. You'll have to look for him too. Bending metal of this thickness to the desired angle can be very difficult. Insufficient sheet bending power will require additional procedures and heating of problem areas.
How to make a power bumper on a UAZ 469 with your own hands
Cars produced by the Ulyanovsk Automobile Plant are popular in Russia among those who practice off-road driving. Model 469 is one of the most proven, which is why it is preferred by lovers of travel, hunting and fishing.
However, for off-road driving, it is advisable to have a well-protected front part - collisions with various obstacles are possible. Therefore, many owners install a power bumper made of steel pipe in front instead of the standard one - it is able to withstand the force of an impressive impact in the event of a collision.
You can easily buy a bumper for a UAZ at a car store, but it will cost a pretty penny, since it is not cheap. A more economical way out of the situation is to make a kenguryatnik on an UAZ with your own hands; you can find the drawings on the Internet or make it yourself. It will be quite difficult to weld a power bumper and carry out installation yourself. Such work, like installing a winch on an UAZ with your own hands, will require skills in using a welding machine and mechanical tools. But if you have patience and ingenuity, you will be able to make a bumper for a UAZ-469 with your own hands.
Tuning the body of UAZ 31519
It is recommended to finish car doors with stainless steel. This is not only practical and reliable, but also original when it comes to the appearance of the car. Replacing the existing windows with sliding analogues will improve the quality of ventilation in the cabin. If you love hunting and often go out into nature, you can make a sunroof - you can hunt, what is called “on the go.” In addition, this change also maximizes ventilation capabilities.
Next on the list, of course, is replacing the bumpers (where would we be without this?). We replace them with a kenguryatnik made from a wide pipe. We also install a winch with the possibility of redundant control directly from the cabin. To maximize the level of safety of this large car, it is necessary to replace the fuse box, increasing the number of the latter to 16 pieces and electrical wiring elements. It is better to move the fuse box itself directly into the cabin. Thus, it is possible to protect almost every individual electrical circuit using inserts.
Replace the heater motor with an imported analogue, and the generator with a more powerful one. This will help improve the quality of heating in the cabin. In addition, it is worth upgrading the heating system as a whole. Dismantle the ignition distributor and install a distributor from a foreign manufacturer instead. Of course, for this you will have to change the ignition system, but the risk of missing a spark will be reduced.
