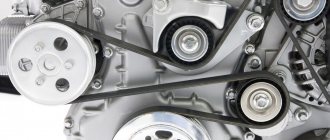
Engine Renault Logan 2 (2014)
- » onclick=»window.open(this.href,'win2′,'status=no,toolbar=no,scrollbars=yes,titlebar=no,menubar=no,resizable=yes,width=640,height=480,directories =no,location=no'); return false;" rel=”nofollow”> Print
Renault Logan 2 cars have been equipped with two types of engines since 2014. Volume 1.6 but different in design. So it can be an 8 valve engine (K7M) or a 16 valve engine (K4M). Accordingly, each engine uses its own components. (belt, rollers). More details about the components in the next paragraph. If we talk about the service life of the belt, then the mileage recommended by the manufacturer is 60,000 km. In fact, when operating the car, it is necessary to regularly check the condition of the belt, to prevent it from cracking, cutting, or excessive wear, that is, the replacement period may be earlier than 60,000 km.
Applicability of parts in the timing belt Renault Logan 2 (2014)
As we have already said, for Renault Logan 2, depending on the type of engine, different designs and different components are used. Further in the table you can see the applicability of components for replacing the timing belt on a machine for 8 and 16 valve engines.
| Engine | 16 valve | 8 valve |
| Timing belt | 8201069699 | 8200939081 |
| Tension roller | 7700108117 | 8200908180 |
| Guide roller | 7700107150 | not provided |
| Repair kit (belt + roller(s)) | 7701477014 | 130С17480R |
It must be said that it is better to change the belt and rollers as a whole, that is, immediately, so as not to complicate your future life with repeated, similar actions during the operation of the new timing belt. The rollers also become unusable and replacing them along with the belt is highly recommended. Don’t leave for later what can and should be done now, that’s exactly what you can say about this case.
The process of replacing the timing belt on Renault Logan 2 (2014) (8 valve engine)
To replace the belt and tension roller of the gas distribution mechanism drive of the Renault Logan 2 (2014) K7M engine, do the following. (8 valve engine). Place the car on a level surface and remove the right wheel. Remove the mudguard from the wheel arch. We turn the engine so that the mark on the camshaft pulley is at the top.
Using an 18 mm wrench, unscrew the crankshaft pulley.
The original belt must have arrows indicating the direction of its movement when the engine is running. If there are no such arrows, and the belt is not being removed for replacement, mark the arrows for the direction of installation of the belt and the position of the belt on the rollers to install it in the same way.
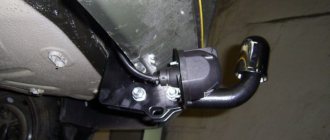
Remove the upper timing belt cover and remove the three bolts securing the lower timing belt cover.
... and remove the cover
Remember or mark in any way the position of the tension roller relative to the axis, loosen the tension of the roller securing nut.
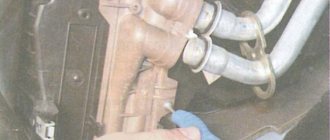
. and turn the roller clockwise, thereby releasing the tension on the timing belt.
Remove the timing belt from the water pump timing pulleys.
. crankshaft and tension roller
. remove the timing belt from the Renault Logan 2 engine.
To replace the tension roller, completely unscrew the nut from its axis.
. and shoot the video itself.
Install the new tension roller in the reverse order of removal. In this case, the holes for the special key should be directed outward.
Replacing the tension roller is shown during the process of replacing the timing belt. However, if necessary, the roller can be replaced without removing the belt from the engine.
First install the belt on the camshaft timing pulley, orienting it with arrows B (or self-marked arrows) in the direction of movement when the engine is running and aligning mark A with the installation mark on the pulley. Then pull the drive leg onto the water pump pulley.
. and the crankshaft pulley, also aligning the mark on the belt with the alignment mark on the pulley. After this, install the belt on the tension roller.
Tension the belt by turning the tension roller counterclockwise until the previously marked marks match, and tighten the roller securing nut. Install the auxiliary drive pulley on the crankshaft and turn the crankshaft two turns using the pulley mounting bolt. Check the alignment of the timing marks on the camshaft and crankshaft pulleys and the belt tension.
The manufacturer recommends checking the belt tension and monitoring it during adjustment using a special strain gauge tester. In this regard, there is no data on the force when a belt branch bends by a certain amount in the technical documentation. In practice, you can approximately estimate the correctness of the belt tension using the rule of thumb: press on the belt branch with your thumb and determine the deflection using a ruler. According to this universal rule, if the distance between the centers of the pulleys is from 180 to 280 mm, the deflection should be approximately 6 mm. There is another way to preliminary check the belt tension by twisting its leading branch along the axis. If you can twist the branch by more than 90 degrees with your hand, the belt is loose. After checking the alignment marks and the belt tension, remove the accessory drive pulley, and then install all the removed components and parts in the reverse order of their removal before replacing the belt.
The process of replacing the timing belt on Renault Logan 2 (2014) (16 valve engine)
Place the machine on a level surface and remove the protection. Remove the right wheel.
Remove the bolt securing the accessory drive pulley.
Remove the three bolts securing the lower timing belt cover.
. and remove the cover.
6. Fix the tension roller with a 6" hexagon wrench and loosen the tension of the roller fastening nut.
7. Remove the timing belt.
The original belt must have arrows indicating the direction of its movement when the engine is running. If there are no such arrows and you are not removing the belt for replacement, apply them in any available way (for example, with a felt-tip pen) to restore the belt to its previous position.
Finally unscrew the nut securing the tension roller and remove it.
Remove the bolt securing the timing belt intermediate roller.
. and remove the roller along with the bolt and washer.
Install the tension roller in the reverse order of removal. Tighten the tension roller mounting nut to 7 N*m.
The protrusion on the tension roller should align with the groove on the engine. Install the Renault Logan timing belt 2. By inserting a 6-point hex key into hole B (shown on the removed tensioner for clarity), move the movable mark A of the tension roller clockwise 7-8 mm further than the fixed mark.
Install the accessory drive pulley in the reverse order of removal. Remove the camshaft and crankshaft retainers. Rotate the crankshaft by the accessory drive pulley bolt six turns. Loosen the tension roller mounting nut no more than one turn, holding the roller with a 6-point hex socket wrench.
Align the movable mark of the tension roller with the stationary one and tighten the roller nut to a torque of 27 N*m. To check the correct setting of the valve timing, align the marks on the camshaft and crankshaft pulleys at the same time. Install the removed parts in the reverse order of their removal.
Replacement timing
Any engine part, including the timing belt in the timing drive, has its own resource. The car manufacturer recommends not to exceed the service life of the belt by more than 60 thousand km. The owner of the machine can adjust this figure, since the service life depends on the operating conditions of the machine, the quality of the spare parts used, and the technical condition of the engine. If the crankshaft or camshaft seals wear out during engine operation, traces of engine oil may appear in the operating area of the timing mechanism.
Contact of technical liquids on the belt body significantly reduces its service life. Therefore, it is recommended to inspect the engine when performing maintenance on the machine; if traces of engine oil are found, the leakage should be repaired immediately.
Replacing and selecting a Renault Logan timing belt
The timing belt is one of the main candidates for replacement after 40-50 thousand mileage. In case of defects or rupture of the timing belt, we risk getting a classic breakdown - the valves sticking into the piston bottom. The belt on Logan and Sandero should be replaced every four years or after a mileage of 60,000 km. Repairing a timing belt is easy to do when you know the catalog number of the required part and its installation diagram. Diagnostics of the technical condition of the timing belt on Renault Logan and Sandero should be performed once every 15,000 km. If the inspection reveals belt defects, it should be replaced.
Renault Logan cars from 2004-2015 were equipped with 1.4-liter k7j engines, 1.6-liter eight-valve k7m engines, as well as 1.2-liter 16-valve engines k4m and d4f. The second generation Renault Logan was equipped with the same engines, and in cars produced in 2021 they began to install a 1.6 liter h4m engine and a 1.5 liter k9k dci version.
About the engine
In addition to 8 valve power units, Logan is equipped with engines that have two camshafts and 16 valves installed in the cylinder head. The engine displacement is 1600 cm 3 with a compression ratio of 9.8 units. These are the K4M models and the newer modification N4MK, the power of the first is 102 hp, the second is more powerful, producing 113 hp. On the latest modification of the N4MK engine, a chain operates in the timing drive. The engines work in tandem with “mechanics”, as well as automatic transmission.
Renault Logan with K4M engine
The K4M engine has certain advantages:
- High reliability of the motor, service life can be more than 400 thousand km.
- Relates to Euro 4 environmental standards.
- Low noise, no vibration during operation.
- The engine cooling system has become more efficient.
However, there are some disadvantages of this power unit:
- Expensive spare parts.
- A broken timing belt leads to damage to the valves.
- Some problems when accelerating the car.
How to change the timing belt on a Renault Logan at home?
Many drivers, when conducting a routine inspection of car components approximately every fifteen thousand kilometers, are required to check the condition of the timing belt. When checking the drive on Renault Logan, you need to pay attention to ensure that there are no folds, cracks, worn teeth or delamination of rubber. Even small signs of wear or exposed cord threads indicate that this unit needs your attention. Also, the timing drive must be replaced if you find traces of grease on it.
According to the manufacturer's instructions, the timing belt on Renault Logan must be replaced after sixty thousand kilometers. You need to check what condition it is in even more often - at least every 15-20 kilometers.
Functions of the timing belt
The timing drive synchronizes the operation of the crankshaft and camshaft. In short, it is necessary to ensure that fuel and air are in the cylinders exactly when they are needed. Without such synchronization, normal functioning of the power unit is impossible. In turn, quite often it also powers additional components of the vehicle; on Renault Logan it is a pump. The gas distribution mechanism drive is an extremely important part of the engine; if it breaks, the valves will bend and subsequent repairs will be quite expensive.
Timing system
How to change the timing belt?
If you don’t know yet, let’s say that the designer’s timing belt was placed under special protection in the front part of the power unit. On the Renault Logan, the engine is placed transversely, and the drive is on the right side. It’s not difficult to get to it, but you still have to dismantle several components. Since replacing this unit at a service station is expensive, and repairing the valve system is even more expensive, it is better to do it yourself, and our article, video and photo report will help you with this.
This video shows how to correctly change the timing belt on a Renault Logan.
After watching the video, you can start working directly.
Set of tools
- a set of keys;
- set of heads;
- new timing drive;
- screwdrivers.
Replacement kit
Stages
- The first step is to lift the car. This is done using a jack or lift.
- Next, remove the front wheel on the right.
- In order to get to the pulleys, remove the protection.
- Use a 13 key and unscrew the poly V-belt tension fasteners.
- Next, we need an 18mm wrench, with which we unscrew the crankshaft pulley fasteners.
- We unscrew the 6 bolts holding the crankcase protection.
- Let's remove it.
- Use a jack to lift the engine. Some people use a lever made of boards for this.
- Now we need a wrench with a 16mm head; use it to unscrew the upper part of the power unit mount.
- After unscrewing the bolts, remove the timing cover.
- We set the ignition to the top dead center position of the 1st cylinder. Using a marker or regular chalk, we place marks on the shafts. During assembly, these marks must match.
- Now, using a 16 key, you need to unscrew the tension roller.
- The belt tension should become weaker and you can replace it.
- Please ensure that the marks do not get lost.
- Now the belt needs to be tightened. Let us remember that over-tightening is just as dangerous as insufficient tension, and under normal conditions it is checked in a fairly simple way. Approximately in the middle, we try to rotate it around the axis with two fingers. If it turns easily, more than ninety degrees, then this indicates a weak tension. This means that using the tension roller we tighten it a little more. Please note that in order to accurately measure the tension, special equipment is needed.
- Now all the removed components and parts can be put back in place.
Installing a belt on a 16-valve internal combustion engine
- The marks on the new belt should match the marks on the pulleys.
- Even if the tension roller is still in working order, it is still better to remove it during installation to gain more space.
- We install a new one in place of the old belt, and first of all we install it on the camshafts, after which we pull it onto the water pump and the parasitic roller.
- When installing a belt drive, it is important to ensure that the pulleys do not rotate. Even a slight deviation in this case is unacceptable.
- Now install the tension roller and use it to tighten the timing belt itself. If the belt deviates more than 90 degrees, it should be tightened again.
- After installing the belt, tensioning it and checking the marks, you can assemble everything in the reverse order and install the camshaft plugs in place.
- After assembling the timing case, it is necessary to install the right engine cushion in place, remove the unit from the jack, install the crankcase protection, return the receiver to its place, put on the boot and screw the wheel.
You can see the installation of the new timing belt below.
[Solved] How to check the timing belt on a Renault Logan?
To check that the crankshaft is in the TDC position of the pistons of the 1st and 4th cylinders, there is a hole in the cylinder block with how to check the M10 timing belt on a Renault Logan, into which you need to screw a special mounting pin with a threaded part length of 75 mm.
When the crankshaft is in the TDC position of the pistons of the 1st and 4th cylinders, the finger should rest against the milled area on the crankshaft cheek and block the shaft when trying to turn it clockwise.
As an installation pin, you can use the bolt of the upper fastening of the gearbox to the cylinder block; for clarity, it is shown on the removed power unit. We screw two nuts onto the bolt and lock them so that the length of the threaded part is 75 mm. The manufactured device - the installation pin... ...is screwed into the threaded hole of the cylinder block. When the crankshaft is in the TDC position of the pistons of the 1st and 4th cylinders... ...the installation pin 1 will be screwed into the hole to the end of its thread and will rest against the pad 2 on the cheek of the crankshaft for clarity, shown on a dismantled engine. and with the oil pan removed.
In this case, it will be impossible to turn the crankshaft clockwise. If, when screwing in the installation pin, you feel that it has rested, and the end of the nut on the pin does not come into contact with the end of the boss of the hole in the cylinder block between the nut and the boss, there will be a gap, turn the crankshaft a little counterclockwise by the pulley mounting bolt.
Then we screw the installation pin into the hole in the block all the way until the ends of the pin nut and the boss of the hole in the block touch, and turn the crankshaft clockwise until it stops, like on a Renault Logan, check the timing belt on the cheeks in the finger.
Checking and replacing the timing belt Logan 2005
After loosening the nut securing the tension roller, turn the roller clockwise, reducing the tension of the timing belt. Remove the timing belt. After removing the belt, do not rotate the crankshaft and camshaft to avoid the valves sticking into the pistons.
Pay attention to the arrows. They should rotate in the direction of movement of the camshaft gear. Align the marks on the gear and belt. Tighten the roller spring by placing a screwdriver in the hole.
How to check the condition of the timing belt on Renault Logan
We install it on the engine. Remove the screwdriver from the roller.
The latter should make a characteristic click, which means that the spring has activated. So, the belt will be tensioned successfully. We turn the crankshaft. Next, we check how correctly the belt was tightened and whether its positions coincide with the marks and whether the valves come into contact with the piston.
Remove the car from gear and rotate the crankshaft. It should rotate freely. You should not feel any resistance at piston TDC. If so, check the position of the gear relative to the belt teeth.
Tightening torque The tension roller is tightened with a force of 27 Nm. To do this you need to use a torque wrench.
Its cost is about thousands of rubles. It is important to maintain accurate tightening. Otherwise, the belt may become loose. Experienced car enthusiasts warn: In such a situation, it is extremely difficult to pull it out unless you weld an iron rod and use it as a key.
Checking the tension Once every 15 thousand kilometers, you need to not only look at the condition of the belt itself, but also check its tension so that it does not jump on a tooth.
We dismantle the timing case cover and, using a wrench with a long wrench, turn the crankshaft pulley 1 turn clockwise. A correctly tensioned belt should rotate 90 degrees from the force of your fingers applied between the camshaft and crankshaft pulleys. Before you remove the belt, you need to install the crankshaft and camshaft so that they are at the so-called top dead center.
Timing belt - checking the tension and replacing the timing belt
We turn the crankshaft in a clockwise direction until it coincides with the triangle-shaped mark, which is located on the camshaft timing pulley. Now you need to slightly loosen the nut holding the tension roller.
For this purpose, the roller must be rotated in a clockwise direction. Thus, the timing belt drive tension will be reduced. As a result, the belt can be removed.
When you change a belt, it would be appropriate to also replace the tension roller. To do this, you need to unscrew the nut securing it and simply remove it from its place. All work on installing a new roller, belt and all other components takes place in the opposite order. It is worth remembering that the belt must be oriented according to the images printed on it. Such indicators are recorded in the manufacturer’s service book.
The specified regulations must be strictly adhered to. Restoring such severe consequences requires serious financial costs and time.
Causes!
The timing belt can break for various reasons.
From all of the above, we understood that on all types of Renault Logan car engines, when the timing belt breaks, the valves bend. And below we will describe the reasons why breaks occur in general and how to avoid it.
- Timing belt wear (poor quality or technical wear), oil ingress, etc.
- Various foreign bodies getting under the belt
- Pump jams
- Tension roller(s) jam or loosen
- The crankshaft or camshaft is stuck
In order not to worry about the condition of the timing belt, you must constantly monitor its external condition, the degree of tension, replace it according to the regulations or change it immediately if there is any damage to it. Make sure that oil and other liquids do not come into contact with the belt (this will cause premature wear).
Consequences of a broken timing belt
This was once a piston and part of an engine
If, when the timing belt breaks, only the valves are bent, we can say that this is great luck. In some situations, such a breakdown may cause damage to the pistons themselves and the surfaces of the cylinders.
Symptoms and behavior of the car that require replacing the timing belt
As a result of increased loads or wear of the connecting rod and piston group, the timing belt may jump one turn, as a result of which the engine will begin to trip and operate unstably. This phenomenon is a symptom of checking the condition of the belt and its correct installation.
Replacing the timing belt on Renault Logan 1.4 liter detailed instructions with photos
Replacing the timing belt of a Renault Logan 1.4 with an 8-valve engine must be done on time, otherwise a broken timing belt will lead to big problems. The fact is that the Renault Logan 1.4 liter engine bends the valves when the belt breaks. The only consolation is that the engine has only 8 valves, and replacing the belt is not a problem.
The motor itself is not technically complex. Just one camshaft. Among other things, the Renault Logan 1.4 K7J engine has small dimensions, so there is quite a lot of space in the engine compartment to work. The engine is located transversely. The Renault Logan 1.4 timing belt should be replaced once every 60 thousand kilometers. In order to get to the belt, you will need to unscrew the crankshaft pulley, remove the Logan drive belt, remove the upper aluminum cover of the timing mechanism, as well as the lower plastic cover. And now the belt appears before your eyes.
Replacing the timing belt Renault Logan 1.4 l.
Below are detailed instructions for replacing the timing belt in Renault Logan 1.4. But first, let’s look at the timing diagram.
Timing drive device for Renault Logan 1.4 engine
- 1 - crankshaft toothed pulley
- 2 - camshaft gear pulley
- 3 - timing belt
- 4 - tension roller
- 5 - coolant pump toothed pulley
The procedure for replacing the timing belt on this engine is as follows - 1 - Unscrew the six bolts securing the upper timing belt cover, then remove the upper timing belt cover. 2 — Unscrew the bolts securing the lower timing belt cover and remove it. Using a 18mm socket, unscrew the crankshaft pulley mounting bolt, then remove the pulley.
About the car
This car of this model is equipped depending on the country to which it will be delivered. This also applies to motors, the working volume of which can be from 1 thousand cm 3 to 1600 cm 3. Motors of the following modifications are intended for the regions of the Russian Federation:
- The 1.4 MPi engine has a displacement of 1400 cm3, 8 valves in the cylinder head.
- Engine 1.6 MPi with a displacement of 1600 cm3, 8 valves in the cylinder head.
- K4M engine with a working volume of 1600 cm3, 16 valves.
The main feature of this line of engines is the fact that the timing valve mechanism uses a toothed belt. The difference between belts for engines with 8 and 16 valves is their length and number of teeth. Power units can work together with both manual gearboxes and automatic transmissions. This car model is very popular among taxi drivers in the Russian Federation and CIS countries, as it is easy to maintain and has a decent service life before major repairs.
1.6 MPi engine on Renault Logan
Chain or belt
When considering the technical conditions of the car being developed, the designers considered the question of how to drive the timing valve mechanism. The chain was considered a more reliable drive element in this mechanism, but many motors in this drive already have a belt. Its use in the drive makes it possible to reduce the length of the power unit, which is mounted transversely in the engine compartment.
If you follow all recommendations for engine maintenance and use high-quality consumables, this will allow you to use the engine for a long period without significant problems. Therefore, in the debate about whether to use a belt or a chain in the drive in Renault Logan engines, the toothed belt won.
Self-replacement of the timing belt in Renault Logan
The gas distribution mechanism (GRM) is a mechanical system of a car engine, responsible for the coordinated operation of the valves of the cylinders of the power plant. The correct operation of the motor depends on the accuracy of its operation.
In most modern cars, Logan is no exception, to transmit torque from the crankshaft to the camshaft, and their coordinated operation, a toothed belt made of rubber with the addition of nylon threads is used.
The diagram shows a timing drive (timing belt with gears):
- Crankshaft
- Timing belt
- Tension roller
- Camshaft sprocket
- Water pump
The belt is a consumable item that needs to be replaced periodically, since its breakage or severe wear can lead to serious consequences.
In engines installed on Renault Logan, the scheduled service life of the timing belt is 60 thousand kilometers . There is no point in delaying replacement, since a broken belt or its misalignment on the shaft gears by just 1-2 teeth is guaranteed to cause the pistons to “meet” the valves, which can lead to subsequent expensive engine repairs.
In this article we will consider the possibility of independently replacing the timing belt on a Renault Logan equipped with an 8-valve engine.
Preparatory procedures
To carry out the work, by default, you will not need any special tools. It is desirable, but not at all necessary, that the garage be equipped with an inspection hole.
First you need to free access to the gas distribution mechanism. To do this you need:
- Remove the engine protection;
- Loosen the tension on the accessory belt and remove it;
- Jack up the car and remove the right front wheel;
- Remove the protective shield in the wheel arch to provide access to the crankshaft pulley.
To continue the work of replacing the belt, it will be necessary to dismantle the engine support located on the right, but to do this it is necessary to support the engine from below, for which a support is installed under its crankcase, on which the power unit rests securely. After that, the 5 bolts securing the support are unscrewed, and the part is removed from the car.
The next step is to remove the crankshaft pulley . It is better to perform this procedure with an assistant, since the bolt securing the pulley to the crankshaft is tightened with considerable force, and to unscrew it, you need to use a pneumatic impact wrench, or, if it is not available, the help of a partner. To do this, ask an assistant to engage 4th or 5th gear and press the brake pedal firmly. Then unscrew the bolt and remove the pulley from the shaft.
Having installed a spacer sleeve on the bolt (you can screw a couple of nuts on it or gain a thickness equal to the thickness of the pulley using washers), you need to screw it back. It will be needed to rotate the crankshaft when aligning the gas distribution mechanism to the top dead center (TDC) position of the first cylinder.
We remove two covers covering the mechanism: the lower plastic and the upper aluminum. And you need to start by removing the bottom cover.
While turning the crankshaft, we combine the triangular mark of the camshaft gear with the image of the letter “D” cast on the block head (Dacia logo). Thereby setting the piston of the first cylinder to TDC.
At the next stage, it is necessary to unscrew the tension roller fastening and dismantle it , after which the timing belt can be freely removed from the mechanism.
Important! After removing the belt, under no circumstances should you change the position of the shafts! Since subsequent adjustment of the timing mechanism can take quite a long time.
Installing a new belt
The new belt has markers on its surface, which, when installed, must coincide with the marks
, marked on the shafts (camshaft and crankshaft), as well as
arrows
indicating the direction of its movement. The presence of marks on the belt greatly simplifies its installation and control of the correct assembly of the entire mechanism.
When replacing the belt, the tension roller also changes (on average, this will cost), which has the same service life as the belt, equal to 60 thousand km. Before installing the belt, a tension roller is mounted on the engine, and then the belt itself. When installing it, you should be guided by the marks marked on its surface. Make sure that the direction of rotation arrows are located to the right of the top marker.
If we are talking about buying a new one, then the average cost of a timing belt in Moscow is 750-800 rubles, the entire timing belt set will cost an average of 1900-2000 rubles, if you take it with a water pump, then about 4000 rubles. Maybe someone will offer something cheaper, you can choose here.
After the belt is in place, it is necessary to adjust its tension . To do this, loosen the fastening of the roller and, using pliers or another suitable tool (depending on the design of the tension roller), turn it clockwise until the required tension is created. Then tighten the mounting bolt.
To check the correct installation and tension, you need to turn the crankshaft several revolutions (1-2), and check the alignment of the marks and the belt tension .
Checking belt tension
Using your thumb and forefinger, try to twist the belt at the point between the camshaft timing gear and the water pump. If you can twist it by about 60-70 degrees, then the belt tension is fine; if more, the tension is weak and needs to be adjusted.
Important! When replacing the belt, attention should be paid to the condition of the crankshaft and camshaft rubber seals. If oil leaks are detected, they must be replaced so as not to re-disassemble the gas distribution mechanism.
Upon completion of the belt installation procedure and its tension, it is necessary to install the previously removed parts on the vehicle. Assembling the units must be done in reverse order.
A similar replacement procedure on 16-valve engines requires somewhat more effort, specialized tools and devices, so it will be discussed in another article.
Installing a belt on an 8-valve internal combustion engine
- To begin installation, you need to loosen the nuts of the component parts, and then remove them together with the roller.
- The new belt has marks and directions of movement. When installing it on the seats, we combine the timing marks on the belt with the marks on the shafts.
- The belt is tensioned using a special key.
- After installing the new belt, check that it is tensioned correctly. If the belt drive rotates at an angle of more than 90 degrees, it should be tightened.
- The assembly process is reverse.
Replacing a belt drive on a 16-valve unit will be somewhat different and more labor-intensive, which is explained by the presence of two camshafts.
How to change consumables yourself
The timing belt replacement begins as follows: with the car jacked up, first remove the right wheel from the front axle. Behind the counter, you will have access to a black plastic protection, which is secured with a small nut. It is unscrewed manually and the casing is dismantled. The next step is to remove the drive belt and use wrench No. 15 to loosen the tension roller. This allows you to easily pull the belt off the pulley. There is a drain hole for the engine oil sump. It is located to the right towards the front edge of the crankcase on Renault Sandero models with 1.4 liter and 1.6 liter engines. The hole plug is supported by a stump (bar). Now the car is lowered slightly on the jack, which makes it possible to raise the power plant on an improvised support.
Afterwards the support will be removed. First, in the engine compartment, near the dipstick for checking the oil level, three bolts with 16mm hex heads are tightened. The upper frame of the timing mechanism is secured with 4 13mm bolts and one 10mm bolt. The casing can be easily removed when they are unscrewed.
The bottom bolts (2 pieces) are lubricated with sealant. It is necessary to lubricate thoroughly, as this affects the service life of the new set. Also, the sealant is a kind of valve protection.
The camshaft pulley on the Renault Sandero has recognizable channels that are located around the circumference. A block or rod is inserted into one of them to stop the rotation of the pulley. The number of bolts that need to be unscrewed is four. They are easily unscrewed with an 18mm wrench, without any effort.
Using a key, the shaft is rotated until the marks are aligned again - the white mark will be parallel to the “D” marker in the engine body. This will prevent damage to the valves. There is no such mark near the crankshaft pulley, so you need to arm yourself with a pencil and apply it. During installation, the gear returns to its original position.
To remove the timing belt from Renault Sandero, use key No. 13 to loosen the tension roller. The crankshaft gear is removed manually or using pliers that pull it out by the bolts. The bolts are screwed into the grooves on the gear in advance. Don't forget about the timing marks. Now you can install the new timing belt. The process is completely reverse to disassembly. It is necessary to ensure complete coincidence of the marks on the pulley and the area where the belt is marked, otherwise there is a possibility of damage to the valve mechanism, which is not uncommon on the 1.6 and 1.4 engines from Renault Sandero. So remember that timing marks must be observed.
Chain or belt
There is a constant debate among car owners about which is better: a timing chain or a timing belt. There is simply no definite answer, since each type has its own advantages. According to many motorists, the chain is much stronger and has a longer service life. It is extremely unlikely that it will break during operation. However, with a timing chain, you won't have to worry about stretching.
On the other hand, of course, it has a number of disadvantages. Chains are more expensive than belts, they are much more difficult to put on, and they also make a lot of noise during operation. What is most important is that it is the belt drive that is installed. If you don’t want to experiment, we recommend using a classic belt from Renault, especially since the regulations for replacing the Renault Logan timing belt apply specifically to the strap, and for chains you will have to determine the service life yourself as you use them.