The gear shift system on a bicycle is an important part of the transmission, which allows you to change the frequency of rotation of the torque. Accordingly, the gear shift cable must always be in good condition. If it suddenly breaks or wears out over time, it urgently needs to be replaced. This must be done in advance to avoid possible emergency situations. How to replace the gear shift cable on a bicycle yourself, what malfunctions and problems arise in the operation of this element, we will consider further in more detail.
Preparatory stage
Before you begin routine bicycle repairs, you need to stock up on certain tools. They will come in handy in any case and will last a long time. Basic tools for bicycle maintenance:
- hex keys of different sizes - it is advisable to purchase them immediately in a set;
- wrenches of different sizes - it is advisable to buy a set;
- screwdrivers – you will need both Phillips and slotted ones;
- pliers of different sizes;
- tweezers;
- mallet;
- end attachments;
- scissors;
- clamps.
These tools and devices should always be available, because they may be needed at any time. In addition to the above, it is worth purchasing:
- bicycle chain cleaning brush;
- sleeve wrench;
- bicycle chain squeezer;
- ratchet wrench;
- spoke key.
Necessary tools for repairing and servicing bicycles also include consumables - they should not only always be available, but also in sufficient quantity. Consumables in this case include:
brake fluid; oil for various parts; Please note: you need to have oil available for every part - fork, chain, pedals, and so on.
solvents; cleaners; hydraulic oil.
All these consumables will help not only to properly repair your bicycle, but also to maintain your vehicle in almost perfect condition.
Particular attention should be paid to lubricants - the choice of them on the market is simply huge, you can trust sellers, but with caution. To avoid mistakes, you should remember the following recommendations from experts:
- Any liquid lubricant (I5A oil, for example) is only suitable for processing the rear hub drum and chain. This lubricant has an individual feature - it is excellent for spot use. But there is one critical point - if you plan to ride a bicycle in the cold season, then liquid lubricant cannot be used, since at subzero temperatures it quickly hardens and makes it difficult for the mechanisms to work.
- If there is no time to carry out full repair work, but you urgently need to lubricate the chain and cables, then you can use aerosol lubricants. They instantly restore the operation of all hinge joints and are easy to use - even a child can handle the job.
- For processing threads and bearing units, the best option is to use a thick lubricant.
Carrying out the replacement in stages
The process of replacing the cable is very similar to replacing the switch itself.
Attention! Due to different designs, it will not be possible to use the same method. The replacement steps themselves will consist of 12 steps:
The replacement steps themselves will consist of 12 steps:
The rear derailleur should be located at the smallest sprocket. Using wire cutters you will need to bite off the end of the cable and loosen the screw used for clamping. But before you perform this action, you need to remember the initial position of the clamped cable
There are only two options: above the screw or below the screw, this is very important for correct gear shifting. Most likely you need a 5 mm hexagon, use it to loosen the shifter fasteners, and then remove it and put it aside. Now access to the protected element is completely open. To remove the cover, you will need to turn it counterclockwise, so the lock will unscrew and go to the shifter. Thanks to the removed cover, the end of the cable located under the spring becomes visible
Carefully study its location there so that you can easily pull it out and re-secure it in the future. Using the tension regulator, pull out the entire cable. Gently slide the spring to the side to gain access to the end of the cable so you can release it. Remember this sliding motion because this is also what the spring will need to move when installing the cable. We replace all the freed space with a new cable. It does not have to be identical to the one that stood before. For precise installation, use a handy tool, such as a screwdriver or perhaps an awl, to guide the end of the cable. After the last steps, carefully review the position, it should stand correctly and not stick out. Now install the shifter cover. This time the lock needs to be turned clockwise until it is fully tightened to prevent breakage. We install the shifter in the place it previously occupied. The cable is stretched until its beginning appears on the other side. This is where it becomes clear whether the cable is suitable. If it does not fit through the braid, then most likely you will have to replace it. If the cable has passed further and you notice its beginning, then we check the location of the switch again. It should be exactly opposite the small star. We apply the cable, remember where it was attached, from above or below, and we can tighten the retaining screw. As promised, this is the last step. To eliminate possible problems, cut off the remaining cable using wire cutters; leaving a couple of centimeters will be enough.
After all these steps have been completed, the cable can be considered replaced. To make sure that no problems will arise on your next bike ride, you should check it. The check should be carried out on the switch and shifter. Testing must be carried out on a bench. But of course, there is no such opportunity and I don’t want to go anywhere for it. Therefore, carry out the most rigorous check yourself. After all, your health is more valuable.
Testing on a stand, and even more so testing on your own, can be very different from actually riding a bicycle. Take this into account.
How to install a rear derailleur on a bicycle
You will need
- — a set of hex keys;
- — a set of open-end or socket wrenches;
- - flat and Phillips screwdriver
Instructions
To remove the old rear derailleur, loosen the cable mounting bolt and remove the cable. Then unscrew the derailleur rollers or remove the chain from the bike. After unscrewing the bolt securing the switch itself, remove it.
To install the rear derailleur, screw it to the mounting location.
When tightening the mounting screw, pull the switch back to avoid damaging the upper roller position screw relative to the cassette. After this, tighten the adjusting bosses on the switch and on the shifter until they stop and unscrew exactly 1 turn.
Pull the drive cable, place it in the groove and secure it with the fastening bolt.
After installing the rear derailleur, it must be adjusted.
Adjustment is made using the control cable fastening bolt, the control cable tension adjustment screw, the high and low gear limit screws, and the screw for adjusting the position of the upper roller relative to the sprockets.
The tension of the control cable can be adjusted using a boss on the shifter. Some switches may not have all the adjustment elements, and Simano switches are additionally equipped with a screw for adjusting the spring tension of the parallelogram mechanism.
Before making adjustments, loosen the control cable with the adjusting screw or lug on the shifter. Install the chain on the smallest sprocket.
By rotating the high gear limiter screw, install the frame with the rollers so that the plane of the rollers exactly coincides with the plane of the small sprocket. Then install the chain on the largest sprocket.
In the same way, by rotating the low gear limiter screw, achieve an exact coincidence of the planes of the large sprocket and the rollers.
Place the chain on the smallest sprocket at the front and the largest at the rear. By rotating the screw for adjusting the position of the rollers, make sure that when you rotate the pedals back, the roller does not touch the teeth of the large sprocket and there is a gap of 3-5 mm between them.
Important
Try changing gears while pedaling the bike by hand. If the chain has difficulty moving from large sprockets to small sprockets, loosen the control cable using the adjusting lug. Once you have achieved smooth operation of the switch, try shifting under load by riding a bicycle.
Make additional adjustments if necessary.
If the adjustment fails, check the control cable for free movement. If it sticks, clean it and lubricate it. If it has broken wires, replace it.
Check the coincidence of the plane of the chain tensioner and the plane of the sprockets. If they do not match, straighten the speed switch mounting bracket. Make sure there is no play in the rollers.
The play at the end of the chain tensioner frame in the transverse direction should not exceed 3-4 mm.
Source: https://www.kakprosto.ru/kak-890227-kak-ustanovit-zadniy-pereklyuchatel-skorostey-na-velosipede
How to Replace the Drive Cable on Shifters and Brakes
A bicycle derailleur is a capricious thing and requires periodic adjustments, in particular, adjustment of the cable tension. The brake system drive also becomes unstable from time to time. This will be indicated by weak pad movement, poor performance and reduced braking efficiency. Despite this, the procedure for adjusting and installing a new cable is simple and accessible when repairing a bike.
Best articles: Lose weight by cycling
Caring for brake and transmission cables for bicycles and jackets:
Trim frayed ends only with special tools: semicircular scissors, chisel or hacksaw. Once a season it is necessary to lubricate the cables with a thick compound. The caps should tightly close them from the external environment.
Damaged or excess pieces of shirts are trimmed using a grinder or a grindstone. After trimming, it is advisable to straighten the coils from the inside so that the cable does not rub against them.
The cable must be replaced with a new one in the following cases:
- movement inside the braid is difficult;
- there are gaps;
- the threads stick out in different directions or are bent;
- rust on the shirt or cable;
- broken or damaged shirt.
If suddenly there is a need to change the cables to the switches, it’s okay. This is done in literally five minutes. Progress:
- Release the old cable from the gear shifter.
- Pull the shirt out of the mounting sockets on the frame.
- Inspect the shell for damage. If there are no serious defects, it can be left.
- Remove the metal cable from the jacket.
- Insert a new cable into the shirt (or buy them as a set, which is recommended), secure them in the sockets and connect to the switch and shifter.
- Be sure to set the switch to work.
So, the transmission is tuned, now it's time to update the brake cables. First, unhook them from the lever and brake. We inspect the shirt for damage. Typically both the drive and the braid wear out at the same time, but sometimes you can get lucky. If there are noticeable damages and fractures, the shirt is in no way suitable for use. If you insert a new cable into it, it will be of no use: the faults will not hold the tension.
Remove the old cable: loosen the adjusting and fastening screws in sequence. If the shirt is suitable for further use, remove it from the braid. Brake cables are slightly different from the type of handlebar. Therefore, before you buy it, you should look at whether the handlebars on your bike are straight or curved.
If the cable was purchased separately from the sheath, lubricate it a little. The kit does not require lubrication at the replacement stage - everything is fine inside
Installing a new cable on the bicycle frame and connecting to the brake and handle
- Place metal caps on the ends of the shirt.
- Insert into mounting sockets.
- Place the boots on the ends and tighten the mounting screws.
- Temporarily tighten the adjusting bolts.
- Set the optimal tension: the brake should respond instantly to pressing the handle.
That's how easy it is to install a new drive cable on the brake system.
The installation procedure for these components is not only inexpensive, but will also avoid more serious problems with the gear shift mechanisms and braking system. Now that all the cables have been replaced and adjusted, you can safely roll out your bike towards new achievements.
Which cable to choose and where to find it
There are three types of braids:
- twisted - consists of thin, twisted wire coated with polymer. Inexpensive option with a short service life;
- SIS - similar to twisted, but instead of wire for twisting the shirt, strips of metal with Teflon coating inside are used. The most popular type of cables;
- SIS-SP - consists of a shirt in which the threads are arranged in parallel. They are bonded with a polymer layer. During operation, the braid does not stretch. Tension is transmitted directly through the cable. The most reliable, accurate, expensive variety.
A cable for shifting gears and bicycle brakes can be purchased in regular and online stores specializing in cycling products.
Replacing the cable in a bicycle derailleur
Since replacing a cable is a repair process, the person doing it will need a certain tool kit:
- a set of hex keys (and it must contain a 5 mm key);
- and wire cutters.
Moreover, the procedure for replacing the rear derailleur cable is almost identical to the process of changing the front derailleur. Only the latter will need to be set to easy gear before loosening the cable clamp screw
Well, the designs of these two switches are somewhat different - you also need to pay attention to this. It’s also worth remembering how the cables were routed before replacement.
Also, after the cable replacement procedure, you should definitely adjust the rear (or front) derailleur.
Actually, the replacement is carried out in stages, sequentially, step by step:
- The rear derailleur is set to a position strictly opposite the smallest bicycle sprocket. The end of the cable must be cut and the clamping screw loosened. And first you need to remember in which part of the screw (top or bottom) the clamped end of the cable was located. Since this circumstance can have a significant impact on the correctness of gear shifting.
- Using a five-millimeter hexagon wrench, you need to loosen the shifter fasteners and then remove it. This will give access to the protection cover.
- The cover latch must be turned counterclockwise to remove.
- And the removed cover provides the repairman with the opportunity to see the tip of the cable under the large spring. And you need to take a good look at how it is installed there in order to understand how best to remove it.
- The cable must be pulled out completely, assisting the process through the tension regulator channel.
- To help the cable head release, you need to carefully move the spring away. And in exactly the same way it will need to be removed when installing a new cable.
- A new cable must be installed in the vacant space. And you need to stretch it tightly to the location of the old cable. For convenience, you can guide the cable with the end of a thin screwdriver or even an awl. And at the end it is better to make sure that the cable is installed exactly as it should be.
- Now you will need to put the shifter cover in its original position. And secure it with the previously removed lock, this time turning it clockwise.
- The shifter is installed in its place immediately before pulling the cable through the braid.
- The cable is pushed into the braid until its end appears in the area of the rear derailleur. And there is one significant nuance. If the cable “doesn’t want” to fit into the braiding, it always gets stuck and clings to something, it (the cable) will probably have to be changed.
- At the very end, you need to make sure that the rear derailleur is directly opposite the smallest of the bicycle chainrings. Attach the cable and secure it to the screw.
- Cut off the excess cable with wire cutters, leaving only 3 centimeters, and crimp its tip.
After the procedure for replacing the gear shift cable on a bicycle, it is necessary to thoroughly test the functionality of the shifter. And the switch too. This must be done before the bike begins to be used to its full potential. It must be tested on a special stand. And if this is not done, then the brakes may fail at the most inopportune moment.
Just keep in mind that the bench test and the conditions of the real road can vary greatly.
Replacing the cable
If the bicycle gear shift cable is worn out, you can replace it yourself without contacting a technical service. When disassembling, remember the order and position of all elements. To do this, you will need hex keys and wire cutters or a knife (to remove worn parts of the cable). Repairing the rear and front cables is similar, but when changing the latter, select the lowest gear.
The work is carried out in stages:
- The rear derailleur of the bicycle is mounted on a small chainring. The ends of the cable are cut off, the clamping screw is loosened;
- The shifter fasteners are loosened using keys and removed;
- Reduce the fixation and remove the protection cover;
- Carefully remove the cable, using the tension regulator to help;
- Check the braid, if it is in satisfactory condition, leave it;
- Pull back the spring and release the cable head. When installing a new element, the spring will also need to be moved;
- Replace the old worn cable with a new one; it should be installed in the same positions as the old one. Check the installation;
- Reinstall the protection cover by twisting it clockwise;
- The cable is pulled through the braid of the shirt until its ends appear in the rear derailleur of the bike. A negative nuance may arise when the ends of the element do not come out in the rear derailleur (jam, bend, snag), in which case it will have to be replaced;
- After installation, check the location of the rear derailleur - it should be at the smallest sprocket. Fix the position of the cable element with a screw;
- Excess wire is cut off with wire cutters, leaving about 2.5 - 3 cm, the ends are crimped so that they do not fray.
Immediately after replacing the elements, be sure to check the operation of the shifters, tension, switching, everything must be in perfect working order.
Transmission repair stages
The repair includes adjusting the front and rear derailleurs, as well as checking the condition of the cables, chain, cassette and rollers.
Top articles: Travel speeds on different bikes in different conditions
If you see that the cable has broken or is about to break, you should replace it. To do this, buy a suitable cable from a sports store, and then do the following:
- Unscrew the bolt holding the cable.
- Disassemble the shifter and remove the cable from it and from the shirts. It is also recommended to replace shirts!
- Clean the shirts and pour a drop of oil into them for better cable glide.
- Thread the new cable through the shifter and then through all the shirts.
- Proceed to configure the switch.
- Bite off the excess part of the cable and secure its end with a special tip.
Over time, the chain becomes unusable. It is recommended to have several chains in stock and change them every 100 kilometers, because the cassette deteriorates due to chain wear. Multiple chains will wear out more slowly and the cassette will last longer. You can determine the condition of the circuit using a special tool. It is impossible to repair the chain; you just need to replace it if necessary.
If the chain is in good condition, simply remove it, clean and lubricate it. Remove excess with a napkin or dry cloth.
Cables and jackets wear out
If malfunctions begin during the operation of the rear derailleur of a bicycle, you should immediately check the condition of the shift cables. Most often, this is the reason. The option either does not fully work or its movement is stuck. The working parts of the bicycle become unusable during use and should be replaced. They are also influenced by the following factors:
- dirt, moisture;
- precipitation, bad weather;
- temperature changes;
- improper care of the bicycle - all parts must be kept clean and dry, and if necessary, lubricated, including with aerosols.
New products purchased at the store are protected by factory lubricant, but over time they will still become unusable and will have to be replaced.
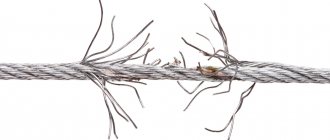
Since the cable consists of thin metal wires, over time they inevitably begin to fray and wear out (in the most used places), bend and break. The same goes for braiding.
What cables and shirts are used on modern bicycles
Bicycle cables are made from a large number of thin steel wires. Evenly intertwined with each other, they form a wear-resistant and durable metal fiber.
Over time, the strength of each thread decreases unevenly, resulting in “weak areas” where they can break, as well as come out and bend. To improve resistance to mechanical stress (and extend service life), a layer of polymer is applied. An advanced and durable option is the use of stainless steel.
During active use, the cable not only experiences mechanical stress. In addition, dirt or dust may get inside the braid. To protect the metal, special lubricants are used. The most durable and durable Teflon is widely used.
The shirt is also available in several versions. There are three types of cable braids:
- twisted,
- SIS braid,
- upgraded SIS-SP.
Twisted braid is a metal wire twisted into a spring. The metal is covered with a layer of plastic on top. The inner surface of the metal springs is lubricated to reduce friction between the cable and the braid. The price of cables with this braid is the lowest in the series, however, it has become a thing of the past, and it is increasingly difficult to find it on sale.
SIS is essentially the same spiral braid. Its difference from a twisted shirt is that instead of a thin wire, sheets of metal are twisted into a spring. Instead of conventional lubricant, “long-lasting” and cleaner Teflon is applied inside. Currently, it is this type of braiding that has begun to be used on gear shift and brake cables.
SIS-SP is a parallel braid whose threads are held back by a polymer layer. Unlike a spring shirt, this shirt does not change length, while balancing the tension of the cable itself. Thanks to this, both the brakes and the shifters work more accurately. The internal cavity of SIS-SP jackets is lubricated with silicone grease.
It is much easier to tighten the cable on a compressible jacket than on a parallel-woven one.
What types of bicycle cables are there?
The cable is the connecting element between the brake lever and the brake mechanism, and also, if it is a gear shift cable, then between the coin and the gear selector. It is made from an interweaving of thin stainless steel threads, which help it achieve strength and reliability without losing flexibility. The difference between the cable for shifting high-speed gears and for brakes is only in the tip at the end of the cable, which can have a different diameter (there is a landing and an internal diameter) .The cable for a bicycle is protected by a casing (shirt or braid), which partially covers its surface and helps the cable to smoothly change the trajectory of its movements. It flexes as it passes from the frame to the brakes or shifter, so the casing (braid) must have good friction resistance. The color of the braid can be any: black, white or colored. There are 3 types of casings:
- The “old” type of braid is wire twisted into a spiral and covered with plastic on top. This type of shirt has the following disadvantage: the inner walls of steel and the steel cable produce friction, as a result, interaction with the brake handle becomes difficult, and the accuracy during gear shifting is low;
- “New” type - the internal cavity of the casing is covered with plastic, so the wire clearly transmits the jerk for the brakes and for changing gears without heating or wearing out;
- Shimano's new type of jacket - there is no spiral tube made of steel, and the surface of the shirt is made of steel rods, which are parallel to the axis of the casing, and the covering of their surfaces is made of plastic. The transmission clarity of this type is higher than previous types. A new braid model has also been released with silicone lubricant, which can reduce friction.
And so that the ends of the shirt (casing, braid) are not shaggy, special tips are put on them.
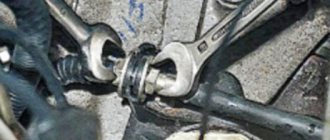
When installing the cable, it is important to note that it is advisable to cut off excess parts only with a grinder. If you don’t have this tool, you can use wire cutters, but they must be very sharp. If the ends of the cable are damaged, carefully squeeze them into the tip, which must be pressed with pliers.
For the cables to operate effectively, it is important to lubricate them and their housings once a season. This can be done with liquid oils, aerosols, or the same silicone grease. It’s best to do this with a lubricant, because that’s what it’s designed for.
Despite their small footprint in the volume of a bicycle, cables are an important and significant component that ensures the safety and convenience of cycling.
Source: https://yvelo.ru/zapchasti/kakie_biivayut_velosipedniie_trosiki.html
Take the traffic rules knowledge test for a cyclist!
Time limit:
out of 15 tasks completed
Questions:
- 1
- 2
- 3
- 4
- 5
- 6
- 7
- 8
- 9
- 10
- 11
- 12
- 13
- 14
- 15
Information
To be able to obtain rights, please click Next
You have already taken the test before. You can't start it again.
The test is loading...
You must log in or register in order to begin the test.
You must complete the following tests to start this one:
results
Correct answers: out of 15
Your time:
Time is over
You have scored
a maximum of 15 points
| Place | Name | Recorded | Points | Result |
| Table is loading | ||||
| No data |
Your result has been recorded on the leaderboard
Captcha:
- 1
- 2
- 3
- 4
- 5
- 6
- 7
- 8
- 9
- 10
- 11
- 12
- 13
- 14
- 15
- With answer
- With a viewing mark
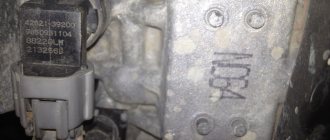
Replacing transmission control cables
Replacing transmission control cables
Replacing control cables is shown using the example of a manual transmission; the control cable for an automatic transmission is replaced using almost the same techniques.
You will need a flat blade screwdriver.
1. Remove the floor tunnel lining (see Removing and installing the floor tunnel lining).
2. Using a screwdriver...
3. ...slide the gear selector cable end lock...
4. ...and disconnect the cable from the gearbox control lever.
5. Squeeze the shift cable sheath clamp with pliers...
6. ...and remove the cable from the groove of the gearbox control lever bracket bracket.
7. Similarly, disconnect the gear selection cable (with a white sheath).
8. In the engine compartment, use a screwdriver to pry off the end of the gear shift cable...
9. ...and disconnect the cable tip from the gearbox lever, overcoming the elastic resistance of its spring clamp.
10. Use a screwdriver to pry off the end of the gear selection cable...
11. ...and disconnect it from the gearbox lever, overcoming the elastic resistance of the spring clamp.
12. Slide back the gear selector cable sheath stopper...
For clarity, shown with the battery and its mounting shelf removed.
13. ...and remove the stop from the bracket on the gearbox.
14. Similarly, disconnect the gear selection cable stop from the bracket.
15. In the car interior, under the instrument panel, remove the cable seal from the hole in the front panel and remove the cables into the passenger compartment.
16. Install the parts in the reverse order of removal.
17. Adjust the transmission control drive (see Adjusting the transmission control drive).
Step-by-step instruction
The stability of gear shifting depends on the stretch of the cable and the presence of damage. In this case, the drum is rotated clockwise to the correct position. In some situations, the drum is tightened until the chain jumps smoothly. If the problem persists, the cable must be replaced. You can replace a torn or damaged product yourself.
When the problem is in the spring, it is cleaned of contaminants, then lubricated and checked. No adjustment or adjustment will be required if the speed operation is restored when the fault is eliminated. Before adjusting the switches, you need to check for deformation of the cock plane.
The malfunction could have started after the bike was dropped or hit. In this case, the vehicle is checked for deformations. Broken screws, frames and ears are replaced. Then the transport functionality is checked again.
After all checks, you can adjust the front derailleur and rear derailleur. Otherwise, manipulations will not help. Any malfunctions can negatively affect ride quality and lead to unexpected serious breakdowns and injuries. It is useful to carry out transmission adjustments as a preventative measure for vehicle health.
Before starting the adjustment, you need to check for deformation of the cock plane
Rear derailleur
Owners need to know how to properly set the speeds on their bike. Self-regulation requires compliance with the instructions:
- move the chain to the small sprocket;
- unscrew the screw;
- loosen the cable tension;
- adjust the screw with the letter “H”;
- pull the cable.
Check the functionality of the switch mechanism. Crank the pedals several times and watch the chain flipping. If the problem persists, tighten the cable more. After checking, move the chain to a large sprocket and adjust the tension of the screw with the letter “L”.
You can adjust the switching if you have screwdrivers, hex keys and pliers. It is not necessary to register the transport itself. It is advisable to prepare a cloth for cleaning parts and lubricant in advance. Adjustment of the limiters is possible after checking the serviceability of the components of the mechanism.
Rear derailleur designShift pattern
Front derailleur
Step-by-step instructions will explain how to set up the gear shifters on your bike. The process comes down to adjusting the tension and gear limiters. Setting the transfer quality is important. It is worth eliminating the gaps in advance and replacing deformed parts. You can configure the front derailleur according to the following scheme:
- the chain is moved to the smallest sprocket;
- remove the fixing element;
- loosen the cable tension;
- adjust the frame with a screw with the letter “L”;
- the cable is pulled;
- fixed with a screw.
The chain is moved to the middle sprocket and checked. If necessary, adjust the frame again and fix the correct cable tension. The drum on the left coin will help you quickly achieve the correct tension. The front gear derailleur is checked.
Any cable tension is released at minimum speed. To complete the adjustment and quickly adjust the front derailleur, after correcting the position of the cable, secure it with a bolt and repeat the check.
Gear shifting should be correct. Adjustment may be required due to looseness, wear of parts, or damage. You can carry out the work yourself if you familiarize yourself with the design of the mechanism in advance, study the instructions, and follow the algorithm exactly.
Front derailleur deviceSetting
How to set the rear and front derailleurs on a bicycle + photos and videos
Shifters are widely used when riding both mountain and city bikes. A lot depends on their quality work: the pleasure of cycling, ride quality and even your safety. Before each cycling season, you need to check and, if necessary, adjust this mechanism correctly.
What parts help set up the speed switches?
A multi-speed mountain or city bike is equipped with several gears and gives new possibilities. It is much easier to conquer peaks, ride over uneven terrain, and even perform various tricks. To enjoy cycling, you need to set the gear selector correctly.
Those who first decided to figure out the switch mechanism on their own should first become familiar with the transmission parts and their functions.
Knowledge of the structure of modern bicycles helps to correctly set gear shifting
We will not go into detail on each part of the bicycle. Let's look at just some of the elements that make up the transmission.
- The front derailleur helps the chain move along the drive sprockets of the system. Attached to the frame in the pedal area;
- the system is part of the front derailleur.
It also consists of stars, different in diameter and number of teeth, which are attached to the connecting rods with special bolts; The front derailleur is located in the pedal area - The rear derailleur helps the chain move along the cassette sprockets. Located in the rear wheel area;
- Cassette/Ratchet - Part of the rear derailleur.
Consists of several stars, different in diameter and number of teeth. On expensive bicycles, the cassette is mounted on a drum. In cheap ones, there is a ratchet in place of the drum. The latter can also be observed on older bicycle models; The rear derailleur is located on the rear wheel - chain is a part of the transmission that must be periodically lubricated with special oils and washed;
A bicycle chain is an important part of the transmission. - shifters (or shifters) - a device with which the cyclist controls the gear change. When you press the shifter, the cable tension changes, causing the speed to change. It is mounted on the steering wheel, near the handles.
The shifter on the right handle is responsible for the rear gear shift, and on the left - for the front. There are bicycles with one right-hand shifter; Shifters are mounted on the steering wheel and are responsible for changing gears - cables - parts that connect the shifters to the speed switches. A high-quality transition from one speed to another depends on the correct tension of the cable;
- jacket - a rigid tube through which the cable passes.
Attached to the frame. The transmission cable connects the shifter to the shifter
The operation of the rear and front derailleurs is as follows: if the cable is tensioned, the derailleur frame moves the chain to higher sprockets. If, on the contrary, you loosen the cable, the frame will throw the chain onto the smaller sprockets.
Speeds are switched using shifters (coins) located on the steering wheel. The rear derailleur is adjusted with the right shifter. This way the chain jumps between the rear sprockets. And the front derailleur is adjusted with a shifter on the left side. This is how the chain jumps among the front sprockets.
How the speed switch works - video
Gear shift types
Before making any adjustments, determine what kind of gear shift your bike has. There are 3 main types of switches.
- External switching mechanism.
- Internal switching mechanism.
- Combined type.
Internal gear shifting on a mountain bike
The basis of this design is planetary bushings. This mechanism does not use cassettes. The transmission includes only 2 stars: front and rear. The entire mechanism is hidden inside. Usually there is no front gear selector either.
All elements of the speed switch are hidden in the housing
This mechanism is often found on road, touring, folding and city bikes. The system itself is located inside the rear planetary hub. This type of speed switch can be seen, for example, in the Forward Surf city bike (3 speed gears).
External shifting on a speed bike
The external type belongs to most multi-speed bicycles. It is used on both mountain and city walking models. The mechanism consists of gear shifters and sprockets, forming a cassette or system . The speed is changed using the rear and front derailleurs.
External shift type elements - derailleur and cassette
This type of gear shift can be seen on both the Forward Dortmund city bike (7 speeds) and the Forward Agris mountain bike (24 speeds). this switch yourself by studying the mechanism.
Bicycle chassis structure, operating principles - video
Combined mechanism
The combined type is a combination of external and internal mechanisms. It is mounted on the rear wheel hub of the bicycle.
A combination shifter is a hybrid of external and internal bicycle shifting types.
This mechanism is extremely rare, since it combines all the negative aspects of both the external and internal gear shift systems. It can only be configured by a professional.
Switch classification
In the modern world, there are many companies that create equipment for bicycles. The best quality models are made by corporations such as Shimano (Japan) and Sram (America), which produce entire lines of derailleurs.
Devices for professionals:
- Shimano XTR, Sram ESP 9.0 and Sram ESP X.0 take the lead in price and quality. They are mainly used in competition bikes. They are characterized by low weight of the structure.
- Shimano deore xt, Shimano Saint, Shimano slx took second place in the same category. Used in bicycles with 27 gears.
- Shimano Deore LX, Shimano Dura-Ace, Shimano Hone - third place. They are designed for devices with the maximum number of speeds.
Sports bike lines:
- Sram ESP 7.0 and Shimano Deore are similar designs. Made from very durable components and designed for 24 gears.
- Sram ESP 4.0, Sram ESP 5.0, Shimano Nexave and Shimano alivio are cheaper than the professional line. They support up to 24 speeds and are designed for touring bike models.
Sram ESP 7.0 derailleur is specially designed for sports bikes
Line of switches for hobbyists:
- Sram ESP 4.0, Shimano C201 and Shimano acera are included with cheaper hybrids and entry-level mountain bikes. Can withstand up to 24 gears.
- Sram ESP 3.0, Shimano Nexus and Shimano altus are designed for recreational, city bikes.
- Shimano tourney is designed for a quiet, smooth ride. Carries 21 gears.
There is no fundamental difference in the adjustment and operation of different lines of switches from the same company. For example, different groups of Shimano derailleurs work the same and are interchangeable. Let’s say that the drive of eight-speed Alivio, Altus, Acera switches can be equipped with nine-speed systems Deore, Deore XT, Deore LX, XTR and vice versa.
The difference between devices in the Shimano line - video
What can affect the quality of switches?
It is important to find out what caused the problem.
Stretched cable
This defect is regulated by a drum on the shifter.
- When the chain moves silently and has difficulty jumping onto large sprockets, it means the cable has stretched. Rotate the drum clockwise until the part is tensioned to the desired position.
- If the chain does not want to go down onto small sprockets, loosen the cable by turning the drum counterclockwise.
- Check the operation of the speed switch. If necessary, tighten the drum further. Adjust until the chain begins to jump smoothly.
Broken cable
If a part is damaged, it must be replaced.
- Unscrew the fixing screw on the crossbar.
- Disassemble the shifter to remove the cable.
- Insert a new one, treat with special lubricant.
- Pass it through the shirts and set them in place.
- Secure the new cable to the derailleur.
Changing the cable on a bicycle - video
Parallelogram spring problems
For better performance of the return spring, you need to wash it. Then lubricate, after cleaning.
The rooster is bent or broken
If the rear derailleur tab is askew, it means the mount is bent. You can fix this defect yourself.
- Hold the foot with one hand and grab the switch with the other.
- Gently, without sudden movements, align the position of the rooster until the rear frame is level.
Switch deformation
A common cause of such a breakdown is a bicycle impact. Usually the rear derailleur suffers, the front derailleur is very difficult to bend. After a breakdown, it is worth checking exactly which parts have broken.
- If it's a frame, align it or change the part.
- If the screw that regulates the chain tension or the eye that secures this screw is broken, it is better to replace the parts. Otherwise, speeds will change very poorly.
Changing bicycle transmission parts - video
How to adjust the rear derailleur
The rear derailleur is a machine that transfers the chain from one sprocket of the rear wheel to another. Today, the vast majority of high-speed bicycles are equipped with such a switch.
Most speed bikes are equipped with a rear derailleur.
The rear derailleur consists of the following elements.
- Switch frame. The number of bicycle speeds depends on its length.
- Two rollers that are responsible for directing the chain: a guide and a tensioner roller.
- The mechanism itself (parallelogram).
- Mounting bolt.
- The lower gear limiter is a screw labeled L.
- The top gear limiter is a screw labeled N.
- Cable guide groove.
- Tensioner adjustment screw.
Adjusting the rear derailleur is necessary if the mechanism is not working correctly, the chain is jumping over the required sprockets, the speed does not change, or you hear grinding or loud noises. You can set up the mechanism and debug its operation yourself. You will need a Phillips screwdriver and a #5 hex key.
First, make sure the derailleur is positioned vertically and parallel to the bike. If everything is in order, you can proceed to configuration. For convenience, turn the bike upside down, placing it on the saddle and handlebars, this will give access to the switch itself and the adjustment screws.
- First, lower the chain onto the smallest sprocket.
Do this with the shifter on the right handle of the bicycle, it is responsible for the rear derailleur. Using the right shifter we lower the chain - Loosen the screw holding the cable.
This is done in order to unlock the switch. Loosen the screw holding the cable - Prepare a screwdriver and find the screw with the letter H on it.
Screw H limits the top gear - Move the switch so (adjust with screw H) so that the sprockets on which the chain rests (one sprocket on the cassette, two sprockets on the switch) are in the same plane, i.e., they form one line.
All 3 stars must lie in the same plane - Take the cable with your hand.
It needs to be pulled out as much as possible and secured by tightening the screw. Pull the cable by hand and secure the screw - Check if the switch is working properly.
If it does not move well to large stars, turn the wing counterclockwise, tensioning the cable. Adjust the cable tension by turning the knob - Now throw the chain onto the smallest sprocket using the shifters.
- Find the screw with the Latin letter L.
Adjust the position of the switch - Change the position of the switch so that the largest star in the cassette lies in the same plane as the switch tab, forming an even line with it.
Adjust until the frame and the largest star form one line
Setting the rear derailleur - video
Front Derailleur Adjustment
The front derailleur is less common than the rear derailleur. Bicycles with this device are cheaper. The front derailleur moves the chain along the system's sprockets. Moving from side to side, he pushes the chain onto the next sprocket.
Front speed derailleur device
Front derailleur device.
- Switch frame. A chain passes through it; this is the main element when changing gears. It moves to the sides in front of the front sprockets.
- The parallelogram is the mechanism itself (speed switch). Includes spring.
- Fastening to the frame.
- Upper limiter L.
- Lower limiter N.
- Cable fastening.
The main problem with the front derailleur is that the chain touches the frame when driving. You can fix this problem yourself.
Setting up the correct operation of the mechanism
- First, you need to set the front to the smallest star, and the rear to the maximum. To do this, rotate the pedals while pressing the shifter.
- Using a #5 hex, lower the screw holding the cable.
Loosen the screw holding the cable - Take a screwdriver and find screw L. Move the frame so that the distance from its inside to the chain is approximately 4 mm.
We adjust the correct position of the frame by turning screw L - Reattach the cable.
To do this, pull it with your fingers and tighten the screw that presses against the cable. Hold the cable with your hand and fix the screw - Now you need to adjust the second star. First, put the smallest sprocket on the rear derailleur, and move the front derailleur to the old one.
- See if the chain touches the outside of the frame.
If the problem persists, tighten the cable further using the thumbwheel on the left shifter. Turn it counterclockwise until the chain is in the desired position. The distance from it to the frame should be approximately 3 mm. Tension the cable by turning the knob counterclockwise - Go to the third star.
If the chain touches the frame, then use a screwdriver to adjust screw H. You need to increase the gap by moving the frame outward. Adjust the frame with screw H
Troubleshooting the front derailleur - video
How to change gears on any bike from Merida to ladies' model
To ride easily and comfortably, with less effort, you need to change the speed correctly.
- When you hear extraneous sounds when changing gears, the transmission has not worked. You need to press the shifter lever.
- If you decide to conquer the peak, use the rear derailleur.
- It is better to change gear before you start climbing a hill.
- Change gears while moving and do not jump over several stars at once.
- When changing speed, ease the pressure on the pedals. This way the switching will happen smoothly and correctly.
Problems with gear shift faults
Problems may be the following:
- Shirts are broken - you need to check their integrity. This can be detected visually if there is a visible defect resulting, for example, from a bicycle fall. The braid will spring back and will not transmit the impulse of the cable to the switch. Or low-quality copies. There is only one way out - replace the damaged element;
- Rust has accumulated under the end of the braid, the wires are coming out or are all frayed;
- The components (wires) of the cable itself are worn out (it unravels and gets stuck in the braiding) and the necessary lubrication is completely missing, as well as the presence of rust and oxide. Everything should be replaced. The priority is polished cables (smooth) for bicycles.
Professionals do not recommend filling old versions of the cable with lubricant, since after just one or two kilometers of riding a bike, sand sticks to the lubricant and gets clogged inside, which aggravates the situation. It is better to replace worn components.
Causes of malfunctions
The first and main reason for poor gear shifting is usually a damaged cable and switch jacket. Replacing it is not difficult and identifying this malfunction is simple. However, in order not to have to change the cable with the jacket again, we recommend monitoring its condition.
Winter is ahead and this is an excellent time to inspect and replace the cable (if necessary). In order to check whether the cable runs well inside the shirt, you need to do the following:
- Drop the gear to the smallest star.
- Visually inspect the jacket and cable end for damage or fraying. If they are, then go to step 8.
- Unscrew the cable retaining bolt on your derailleur (front or rear) and pull the cable out of the groove in the derailleur.
- Pull the shifter shirt to expose the cable. Check the cable for dirt. If necessary, remove it.
- Using forward and backward movements, check the smooth movement of the cable. If the cable moves smoothly and without noticeable effort, we recommend lubricating the cable jacket for prevention.
- Instead of alcohol-based lubricants such as WD-40, we recommend using a little winter oil for your car's engines. Up to -25, it will be able to provide you with acceptable lubricating properties, preventing the cable from freezing in the jacket. And when you put the bike in a warm apartment, unlike aerosols, it will not evaporate from your shirt. To lubricate the shirt you will need a regular syringe with a needle. After first drawing a few milliliters into the syringe and moving the cable to the side, insert the needle into the hole for the cable and inject up to 5 milliliters of oil inside.
- Repeat the forward movements from step 4 several times so that the oil spreads over the shirt. If replacing the cable is not necessary, you can proceed to setting up the switch. We talked about how to set up a rear or front derailleur in this and this article.
- If you need to replace the cable, then you need to read the instructions for your shifter. Usually the cable can be pulled out of the shifter by dropping the gear to the smallest sprocket and “pushing” it inside the shifter. But first, check the “end” of the shifter for the presence of a plug bolt. Before replacing the cable, this bolt must be unscrewed.
- If there is no plug (as in my case), then most likely the cable can be pulled out by simply disassembling the shifter. In order for you to conveniently disassemble the shifter, it must be removed. Difficulties at this stage can only arise with the flu. By clicking on the inscription you will learn “how to remove the flu”.
- After removing the shifter, unscrew the top cover by turning the bolt counterclockwise.
- Important! Be extremely careful when removing the cover, making sure that the return spring does not fly out of the shifter. Press the cable as in step 8 so that it comes out of its groove. Along the way, you can check the shifter for dirt inside and lightly lubricate the insides with the same oil. A couple of drops will benefit your shifter mechanism.
- Insert the new cable and assemble the shifter. Also do not forget about replacing the cable jacket. After replacement, proceed to setting the switch from step 6.
Inspecting and replacing a shift cable is not a complicated matter. With the help of these instructions and with minimal tools, you can replace the cable yourself without contacting a service center. Happy renovations!
Video about replacing cables and jackets:
Purpose of cables and braids
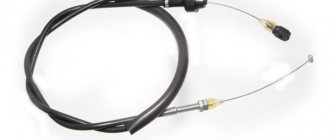
The shift cable on a bicycle is the connecting thread between the shifter and the derailleur. It is a very strong metal straight thread. The job of this cable is to take all the forces and transfer them to the mechanism, thereby operating the gear shift. Depending on which gear is selected, by pressing the lever the cable tension becomes stronger or weaker. When the cable tension is optimal, the switch is in working condition.
With the help of a braid of cables (shirts), the force is transmitted to the mechanism into the rear stay. The braid also protects the cable from mechanical damage. It is a twisted metal wire, usually coated with polymer on top. At the ends there are lugs, from which a section of cable appears for adjustments.
A cable is a set of thin strands of steel that are intertwined and together formed into a reliable, damage-resistant metal fiber. Over time, the threads can wear out and the strength of some of them decreases, thus, damaged areas appear with breaks, kinks and individual wires coming out. Therefore, the fiber is coated with a layer of polymer or stainless steel, this improves wear resistance and significantly extends the service life of the cable.
In addition to mechanical influences, cable wear is also influenced by external factors - moisture, dirt, dust. In order to protect the metal from external influences, lubricants such as Teflon are used - one of the most durable and hardy.
Braids on the market are presented in three types: twisted type, SIS type and improved SIS-SP type.
The twisted type of shirt is a spring made of metal wire, covered with plastic on the upper side. Inside, the metal springs are treated with lubricant so that the cable rubs less against the jacket. Cables with such a shirt are the most budget-friendly and are practically not produced today.
The SIS type jacket is similar in type to the twisted one, but the material from which the spring is twisted is more durable - metal sheets. A more durable and clean material, Teflon, is also used inside. This is the most common type of braid today.
SIS-SP braid is parallel woven. The threads are held back by a polymer layer. The length of this braid, unlike the previous ones, does not change, but the tension of the cable is adjusted. This ensures more accurate operation of the shifters. The inside is treated with silicone.
What is the function of cables on a bicycle?
The gear shift cable on a bicycle is a reliable metal connection made of steel (stainless or galvanized) between the switches and the gear shifter. The function of the cables is to receive and transmit the necessary forces to the bicycle mechanism at the right moment. After which the gear selector on the bike begins to move. Therefore, it is very important to immediately replace the element with a new one if it breaks.
The tension on this wire increases or decreases depending on which gear the cyclist selects. The maximum tension is the working condition of the element; if for some reason it weakens, it means that it has become unusable and must be replaced.
The cable is located and moves inside a flexible tube, which is called a jacket (braid). It is a plastic tube covered with a spiral (or parallel) metal braid, with a protective outer layer. The braid protects the cable from various damages. If it fails, it should be urgently replaced with a new one.
The brake cable is large in size and has increased strength. It takes on more serious loads when braking the bike, when moving at different speeds and routes. When you press the bike brake adjustment, the element moves and adjusts the proximity of the braking surface to the brake pad. Be sure to monitor the condition of the brake cable and replace it if it fails.
The bicycle gear shift cable looks like a cable in which:
- main part – 7 cores;
- twisting part in the form of a spiral - 12 cores.
Spiral-twisted steel strands make the product more reliable and durable, while maintaining maximum flexibility.
The shirt itself is multi-layered, it contains the following layers:
- polymeric;
- protective steel stranded;
- polymer internal and external.
This element differs in the brake and shift cable of a bicycle:
- in the braking mechanism - the protective layer is laid in rings on top of the polymer inner layer (this increases flexibility and resistance to high loads);
- in the switching circuit, the protection layer is located in the form of an elongated spiral (parallel to the switching cable).
It is important to know that the jacket for shift cables on a bicycle will not be able to withstand the load from the brake elements - they are not compatible, the elements cannot be replaced one with another.
How to change gears on a bicycle correctly?
The rules for shifting gears are simple and not so numerous:
- You only need to shift when the bike is moving. If you don't turn the pedals, nothing will happen.
- When shifting, the load on the bicycle chain should not be heavy. Switching should occur softly and smoothly.
- Don't switch gears when going uphill. The speed must be set in advance.
- The correct speed change is a step change, i.e. at a time - one speed. This will save the chain and nerves.
- If you have a classic system (3x8), then each front sprocket has its own personal rear sprockets. This will protect the chain from distortions.
The large chainring is used for cruising. Medium is needed for poor asphalt, on dirt roads, etc. The small sprocket is invaluable when riding on steep climbs, sand, tall grass, etc.
You can install the most expensive switches on a bicycle, equip it with the coolest shifters, but it will be impossible to ride it. And another unsightly-looking bike, assembled from unknown components, but made by a real master, will “roll”, pleasantly rustling the transmission.
Shifting gears on a bicycle is a complex and organic system. It cannot be divided into separate elements: everything must correspond to each other, and then the bike will “fly”.
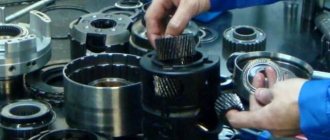
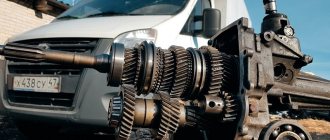
Shift mechanism and cable of a manual transmission
So, let's start with the features of different manual transmissions. Depending on the number of stages, such gearboxes can be divided into:
- four-speed gearboxes;
- five-speed gearboxes;
- six-speed gearboxes and higher.
Also, manual transmissions are performed according to two different schemes and are divided into:
- two-shaft manual transmissions (boxes with primary, intermediate and secondary shafts are installed on front-wheel drive and rear-engine cars);
- three-shaft gearboxes (boxes with drive and driven shafts are installed on rear-wheel drive vehicles).
The design and principle of operation of two-shaft and three-shaft mechanical boxes have significant differences. One of these differences lies in the principle of connection between the box and the gear shift mechanism, which directly depends on the location of the gearbox.
- the three-shaft manual transmission mechanism, consisting of a control lever and sliders with forks, is usually located on the gearbox body;
- mechanism of a two-shaft manual transmission, consisting of a control lever connected by cables (rods) to the gear selection and gear levers. The levers, in turn, are connected to central gear selection rods with forks. The mechanism is located separately from the box body.
Next, we will dwell in more detail on the switching mechanism of a two-shaft box, where most often a cable connection is used in the switching mechanisms. The lever of a twin-shaft manual transmission, as mentioned above, is located remotely (on the steering column or in the area of the central tunnel) and is connected to the gearbox by cables or rods located separately from the gearbox.
This arrangement has its pros and cons. Among the advantages are the absence of vibrations of the gearbox lever, as well as the remote location of the gearbox lever. If we talk about the disadvantages, the mechanism is less durable, the gears may not engage clearly, and the mechanism needs to be adjusted or replaced periodically.
Bicycle handlebar shifters - description
The shifter is the external feature that distinguishes a multi-speed bicycle from a single-speed one. At the beginning of their development they were installed on the bike frame, now for the convenience of cyclists they are placed on the handlebars. Their professional name is shifters.
If the bicycle is equipped with two speed switches, then two shifters are installed on the handlebars: one, for controlling the front derailleur, is usually mounted on the left handlebar handle, and for the rear derailleur, on the right.
If the bike is equipped with only one rear derailleur, for example, internal or combined, then the shifter will only be on the right.
Design and principle of operation
The design structure and principle of operation of the shifter are elementary, and little has changed since their appearance.
It consists of several parts: a shifter handle, a moving block, a locking spring, a moving block lever, a wound cable and a housing. This design is created in order to “feed” the cable and fix it.
The principle of operation of shifters in the gear shift system is that when the position of the lever changes, the length of the connecting cable changes, which in turn affects the speed switch - a change by one control division in the shifter corresponds to switching to the next (lower or higher) gear.
Best articles: How to choose a bike for a child
Cable routing
Details
The correct and precise operation of the brakes and switches depends on how correctly the cables and shirts on the bicycle are laid.
Even the most expensive models will perform poorly if there is excessive friction or play, but cheap brakes and shifters, with the correct installation of cables and jackets, will work quite satisfactorily.
Most problems in the operation of the brake system and gear shift system of a bicycle are caused by improper cable routing.
Cutting the Shirt and Preparing the Ends
There are two types of shirts:
- Spiral jackets - used in brake systems;
- Uncompressed jackets - used in gear shift systems.
For quality work, it is very important to properly prepare the shirts; an important factor in this is the correct cutting and preparation of the ends of the shirt.
Spiral shirt
It is best to cut a spiral shirt with regular or special cycling shirt nippers. After cutting, if there is a piece of coil left that covers the hole, it needs to be cut off. Since the end of the shirt remains not even, not perpendicular to the shirt itself. The uneven end needs to be leveled; for this you can use a grinding wheel or a file.
When cutting a shirt, the end of the plastic is bent inward. Take an awl and, after filing, while the plastic is heated, insert the awl inside. This will not only round the end, but also widen the hole, which will improve the quality of work.
Uncompressed shirt
To cut such a shirt, you will need a special cutter that allows you to cut the desired length and not break the shirt when cutting. Some people use a grinder with a fine abrasive disc.
After cutting with a cutter, there is no need to grind the end of the shirt, but you will need to clean it with an awl.
Before cutting off the jacket for the final turn to the rear derailleur, we recommend that you first bend it to the desired shape and then cut it off. In this case, the end will be straight and the connection will be more reliable.
Tips
The ferrules fit onto the ends of the jackets and are usually made of nickel-plated brass. Promote high-quality connection of the shirt with the holder on the frame. On some frames, the holders themselves act as tips and there the shirts are used without them. In all other cases, tips must be used.
The main rules for laying cables:
- The steering wheel should turn to its maximum angle in both directions. The tension of the cables should not limit it. Turning the steering wheel should be limited to the frame resting on any part;
- There should be no unnecessary bends. The cable, in places of turns, should immediately go in the right direction. If he first turns in one direction, and only then in the right direction, then the length of the shirt is chosen incorrectly;
- The cable should move smoothly in places of turns;
- Shirts should be as short as possible. But at the same time they must not violate the previous rules.
Routing brake cables
Curved handlebar (ram's horn)
Previously, the cable was carried out by bending it upward and behind the wheel. This ensured the smoothest bending. On modern bicycles, with combined brake levers and shifters, the brake cables are routed under the grips or handlebar wrap. This way the cables do not block access to the shifter and bike computers.
Straight steering wheel
The cables are laid under the steering wheel. The front brake cable goes directly to the brake, and the rear brake cable goes around the steering tube of the frame in a circle and goes to the holder on the frame.
Routing switch cables
Under the carriage
This type of cable routing is common on road bikes.
This method of routing has disadvantages - gear shifting is worse, due to the fact that the cable runs along the bottom of the chainstay, as a result, the shirt on the rear derailleur makes a very large loop.
In addition, the jackets and cables laid under the carriage are subject to increased contamination; they receive a large amount of dirt from the front wheel.
Along the top tube of the frame
Top cable routing is common on mountain bikes. Since, in addition to problems with contamination, there is a danger of damage to the cable on a stone if it is laid under the carriage.
Lubrication
Lubricating the cables
Not so long ago, before the advent of modern shirts, it was necessary to lubricate the cables with thick oil. Today, shirts are made with a special plastic interior coating that makes lubrication unnecessary. And in some cases (modern (discrete) switches) lubrication can spoil the clarity of operation.
But if you plan to use the bike in wet conditions, a small amount of lubricant should still be applied. In this case, lubricant will slow down rusting. Also, a small amount of lubricant can help if the cables are sloppy. When the shirt enters the holder at an acute angle, you can lubricate this place.
Parts lubrication
Most cable-related parts should also be lubricated.
- You need to lubricate the threads of the adjusting drums, then they will be easier to use.
- The threads of the bolts that clamp the cables also need to be lubricated.
Source: https://velosreda.ru/prokladka-trosikov-na-velosipede