Topic: How to glue headlight mounts?
Theme Options
Hello everyone, tell me how to glue a broken headlight mount. Is there a way to do it reliably and at home? Personal experience is welcome!
Paxipol. I glue everything onto it, only the surface needs to be degreased and “burrs” made so that it grips more firmly. The main thing is to mix well and let it dry for a day.
I tried Poxypol, but it didn’t work very reliably.
I glued the headlight mount with Poxipol. The main thing is to do everything according to the instructions. Everything was holding up great.
1. sealant for gluing glass. 2. Poxypol. 3. Heat and cook with an industrial hairdryer.
About Poxypol 0.5 cents. You need to take gray, not transparent. Glues much better.
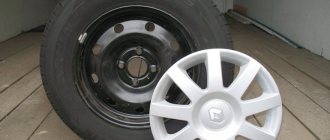
Poxypol holds well, I once glued it with it. Just to be more reliable, I bought a sieve with a fine metal mesh for 100 rubles, knocked out the mesh and soldered it in with a soldering iron, and coated it with Poxypol on top and it held up very well to this day.
If you're talking about hot melt glue in the gun, then it melts under the hood due to the temperature. epoxy or dichloroatane, but it’s better to do it mechanically somehow IMHO
What is dichloroatane? Do you mean dechloroethane? С2Н4Cl2? Epoxy + fiber reinforcement. the strongest topic. The metal mesh is also gutted, but already extreme. It is necessary to ensure that the reinforcing mesh or fiber is WELL saturated with the composition and fits tightly to the surface. You can first glue it in one step with epoxy, wait for it to dry completely, sand it, and then wrap it in fiberglass and impregnate it with epoxy. On top, for a better fit, if the shape allows, you can wrap it with plastic film for a better fit, or put a rubber ball with water so that it evenly compresses the surface.
+1. Only then paint it with epoxy to protect it from water.
Source
Reasons for optics failure
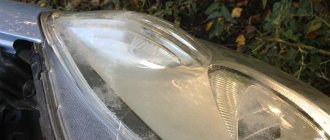
Modern car optics consists of a plastic body and a transparent front cover made of glass or polymer. A crack in the glass is the result of a stone hitting you while driving on the highway. They appear due to an accident or mechanical impact. If a defect is detected, you need to seal the area with transparent tape. This will protect the internal parts from penetration of moisture, dust, and sand.
If a plastic headlight is cracked, you need to turn off the light bulb or not use the light. Heating will deform the part, and it will be impossible to restore its original appearance. A defect in a plastic headlight appears due to a sudden temperature change, impact or strong pressure on the mask.
Breakage of headlight mounts is caused by abruptly closing the hood with a forgotten tool on the optics housing or when ice freezes in winter. The retaining tendrils can be torn off by a person leaning against a car or by an accident.
What sealant should I use for headlights?
Types of automotive headlight sealants
Every motorist knows about the need to periodically replace glass on headlights. The reason for this is stones found on the road, clouding of lenses over time and exposure to ultraviolet radiation. Installing bi-xenon lenses, angel eyes, and flexible DRLs into headlights involves disassembling them and then reassembling them. However, this operation requires the use of a special sealing agent.
The sealant for gluing headlight glasses protects the housing from moisture, dust, and air. Modern insulating materials are produced, as a rule, on a polymer base using fillers and hardeners. They come in liquid and paste forms, packaged in tubes, bottles and aerosol cans. What sealant is best for gluing headlights?
For this, depending on the operational properties and purpose, the following types of products are used:
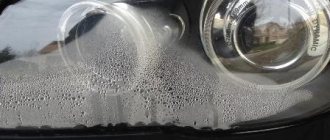
Some materials are capable of releasing volatile compounds, which during installation negatively affect health and may form a cloudy deposit on the inner surface of the glass during operation. Often there are sealants that make the connection practically inseparable, which makes repeated replacement much more difficult. You need to be very careful about the question of which sealant is best to install the headlight glass on.
The appearance of deposits on glass when using silicone sealant
Advantages of butyl sealant
This professional product
for sealing headlights is a thermoplastic mass consisting of synthetic rubber (polyisobutylene).
The polymer has a carbon-chain structure and has good resistance to oxygen, bleach, acid-containing solutions and other chemical compounds. The advantages of the sealant
include:
How to glue headlights using butyl sealant?
How to remove old sealant from headlights
The most labor-intensive stage of headlight assembly is considered to be removing the old sealing layer. Don’t let the question of how to remove sealant from plastic headlights scare you. The easiest way to do this is by preheating the part with a hairdryer. The waste material should be cut off in small sections, then it will not have time to cool. Avoid overheating to avoid damaging the plastic. The heated mass can be easily removed with a flat screwdriver or a sharp knife. Don’t be afraid to scratch the body or glass in places of future installation; artificial relief will only increase the adhesion of the sealant to the surfaces.
DIY headlight repair
Small abrasions can be removed by abrasive polishing. This does not require dismantling the optics or purchasing expensive components. Repairing fog lights by sealing chips is often impractical. In this case, you should remove the old glass and install a new one.
Repairing diode headlights is very difficult due to the large number of elements and microblocks. If the lens cracks or burns out, you will need to remove the protective glass and re-glue the LED panels.
Defects are divided into:
- cracks;
- scratches;
- cloudiness;
- fastener failures;
- souring of the corrector;
- contamination of internal surfaces.
Eliminating serious defects requires removing the headlights and using special compounds and repair kits.
Cracks
You can remove microcracks yourself using repair compounds that are sold in car dealerships. The 3M glass and plastic restoration kit consists of a dispenser, polymer, cleaner and syringe.
Before starting work, you need to complete the following preparatory steps:
- Wash the car.
- Buy gloves and a respirator.
- Make sure you have a warm garage with a constant air temperature of +15 °C.
Repairs are carried out in a closed, windless room, so it is important not to inhale vapors from the liquid and avoid contact with the eyes and skin of the hands.
Materials and tools:
- clean cloth;
- glass cleaner;
- respirator;
- kit for repairing cracks and chips;
- blade;
- cosmetic hair dryer.
For best results, wash the headlights thoroughly, paying special attention to the damaged area.
Repairing cracks in headlights:
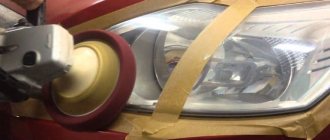
- A frame with suction cups is installed on the cleaned optics.
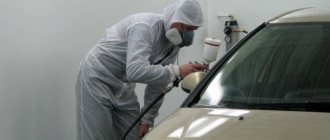
- Car headlight adhesive is carefully applied.
- For better penetration of the composition, the area is heated with a hairdryer.
- After filling the crack, the frame is removed and tape is placed on top.
- The hardening time is indicated in the instructions or on the packaging of the liquid.
KIA Cerato Koup Iron Horse › Logbook › Repair part 2. Restoring headlights.
Take two-component Perma Poxy glue
With its help, we take the broken parts and little by little begin to assemble the headlight, like a mosaic. This is not a difficult matter, but it is quite painstaking.
The small legs did not split into several parts, so I glued them together in one piece.
The larger ones consisted of 2 fragments and were glued separately.
Next, for reliability, I decided to weld all the fasteners on top using a soldering iron. But it’s not just brewed, but a metal mesh is soldered in for strength. I couldn’t find a metal mesh and, using my wits, I bought a colander at a hardware store.
This colander had a fairly fine mesh that suited me perfectly. I took the mesh out of it. I cut it into the pieces I needed and began to try it on for the future welding site.
Next, using a soldering iron, the mesh was welded into the headlight housing.
After strengthening the glued part with a metal mesh, for good measure, I soldered another layer of plastic on top, borrowed from work.