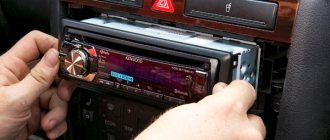
Long gone are the days when the source of music in the car and beyond was a CD. This is why many manufacturers have stopped producing car audio equipment without USB support. Indeed, in the current age of technology, music can be stored anywhere, from flash drives to a mobile phone, which have a large volume, unlike CDs and DVDs. You can quickly and easily add music tracks to them. And USB makes it possible to listen to MP3 files from flash drives, various memory cards, and is equipped with an extra input for connecting external audio sources.
Flipping through folders, tracks, and rewinding is done from the car radio. For a multimedia system in a car, flash drives have come into first place, but not everyone has radios that support USB installed in their cars, and money does not allow them to replace it with a new one. Therefore, many car owners are interested in the question of how to improve the radio without replacing it with a new one. Of course, you can buy an adapter and shell out a lot of money for it, but you can give a standard speaker system a second life by equipping it with a USB output yourself, spending only a little time on it.
Why connect USB
Music in cars appeared back in the 70s of the last century. At first these were simple radio receivers with a small range of received waves, and they were installed only on executive Volgas. For the owner of a medium-sized Zhiguli, such luxury was unavailable for a long time. With the development of industry, a cassette recorder was added to the radio receiver, which was later replaced by disc support. Subsequently, even a CD changer appeared. The newest cars have radios with the ability to listen to music via USB.
The USB connector is in the lower right corner
But what should the owner of a car produced 5-10, or even more years ago? Buy a new radio? No - modernize the old one.
But before we talk about such modernization, let's figure it out.
After installation
The steps described above help get rid of the annoying shortcomings of data transmission over a radio channel. Directly soldered wires will prevent interference, glitches and signal loss. On the one hand, it would be possible to go further and, having figured out the structure of the radio, connect the control buttons from the player with the buttons of the tape recorder with the same wires, so that you can switch tracks using the standard buttons. On the other hand, we leave such delights to the discretion of inquisitive drivers. Just remember about moderation and safety precautions.
What is a USB input on a radio?
This input on it, like on any other household audio-video equipment, allows you to connect ordinary flash drives according to the 2.0 standard. But this is clearly not enough. The radio must detect the flash drive, understand the format of what is recorded on it, and play it back. No one argues that if the radio has an audio input, you can connect the output from your smartphone and download music to it.
But what happens when you get a call? In most cases, they unplug the cord from the headphones and talk without them. This simple operation requires both hands and distraction for a few seconds. If this happens in a fast moving car... The situation on the road changes quickly, you are distracted... and get into an accident .
There are several solutions to this situation:
- The radio (sometimes the CD player) may have an external input on the back side, plug a special adapter into it;
- you can remove the old player and put an FM modulator in its place;
- Solder the USB extension cable to the radio board.
Format a flash drive for the radio
Many music lovers copy audio files from a computer to a flash drive for later listening to them through a radio. But it is likely that after connecting the media to the device, you will not hear music in the speakers or headphones. Perhaps this radio simply does not support the type of audio files in which the music is recorded. But there may be another reason: the file format of the flash drive does not correspond to the standard version for the specified equipment. Next, we will find out what format you need to format the USB drive into and how to do it.
Formatting procedure
In order for the radio to be guaranteed to recognize a flash drive, its file system format must comply with the FAT32 standard. Of course, some modern equipment of this type can also work with the NTFS file system, but not all radios can do this. Therefore, if you want to be 100% sure that the USB drive will fit the device, you need to format it to FAT32 before recording audio files. Moreover, it is important to perform the process in exactly this order: first formatting, and only then copying musical compositions.
Attention! Formatting involves deleting all data on the flash drive. Therefore, if files that are important to you are stored on it, be sure to transfer them to another storage medium before starting the procedure.
But first you need to check what file system the flash drive currently has. It may not need to be formatted.
- To do this, connect the flash drive to the computer, and then through the main menu, a shortcut on the “Desktop” or the “Start” button, go to the “Computer” section.
- The specified window displays all drives connected to the PC, including hard drives, USB and optical media. Find the flash drive you are going to connect to the radio and right-click on its name. In the list that appears, click on “Properties”.
- If the “File system” option is “FAT32”, this means that the media is already prepared for interaction with the radio and you can safely record music on it without additional steps.
If the name of any other type of file system is displayed opposite the specified item, you should format the flash drive.
Formatting a USB drive into the FAT32 file format can be done either using third-party utilities or using the functionality of the Windows operating system. Next we will look at both of these methods in more detail.
Method 1: Third Party Programs
First of all, let's look at the procedure for formatting a flash drive in FAT32 format using third-party programs. The algorithm itself will be described using the Format Tool as an example.
Download HP USB Disk Storage Format Tool
- Connect the USB flash drive to your computer and activate the Format Tool utility as an administrator. From the drop-down list in the “Device” field, select the name of the USB device that you want to format. From the "File System" drop-down list, select the "FAT32" option. In the “Volume Label” field, be sure to enter the name that will be assigned to the drive after formatting. It can be arbitrary, but it is highly desirable to use only letters of the Latin alphabet and numbers. If you do not enter a new name, you simply will not be able to start the formatting procedure. After completing these steps, click on the “Format Disk” button.
- Next, a dialog box will open in which a warning will be displayed in English that if the formatting procedure is launched, all data on the media will be destroyed. If you are sure of your desire to format the flash drive and have transferred all valuable data from it to another drive, click “Yes”.
- After this, the formatting procedure starts, the dynamics of which can be observed using the green indicator.
- After the process is completed, the media will be formatted in the FAT32 file system format, that is, prepared for recording audio files and then listening to them through the radio.
Lesson: Programs for formatting a flash drive
Method 2: Standard Windows tools
The file system of a USB drive can also be formatted in FAT32 using exclusively the built-in Windows tools. We will look at the algorithm of actions using the Windows 7 system as an example, but in general it is suitable for other operating systems in this line.
- Go to the Computer window, where your connected drives are displayed. This can be done in the same way as was described when we looked at the procedure for checking the current file system. Right-click on the name of the flash drive that you plan to connect to the radio. In the list that opens, select “Format...”.
- The formatting settings window will open. Here you need to perform only two steps: in the “File system” drop-down list, select the “FAT32” option and click on the “Start” button.
- A window will open warning you that running the procedure will destroy all information stored on the media. If you are confident in your actions, click “OK”.
Source: https://lumpics.ru/what-format-to-format-flash-drive-for-radio/
Option with adapter
The adapter works not only with USB, but also with memory cards
Most factory radios may have a socket on the back. All work comes down to several actions:
- take the radio out of the car;
There will be sockets for connection on the back wall of the radio
The adapter can be placed like this
The advantages of this solution:
- The radio will “decide” that you just changed the player. Accordingly, if the radio supports MP3 playback from a disc, it will be able to play it from a flash drive.
- Some adapters, in addition to USB support, have memory card support. You can remove the card from the smart card described above and insert it into such an adapter.
But there is also a minus
Control protocols are different for different cars, so when you change cars, you will most likely have to change the adapter. But when buying a new car, this issue is not so important.
Let's get started
First of all, disassemble the modulator. Under its body, in fact, one microcircuit is hidden. Structurally, this is a simple device, the main thing we need from it in our process is the firmware. It is this that determines the operation of the device, and only because we cannot do it ourselves, we basically use a third-party device. Its model will be written on the microcircuit. You need to find the specifications of this chip on the Internet. In order to convert the radio into a flash drive, you will need an audio signal output connector. Maybe on this board something like audio out will be written, but usually due to their small size there is no inscription. However, this does not matter, because the pinout diagram can be found on the Internet without any problems. Now take a soldering iron with a thin tip and carefully solder the wires to this pin.
Modulator: how to connect and use
FM modulator and remote control for it
An FM modulator is a device that can transmit a signal from a flash drive (as well as a memory card) over a radio channel. In general, it is plugged into the cigarette lighter socket and tuned to a certain frequency. The same frequency is adjusted on the radio receiver. You (and your neighbor nearby) can listen to music from a flash drive. But for a large city, where the radio range is jam-packed, you can do it differently: install the modulator directly into the tape recorder. How to do it?
To work you will need:
- soldering iron;
- a set of shielded wires (you can take regular ones, but shielded ones will give better quality (a sufficient amount of wire will be in the original radio);
- Modulator (you can use any MP3 player). The advantage of the modulator is the presence of a remote control, as well as a built-in power converter;
- the radio itself;
- voltage converter 12 - 5 V.
Operating procedure
Nutrition
- After disassembling the radio, disconnect the tape drive or disc player.
Disassemble your car radio
Remove the circuit from the case
Connect power to the radio power contacts
Use an extension cord to bring the contact closer
The power converter in the modulator is different, in the player it depends on its brand.
Audio
A shielded wire connects the audio output of the modulator and the input of the radio.
There is no such input on ancient cassette players. In this case, the signal will have to be fed directly to the input of the preamplifier. It’s easy to find - it’s where the shielded wire from the head goes.
The wiring diagram for the amplifier chip can be found on the Internet.
Amplifier circuit indicating the required parameters of the parts
For example, this is what the circuit of an amplifier based on TDA2005 looks like.
Assembly
Since in the new version only the radio receiver unit remains, the modulator can be located in the housing. If all contacts are connected correctly, then the activation of “AUX” or “Tape” is redirected to the modulator.
Video
How to make USB support and still keep the old (working) player
Preparing for work
Before installation of the equipment begins, it is necessary to stock up on auxiliary materials. This set depends on the existing audio equipment model. In some cases, it is enough to use an old MP3 player that has the appropriate connectors for connection. Often, in addition to USB connections, it is possible to add a slot for memory cards, which is provided in players, to a standard car radio.
This allows you to expand the functionality of multimedia. Some craftsmen connect USB to an outdated audio system using a player connected through the cigarette lighter. This gadget has a built-in popular flash drive slot, and it transmits information to a fixed frequency FM radio. Usually, the electronic filling is removed from its body and connected by soldering to a car cassette player or to a disk radio.
What to do if you need a cassette
Sometimes the electronics of an old cassette player are configured so that it can only play when the cassette is inserted. In case of modernization there will be nothing to play with. The solution would be to find a diagram of your cassette player online and find out which jumper is clamped by the inserted cassette. Close the jumper, and the radio will be “sure” that the cassette is in place.
An ancient car radio lying on a shelf in a closet will last for many more years. Instead of buying a new one, add USB support to the old one.
What is a USB input on a car radio?
Many car owners are faced with a situation where the standard radio in the car does not read music from a flash drive. And the whole problem is that the device simply does not have a USB input, i.e. it was not originally provided. Moreover, this situation is relevant not only for old cars, but also on modern foreign cars you can often find such a distinctive feature. Almost everyone will agree that you want to listen to music in the car without any restrictions, but you can’t burn a lot on a CD. Yes, and disks in a car today are somehow inconvenient and outdated. What to do, is there a solution to the problem? After all, replacing a radio is not the cheapest pleasure and not everyone can afford it. Below we will try to understand the situation in detail and find the optimal solution.
The photo shows an example of a standard Audi TT radio with a USB input, but even today there are some cars whose radios do not have a USB connector
How to listen to music in the car via a flash drive: how to turn it on and record
Do you know how to listen to music in the car via a flash drive, even if the car radio does not have a USB port? By the way, even if there is a connector, don’t think that you just need to plug in the media to play it.
More precisely, the algorithm of actions, in principle, is the same, but if you want to act correctly, the flash card should be prepared, and first, choose the right one.
In this case, you will not encounter various problems and failures when the radio does not read the drive.
As you understand, in this article we will tell you how to listen to music in the car from a flash drive, and we will devote maximum attention to this topic. Let's start with the connection instructions.
You can listen to audio files in the car via a flash drive by inserting it into a USB port.
If the latter is not available, purchase an FM adapter that works from the cigarette lighter. The device transforms the digital signal into a radio wave, which is easy to catch through the radio receiver in the car radio. Let's look at how to listen to tracks from a flash drive using these two methods.
How to listen via USB port?
Playing music on a flash drive in the car, if the car radio has a USB port, is as easy as shelling pears.
- Switch the car radio to playback mode from third-party sources (look at the name of the mode in the instructions for your device);
- Turn up the volume! You can listen to your favorite songs.
How to listen via FM transmitter?
Now let's look at how to turn on music in the car via a flash drive if there is no USB port. This happens on old car radios, but modern audio systems, as a rule, are comprehensively equipped.
So, you purchased an FM adapter with a USB port for your car.
Next, proceed as follows:
- Insert the modulator into the cigarette lighter;
- Connect the media to it;
- Set the frequency on the transmitter display. It is advisable to choose the one farthest from popular radio stations so that the signal is not disrupted by interference;
- Turn on the car radio and start searching for radio frequencies. Once the waveform set on the FM adapter is detected, you can listen to your music. It's like you turned on your own radio!
As you can see, everything is simple and logical; there is no need to organize dances with tambourines. However, so that listening to music from a flash drive in a car does not cause any trouble at all, we advise you to familiarize yourself with the material in the next two sections.
How to prepare a flash drive?
To listen to tracks non-stop, first find out which flash drive is best to buy for your car for music.
- Try not to choose a media that is too capacious, because the car radio may refuse to read it. Let the amount of memory be acceptable for audio tracks, not more. This type of media connects and works faster, and costs less, so you don’t mind losing it or using it only in the car. The optimal volume is 1-4 GB.
- By the way, yes! Try not to use the car flash drive for other needs. This will significantly extend its service life and protect it from viruses that are literally littered with modern computers. Well, or check it regularly with an antivirus program.
- Now about the media file system. The most common are Fat32 and NTFS. Find out in the radio manual what type of file system it reads and format the flash drive in the required format. You can do this on any computer by inserting a flash drive and right-clicking on it.
- The next nuance is the music recording format. Open the car radio's manual again and find out what formats it recognizes. Most often the most common ones are suitable: mp3, mp4, WAV or AVI. Accordingly, all audio tracks must be encoded in a supported format.
Let's sum it up! For a car, it is better to purchase a small flash card and use it only for listening to audio on the road. The media must be formatted in the desired file system, and tracks must be recorded in supported formats. Periodically, your device should be checked for viruses.
Common problems
So, a flash drive for listening to music in the car has been purchased, the preparation has been completed, the tracks have been recorded. But there is no playback... What should I do?
- If you are sure that you have formatted the media in the correct file system and selected the correct track format, check the serviceability of the flash drive itself. Insert it into your laptop and try playing music. If the device is faulty, replace it;
- An error may have occurred during recording. Try deleting all data and recording music again;
- Check the flash drive for viruses;
- Your USB port may be faulty. This happens if flash drives are removed from it incorrectly, for example, they are roughly pulled, pulled out, or loosened. Only repairs will solve the problem;
- Some old radios do not read audio files whose names are written in Cyrillic, contain spaces or are not numbered. Insert the flash drive into the computer and check these points;
- Avoid complex hierarchy (folder within a folder, within a folder). Let the music be recorded directly in the main window of the flash drive, so it will be easier for the car radio to detect and read it.
That's all the wisdom you need to know in order to listen to your favorite music in the car without hassle. This is the coolest method, implemented on almost any radio. It has almost no flaws! By the way, if you listen to tracks from your phone using a USB cable, the gadget will also charge!
Source: https://avtodigitals.ru/kak-slushat-muzyku-v-mashine-cherez-fleshku/
How to make and connect a USB input to a radio
Today, all kinds of electronic devices and devices do not exist and, of course, the problem outlined above has not remained aside. It is not necessary to change the standard radio; it is enough to simply improve the device. There are different options, which we will consider.
USB adapter from mp3 player for standard tape recorder
For this method, we need the simplest mp3 player that is capable of reading music files of the appropriate format from both a memory card and a flash drive. Important feature: the player must have an audio output (jack) for headphones. It is from this that the signal will be taken and sent to the radio. It is worth noting that to perform the procedure you need at least minimal skills in working with a soldering iron in order to avoid short circuits with solder during the soldering process and damage to the insulation of wires, elements, etc. We implement the player as follows:
- We disassemble the radio and remove the CD drive or tape drive from it (if the radio is a cassette).
- We take power from the standard device to power the player, the board of which is first removed from the case.
- Depending on the player's supply voltage, you will have to implement a voltage converter circuit. For example, the car's on-board network has 12 V, and the player is powered by a 3.6 V Li-ion battery.
- We take the sound signal from the output of the player and feed it to the AUX input of the radio. The connection requires a shielded wire, i.e. the wires must be braided. On the radio board you need to find the audio input contacts. We solder the wire from the player to them.
- We install the player board inside the radio, since after removing the CD drive, space will be freed up. For convenience, the USB connector itself is located in a hole intended for cassettes or disks.
- The wires must be connected carefully to avoid a possible short circuit.
- To control the player, the buttons are connected to unused buttons from the CD drive.
- All that remains is to assemble the radio, install it in place and you can enjoy the music, for which you just need to activate the AUX mode.
Installing USB in the radio is possible by introducing an mp3 player into the device
Thus, we assembled the USB adapter ourselves. With this connection method, the volume level on the radio should be lower, which will eliminate the loud signal at a high input signal level.
DIY adapter
Let's consider another option for connecting a flash drive. In this case, you will need a plug from standard headphones, tulip-type connectors and a 4-core copper braided wire. The adapter will be made from these elements. For the procedure to be successful, the radio must have an AUX input. Before starting work, make sure that the headphone wire is not broken. For this reason it is called a multimeter. The whole process is as follows:
- We remove the insulation from the headphone wire and see red and green conductors that correspond to the right and left channels (we cut off the headphones themselves). These conductors must be stripped and soldered to the middle contacts on the tulip connector.
- The braid of the main wire is connected to the steel base of the “tulip”.
- The finished adapter should have the following wiring: a signal from the right and left channels is supplied to the middle contacts of the “tulips”, and the steel base is the common contact.
- We connect an adapter to the external sound signal connector of the radio, with which you can connect any device: tablet, smartphone, player, etc.
- All that remains is to activate the AUX mode and you can listen to music.
How to make an AUX jack
From the above, you can understand that the radio must have an AUX input. But what if there is no such connector, how to connect an external signal source in this case? There is a way out of this situation, and you can do everything with your own hands. For this we need:
- audio jack (standard 3-pin stereo jack);
- wire for connections (2 in the screen);
- soldering iron and everything necessary for it (solder and flux);
- multimeter
To make AUX on the stock radio, you will need to remove the device
Once everything is prepared, you can begin dismantling the device. Let's look at the whole process using the standard Toyota Avensis radio as an example. To remove it you need to:
- Pry the decorative strip from the end on the right, pull it along its entire length and remove it.
- Remove the connector from the button responsible for heating the rear window.
- The radio is secured with two bolts. To unscrew them you need to use a screwdriver with a magnet. Otherwise the bolts will fall behind the panel.
- To ensure free access, the handbrake must be raised.
- Move the selector to the central position and press the Shift Lock button, while the ignition should be turned off. In the corner we pry up the selector panel by snapping the pistons.
- Disconnect the connector going to the ashtray and remove the panel.
- More fastening bolts will be visible from below, which we carefully unscrew.
- We take out the radio so that access to the connectors on the rear panel is provided.
- Disconnect all connectors.
At this point, the dismantling process can be considered complete. Next, you will need to disassemble the device in the following sequence:
- Remove the brackets (left and right).
- Using a flat-head screwdriver, pry up the plastic locks on the front panel, and then remove the panel itself.
- There is a seal under the panel, which we also remove.
- We unscrew the bolts that connect the front panel to the side walls and the player. After which the walls can be removed to the side.
- Remove the back cover of the radio and the top of the player.
- You need to carefully lift the player, after which two cables will be visible and accessible. We take them out of the connectors and remove the player.
To supply a signal from an external source, you need to find the RCH and LCH connection points on the radio board
This completes the disassembly process of the device. But before you connect the AUX connector, you need to understand the board and find two points (RCH and LCH). These points correspond to two channels (outputs) of the player to the head unit. After the points are found, perform the following actions:
- We take 3 wires of different colors (the best option is a shielded pair of wires) with a small cross-section and a length of about 0.5 m.
- We connect one of the wires by soldering to ground.
- We solder the remaining two wires to the right and left channels. For soldering, use a low-power soldering iron of 25–30 W.
- After the wires are soldered, you should write down which color wire corresponds to which channel.
- The wires are wrapped in a heat-shrinkable tube.
You can make the AUX input on the standard radio with your own hands, and you will need a minimum list of parts and tools
If the question is about introducing an AUX connector into a cassette recorder, then the process is not difficult. On the front panel of the device there is a volume control with 3 pins arranged in a row. We solder wires 25 cm long to the outer terminals. It is advisable that the wire be shielded, which will avoid interference. The wires from the device are routed outside. Alternatively, you can make a small hole in the side wall for them. All that remains is to connect the audio connector and our marking will come in handy so as not to get confused with the channels. When the wires are soldered to the connector, select a convenient place to attach it.
Upon completion of installation, check the functionality of the speakers in radio mode. To supply an external signal (from an mp3 player, smartphone or tablet), use an appropriate audio adapter that connects the audio output of one of the listed devices to the AUX input of the radio. In this case, you need to turn on the CD on the radio to activate the channels.
Connecting a USB extension cable to the board
To make the correct connection, first you need to pry up the front panel with a thin awl or knife and remove the clip latch. To remove the radio itself, you will need a star screwdriver. You need to unscrew the 4 corner screws with it. Move towards yourself to pull out the radio. You need to take it out carefully so as not to damage the connectors on the back. The antenna connector is removed as follows:
- Raise the latch.
- Remove the connector.
The rest are removed by pressing a button and pulling out a chip.
After this, you need to disassemble the radio itself. First of all, cut off the seal and remove the top and bottom covers. The next step is to remove the CD drive to make it easier to work with. The main thing is not to damage the cable. It must be removed from the drive side. Next you will need:
- magnifying glass;
- soldering iron, or better yet, a soldering station;
- 3 resistors with a nominal value of 0 Ohm.
If you look on the board, the soldering point will be marked as R25. It is located next to capacitor C3. We place an SMD0603 resistor R25 with a nominal value of 0 Ohm. We solder the remaining 2 resistors where L501 and L500 are located. We unsolder the existing resistor R212 and replace it with a 10 kOhm resistor. And we add one more of the same additionally.
Then we solder in capacitor C515, equal to 0.1 microfarad. And then we install a USB power supply microassembly nearby. A capacitor C516 with a capacity of 0.1 microfarad is soldered in. At the end, you need to attach a USB cable to the connector and solder 2 electrolytic capacitors in place of capacitors C500 and C501. You need to make holes for them from the inside of the plank.
Insert electrolytic capacitors into the holes, observing polarity. Their capacity should be 100 microfarads, voltage - up to 25 volts. After this, you can check the device by connecting it to an autonomous power supply. If everything is in order, the flash drive should blink. You won't be able to play music in your car unless you have a CD player installed. There may be a problem with drive detection. This can happen if the cable is not securely attached.
If you follow all the recommendations and strictly follow the instructions, the conversion will be easy and interesting, and instead of a CD, you can play a flash drive. We often redo things that no longer suit us, the main thing is to do it right.
Even today, there are some modern cars that are equipped with radios without a USB connector, not to mention older cars. This state of affairs does not suit many car owners, which prompts them to search for possible solutions. One of the available options for equipping a standard USB radio is to connect the input yourself; this is not difficult to do, but not all car radios accept this solution.
