How to connect?
To work, you will most likely need pliers, a screwdriver, electrical tape, a multimeter (optional), and also care when dismantling the decorative panels of the interior. When replacing an old radio with a new system, there should be no problems, because the speakers are installed, all that remains is to simply replace the device itself. All you have to do is check the integrity of the wiring, as well as the correct connection of the speakers.
The only problem may arise if the new audio system has different connectors for connection. But, as a rule, there is a single world standard, namely the ISO connector. But, if something happens, you can always buy the required adapter; there is plenty of such “good” in stores and markets. It is possible that the new radio already comes with several adapters; carefully inspect the contents of the box.
When you first connect the radio, pay attention to which wires are suitable; they must be made of oxygen-free copper, with a corresponding cross-section of 2-4 mm. https://www.youtube.com/embed/3YR_CHvgTgo
Selecting a car radio
Since by default we will use a device lying around idle to create a homemade speaker system, any car radio will suit us. But this “any” should still have a minimum set of functions:
- At least two-channel output with a power of 40 W each;
- Tuner;
- CD/DVD/MP3 disc player;
- USB – connector for reading information from flash drives.
In addition, you should pay attention to the sound card of the device itself. Some radios can even surpass most modern music centers in terms of purity and sound quality.
And although, due to the fact that the car radio does not have large and capacitive capacitors in its “arsenal”, due to which it loses in the reproduction of low frequencies to powerful stationary acoustic systems, it is definitely at its best in the reproduction of the high-frequency range. Another definite advantage of the car radio is the presence of a multi-stage frequency-separate equalizer, while most stationary music centers are equipped with only standard presets.
Other options for connecting the device to the power system
The standard method of connecting a car radio with an ISO connector or through an adapter is not suitable for all consumers. Some connection options make it possible to increase the safety of using the device and solve specific problems associated with the operation of the on-board electrical network.
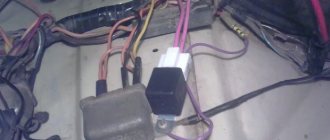
Direct to battery
Fans of loud sound and rich bass install additional amplifiers and active subwoofers in the car interior. This technique consumes very high currents. As a result, the contact pads in the ISO connector cannot ensure its conductivity. They heat up, which can cause various dangerous consequences: from the banal burning of contacts and melting of the plastic connector housing to the formation of short circuits in the on-board network.
Advice! If you need intensive power take-off from the on-board system, it is recommended to connect the car radio directly to the battery.
This is done as follows.
- Wires with a cross-section of at least 3.5-4 sq. mm are laid to the battery area. They should be routed away from hot or moving parts in the engine compartment.
- The cables are routed into the receiving panel area through the existing opening in the housing. At the end of the work it is sealed. In the absence of special compounds, this can be done with hot glue.
- The ends of the wires are wrapped around the terminals (if the battery design allows). They are placed under the main clamps on the battery terminals. The black wire is connected to the negative terminal, the red wire to the positive terminal. For good contact, the commutation area should be treated with WD-40.
- The black cable from the battery is connected to the corresponding cable on the radio.
The red positive cable requires some additional work. First, the fuse block is installed. Its operation current should not be less than 10A. Fans of loud sound can calculate the optimal value based on the power of the speaker system used. The fuse serves as secondary short circuit protection, complementing measures in car radios, amplifiers and subwoofers. Two radio wires – yellow and red – are connected to the second contact of the installed unit.
Important! This car radio connection diagram is fully effective and safe to use without additions, if the model supports the complete power interruption mode. If there is no such option for the device, it will drain the on-board battery, even if the car is parked with the ignition off.
With interruption via ignition switch
The switching method to the ignition switch terminal allows you to completely eliminate parasitic power take-off or minimize the discharge rate of the car's on-board battery to the radio during parking. Switching occurs as follows:
- the car radio is connected to the battery;
- using a multimeter, examine the ignition switch and determine one of the terminals at which there is voltage at the first turn position (the “Ignition on” mode);
- The yellow wire, instead of the safety block, is switched to the found terminal.
With this switching scheme, the car radio in a parked car with the ignition completely turned off will either be de-energized or severely limited in functionality. For modern models, the clock will work and you will be able to remove the CD tray. Overall food consumption will be minimal.
Using the lock button
You can completely eliminate parasitic power consumption in parking mode when connecting the car radio to the battery using the lock button. When it is on, the audio system works. The easiest way to implement such a scheme is to install a two-pin switch into the red wire of the radio.
The button can be installed in a convenient place on the dashboard or dashboard. Especially if the manufacturer has provided points for placing such switches. To eliminate sudden surges in voltage on the radio, amplifiers, subwoofer, and to turn groups of devices on or off, the button is combined with a fairly simple relay circuit.
Connecting a radio via an additional button
To prevent current leakage, place a button in the cut of the red wire:
- Button in the section of the red wire of the radio;
- The button switches between constant “plus” and after ignition;
- Through the alarm.
With the first option, I think everything is clear: just a regular on/off button is hung in the cut of the red wire on the radio. Thus, your radio always works, but if you decide to leave the car in the parking lot for a long time, then simply turn it off. button to supply current to the radio.
The second option is when an emergency button is used instead of a regular button. You will use the second emergency button to switch the power mode of the radio:
- The button is pressed - power is supplied to the radio through a constant plus
- The button is not pressed - power is supplied to the radio through the plus from the ignition
Example of connecting a car radio:
- The radio backlight wire to the cigarette lighter backlight wire.
- Plus after ignition from the clock block (orange wire)
- A permanent plus with a battery or cigarette lighter.
- Ground "-" from the cigarette lighter
Third option : you can install a simple circuit that will supply a plus and automatically disconnect it from the alarm. If the car has a two-wire solenoid with activation for closing and opening by changing the polarity for each of these operations, then it should work like this: When the doors are opened, a positive pulse from the solenoid is sent to relay P1, and the relay will operate and actually go into self-retaining mode, providing power from the battery through the terminals of its contacts and relay P2 and connecting the radio to the power supply.
If there is a positive pulse during closing, relay P2 will operate, and the power supply circuit of relay P1 and the radio will break, the radio will turn off, and the relay will go into a de-energized state. But this scheme also has a minus - it is increased power consumption due to the additional relay P1, which will always be turned on along with a working radio.
Connection adapter plugs for radio in car
As you understand, there are many adapters for installation and connection. In this case, on the one hand, the plug has an ISO standard, and on the other hand, the sides are connected to the audio preparation in the car. Here are examples of such plugs.
Yes, of course, when installing and connecting the radio, a simple connection method would be to cut the wires directly from the radio plug or from the wiring of the car plug, connect the radio according to the pinout of the color wires of the radio on the winding, using us. But I would like to warn you against doing so, an act like this, which is not only barbaric and not always, but not aesthetically reliable. Wire connections, especially during the winter period, do not guarantee tight fit and reliable gluing of the wire to electrical tape. As a result, such connections can short-circuit with each other. If you still decide to connect in this way, then use at least a heat-shrinkable tube or specialized clamping terminals. Better yet, solder the connections. By the way, you can read about connecting wires in a car in the “How to connect wires in a car” article.
It is about them that we will talk further.
Features of Chinese car radios
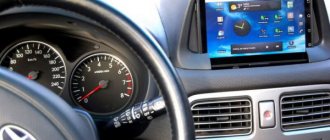
2 din radios differ significantly from smaller devices. These multifunctional modules with a 7-inch diagonal LCD screen allow you not only to listen to music, but also to watch videos. The size of the radio exceeds the dimensions of a 1din device, which immediately catches your eye. Users note their stable operation and high-quality sound.
Most often, Chinese 2 din format radios are equipped with a GPS module. With such a car player, there is no need to purchase a navigator. Additional gadgets can be connected to a Chinese head unit (GU) of this format: multifunction steering wheel, rear view camera, GPS antenna. This slightly modifies the connection diagram of the car radio, because new wires appear that were not on the standard chip.
In most cases, the audio device comes with ISO connectors and wires. Otherwise, you will have to buy an adapter to connect the purchased car player. Switching the device with a source of electricity will not be difficult, since the pinout of radio tape recorders of both formats is identical.
The yellow DC +12V wire is connected directly to the battery through a safety device.
The red control wire is connected to the ignition switch. It is desirable that when the key is turned to the ACC position, there are no other consumers besides the control unit. This will reduce the load on the battery. It is better to connect the black wire (“ground”) to the negative terminal of the battery, and not to the car body, since a 2 din radio is an energy-intensive device.
The GU has the ability to reduce the brightness of the backlight of the buttons and screen when the side lights are turned on. This makes it possible not to blind the driver at night. Power is provided by the wire marked ILL. Terminals KAY1 and KAY2 are responsible for connecting the remote control for the car radio (multi-steering wheel).
How to connect through the ignition switch
To power the head speaker, 2 wires are used that supply a positive signal (with red and yellow insulation) and an additional cord for grounding (with a black insulator). Direct connection to the battery avoids voltage drop and allows operation at higher volumes. Installing a fuse in the power circuit protects the radio from damage due to a short circuit, and using a capacitor smoothes out voltage ripple.
After turning off and stopping the player's engine, current consumption continues due to the operation of the electronic circuits of the radio, leading to battery discharge during long-term parking. To reduce battery discharge, the radio is connected via the ignition switch. The technique ensures that the equipment settings are saved; the switching method depends on the year of manufacture of the car and the type of ignition switch.
When switched through a lock, a cable with a yellow insulator is led to the battery, providing power to the device’s memory at rest. The wire exits to the battery installation location parallel to the factory harnesses, which reduces the likelihood of breakage by moving structural elements. It is allowed to connect the cord to elements of the vehicle's electrical circuit designed for a current of 15-25 A (for example, a cigarette lighter).
The ground is connected to the negative terminal of the battery, a metal part of the body, or to the cigarette lighter plug.
The second cord, equipped with red insulation, passes through the contact group in the lock. On VAZ-2107 vehicles equipped with engines with distributed fuel injection, the contact design provides for an intermediate ACC position. When the key is turned to the specified position, current is supplied to the radio amplifier, which allows you to listen to music without starting the power unit. After removing the key, the current supply is automatically interrupted; the car owner does not need to forcibly turn off the player.
To connect equipment to the VAZ-21011 through the ignition, a slightly different technique is used, since the lock does not provide an intermediate ACC position. The owner of the car needs to replace the unit or modify the existing contact group. To modify or replace, you will need to remove the plastic from the column and dismantle the lock body. To replace the contact group, it is necessary to disassemble the unit; some owners install plates borrowed from VAZ-2107 injection machines.
Connection benefits:
- no additional switches required;
- the owner does not need to turn off the player after stopping the motor;
- The battery is automatically protected from discharge during parking.
Disadvantages of the method:
- The lock needs modification;
- It is impossible to listen to music without a key.
Connection via adapter/charging
Most chargers or adapters for small appliances provide 12 volts. But you also need to select the current that this device produces. If you have a passport for the radio or a nameplate on it, look at the exact data there.
The car radio requires 12 V and 5-6 A to operate.
Most chargers or adapters for small appliances provide 12 volts. But you also need to select the current that this device produces. If you have a passport for the radio or a nameplate on it, look at the exact data there.
If there is nowhere to get the data, you can focus on the “average”. Typically, a car radio in normal operating mode consumes 5 A. At maximum load, perhaps, the consumption is 10 A. But with such a connection, you cannot squeeze the maximum out of it. So, we are looking for a network adapter or charger that produces 12 V and 5–6 A.
If you find an adapter or charger with suitable parameters, after five to ten minutes the car radio will work from the 220 network
Most of the procedure for connecting a car radio at home is outlined above. We will describe only the immediate actions.
If you find an adapter or charger with suitable parameters, after five to ten minutes the car radio will work from the 220 network
- Cut off the plug. The part that we insert into the equipment from the charger/adapter/adapter/power supply.
- We separate the conductors, being careful not to damage the insulation.
- Use a multimeter to determine plus and minus. You can often find a central wire and braid in the cable. Everything here is just a braid - this is a minus.
- We connect them to the power inputs of the car radio.
- We plug in 220 volts and check how it works.
If you don’t want to cut off the plug, you can simply strip the wires at some distance and draw conclusions. But after checking it is better to insulate the connections.
Another option is not to cut or clean anything. You can simply connect the wires to the plug. The “+” wire is stuck into the central hole, and the minus is the external contact.
How to properly connect any car radio to anything
In order not to encounter difficulties when connecting the radio or, even worse, to avoid making sad mistakes, you need one thing - to clearly understand what you are doing. When you have such an understanding, it no longer matters whether you have a circuit diagram, pinouts, connectors, whether the colors of the wires comply with the standards, whether your radio is Chinese or Japanese, a foreign car or a domestic auto industry. Knowing exactly what you are doing, you can easily connect any car radio to anything - a car, a power supply, a separate battery, speakers, speakers, subbuffers, and so on. You will find such knowledge in the presented material.
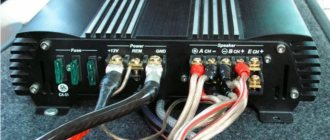
Fuse
To connect the “plus” of the radio, you will need a stranded copper wire with a cross-section of at least 4 mm2. Its length should be as short as possible - without unnecessary zigzags and other things. Connecting a Sony car radio always implies the presence of a fuse on this wire with a rating of 10-20 amperes with good insulation.
It is usually installed at a distance of 50 cm from the battery terminal. Sometimes such a fuse is already provided by the manufacturer, and some of the hassle is eliminated. The negative wire should also be as short as possible.
The wires must be laid extremely carefully, without any twisting and as far as possible from third-party energy consumers such as an alarm system or a trip computer
It is important to note that these wires need to be connected only after all speakers are completely connected and insulated. Never allow the exposed “plus” to touch other devices.
It must be “tightly” insulated.
Selection of connecting wires
Installing audio leads is different from normal electrical connections. The fact is that an alternating sound signal propagates through the conductors going to the speakers and speakers. It has a frequency ranging from 20 Hertz to 20 kilohertz. In principle, the frequency is low, but linear distortions, electromagnetic interference, and interference are possible. They degrade the sound quality. Therefore, along with observing the rules for choosing the cross-sectional area of the wire, the type of conductor is selected.
The cross-section is usually chosen from the following consideration: for every 10 watts of amplifier power - approximately 1 sq. mm of wire cross-sectional area. That is, with a radio power of 40 watts per channel, the cross-section of the conductor leading to the speaker must be at least 4 sq. mm.
You should think about choosing the type of speaker cable if the radio is capable of providing high-quality sound. On the Hi-end equipment market you can find many different speaker cables with unique parameters and prices.
The feasibility of installing such expensive conductors for a middle-class car radio is zero. The main thing when connecting is to ensure that the phases of the speakers and speakers are synchronized. Otherwise, the interior will be filled with cacophony instead of high-quality sound.
➤ Installation and connection of the VAZ 2107 radio
Owners of VAZ 2107 begin acoustic tuning of their car by installing or replacing the main components - the head unit (car radio) and low-quality standard speakers. Replacing the head unit (head unit) is also practiced if the VAZ 2107 radio tape recorder stops working, which they refuse to repair as outdated.
Theft of a radio is also a common reason for installing a new PG. For professionals, installation operations are not difficult, but a novice amateur can damage the dashboard by connecting the wires incorrectly. Incorrect installation of the VAZ 2107 radio leads to short circuits and burnout of the receiver's electronic boards.
In this article we will describe how:
- replace front speakers;
- use the sound shelf correctly;
- move the radio to the place of the air ducts or to the glove compartment;
- install a 2DIN car radio;
- Connect the head unit to the speakers and power supply.
We hope that the tips will be useful to you.
Installing the front speakers
First of all, we install the front speakers. Then, when connecting the radio, you will not have to get confused in the wires installed by an illiterate radio technician. Most often, buyers of used cars encounter such cases. Identical black wires with careless twists and minimal insulation need to be ringed and labeled. It is much easier to replace unreliable electrical wiring with cables of the desired cross-section and color.
Speaker wires of different colors are used for the left and right speakers. The color of the wire is selected according to the pinout of the car radio manufacturer. In radio engineering, pinout is the color, letter, and digital designation of outputs and cables. When installing more powerful speakers (100 - 150 watts), take into account their mounting depth, which should not interfere with the movement of the glass. To extend the speaker, spacer rings are used.
To install the speakers, you need to disassemble the front door and remove the window lift mechanisms.
The bottom of the door is usually used to install speakers. Holes for the diffuser are cut in the door panel. Spacer rings are attached to the door frame, into which the speakers are installed. The wires for connecting the speakers to the head unit are pulled into the technological holes in the door. After assembling the door, additional work can be done.
A grill (decorative and protective grille) is installed on the speaker, the door card is covered with vinyl or leatherette. Without additional door cavity soundproofing, the speakers may sound muffled or resonate. For sound insulation, the outer metal is glued with a vibration-insulating material that dampens metal vibrations (for example, “Bimast”). The internal surfaces of the frame and stiffeners are covered with noise-absorbing “Spleen”.
Expanding the sound system with speakers on the rear sound shelf
The extended connection diagram for the VAZ 2107 radio provides for the installation of front speakers and rear acoustics. The front speakers create frontal sound, the speakers from the passenger compartment are responsible for the lower frequencies and surround sound. At the rear, multi-way speaker systems use woofers or oval full-range speakers.
From an acoustics point of view, the best place to install ovals or compact subwoofers in the 7's cabin is the rear parcel shelf of the car. The standard rear shelf of the VAZ 2107 for mounting equipment is not strong enough. If you simply cut holes in it for speakers, the plastic will vibrate and distort sound waves.
To reconstruct the shelf, additional fasteners (corners) are used along the sides of the body. The shelf is reinforced with an additional frame, soundproofed, and covered with carpet (a special sound-absorbing and decorative material).
The acoustic wires are pulled under the interior flooring along the sides of the car.
Choosing a location for the car radio
The standard connection of the VAZ 2107 radio is provided by the factory in an inconvenient place. The factory niche, closed with a plastic plug, is located at the very bottom of the center console.
This place is inconvenient for three reasons:
- when the stove is operating, the radio tape recorder overheats, which reduces its operating time;
- the gearbox selector interferes with working with SD and DVD drives (this drawback is not critical when using flash drives and compact storage media);
- You cannot install radios of larger sizes or with retractable screens in the standard niche.
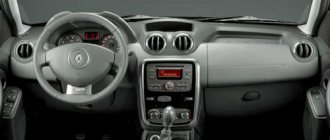
If you want to avoid these troubles, you have no other choice but to install the radio in the VAZ 2107 in place of the two central air ducts.
In principle, this method does not affect the operation of the heating system, since the mass of warm air will pass through the side and bottom air ducts.
Before moving the radio up to the VAZ 2107, you need to remove the air ducts and do a number of preparatory work.
When installing a car radio in place of the air ducts, difficult work for a novice amateur will include making sealed plugs for the air ducts, carefully cutting out plastic partitions and shaped protrusions on the dashboard. Under the installation frame of the car radio, you need to make and secure brackets (bars - inserts). To close the gaps between the dashboard and the car radio body, you need to buy and fit a factory adapter frame.
Even more difficult is the independent production of original decorative cladding made of wood or fiberglass. Installing the radio in the air duct slot makes it easier to control the receiver and view the display.
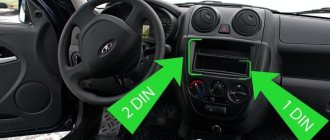
Installing a double din car radio
Modern 2DIN size standard radios are equipped with a larger display and touch controls. They are similar to 1DIN car radios in width and installation depth. Better functionality is achieved by increasing the height of the housing by 2 times (up to 100 mm). The two-din radio tape recorder does not fit into the VAZ 2107 car in its regular place. The installation of a large housing under the center console is hampered by the gear lever. It is also impossible to install a 2DIN car radio in place of the air ducts. At the top, the edge of the “dashboard” does not allow expanding the niche of the air ducts. To expand the niche downwards, you need to remove the stove controls. Much easier than a complex reconstruction of the dashboard would be to install a double-din radio in the glove box of the car. There is enough space in the glove compartment to install a double-din radio, which can be supplemented with a separate amplifier. The main difficulties of this method are the design of fasteners for the installation section. Under them you need to install damping pads that absorb vibrations of the plastic.
Installing the head unit
All modern power units use a standard ISO connector (International Unified Electrical Engineering Standard) to connect power cables and speaker wires. After installing the car radio housing in the selected location, all cables must be secured into a rectangular block suitable for this connector. The letter markings of the car radio outputs are different; you need to look for them in the equipment manufacturer’s instructions. If your existing wiring uses a different type of connector, purchase an ISO connector adapter.
Connecting the radio to the VAZ 2107 power supply
The standard connection of the VAZ 2107 radio through the ignition switch is inconvenient because the radio and player can only be listened to when the engine is on. The designers chose this connection scheme for reasons of increasing battery life. To connect a new car radio in the same way, you can use the standard wiring. But keep in mind that with such a connection, advanced power units, such as Pioneer, KENWOOD, Alpine, Hertz, can reset new settings when the engine is started. Indeed, a more logical connection of the radio directly to the VAZ 2107 battery can drain a worn-out battery. Most often this happens when the driver forgets to turn off the quiet music at night. To avoid this drawback, a manual power switch button is embedded into the yellow power wire from the battery. The standard fuse for the VAZ 2107 radio is not provided in the block of protective devices. To install protection in a reserve location in the fuse box, you need to rebuild the electrical circuit. It's easier to buy a power cable that has a fuse built into it. For normal protection of the radio from strong inrush currents and short circuits, a 20-amp blade fuse is sufficient.
To expand the acoustic system, move the installation location, and install complex power units, an acoustic tuning enthusiast must master the skills of an auto mechanic, radio technician, or electrician. If you do not have confidence in your abilities, it is better to turn to car acoustics professionals.
Video - installing a radio in a VAZ-2107
Installation in the car
Installation of the radio begins with the removal of the decorative plugs covering the mounting socket in the center console. To mount the head unit, metal clips are used, which are held in the instrument panel by bendable antennae. If the car was equipped with a 1 Din-format radio, and you plan to install equipment with increased dimensions, then a box for small items is removed from the console. It is not possible to install a 2 Din standard player on some machines, or the installation of a new console will be required to accommodate the unit.
To install a radio instead of the original equipment, it is necessary to install adapter brackets that allow you to attach the tape recorder to the power frame of the dashboard. Installing a non-standard radio requires the use of a decorative frame that allows you to fit a rectangular front panel into a hole with beveled edges or rounded corners (depending on the type of car). The additional element is installed by hand and does not require modification of standard parts from the machine.
Connecting speakers
Connecting the radio to a car equipped with standard acoustics does not require laying patch cables. The owner will need to directly connect the plugs to the mating connectors on the head unit or use an adapter. If speakers are installed simultaneously with the installation of multimedia equipment, then signal cables will need to be laid. Depending on the design of the car, acoustics are installed in the doors, instrument panel or shelf located behind the back of the rear row of seats.
To connect the acoustics to the head unit, a special-purpose stranded copper wire coated with an elastic insulator is used. On the speaker body there are positive and negative contacts with symbols. The connection diagram for the car radio provides for connecting loudspeakers in compliance with polarity; connecting negative cables into a common bus is prohibited. Since the wires come without a chip, it is necessary to provide a plug that will ensure a reliable connection.
Antenna connection
Once the power cables and speaker patch cords have been connected, the antenna plug should be reinstalled. On some cars, the cable with the connector is folded deep into the instrument panel; the owner needs to pull the cord to the installation site himself. Standard antennas are equipped with frequency filters that eliminate interference and increase the range of signal reception from repeaters. The factory unit is connected using a plug that is installed in the mating socket on the back of the car radio.
If the car is not equipped with an antenna, then many owners connect an active type device that is mounted on the windshield. The built-in amplifier requires power, which is provided by the output in the player's jack, marked AMP or REM. After connection, the junction point is protected with insulating tape. At this stage, the procedure for installing the radio in the car ends; the owner can test the operation of the equipment.
How to install a car radio
Installation of a car radio is most often carried out in a standard place on the front panel of the car. Otherwise, installation of the radio is done using a special mount that you can make yourself. Since 1 DIN radios are the most common, the seats have a height suitable for installing these devices. For 2 DIN sizes, additional modifications to the dashboard will be required to install a player in the car.
You should check the package contents of the device before installing the car radio to make sure you have all the necessary parts. Installation of the standard radio is done using a special frame that is included with the device. It is used to fix the radio in the car. First, the box for small items is removed, which is located in the standard place for installation. Then the metal frame is inserted.
Using the supplied special tool, pick up and bend the fixing tabs.
The next stage of installing a car radio with your own hands is securing it to the seat. Some devices have a threaded hole on the back wall. A pin is screwed into it, with which you can further secure the player. To do this, attach a special strip to the back of the dashboard.
To install a non-standard radio, you will need to check which mount is used and whether it fits the seat. If there are threaded holes on the side walls of the device, then installation of the radio on the car is carried out by screwing it to the dashboard with bolts.
How to connect an antenna
To connect a radio receiver, you must additionally install and connect an antenna. Most often it is located on the roof or fender of the car. A stronger and more stable signal is provided by an additional amplifier, which is located in the switching circuit. Power is supplied via a separate cord. The connection diagram depends on the model of the head unit and the technical design of the amplifier itself.
In a 2 DIN radio, the round ANT connector is responsible for connecting the antenna. The wire with positive polarity is connected to the red cable, which is responsible for supplying voltage. The negative cord is connected to the body panel.
Installation of radio VAZ-2107: 2106, how to connect, car, correctly, music, diagram
The primary element of modification of VAZ cars is the installation of an acoustic system and loudspeakers. Installation of the radio on the VAZ-2107 is carried out in several places located in the instrument panel. It is possible to use an additional subwoofer, amplifiers or distributed acoustics. The list of devices depends on the wishes and financial capabilities of the car owner.
How to install
Model 2107 has 2 locations suitable for mounting a 1DIN head unit. The radio can be installed in a standard place on the center console; it is also possible to install equipment instead of the central vents. The first installation option requires trimming the mounting socket to the required size.
The second option reduces heating of the player body by the hot interior heater, providing comfortable control of functions. But at the same time, ventilation deteriorates and there is a risk of heating the head unit by direct sunlight.
On the VAZ-2106, the only place for installation is the center console, which needs to be cut to the standard 1DIN size. The head unit is attached using a metal shaft, which is located in the instrument panel. The shaft fixation scheme is the same for VAZ-2106 and 2107 - using bent tongues.
It is possible to install 2DIN standard equipment, which is located in the glove box.
To fix the device, a housing must be manufactured; control is carried out using a remote wired remote control or via radio. It is possible to install the head equipment in the front passenger's feet, but such a scheme is rarely used due to the risk of damaging the radio.
How to connect
The correct connection of the radio on the VAZ-2107 and any other car is carried out through the contact group of the ignition switch. In this case, when the key is removed, the power supply to the equipment is stopped; only the memory unit is powered, which is supplied from the battery.
On carburetor cars it is necessary to modify the contact group:
- Disassemble the plastic steering column cover.
- Remove the connector from the ignition switch and unscrew the 2 mounting screws.
- Remove the lock from the column by squeezing the lock with a thin object (with the key inserted and turned to position 0).
- Remove the contact group that needs to be modified by soldering an additional element.
- Assemble the lock and install the parts in their original places.
A lock modified in this way receives the ACC position instead of 0, which is used to operate the head unit in the parking lot. An additional fuse is introduced into the connection circuit of the tape recorder to protect the circuits from overload. Connection with speaker cables is made through an adapter.
Speakers
The 2107 car has standard installation locations for front speakers, located in the corners of the instrument panel. When installing speakers in door panels, it is necessary to cut holes in the parts; diffusers and loudspeaker magnets are placed in standard recesses available on the inner metal part of the door. It is necessary to correctly route the speaker cables; for this, a special adapter sleeve is used, placed between the end of the door and the stand. The element protects the tourniquet from creases and damage.
For improved music playback, a pair of rear speakers are installed, which are located on the shelf behind the back of the rear seat. To install the parts, trimming of the metal panel is required; the cables are routed under the floor covering.
You can connect the radio on the VAZ-2106 only to the speakers located in the front doors and on the rear parcel shelf. There is no space in the instrument panel for installing speakers (except for the central oval-shaped loudspeaker, which was mounted in the console during the Soviet era).
Subwoofer
The low-frequency speaker on the VAZ-2107 is installed in the trunk. For connection in the car, separate speaker cables are used, connected to the head unit or additional amplifier. When using an active device connected to the on-board network, a protective fuse must be placed in the power circuit.
Antenna
The antenna on a VAZ-2106 or 2107 is installed on the roof or trunk lid; it is possible to use an active type device mounted on the windshield. The unit is connected to the car radio in a VAZ-2107 or 2106 using a standard plug or adapter.
How to check the connection
To check that the cables are connected correctly, turn off the ignition and measure the leakage current, which should not exceed 30 mA. An additional test will be to turn on the equipment in high volume mode, and the components should not turn off spontaneously.
Installation of a new device
Using an adapter
To insert the body of the new car radio into the dashboard niche, you need to repeat the dismantling operations in the reverse order. In new cars with “audio preparation”, it is enough to compare the connectors of the head unit and the car wiring of wires from the battery and speakers. Each of the well-known car audio brands uses connectors of its own design, which differ in configuration
If the connectors of the car electrical wiring and the new car radio match, it is enough to connect them and insert the head unit housing on the slide into the niche. For mismatched connectors, you will need to purchase an adapter, which is available for all models of car speakers.
To find an adapter in retail or at a car market, you cannot remove the connectors from the car radio. The easiest way out would be to photograph both connectors and write down the exact markings of the car radio model.
Connection without connector and adapter
In order to independently connect the wires if there is no connector in the car’s speaker system, you need to remember the color pinout of car speakers, which is used in standard systems.
The following are connected to the car radio:
- yellow cable (from the positive terminal of the battery),
- black wire to vehicle ground, red (to ignition switch).
Wires of the following colors and purposes depart from the head unit:
- purple (plus right rear speaker);
- purple with black stripe (minus right rear speaker);
- gray (plus right front speaker);
- gray-black (minus the right front speaker);
- white (plus left front speaker);
- white-black (minus left front speaker);
- green (plus left rear speaker);
- green-black (minus left rear speaker).
Expensive car radios use non-standard connectors with additional outputs.
The head unit can be equipped with the following outputs:
- MUTE (mute function, can be automatically associated with connecting the “hands free” option);
- REMOTE (used to connect an external amplifier, additional speakers, subwoofer to the head unit);
- ANT (regulates the automatic extension of the car antenna in cars equipped with such a device);
- ILLUMINATION (reduces screen brightness when driving, when stopped, increases display illumination for ease of adjustment).
If you feel that you cannot figure out the complexities of connecting an expensive device on your own (there are no Russian-language instructions for the car radio), it is better to contact a specialized car service.
You can see in detail how to properly connect a car radio in the video:
https://youtube.com/watch?v=kN1biKA0QFM
How to connect the radio to the ignition switch so that it works when it is turned off
Self-installation of acoustic equipment is a common method of modifying Russian and foreign-made cars. In this case, the user needs to know how to connect the radio to the ignition switch, since erroneous connection leads to accelerated battery discharge and damage to the vehicle’s on-board network. If a new player is installed to replace a standard one, it is recommended to keep the factory connection circuit.
Car radio installation process
Regardless of the location - in a service center or garage - the procedure looks approximately the same for most brands of radio tape recorders. The device is inserted into the standard location, bending the fixing metal petals.
- The international ISO standard connector is provided on many modern cars. In such a case, the whole task comes down to connecting the contact block of the device to the design connector.
- Older cars may have a different connection. In this case, experienced craftsmen use two connection methods. Firstly, it is possible to purchase an adapter and connect the necessary contacts. Secondly, a specialist can “bite off” the connectors on the car and the radio, and then connect each wire separately.
- Older cars may not have a corresponding connector for the car radio. To solve this problem, you need to intervene in the factory layout and carefully lay new wires under the interior trim.
In the case of a pre-provided ISO, installation will take only a few minutes. However, to accurately guarantee serviceability, it is better to entrust the matter to a specialist. Lack of proper experience can lead to shorted wiring or a sloppy appearance.
Radio connection diagrams
Not all models of domestic cars have a key position in the ignition switch in which it would be possible to turn off the power to the car's electrical equipment and remove the key. For example, position “0” for a VAZ 2107. In this position, when most consumers are turned off, the key is not pulled out.
A lock with an “ACC” position is only available on later models. Therefore, in order to protect yourself from battery discharge during prolonged inactivity, it is better to use one of the proposed schemes.
Connection to the ignition switch of imported cars
This method is “correct” for imported cars and “wrong” for domestic ones. The fact is that in imported cars there is a special key position in the ignition switch, signed ACC. When the key is in this position, power is supplied to the car radio, but the starter is not activated.
So, if you connect the car radio to the system of an imported car without an adapter, you need to:
- Connect the plus from the car battery (usually yellow) to the corresponding socket in the car radio.
- The second connection point is the ignition switch terminal labeled ACC and the same connector on the radio.
Diagram for connecting a car radio to the ignition switch of an imported car. The diagram is more than simple and understandable. The tape recorder will work either while the motor is running or if the key is in the ACC position. If the key is in the neutral position, nothing works, there is no loss of charge.
In any circuit, it is worth installing a fuse in the voltage supply circuit from the battery (yellow wire). Even if it is at the input of the radio. It's much easier to replace the fuse on the wire than to look for what's burned out in the radio.
What will happen if you connect it to a domestic car using this scheme? That is, stretch one wire from the battery, and take the second from the ignition switch. The radio will only work if the ignition is on. The engine was turned off -
To the battery via a button
Sitting in the car in silence, or listening to the radio with the ignition on is not the best choice. Therefore, when connecting the radio, they try to ensure that it works even when the engine is turned off. One way is through a button that turns on when the engine is off. When turned on, it supplies 12 V from the battery to the second input of the radio, thereby ensuring its operation. When the motor is running, the button should be off. Then the device operates according to the classical scheme.
How to connect a car radio so that it works without the ignition
The disadvantage of this method is that you will forget to disable the button. And this accelerates the “drawdown” of the battery. As an option, install a button backlight in the circuit. It will light up when the button is turned on, reminding you to turn on the power.
Self-retaining, correct operation scheme without ignition
This is one of the best ways to turn on a car radio in domestic cars. To start, you need to turn on the ignition. The device will start working and will work until you turn it off with the button. There will be power from the battery, but there will not be 12 V from the ignition switch and the device will go into sleep mode with minimal consumption. To turn it on again, you just need to turn on the ignition, and when the radio starts working, you can turn it off again.
Connecting a car radio with and without ignition
As you can see, for such a connection you will need two diodes with an operating voltage of more than 12 V and 300 mA. Turn them on towards each other - as in the diagram. Connect one end of this bundle to the output of the ignition switch. Connect the middle point (the junction of the two diodes) to the red wire. Connect the free end of the diode bundle to the antenna output (usually blue and white).
How does this scheme work? When the ignition switch is turned on, power flows through the diode and through the middle point is supplied to the +12 input. The ignition is turned off, and power is supplied through the second diode from the antenna terminal.
Connecting a car radio through an alarm system
There are two types of car alarms. The first is when -12 V appears when the alarm is disarmed, the second is when it is armed. The second option “without bells and whistles” will not work, since the radio will turn on when you arm the car. But with the first one - when the minus appears when the signaling is turned off - you can connect the car radio according to a simple circuit.
Connection diagram for car radio power supply via alarm system
If minus 12 V appears in the alarm after disarming, connect the terminal on which it appears to the relay coil. The second contact is powered by the battery. When the alarm is turned off, the relay is activated and supplies a positive signal to the tape recorder.
If a minus appears in the alarm when setting the alarm, then it is better to use a circuit with a button or implement another option.
How to connect a car radio in a car with your own hands? (photo - video instructions)
Good afternoon. In today's article I will tell you how to connect a car radio in a car and analyze typical errors in connecting radios. Traditionally for our site, the article is equipped with detailed photos and video instructions.
Attention!
If, when connecting, you arrange the so-called. A short circuit can lead to melted wires, burns and, in extreme cases, a fire. Please, when connecting the car radio, be careful, carefully insulate all wire connections and do not forget about the fuse...
To connect the radio we need:
- The car radio itself, the speakers and their wires
- Stationery knife or special knife. tool for removing insulation from wires.
- Insulating tape.
- Fuse (10a-15a) and its connector.
- Multimeter or test light.
- Crown battery
The simplest option is that the car has audio preparation.
Audio preparation – i.e. Special connectors, an antenna are installed in the car's wiring, and speakers are fixed in standard places. For many models, audio preparation is an option, and many owners refuse it in order to reduce the cost of the car when purchasing, but this should not be done, since radio installers will ask for much more money for it.
With factory audio preparation, installing a radio comes down to purchasing an adapter between the wiring connectors and your radio.
Adapters are freely sold in most stores that sell radio tape recorders, but if you want to save money, you can order them on AliExpress.
The adapters look like this:
The second most difficult option is that the car does not have audio preparation, but a radio tape recorder was previously installed (for example, a cassette).
In this case, you need to replace the radio connector with a new connector (or maybe you’ll be lucky and they will match).
The diagram for connecting a car radio looks like this:
Most likely after you cut off the old radio connector (it’s better to do this with the battery terminal removed). You will have several wires and you need to determine where they are coming from, usually you need to find the permanent positive, positive from the ignition, ground and speakers.
How it's done?
— We expose the wires using a utility knife and arrange them so that they do not short-circuit.
— We put the terminal on the battery.
— We connect one terminal of the test lamp (or multimeter) to the car body (ground) and with the second terminal, sequentially, we touch each of the exposed wires. When the light comes on or the multimeter shows voltage, congratulations, you have found a permanent positive.
— It’s better to immediately twist it with the radio connector (usually the wire is yellow and BAT +12v is written on it) and insulate it with heat shrink or electrical tape. A fuse with a rating of 10-15 amperes must be installed on this wire.
— We are looking for the plus from the ignition switch, to do this we open the lock to the “ignition on” position and similarly, using a multimeter or a light bulb, we look for the required wire. The found wire must be connected to the red wire of the radio connector (usually ACC+ is written on the wire); we do not isolate it yet!
Note (sometimes this wire is connected to a permanent positive, but in this case the radio will drain the battery, since it will not have a standby mode)
— We are looking for ground, to do this we disconnect the control lamp from the body and connect it to the last twist we just made and connect the second terminal of the control (multimeter) in series with the remaining wires. Once the light comes on (or the multimeter shows voltage), you have found ground. We connect it with a twist to the black wire of the radio connector (usually it is labeled gnd, ground)
— We isolate it and the plus from the ignition switch.
All of you can connect the radio. If everything is done correctly, it will light up.... But you also need to connect speakers and an antenna to the radio.
Connecting speakers.
You have 10 wires left. One of them is an antenna cable, one plus antenna power and 8 wires from the speakers.
Wires from speakers usually come in pairs, but their markings are not always correct. Therefore, we need a crown battery.
We attach it to a pair of wires for 1-2 seconds and listen to which speaker clicks. Next, we look at the speaker itself and connect the battery again. If the speaker goes forward, then the polarity is correct, and we screw it + to + and – to -, in accordance with the diagram. If the speaker goes inside, it means the polarity is wrong and we connect it the other way around.
Here's a video on how to determine speaker polarity:
It is very important to monitor the polarity, otherwise the sound in the car will be of very poor quality!
We consistently check and connect all the speakers, front left. Rear left, rear right, front right.
Connecting an antenna usually does not cause any difficulties.
Here is a short video about connecting a car radio, but the red and yellow colors are mixed up (as written correctly in the article):
The third most difficult option is to install a car radio in a car without audio preparation for the first time.
Don't be alarmed, there is a lot less text here since there is no need to determine the purpose of the wires. The labor intensity is higher since we will be laying these wires!
The connection diagram does not change:
- We draw a constant positive from the battery, always through a 10-15 ampere fuse, with a wire of 2.5-4 squares!
There is an option to take a permanent plus from the cigarette lighter, but as practice has shown, usually the cigarette lighter is powered by a 1.5 square meter wire and has a 10 ampere fuse. In my car, when the tire inflation pump was connected and the radio was running, this fuse burned out!
- We look under the panel (for example, on the fuse block or on the ignition switch) for the wire where the plus appears when the ignition is turned on, and accordingly, from there we pull the wire to the plus of the radio, which is responsible for turning it on. You can hook this wire to a permanent plus, but the radio will drain the battery!
- We lay the ground wire and securely fasten it to the body (for example, to fasten a panel to the body)
- We install the speakers in their regular places and lay their wires, be sure to observe the polarity!
- We connect the antenna and its control wire.
The installation of the radio is complete, you have just saved 1.5-3 tr.
The most complex option is that the car radio is installed in a car with non-standard wiring (trucks and vintage cars).
Most car radios are designed for 12 volt power. Most trucks use a voltage standard of 24 volts, so when you connect a 12-volt car radio to a 24-volt network, it will inevitably fail.
Therefore, they connect the car radio to one battery (the one with the minus side attached to the car body), and from its plus they pull the wire into the cab to the radio. This solution does exist, but it has a significant drawback - after 1-2 weeks of inactivity, the battery will be severely discharged and it will be impossible to start the engine without charging it!
To prevent this from happening, it is necessary to use a special voltage converter. It looks like this:
Usually they refuse the memory of the radio and connect the device according to this scheme:
As a result, the memory function of the radio will not be used, but it will not drain the battery and, most importantly, there is no need to run a non-standard wire from the battery into the cabin.
The converters themselves are sold in online stores; as an option, consider purchasing on Aliexpress.
In the case of vintage cars, non-standard supply voltages (6 volts) or + on the car body are possible. Connecting a car radio in such cars is decided individually each time and has no general recommendations.
That's all for me today. Smooth roads and reliable radios to everyone.
Best regards, administrator
Share
Connection
The Pioneer car radio can be connected in two ways. The first of them will be presented below. The first connection method involves using a standard connector, and the second involves connecting without standard connectors.
Note. It is worth knowing in advance that the use of the second connection method is not supported by car radio manufacturers and the warranty will no longer be valid. In addition, there is a slight chance of making a mistake in the process of connecting the wires.
On the other hand, the second connection method is popular among motorists due to the fact that there is simply no other choice. In particular, if the vehicle does not have an appropriate connector for connection, you have to use this method.
Attention. Even if you use the first connection method, you need to be extremely careful and do everything very carefully
It is first recommended to make sure that the wiring of the terminals on the connector is carried out correctly.
Pioneer car radio connection algorithm
Pioneer instructions for car radio
ISO plugs are an internationally accepted connection standard for all car radios. So, to connect the car radio in the first way you will need:
- Plugs;
- Adapters;
- Insulating tape.
Let's get started:
- We cut the wires from the radio plug or car wiring.
- We connect the car radio according to the color pinout given above.
- All wires are carefully insulated with tape.
Installing contacts according to the ISO standard makes it possible to subsequently install a new pioneer car radio without laying wires. It will be enough to pull out the old radio on the slide, switch the plugs and that’s it.
Instructions for the pioneer car radio
If you have never connected a car radio to your car, you will have to do the following:
- Route the speaker wire for the speakers in accordance with the pinout above.
- Attach the car radio frame to the console panel.
- After installing the frame in the finished slot, the metal petals on the frame are bent (this is done with a screwdriver and thus the frame sits securely in its place).
- We connect the radio to the plugs.
- We insert it into the socket until a characteristic click appears.
- We check the operation of the radio.
When dismantling the car radio, it will be enough to unclench the side lobes.
The above instructions for connecting a Pioneer car radio are not the only ones. Here the process is described in general terms, and for detailed information it is recommended to use not only step-by-step recommendations, but also photos and videos - materials where everything is carefully shown and explained. The cost of installing a car radio with your own hands will be very low, because you will only have to spend money on a couple of plugs and electrical tape.
How to install a radio in a Zhiguli.
It is no secret that AvtoVAZ in Tolyatti still gives the future owner of the VAZ 2107 car complete freedom of action, covering the place for installing the radio in the “beard” or the center console with a plug.
Connecting the radio yourself is a matter of honor for an amateur. Installation here is safer in terms of theft, since the radio is not conspicuous to anyone and is located low. In addition, it is easier to install the device - no re-arrangement of electrical and internal space is required. The only significant “minus”, even two, is the rather strong heating of the audio system when the heating is on. At high temperatures, the radio does not work for long. There is also the inconvenience of pulling out the audio disc due to the fact that the gear shift lever is in the way. But since disks are already becoming a thing of the past, giving way to “flash drives,” this is not a very significant drawback, unlike the first. Some prefer an unusual place for it: to place it where the VAZ 2107 has upper air ducts. Like this:
Shown here is a homemade installation on a “seat” under the radio instead of elongated and removed air ducts. This homemade configuration has the following advantages: no heating (after all, the air ducts are removed), and ease of control of the device. Disadvantages are: changes in design, strong heating in direct sunlight, and the risk of theft. In addition, if you put it on top, the interior ventilation works worse, and this is an important argument against. Selling such a VAZ 2107 will most likely be more difficult. Therefore, before you connect a radio with such a serious modification, think carefully.
The picture shows the finished converted structure:
Either way, you need a radio. If you are just a fan of listening to “Autoradio”, then you can install “Aiwa”. If you want to get professional car audio, then think about purchasing a full-fledged audio system to connect a serious system, such as Pioneer. But at the same time, remember that you need to start working with proper complete soundproofing of the interior, purchasing a subwoofer, amplifier and other expensive things.
In addition, if your radio does not have a USB input, then know that you are purchasing and intend to install a very cheap and old model.
After this, you need to purchase speakers, at least four: a classic installation contains two front and two rear, with a power of about 200 Watts. It is not worth purchasing higher power speakers for the VAZ 2107.
Auxiliary antenna
Before you connect the antenna to the radio, you should know that there are two types of antennas - passive and active. Passive connects literally in one step, you just need to insert the plug into the required place. But with the second one you will have to tinker a little, connecting power to it. Usually, tape recorders nowadays have a special output. The output is usually a blue wire designated ANT, REM or AMP. In some cases there are two wires. These wires turn on the devices that operate when playing the audio system. This device is an antenna.
Of course, there are other methods on how to properly connect a car radio, high-quality analyzes described in the manuals.