If you decide to change the front and rear bumpers on your favorite Mitsubishi Lancer car, the first stage should be to dismantle these important parts, which are not only protection against impacts and collisions, but also a kind of tuning decoration for the car. How to remove the front bumper on Lancer 9 and replace it with another? Select the necessary tools and follow our instructions.
To dismantle the car bumper correctly and without problems, you need the following tools:
- screwdrivers (flat and Phillips),
- a 10 mm wrench (for owners of cars with crankcase protection, you will also need a 13 mm wrench, and for Lancer 9 - a 12 mm wrench),
- pliers with narrow ends,
- masking tape,
- socket wrenches.
Instead of a flat-head screwdriver, you can use a special pin remover.
Replacing the front bumper on a Mitsubishi Lancer
To remove the car bumper, you must do the following one by one:
6. Remove two pistons on each side that hold the casing and screws that secure the bumper, using a spanner and a screwdriver. The pistons located in the wheel wells should be unscrewed by turning the steering wheel to the side.
7. It remains to unscrew the lower fastenings of the car bumper. For those with crankcase protection, you will only need to unscrew the fasteners with a 13 mm spanner. Other car owners should use pliers, holding the two tongues with them and thus pulling out the piston.
Bumper installation
To install a new or repaired old car bumper, Mitsubishi Lancer cars should:
- screw on the fog lights (if your car has any), for each of them you will need 4 screws,
- if there are no fog lights, put plugs in place of their intended mounting,
If you have cleaned/painted and disassembled the car bumper, remember that its plastic side panels are attached to 8 screws, and the lower casing (grille) is held on by another 6 fasteners.
- take the car bumper with a partner from both sides and put it on the 2 clamps, performing a “bottom-up” movement (do not apply too much force, as the safety buffer should easily fit into the grooves due to its flexibility),
- from the outside (from the front side) should be screwed in using a self-tapping screw,
- insert 2 pistons into the holes specially designed for this in each wheel arch and then screw the bumper to the car fender on the right and left,
- attach both parts of the Lancer radiator grille in this way: 2 latches in the center and 2 pistons on top,
- Attach the car bumper to the car with four self-tapping screws.
Duplicate restyled bumper
A new duplicate front bumper for cars produced in 2011 and after can be purchased for around 4 thousand rubles. Produced by the already mentioned Taiwanese-Chinese tandem API/TYG. Based on the reviews, the duplicate restyle bumper has the same advantages and disadvantages as its pre-restyle predecessor. The advantages include:
- identical appearance;
- low price;
- easy installation and replacement;
- optimal combination of price/quality.
Among the minuses it is worth highlighting:
- lower quality of material compared to the original;
- lower impact resistance;
- possible slight deviations in the location of the mounting holes.
Removing the front bumper of Lancer 9
The tools you will need to remove the plastic part are:
- flat and Phillips screwdrivers,
- spanners for 10 and 13,
- platypuses or narrow pliers,
- masking tape.
The procedure for removing the front bumper on Lancer 9:
- If fog lights are installed, the harness connector must be disconnected from the headlights before removal.
- First you need to free the radiator grille by pulling out the fastening rivets located along its top from the outside. To do this, use a flat screwdriver to pry up the cap of the piston, then pull it towards you with your hand and remove it. In total, you need to release 4 pistons, two on each grid.
- We remove the grille itself from the fastenings in its center. To do this, use a screwdriver to press the fastener tab, lower it down, and move the part towards you, pulling it off the fasteners. Each of the two parts of the grille is supported by two such fasteners.
- The bumper is attached with the same clips as the grille. We pull up two pistons at the corners of the bumper on the left and right, prying and pulling.
- Using a size 10 wrench, unscrew the self-tapping screw located near the headlight. We repeat the operation near the other headlight.
- Turning the wheels all the way to the right, remove the lower and middle pistons securing the plastic protective locker to the bumper in the left wheel well and unscrew the top screw with a 10 mm spanner. Similarly, remove the two fasteners and the self-tapping screw in the right wheel well.
- From below, the bumper is attached to the “TV” with two pistons. To remove them, you need to pinch the two tabs on the sides with a duckbill and pull them down. If crankcase protection is installed, then bolts are placed in these places from below, and nuts are tightened from above. To release the front part of the protection and remove the bumper, use a 13 key.
- Now all the fasteners are freed, the front bumper can be removed. To prevent accidental scratches, cover the fenders at the points of contact with the bumper with masking tape. Gently tapping, you need to lower the curved outer parts down until they are released from the grooves, pull the entire part forward and release it alternately from two clip-latches located under each headlight.
If during disassembly there were self-tapping screws instead of plastic pistons, then this means that this unit has already been disassembled. Properly selected screws increase the strength of the connection. The manufacturer uses standard pistons on the conveyor to reduce the cost, speed up assembly, and eliminate the possibility of metal damage and subsequent corrosion.
Replacing the front bumper Lancer 9
Necessary tool
The set of tools we will use is extremely minimal:
- Screwdrivers: “+” and “-” (or a pin remover instead of a flat screwdriver).
- The spanner is set to 10. If the car has crankcase protection installed, then there is also a spanner set to 13.
- Pliers with a narrow working part or “duckbills”.
- Masking tape (optional, but may come in handy).
Assembling and installing the front bumper
- Each fog lamp is screwed onto four self-tapping screws. If they are absent, plastic plugs are installed in these places.
- Eight screws secure two horizontal plastic panels, six more secure the lower grille-casing of the central hole of the bumper. Six screws are screwed in to secure the upper casing-grill, through which air flows to the radiator.
- The assembled bumper can be installed on the Lancer 9 body; it is better to do this together. There are two latches along the edges; there are corresponding holes for them on the body, which you need to get into by “dressing” the bumper from the bottom up. There are two pairs of latch-catchers on the front side. Installation takes advantage of the flexibility of the bumper material, but you should still avoid using unnecessary force.
- Two screws are screwed in from the front side.
- On each side in the wheel well, two pistons secure the locker to the bumper, and the upper self-tapping screw to the fender.
- The radiator grille consists of two parts, each attached to two latches in the center and two pistons at the top. If the plastic parts were broken during dismantling, they can be replaced with self-tapping screws. Two parts of the radiator grille are attached to the “TV” with four self-tapping screws, and the bumper itself with another four.
- Finally, a platform is secured with two self-tapping screws to install the front license plate on the Lancer.
Duplicate pre-styling bumper
Duplicates of the original bumper from the Taiwanese company Auto Part Industrial (API) and their Chinese partners TYG are in great demand on the Russian market. You can purchase a spare part within 4 thousand rubles; article number - AP6400B914. The bumper is an exact copy of the original and has the majority of good or satisfactory reviews. The advantages include an identical appearance, a simple installation and replacement procedure that exactly repeats the algorithm for doing it yourself with an original Mitsubishi bumper, as well as generally satisfactory quality at an affordable price.
Despite the satisfactory workmanship, in some reviews you can find complaints regarding this item. In particular, there is a reduced impact resistance compared to the original and a generally shorter service life. A number of car enthusiasts note minor difficulties when installing the bumper. This applies in particular to small deviations in the location of the mounting holes. However, this problem does not lead to distortion of the installed bumper and can be solved by easily adjusting the spare part.
Bumper tuning
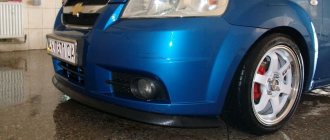
In addition to the standard bumper for Lancer 9, there are probably dozens of tuning options available. The main inspiration for the design is the Mitsubishi legend – Lancer Evolution, a sports modification of the Lancer, a multiple winner of the world rally championships. Based on it, sports aerodynamic body kits are offered, as well as a separate rear wing, side skirts, rear and, of course, front bumper. Usually it has a lowered skirt clearance, the main air intake is increased to the maximum area, and a metal mesh is installed instead of a plastic grille. Some options are installed on standard mounting points, but most require adjustment in place.
Lancer 9 is a common model, economical to operate, maintain and repair. If necessary, after damage, its fiberglass front or rear bumpers can be repaired, or replaced with a new or used standard one.
For those who like to stand out, a tuning bumper is suitable, the choice of which in terms of design and price is very large.
The rear bumper is a protective energy-absorbing structure designed to distribute kinetic force over the area of the part in order to protect the car body from damage. Due to the purpose and location of the part, the rear bumper is considered a consumable spare part that will have to be replaced after an accident.
Removing the Lancer 9 front end: step-by-step instructions
To replace the front of a car, you need approximately 3-4 hours of time, as well as a set of spanners, Phillips and slotted screwdrivers, round nose pliers or narrow pliers and molar tape.
The removal procedure can be performed independently, however, to directly dismantle the bumper, it is recommended to call a partner for help so as not to damage the paintwork. To remove the front bumper you need to:
- If there are fog lights, remove the block with the wiring harnesses and disconnect the lamp connectors;
- Next, use a slotted screwdriver to snap off the plastic pistons around the entire perimeter of the radiator grille, after which we remove the grille by moving it towards ourselves;
Note! It is necessary to remove the pistons with great care - the plastic latches break easily, which complicates the dismantling procedure. If it breaks and it is impossible to remove the piston, the product will have to be drilled out by the door and the threads cut.
It is also recommended to purchase additional pistons before repair work, which will facilitate the assembly process - plastic fasteners are quickly lost or burst.
- Next, we remove the pistons from the bumper mounts along the entire plane of the spare part, the dismantling procedure is similar;
- After removing the plastic clips, the front of the Lancer remains fixed only with bolts, which also need to be unscrewed. We unscrew the bolts on top of the part with a spanner wrench, and then repeat the procedure on the sides in the area of the fender liners, having first turned the wheels in the right direction;
- Next, we unscrew the bolts in the headlight area, after which we remove the screws from the bottom of the product and dismantle the protective casing;
- Then we pull out the pistons from the bottom of the part: to do this, you need to unclip the latches with round nose pliers and pull out the latches with your hands - you can’t get there with a screwdriver. If there is crankcase protection, the metal sheets also need to be dismantled in order to provide free access to components;
- Now the bumper can be removed - it is recommended that two people take the part out so as not to damage the paintwork. The bumper is pulled out by moving towards you and the top: if the spare part rests, then there are latched pins left somewhere.
This is important to know! Before directly dismantling the front end, it is advisable to glue the contact points between the fender liner and the bumper with masking tape or electrical tape - otherwise scratches are guaranteed.
Rear bumper for Lancer 9: originals and analogue components
You need to select a rear bumper based on the car’s VIN code or part numbers, checking the spare part for compatibility on the official Mitsubishi website. Otherwise, there is a risk of purchasing a part with a design that does not fit the standard car mounts, which will force you to sharpen the sockets for the bolts.
| Manufacturer | vendor code | Compatibility by car body type | Compatibility by year of manufacture with car | Approximate cost, rub. |
| FPI | MBBL026NB26 | Sedan | 2004-2008 | 5000 |
| SAILING | MB250803044 | Hatchback | 2003-2007 | 6700 |
| API | MB24408702000 | Sedan | 2003-2007 | 7200 |
| KAYABA | 341368 | Hatchback | 2004-2007 | 6500 |
| PATRON | PSA341368 | Hatchback | 2003-2008 | 8100 |
| TONG YANG | MB04132BB | Sedan | 2003-2008 | 4900 |
Bumper care
A bumper with good and original tuning costs several times more than its regular counterpart. Therefore, when buying rear or front bumpers, you probably spent a lot of money and now expect to use them for quite a long time. This will happen if you follow a few simple rules and take care of your bumper as needed. So, the main enemy of plastic is dust and other contaminants. Moreover, damage to the surface occurs at the moment when the driver, wanting to clean up, begins to wipe off the dirt with an ordinary rag. Under no circumstances should you do this. First, the dirt should be soaked, and then you can wipe it off using a special rubberized rag. In this case, there will be no traces left on the surface of the bumper, and it will delight you with its appearance for a long time.
Types of rear bumper for Mitsubishi Lancer 9: review of design variations
The latest generations of Mitsubishi Lancer 9 provide for installation on the rear of the car:
- Plastic body kits on a metal body are standard equipment, which is characterized by the presence of an aluminum beam on which plastic is installed in order to increase the aerodynamics and aesthetics of the car. Due to design features, repairing a damaged part is often impossible.
- All-metal bumpers are a more expensive option that can be optionally installed on maximum configurations of Lancer 9 as part of packages of additional functionality or installed by the owner. It is characterized by a high service life and more efficient energy absorption, which increases the security of the vehicle.
It is important to know! In order to ensure stable handling of the vehicle and maintain aerodynamics, it is advisable to install only original components or parts recommended by the official manufacturer as analogues.
Choosing the right bumper: analogue or original components?
It is not advisable to save on the front end of the car: the better the quality of the part, the stronger the front part of the body, which protects both the car engine and the driver. When choosing a bumper for Lancer 9, it is recommended to give preference only to original parts or analogue components recommended by manufacturers - otherwise the security of the car will only worsen, but the right to free service under the dealer warranty will disappear.
Among drivers, purchasing original parts from the secondary market is considered a popular practice, which eliminates the purchase of low-quality replicas or fakes. However, in order to choose a quality part, you need to check:
- Presence of chips or scratches;
- Number of dents or signs of mechanical repairs;
- Welding seams or traces of putty;
- Quality of painting and number of layers of paint.
Low cost, lack of documentation for a part, or traces of repairs may be signs that components are being sold after an accident and it is advisable to refuse the purchase.
Replacing the rear bumper on a Mitsubishi Lancer 9: nothing could be easier!
The dismantling procedure can be carried out by one pair of working hands, however, to directly remove the part, the help of a partner is required - due to the size of the spare parts, it is problematic to remove the rear bumper yourself without damaging the paintwork.
To replace the part, you will need a set of wrenches, slotted and Phillips screwdrivers, pliers, a T20 wrench and a cleaning cloth. Also, the vehicle must be driven onto an observation deck, a lift, or the necessary part of the car must be jacked up. To replace the rear bumper on a Mitsubishi Lancer 9 you need to:
- Unfasten the plastic clips securing the rear panel facing panel and dismantle the part. To do this, use a slotted screwdriver to unclip the clips, carefully pushing the tool into the connecting seam of the parts. At this stage, it is important to be careful - it is easy to damage the latches, and to restore the fastenings you will have to seek help from a service station;
- Next, unscrew the fastenings of the rear lights and brake lights, disconnect the wiring leading to the headlights and pull the headlight unit out. A similar procedure is repeated with the second block;
- After removing the headlights and rear panel trim, access to the fasteners holding the rear bumper opens. First, we disconnect the visible plastic clips, and then through special windows we unscrew the screws with a screwdriver in the depths of the body;
- Now we begin to dismantle the spare parts on the sides of the car. First, we remove the mudguards, after which we turn the wheels one by one to the side to the limit, unscrew the bolts securing the fender liners;
- From the bottom of the car, all that remains is to unfasten the plastic clips, disconnect the wiring leading to the fog lights and the bumper is ready to be removed.
It is recommended to pull out the bumper together with a partner. It is also advisable to glue the joints of the parts with the fender liners with masking tape in order to protect the paintwork from accidental scratches. The procedure for installing the bumper is performed in this manual in reverse order. A full rear bumper replacement cycle will take up to 3-4 hours.
Note! When dismantling the bumper in order to replace the product with new components, it is recommended to remove the fixing “braids” and the upper bumper reinforcement from the old part.
This will save on the cost of a new product, and will also prevent the possibility of incompatibility between car mounts and non-original spare parts - it is easier to calibrate the mounts of a stock amplifier and braids than to sharpen the car body.
For most car enthusiasts, work related to body parts usually raises doubts about the ability to produce them themselves. However, dismantling the front bumper on a Mitsubishi Lancer 10 turns out to be much easier than it seems .
How to replace the bumper on a Mitsubishi Lancer yourself: step-by-step guide
If you decide to change the front and rear bumpers on your favorite Mitsubishi Lancer car, the first stage should be to dismantle these important parts, which are not only protection against impacts and collisions, but also a kind of tuning decoration for the car. How to remove the front bumper on Lancer 9 and replace it with another? Select the necessary tools and follow our instructions.
To dismantle the car bumper correctly and without problems, you need the following tools:
- screwdrivers (flat and Phillips),
- a 10 mm wrench (for owners of cars with crankcase protection, you will also need a 13 mm wrench, and for Lancer 9 - a 12 mm wrench),
- pliers with narrow ends,
- masking tape,
- socket wrenches.
Instead of a flat-head screwdriver, you can use a special pin remover.
Replacing the front bumper on a Mitsubishi Lancer
To remove the car bumper, you must do the following one by one:
1. Disconnect the block with the harness from the fog lights, if they are installed. 2. Remove the two pistons that secure the radiator grille by prying up the cap with a screwdriver.
3. To remove the unscrewed part, you need to pull the grille towards you, having first lowered down the tongue of each fastener being removed. 4. Pull out the holders (pistons) by prying them up with a screwdriver. 5. Take a suitable spanner and unscrew the bolt located near the headlight. Repeat the operation on the other side.
6. Remove two pistons on each side that hold the casing and screws that secure the bumper, using a spanner and a screwdriver. The pistons located in the wheel wells should be unscrewed by turning the steering wheel to the side.
7. It remains to unscrew the lower fastenings of the car bumper. For those with crankcase protection, you will only need to unscrew the fasteners with a 13 mm spanner. Other car owners should use pliers, holding the two tongues with them and thus pulling out the piston.
Required removal tool
Tools for work.
To work, you will need a socket wrench or a 10mm socket , a narrow straight and Phillips screwdriver . In addition, it is worth taking accuracy, a little dexterity and attentiveness as assistants.
To work, you will need a warm garage or any well-lit place if the operation is not performed in winter.
Algorithm
A fairly important condition for this work is the cleanliness of the car. In any case, its front part, including the bottom.
- Raise the hood and secure it.
- Using a straight screwdriver, remove two pistons .
Disconnect it and set it aside. Location of the pistons on the air intake. - Using the same technique, we remove the next four pistons that secure the decorative trim above the fan. Let's take it off.
- Under the newly dismantled plastic cover, five bolts (screws) become immediately accessible, with which the bumper is attached to the car frame brackets. Using a socket wrench or a head+wrench system, unscrew them. If unscrewing the bolts is difficult , do not use significant force so as not to damage the geometry of the brackets. This will be a necessary condition for installing the bumper in the future. WD/40 or other useful tricks
to help Location of the upper bumper mounting bolts on the car body. - At the next stage, we free the bumper from its connection with the engine frame at the top of the radiator grille. two 10mm bolts symmetrically from the car axis . We unscrew them too. The car can be equipped not only with a solid grille, but also with two absolutely symmetrical ones. In the second case, their dismantling will increase while removing two more bolts (or pistons). Use a screwdriver to remove the plugs. We turn out the bolts with a 10mm head.
- Subsequent connections of the front fascia of the car are located under the engine compartment. If your car is clean enough, just look under the bumper to see three more bolts right in the center .
Using a key, unscrew them. Unscrew the bolts with a 10mm wrench. - Our next actions will take place at the left and right wings of the car. Here, first of all, it is necessary to free the wing from the fender liner. We remove all visible caps, bend the fender liner and in the area where the wing and bumper meet (just a few centimeters from the edge of the bumper) we find a self-tapping screw. It needs to be unscrewed - it is quite important when attaching the bumper to the sides. Remove the pistons marked with circles (the self-tapping screw is marked with an arrow). Slightly bend the fender liner and remove another piston. We unscrew the screw, bending the fender liner.
- We look under the bottom and, provided the car is clean, we find three pistons attaching the bumper to the boot (protection of the engine compartment).
Let's dismantle them. We take out 3 pistons from the left wing. - All actions performed on one wheel are repeated on the other.
From the right wing we remove 4 pistons. - Now you will need masculine, but not brute, strength . It is necessary to remove the left and right sides of the bumper from the fasteners. To do this, we grab the edge of the bumper under the wheel arch and with a slight tug we force the latches to release it. We pull the bumper off the latches. The latches are located at the edges of the bumper.
- In this operation you will find two (one on each side) flat white plastic pins.
They play the role of guides and are more important when installing the bumper in place. So, if they clearly fit into the frame eyes, you will ensure the required pairing of the bumper and headlights. If the white pins do not fit into the eyes, there will be a gap between the headlight and the bumper. - As a result, the bumper should be practically unrelated to the car. If you have fog lights, do not forget to disconnect the power wires from them , and if you have optics washers, carefully disconnect the capillaries supplying them.
Disconnect all wires and hoses from the bumper. - Now you can, being careful, finally remove the front bumper.
Installation is carried out in reverse order. Undamaged caps can be used again . If damaged by a screwdriver or time, it is better to replace them.
Mitsubishi Lancer X: How to remove the front bumper
We remember where each pistons are located, because...
They are different everywhere, of different lengths and diameters. Let's start with the pistons on the fender liners. They look like screws; in fact, turning them is useless. It’s better to pry at the head of the “screw” with a thin screwdriver.
The arrow marks the self-tapping screw, which is hidden behind the fender liner:
To bend the fender liner without any problems, it is better to remove another piston:
Take a 10mm wrench, bend the fender liner and unscrew the self-tapping screw:
We repeat these operations on the other side.
Then we fall to our knees and remove three pistons from the front boot on the left side:
And four pistons on the right side:
Take the key and unscrew the 5 bolts in the central part of the bumper:
Use a screwdriver to pry out the plugs in the central part of the false grille:
Two more 10mm bolts will open for us, unscrew them.
We get up from our knees and open the hood.
First, we unscrew and pick out two pistons securing the air intake, then four more pistons securing the decorative plastic trim:
We remove the cover and see the following picture. Unscrew five more bolts:
Now you need to pull the sides of the bumper off their latches:
For clarity, the very edge of the bumper, where it is attached with a self-tapping screw, is hooked by the “ear” onto the “dowel”, so it must first be moved down:
The bumper can now be completely removed.
Installation is carried out in reverse order.
Advice:
Before installation, it is better to wash the pistons in water to remove dirt so that they are easier to insert and close.
Source
Articles
Original painted bumper - item 6400B913.
If we are talking about replacement rather than repair, there is a reason to take care of purchasing a new one before removing the old one. There are two options here:
- Buy original.
- Buy an analogue.
By purchasing an original spare part, you guarantee yourself quality and trouble-free pairing and fastening during installation. The only downside here may be the cost.
Today the price for an original front bumper (catalog number 6400B913 ) ranges from 22 to 28 thousand rubles . Analogues are an order of magnitude cheaper. So, for the Chinese model MB04139BA (manufactured by Tong Yang Group ) or the Russian bumper STMBW50000 (manufactured by SibAutoTrade) you will have to pay from 2 to 4 thousand .
Primed bumper STMBW50000 made in Russia.
Differences
In addition to the quality of the plastic itself and the geometry of the design, the originals differ in that they are sold already painted, while the analogues are primed for painting.
Hence the big difference when purchasing.
Types of tuning
Today there are thousands of original tuning options for the Mitsubishi Lancer. Almost all of them have a purely individual design; car enthusiasts even perform some tuning elements with their own hands in the garage.
It is best, of course, to order a ready-made version of the tuned bumper, because if you take on this work yourself, then the first pancake will most likely come out lumpy.
The appearance of the bumper installed on your car will be hopelessly ruined. You can, of course, buy a new bumper and practice on it, however, even in this case you should not expect something unique and beautiful. The training will most likely end with you simply ruining the bumper and that’s it.
So, the ideal option, as we found out, is to order a new tuned bumper. Just don’t do it with so-called garage technicians. The bumper part may turn out to be crooked, and one of the glued parts may even end up falling off on the first bump. A simple and safe way to get the coveted tuning is to order the product in a specialized salon or on the Internet. The main thing is that the site has a good reputation. In this case, you will receive a high-quality bumper, and this will happen exactly within the time period that you specified when ordering.
Tuning Mitsubishi Lancer
Let's summarize and consider the main advantages of ordering a new bumper for the Mitsubishi Lancer:
- The first and, perhaps, most pleasant thing is that the tuning will be of high quality and reliable. The glued parts will not fall off along the way, and when you get tired of the product, you can wash it and sell it to a new owner.
- Another important point is that you will still have the old bumper, and if you get into an accident, you won’t have to spend money on new spare parts; you can simply swap the spare parts.
- And of course, a guarantee. When you contact a certified center or an online source with a good reputation, you will always have someone to ask if you find any defects on the new bumper.
Well, you ordered the bumper and the product is already ready, now all that remains is to replace the old Mitsubishi Lancer spare part with a new, tuned one.
How to insert a mesh or nostrils into a standard bumper with your own hands
Installing a solid mesh in the standard Lancer 10 bumper will give the car an even more daring and aggressive look. To install it, you need to cut out the middle part of the bumper. To do this, the first step is to apply markings with an allowance for the bend. Next, following the markings, use a grinder to cut out the unnecessary part, as well as the edge of the collar and all the fastenings of the standard grille (located on the inside of the bumper). We sand the edges of the cut, then heat and bend the remains from the cut out middle part of the bumper to the collar. We cut off the excess, sand the cuts and adjust the seams for welding, after which we weld them and process them with a file. If necessary, adjust the width of the collar.
