Many vehicle owners are able to repair their car with their own hands in a garage using used parts. But when it comes to work related to eliminating leaks in plastic parts, they prefer to install a new part.
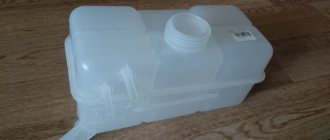
For mass-produced models, purchasing, for example, a new expansion tank for the cooling system will not be too difficult. Unfortunately, for cars that are of a respectable age, it is not always possible to “obtain” the necessary part even at disassembly, so you have to think about repairing the car’s expansion tank yourself.
Tools and materials
To perform this repair operation, you cannot do without the necessary materials and tools.
Before soldering the car's expansion tank, you need to prepare:
- soldering iron with a flat tip, power 40 W;
- a piece of fine-mesh brass mesh;
- metal scissors.
A soldering iron can be used with a higher power, but then you will need to be careful when working so that the plastic material is not pushed through at the places where the metal mesh is soldered.
The brass mesh can be removed from the car's gas line tube, which is located directly in the tank. This mesh is used in the car's power system as a filter. After leveling, it can be used as a reinforcing layer to eliminate expansion tank leaks.
Important! If you couldn’t find a brass mesh, you can replace it with a steel one. Thin metal mesh is sold in hardware stores. The cost of such material is low, but you will need to purchase it in quantities of at least 1 linear meter.
After the preparatory work has been completed and the location of the antifreeze leak has been determined, the tank is thoroughly dried to remove any remaining moisture.
How to solder a crack?
It is not recommended to use even high-quality glue for such car repairs yourself.
High humidity, temperature and significant pressure do not allow high-quality repair of the expansion tank using such substances.
It is much more reliable to eliminate tank leaks by soldering. Plastic easily melts even at a relatively low temperature, so you can use a regular soldering iron to perform the operation.
The soldering process is carried out in the following sequence:
- The tank is placed on a flat surface with the crack facing up.
- The soldering iron warms up to operating temperature.
- A metal mesh, which must be cut in advance so that its length and width are slightly larger than the crack, is applied to the damaged area.
- Using a soldering iron tip, the mesh is soldered into the plastic along the entire length of the crack.
Important! During soldering, you should carefully melt the plastic directly in the crack, otherwise it will not be possible to properly eliminate the expansion tank leak. Metal mesh is an excellent reinforcing element, but the patch will only hold pressure well if the plastic layer is uniform.
Useful video
Watch an interesting video where a car owner shows how to repair a crack using soldering:
And in this video, the driver demonstrates how he glues the tank using Done Deal 15-minute polyadhesive for plastics and what comes out of it:
Repairs on the road
Repairing an expansion tank with your own hands is not at all difficult, but many motorists are interested in the question: “How to seal the expansion tank on the road”?
If during travel, when it is not possible to apply the above method for repairing the tank, you can temporarily fix the leak using white silicone sealant. To perform this operation you must:
- dismantle the tank, empty it of antifreeze;
- Dry thoroughly and apply sealant to the crack on the inside of the container;
- After applying the sealant, it must be left in place for at least 4 hours, after which the part must be put back in place and movement continues.
Results
So, if you decide to restore a plastic tank yourself, then you should use the following repair methods:
- soldering with metal mesh;
- special sealant;
- cold welding or epoxy resin (temporary).
It will not be possible to restore the seal properly using glue!
Source
Seal up a burst washer reservoir on a car step by step
Let's take a closer look at two methods of repairing a burst washer reservoir - glue and glueless (soldering).
Method one - using two-component Hosch glue:
- Preparation. Both surfaces to be bonded should be cleaned of dirt using acetone.
- Applying glue. The liquid cyanoacrylate component is applied in a thin layer to the crack or hole. Welding granules from the second bottle are added on top and again covered with a small amount of glue for impregnation.
- Gluing. The glue sets almost instantly, so within a few minutes after applying the composition, the tank can be returned to its place and filled with windshield washer fluid.
Do not inhale the vapors generated during the reaction process.
VIDEO REVIEW
Method two - soldering:
- The surfaces to be joined must be degreased with acetone.
- Heat the soldering iron to maximum temperature.
- We apply the mesh to the seam so that the edges of the mesh extend to each side by at least 2-3 centimeters.
- We gradually heat the metal mesh, fusing it into the plastic.
- Smooth out the top layer of polyethylene so that the layer becomes monolithic.
- We check the tank for leaks and install it on the car.
When performing work, safety precautions should also be observed. Soldering may only be carried out in a well-ventilated area.
Basic repair methods
When using a tank, the plastic is subject to constant deformation - it contracts and expands due to constant temperature fluctuations. Thermal effects and pressure influences provoke the appearance of cracks in the structure of the material.
At the same time, plastic is used for the manufacture of expansion tanks, which does not react with adhesives. Therefore, it is almost impossible to perform high-quality gluing of such surfaces. In this regard, soldering is most often used to repair this car part. A sealant or adhesive may be used as a temporary measure.
Soldering
Most often, cracks and crevices in the plastic of the expansion tank are sealed using reinforcing metal mesh.
Cold welding
The use of cold welding is justified as a temporary measure. With its help, it is possible to repair cracks in order to get to a car service center.
Sealant
Sometimes a special sealant is used to repair the expansion tank. However, this tool can also hardly be called reliable.
Effective means
Today there are many effective compounds on sale that are used to eliminate breakdowns of plastic car parts.
3M DP8005
This product is actively used for fixing different types of polyethylene and polypropylene. This glue is characterized by a high degree of strength. This structural adhesive is a two-component composition. With its help, it is possible to fix polymer compounds without preliminary preparation.
Glue is considered a modern alternative to common methods of mechanical joining or soldering damaged elements. As a result of using the substance, it is possible to obtain a seam that is characterized by resistance to water, high humidity and the action of aggressive substances. Therefore, it can be safely used to repair the expansion tank.
The only disadvantage of the composition is the high cost. However, if it is necessary to repair the tank of an expensive car, such costs are completely justified.
Hosch
To repair plastic car parts, it is permissible to use this two-component welding adhesive. It is produced by a German company. The substance is designed specifically for fixing polymers. With the help of this glue it is possible to seal holes and cracks in various plastic products. The seam remains elastic even in frosty weather. It is capable of withstanding pressure up to 12 atmospheres.
Typically, the connection area with such glue is stronger than plastic. The kit contains 2 components that complement each other. These include liquid cyanoacrylate ether and fine powder. The mixture contains metal oxides. It also includes catalysts that activate the setting of the adhesive joint and increase adhesive characteristics.
Operating Instructions
For the repair procedure to be successful, it is important to choose the right method and follow a number of recommendations.
Sealing
Before starting the procedure, it is important to prepare everything you need. To do this you will need the following:
- soldering iron with a flat tip - its power should be 40 watts;
- a fragment of brass mesh with small cells;
- metal scissors.
It is permissible to use a more powerful soldering iron. But in this case, you should be careful when working. Otherwise, in the areas where the metal mesh is attached, there is a risk of a through hole appearing in the material.
It is permissible to remove the brass mesh from the car gas pipeline tube. It is located directly in the tank. This mesh is used in the vehicle's power system and plays the role of a filter. After leveling, it can be used as a reinforcing layer. This will help eliminate the tank leak. If you can’t find a brass mesh, you can use a steel one. This material is sold in construction stores and has an affordable price.
After completing the preparatory work and determining the area where the leak is located, the tank should be thoroughly dried. This will help get rid of any remaining moisture.
Soldering is considered the most reliable method for eliminating cracks. Plastic melts easily even at relatively low temperatures. Therefore, to carry out the manipulation it is permissible to use an ordinary soldering iron. To solder the tank, you should perform the following steps:
- Place the tank on a flat surface. Moreover, it is recommended to direct the crack upward.
- Heat the soldering iron to operating temperature.
- Cut the metal mesh so that its length and width are slightly larger than the damaged area. Apply the material to the damaged area.
- Using a soldering iron tip, solder the mesh into the plastic. This is recommended to be done along the entire length of the damage.
Looking for a leak
Loss of the sealed state of the heating system leads to a loss of pressure. By conducting a complete inspection of the heating device and pipe system, leaks can be detected. Leaks to the naked eye are determined by the accumulation of moisture at joints or holes with a characteristic white coating.
When inspecting, you should pay attention to the connecting elements, couplings at soldering points and direct connections to heating devices. A system with metal pipes may leak at longitudinal seams
Once a leak is discovered, it is worth taking care of its elimination. The joints are repacked, gaskets and gland seals are installed, with a thickness slightly greater than the previous one. If the pipeline is damaged, the damaged section must be replaced.
Additional tips and tricks
In order for the expansion tank repair to be successful, you should follow these recommendations:
- It is best to solder the damaged area;
- Brass mesh is used as a reinforcing layer - aluminum material will not be suitable in this case;
- It is recommended to sand the connecting seam, putty, coat with primer and paint.
The breakdown of the expansion tank is considered an unpleasant violation. To repair damage, it is recommended to use a soldering iron. As a temporary measure, it is permissible to use reliable adhesives. Two-component substances are considered a suitable option.
Source
Repairing a car's expansion tank with your own hands
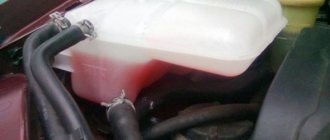
The expansion tank has become a common car part since the active use of non-freezing liquids, including antifreeze and antifreeze, began to be used, however, given the specifics in which it functions, such a problem as “how to seal the expansion tank” also becomes relevant over time.
In order to understand this issue, you should delve a little into the specifics.
Thus, the basis of the liquids used in the expansion tank are aqueous solutions of dihydric alcohol (ethylene glycol), their feature is an increased coefficient determined for thermal expansion (compared to water).
Taking this into account, the liquid poured into the system undergoes expansion during engine warm-up, which leads to its squeezing out through the safety valve located in the radiator cap.
When the engine is turned off and begins to gradually cool down, the volume of liquid decreases, which leads to a vacuum in the cooling system.
Naturally, this activates the lid valve, which leads to air being sucked into the radiator, which leads to a disruption in the heat removal process, and the danger of overheating is probably known to everyone.
In order for liquid, rather than air, to get inside, an additional reservoir is required, which, in fact, is the expansion tank.
Using a hose, it was connected directly to the filler neck in the radiator, positioned so that the middle approximately coincided with the level of the upper edge of the radiator.
This design squeezes excess heated fluid into the tank; as the engine cools, it refills the system, while preventing air from entering.
By the way, by installing an expansion tank, the problem associated with environmental pollution was also solved.
Returning now directly to our question of how to seal the expansion tank, we can note that only replacing it will save the situation.
This is explained by the fact that not a single glue is able to withstand the pressure exerted by a liquid brought to a temperature of a hundred degrees.
In addition, some car models maintain operating temperature exactly within the specified temperature, or even higher.
Accordingly, for antifreeze and antifreeze the boiling point is determined to be almost 103°C, while due to the tightness that characterizes the cooling system as a whole, when the pressure in it increases, the liquid may not boil even at 115°C.
Taking this into account, if there is a crack, then the liquid will not only begin to flow out, but also, due to depressurization, its boiling point will significantly decrease.
Liquids for filling into the tank
Today's cars, built with the widespread use of new technologies, are very demanding of all process fluids, including coolant. The list of requirements is as follows:
- the liquid must boil at a temperature not lower than 110 ° C;
- freezing threshold - from minus 20 to -60 ° C depending on environmental conditions;
- no foaming upon contact with the pump impeller, minimal viscosity;
- the liquid must contain non-aggressive additives that prevent the appearance of scale on metal parts;
- the chemical composition should not change for 3 years or 60 thousand kilometers.
Antifreeze is a purely domestic product, synthesized during the USSR
All of the above requirements are met by antifreeze or antifreeze, which is the same thing. The name antifreeze comes from the English word antifreeze, which means “non-freezing”. Antifreeze is a substance created on the same basis from ethylene glycol in the former USSR. The word consists of the abbreviation TOS (technology of organic synthesis) and the ending “ol”, inherent in the names of chemical preparations.
The base of antifreeze and antifreeze is the same - water + ethylene glycol in different ratios. Differences between products from different manufacturers may lie in the package of inhibitory additives, so it is not advisable to confuse liquids. There will be no fatal consequences, but some substances can neutralize the effect of others and the anti-freeze properties will deteriorate. In this case, the color of the liquid does not matter - it is just a dye.
You can use distilled water to fill the tank in the following situations:
- to dilute antifreeze concentrate to the desired freezing temperature;
- in case of an emergency - complete or partial loss of coolant en route;
- for the purpose of washing.
The color of antifreeze does not affect its properties; the additive package is important
Distilled (desalted) water does not meet the above requirements: it freezes at zero temperature and boils at 100 °C. Therefore, it is poured temporarily or as a solvent for antifreeze.
It is unacceptable to pour tap water saturated with salts into the expansion tank. An exception is the breakdown and loss of antifreeze on the way and the absence of a car shop nearby. Fix the leak, fill the cooling system with tap water and get to a garage or service station, then drain it immediately. Otherwise, deposits will form on the inner walls of the water jacket of the engine and other units, impairing heat transfer.
Repair of radiator and expansion tank
In this article I want to tell you what to do if the radiator or expansion tank is leaking. First you need to figure out why this happened. Almost all cooling systems have pressure, sometimes up to 2 atmospheres depending on the make of the car. The expansion tank (or radiator) cap should release excess pressure. If the lid becomes sour, the pressure begins to increase, causing the plastic to crack. and sometimes honeycombs in the radiator. In newer car models, it is almost impossible to check the expansion tank cap because... the valve itself is rolled into a plastic case, and a special pressure gauge for checking pressure in cooling systems is not found in every car service center. Therefore, if the expansion tank (or radiator) cracks on its own (without mechanical impact), the first thing I recommend is replacing the cap. It costs around 5 dollars, although there are very expensive exceptions.
Now about the repair itself. The plastics from which expansion tanks and radiators are made do not react with more than one glue, so it will not be possible to glue them together properly. If you need to eliminate the leak for some time, you can clean the crack with sandpaper, degrease it with a solvent and fill it with poxypol or seal it with cold welding. If everything is done well, it will last for several months. The whole problem is that the plastic in the cooling system, due to temperature changes, contracts and expands. Therefore, no matter how well you glue it together, it will still leak over time.
The most reliable, in my opinion, the only way to repair plastic in the cooling system is welding. Almost all expansion tanks are made of PP polypropylene or PE polyethylene. They cook very well; in my experience, not one has yet leaked after repair. It is better to take not a bumper as a donor, but something more rigid, such as fender liners. It’s more difficult with radiators; they are made from pa66. This is one of the hardest and most refractory plastics. The repair of such plastic must be approached very carefully, otherwise it will have to be redone. Below there will be a video of repairing an expansion tank from ra66, these are very rare and in terms of the complexity of the repair they do not differ from radiators. As a donor, I took the body from a broken drill.
Causes of breakdowns of plastic containers
The car as a whole and its individual elements acquire various defects during operation. The expansion tank is also susceptible to breakdowns, leading to its depressurization with subsequent leakage of coolant as a result of the following reasons:
- Increased pressure in the cooling system.
- Insufficient thickness of the plastic from which the container is made, leading to cracking of the walls.
- Leaving boiling antifreeze in the tank for a long time.
- Mechanical impacts, shocks.
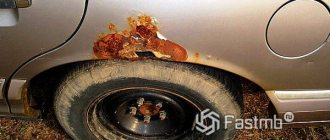
If a release of antifreeze occurs, it is necessary to determine the location of the leak and repair the expansion tank.
Main malfunctions of the expansion tank
During engine operation, the coolant heats up and expands.
The resulting excess coolant is removed from the system through the radiator safety valve.
At the same time, antifreeze itself has increased resistance to thermal expansion compared to water.
After stopping the engine, the coolant gradually cools down with a decrease in volume, and the pressure in the system drops.
If the tightness of the expansion tank (RB) is broken, air begins to flow into the radiator, reducing the quality of engine cooling and increasing the risk of overheating.
Antifreeze has increased resistance to thermal expansion
On the other hand, RB is quite rarely the cause of incorrect operation of the cooling system.
The main reasons for its failure:
- tank cap malfunction;
- valve sticking and wear;
- deformation of the rubber seal due to wear;
- mechanical damage and wear of the RB itself.
In any of these situations, air pockets may form in the system, leading to a critical increase in pressure and rupture of the tank itself.
Diagnosis of expansion tank faults
The most obvious symptoms of RB failure are the following situations.
- While driving, thick clouds of steam appear from under the hood due to coolant entering the hot intake manifold. The engine temperature is normal. The reason for this is a malfunction of the intake valve, as a result of which excess antifreeze leaves the system prematurely.
- Cold air enters the cabin from the heater at elevated engine temperatures. This situation occurs when air pockets form due to a faulty pressure valve.
- Traces of coolant appear at the junctions of the hoses and pipes with the tank. The reason for this is the rupture of connecting clamps, tubes, hoses or the radiator itself due to increased pressure or wear.
Diagnostics of RB comes down to two stages - checking the pressure and searching for mechanical damage.
Pressure check
First check the pressure in the cap. The malfunction of the lid only appears at increased pressure, which is quite difficult to create artificially.
In car services, they use a special pump for this, with which they check whether the valve operates or not.
Checking the pressure in the reservoir cap is quite difficult
Without such a pump, the cover is diagnosed as follows.
- With the engine warm and running, carefully unscrew the RB cover by hand. If a hissing sound appears, indicating the presence of pressure in the system, the cover is operational.
- Tubes and hoses are inspected. If they are compressed, then either the lid does not hold pressure, or it is too low.
You can also use the old grandfather's method. However, to implement it, there must be sufficient free space under the hood to squeeze the main supply hose with one hand and unscrew the cap with the other.
The cap is then screwed into place and the hose is released. If the hose returns to its original shape, the cap valve is operating normally.
This is not always feasible due to the fullness of the engine compartment in modern cars.
Many people use a pump with a pressure gauge and an additional tank. In this case, more accurate results are obtained. The procedure is as follows.
- The pump hose is connected to one of the fittings of the additional empty RB and secured with a clamp.
- All other RB pipes are closed with plugs.
- The cap being tested is screwed onto the additional tank.
- The pump forces air into the tank. At the same time, monitor the pressure gauge readings. At a certain moment you will hear a click, and after a while - a whistle of air escaping through the plug. If at this moment the pressure gauge shows 1.1–1.5 kgf/cm 2, and further injection of air only increases the sound at a constant pressure, the lid is in good condition.
Such a check is also possible on a working tank, without draining the antifreeze. The steam discharge tube is disconnected from the RB and closed with a plug, and the pump hose is connected in its place.
A pump with a pressure gauge is used to check the antifreeze pressure
Checking mechanical damage
When looking for mechanical damage, first of all, on a cold engine, you need to remove and carefully inspect the RB cover for the appearance of cracks, chips, ruptures of the sealing lips and other mechanical damage.
Then you should evaluate the condition of the body of the tank itself, having first cleaned it of dirt, scale and rust.
The valve does not open
The coolant temperature depends on the engine operating mode. The cooling system is completely sealed.
High pressure is created inside it, leading to the expansion of all elements to a certain level.
A valve is provided to relieve pressure in the system. In addition, the valve sucks air into the system when the engine has cooled down.
This is necessary due to the risk of decompensation with a sharp decrease in pressure.
There must be enough air to balance the internal atmosphere of the system.
Valves in a modern car play an extremely important role. Therefore, it is necessary to periodically check their condition.
The valve can rust, clog, wear out and simply collapse. All this will not allow the system to function normally.
The risk of depressurization and air locks will increase. As a result, small components and parts of the system may fail and, as a result, the engine will overheat.
The main sign of valve failure is a non-functioning stove.
RB cover valves are important elements of the cooling system
All this is possible even if the valve is working but clogged. An increase in coolant pressure can lead to rupture of the reservoir and hoses.
As a result, the engine will boil, hot antifreeze will flood the entire engine compartment, etc.
Therefore, it is extremely important to monitor the serviceability of the valve. To check its functionality, press it with your finger and at the same time bring your ear to the lid.
When you press the valve, you should hear a hissing sound, and when you release it, you should hear a suction sound.
Oil in expansion tank
Oil may get into the RB. This problem is especially relevant for American cars, but sometimes occurs on domestic ones as well.
Oil is usually detected only when checking the coolant level in the form of oil traces on the inner surface of the tank neck.
In addition, the color, consistency and smell of antifreeze changes.
Oil in antifreeze is an extremely annoying signal for the car owner
Oil and coolant circulate through different sealed circuits that are closed from each other.
Therefore, oil getting into the tank is a rather unpleasant signal, indicating a leak.
The reason for this most often is:
- wear of the radiator or oil cooler;
- wear of the heat exchanger cuff;
- Damage to the cylinder head gasket.
A heat exchanger or oil cooler is installed on a number of powerful automobile engines to cool the lubricant.
It is at these three points that there is a risk of coolant and oil coming into contact.
Thus, in a heat exchanger, the possibility of their contact is explained by the purpose of the device itself.
Another common reason for mixing antifreeze with oil can be the chemical composition of the coolant.
If the tank is filled with antifreeze with various additives, the structure of which is incompatible with the structure of the oil, the liquids may react, leading to their mixing.
Oil getting into antifreeze is determined by the following signs.
- Traces of oil appear in the antifreeze that is drained completely. Since oil has a different consistency from antifreeze, their complete mixing is excluded. The remaining coolant that is drained will be darker in color. In addition, the antifreeze will become thicker and will have difficulty flowing out of the tank.
- The coolant will become flammable. To detect this, wet a paper napkin with antifreeze and set it on fire at a sufficient distance from the car.
- The oil filter will become clogged. Solid deposits that have not passed through the filter mesh will appear inside. The filter will quickly become dirty and the oil will circulate more slowly through the system.
It is noteworthy that not only does the oil enter the tank, but, on the contrary, the remaining antifreeze flows into the crankcase. Antifreeze deteriorates the quality of the lubricant, and when it gets into the engine, it accelerates the corrosion process.
A big problem that motorists face is coolant leakage.
Place of the reservoir in the cooling system
A container to compensate for expanding antifreeze can be installed in different places, the location depends on the make of the car. The reservoir is attached to body parts - side members and the interior partition using a rubber clamp or a special bracket. As a rule, the tank is placed on the side where the upper radiator pipe for its connection is located.
Typically the container is installed closer to the radiator pipe
There are containers with 2 and 3 fittings. The latter are connected by three hoses to the following units:
- A thick pipe connected to the lower fitting of the vessel connects it to the main line of the cooling circuit - a small circle of liquid circulation that is always open. The antifreeze, which increases in volume, enters the tank through this hose.
- A thin tube running from the radiator to the upper fitting. Designed to discharge liquid and steam from the radiator directly.
- The second thin pipe, connected to the middle fitting, comes from the interior heater radiator. Its task is the same - to drain excess antifreeze and steam into the container.
Excess antifreeze from three units enters the reservoir with 3 fittings.
The expansion tank is the highest point of the engine cooling system. This is done so that the liquid from the tank can flow into the circuit according to the law of communicating vessels. When the antifreeze level in the container is 3-4 cm above the Min mark on the body, all pipes and units are filled with antifreeze. Including the highest of them - the throttle cooling circuit.
Remaining air from the system is removed through the throttle heating pipes
Expansion tank repair
If small cracks and chips are found, the standard seal dries out, or the lid becomes loose, the tank may need to be repaired.
Repairing cracks
Cracks in the expansion tank usually appear as a result of mechanical damage.
When using the machine intensively, this is not surprising, since the plastic tank is not very durable.
A crack in the expansion tank may appear as a result of mechanical damage
Typically, cracks occur due to poor quality plastic.
Therefore, when choosing a new tank, you should pay attention to the quality of the material from which the RB is made and avoid cheap Chinese products.
The appearance of cracks is caused by insufficient thickness of the tank body, aggravated by boiling coolant.
Due to temperature differences, plastic is constantly subjected to mechanical deformation, which, in turn, leads to a decrease in the resource life of the RB.
It is usually impossible to properly seal a crack using generally accepted methods.
The inertness of the material from which the tank is made does not allow the adhesive to provide a strong connection. Therefore, to eliminate cracks, use:
- soldering using metal mesh;
- filling with epoxy resin, cold welding or special sealant.
Using epoxy or cold welding to repair cracks will only help in the short term.
However, this is enough to get to the garage or car service center.
For soldering you will need a powerful (at least 40 W) soldering iron with a flat tip. The process looks like this.
- Using a regular napkin, the body of the tank is cleaned of residual coolant.
- The work area is degreased with acetone or solvent and dried.
- Depending on the size of the crack, a strip-shaped patch is cut from a brass mesh. In any case, its width should not be less than 10 mm.
To seal the crack, a strip is cut from brass mesh
The crack must be completely covered with a reinforced layer
The sealant used to seal cracks is usually red polyadhesive, designed specifically for plastic and resistant to oily liquids.
Before applying the sealant, the working surface is prepared in the same way - cleaned, washed, dried and degreased.
Video: repairing the expansion tank
Repair of a plastic radiator tank
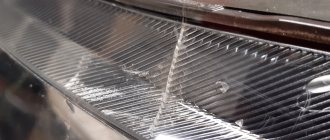
The upper part (tank) of the radiator is made of plastic. As a result of mechanical stress, cracks and chips may form on it, from which coolant will leak.
This may cause air to enter the cooling system. Such damage can be eliminated, as in the case of RB, by soldering, but cold welding is more often used.
In this case, it will provide a stronger connection than on the RB, since the OD pressure in the radiator tank is much lower.
You should purchase a composition designed specifically for repairing gas tanks and radiators.
The plastic radiator tank can also leak antifreeze.
Cracks are sealed using the following algorithm.
- The radiator is removed from the car.
- The radiator is cleaned and washed inside and out. You can use a large bath-type container and washing powder.
- Having straightened the antennae, the upper part is removed from the radiator. The rubber gasket, if it is in good condition, can be left.
- The crack along its entire length is cleaned with a flat-blade screwdriver. If the hole is large, but hidden by plastic layers, this will show the entire damaged area.
- The work area is cleaned and degreased.
- The damaged area is filled with cold welding from the outside and sealant from the inside.
When eliminating cracks in the radiator tank, cold welding is used
Before installation, it is recommended to check the tank for leaks in a container of water..
It is immersed in water and inflated with air. The appearance of bubbles will indicate that the work was done poorly.
You will have to redo it or use other repair methods. In extreme cases, the tank can be replaced.
Video: repairing plastic parts of a radiator
Repair of expansion tank cap
If the tank does not hold increased pressure, the reason for this is not the valve, but the cap spring.
Experts recommend carefully disassembling the cover, shortening the spring by one turn, reassembling it and checking it in operating mode.
Some lid models may have two springs - a short and a long one.
In this case, the large spring is first cut off by one turn and the cover is checked.
If this does not help, the small spring is shortened by two turns and the test is repeated.
The design of some RB covers assumes the presence of two springs
Our services
Repair of radiators on trucks.
We carry out straightening quickly and efficiently. We eliminate breakdowns and leaks in the honeycomb part of copper radiators, depending on the characteristics and nature of the damage, using welding or soldering methods, followed by a mandatory leak test. Restoring the radiator core.
Repair of radiators on buses.
We carry out accurate diagnostics and pressure testing to detect holes and leaks. We carry out the following types of work: cosmetic repairs; external washing and internal cleaning; repair by soldering, argon-arc welding, restoration of metal structure by spraying; repair of pipes, necks, cans and expansion tanks; checking connections for leaks.
Replacement of copper car radiators.
In case of particularly severe damage, it is recommended to replace the radiator with a new one. We will qualitatively dismantle the damaged one and install a new one, and check the tightness of the connections.
Expansion tank cleaning products
To clean and wash the RB, car enthusiasts use various means - cleaners, solvents, citric acid, washing powder, etc.
If the level of contamination is so great that nothing helps, you can try the following.
- Fill the tank 15% with fine gravel.
- Fill the tank with warm water up to half and add dishwashing detergent.
- Shake the tank with both hands.
- Empty the tank and rinse it with water.
The tank should be clean.
You can use ready-made products, for example, DIMER washing concentrate.
In this case, cleaning is carried out as follows.
- Fill the tank 15% with DIMER concentrate.
- Shake the tank, tapping its body with your hands, and leave for 10 minutes.
- Fill the tank halfway with warm water.
- Use a long-handled brush to clean the inside walls of the tank.
- Pour out the solution and rinse the tank with warm water.
DIMER concentrate is quite effective in cleaning the expansion tank
There are many other ways to clean RB.