Stages of replacing Hyundai Getz coolant
The best option for replacing the coolant is draining the old antifreeze and completely flushing the system with distilled water. This method achieves the optimal ability of the new liquid to remove heat. And also retain its original properties for a longer time.
The car was supplied under different names and modifications for different markets, so the process will be relevant for the following models:
- Hyundai Getz Restyling;
- Hyundai Click;
- Dodge Brisa;
- Inokom Getz;
- Hyundai TB (Hyundai TB “Think Basic”).
Engines of different sizes were installed on this model. The most popular are petrol 1.4 and 1.6 liters. Although there were still options for 1.3 and 1.1 liters, as well as a diesel engine with a volume of 1.5 liters.
Coolant drain
You can find information on the Internet that in order to drain the fluid more completely, you need to replace it on a warm engine. But this is fundamentally wrong; you need to change it only when it has cooled down, at least to 50°C.
When replacing on a hot engine, there is a possibility of deformation of the block head due to a sudden change in temperature. There is also a high risk of getting burns.
Therefore, before starting work, we leave the machine to cool down. During this time, you can complete the preparation. For example, remove protection if it is installed, after which you can proceed to further actions:
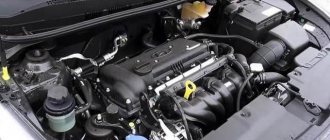
- At the bottom of the radiator we find the drain plug, it is red (Fig. 1). We unscrew it with a thick screwdriver, having previously placed a container under this place.
Fig.1 Drain plug - The drain plug on Getz often breaks, so there is another drain option. To do this, you need to remove the lower radiator pipe (Fig. 2).
Fig.2 Hose going to the radiator - We open the caps of the radiator and expansion tank, thereby ensuring the air supply to them. Therefore, the antifreeze will begin to drain more intensely.
- To remove liquid from the expansion tank, you can use a rubber bulb or syringe.
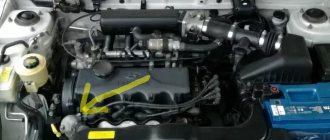
- Since there is no drain plug in the engine, you need to drain the antifreeze from the pipe suitable for it (Fig. 3). For better access to this hose, you can disconnect the wires connected using a male-female connector.
Fig.3 Pipe for draining from the engine
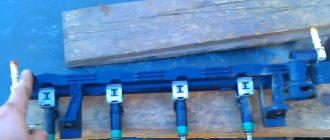
The most difficult task is removing and installing hose clamps without special tools. Therefore, many advise changing them to regular, worm-type ones. But it is better to buy a special puller, which is not expensive. It will save a lot of time when replacing now and in the future.
So on this model you can completely drain the antifreeze as much as possible. But you should understand that some of it will still remain in the block’s channels.
Flushing the cooling system
To flush the cooling system from heavy deposits, special flushes based on chemical components are used. With a normal replacement this is not required, you just need to flush the old antifreeze out of the system. Therefore, we will use ordinary distilled water.
To do this, we put the pipes in their places, clamp them with clamps, and check that the drain holes are closed. We fill the expansion tank to the strip with the letter F, then fill the radiator with water up to the neck. Screw on the caps and start the engine.
You need to wait until the engine warms up to operating temperature. When the thermostat opens, water will flow through a large circuit, flushing the entire system. After this, we turn off the car, wait for it to cool down and drain it.
We repeat these steps several times. A good result is considered when the color of the drained water is transparent.
Filling without air pockets
When using ready-made antifreeze for filling, you need to understand that after flushing, a residue of distilled water that cannot be drained remains in the system. Therefore, for Hyundai Getz it is better to use concentrate and dilute it taking into account this residue. Usually about 1.5 liters remain undrained.
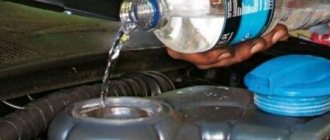
It is necessary to fill in new antifreeze in the same way as distilled water when flushing. First into the expansion tank to mark F, then into the radiator to the top of the neck. In this case, you can press the upper and lower thick pipes going to it with your hands. After filling, tighten the plugs on the filler necks.
We begin warming up, periodically adding gas to speed up the warming up and speed of fluid circulation. After complete warming up, the stove should blow hot air, and both pipes going to the radiator should be evenly heated. This indicates that we did everything correctly and did not develop an air lock.
After warming up, turn off the engine, wait until it cools down and check the level. If necessary, fill the radiator to the top, and in the tank between the letters L and F.
Hyundai Getz GLS › Logbook › Changing antifreeze on Getz
Because
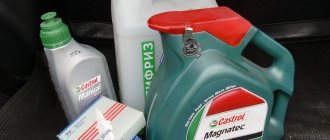
The car was purchased not so long ago and the fate of replacing the antifreeze was unknown, so I decided to replace the antifreeze in all cooling systems before winter. I found the instructions on the Internet from a user with the nickname “Koks” (thanks to him), corrected them a little and did almost everything according to them. Antifreeze was purchased Sintec Ultra, red. According to reviews, it's not bad at all.
1.
We remove the protection (if any), substitute a basin (no less than 5 liters) and use a wide slotted screwdriver to unscrew the radiator drain plug.
IMPORTANT:
Do not open the radiator cap yet. This is necessary so as not to remove the expansion tank. With this draining scheme, antifreeze will be drawn out of the expander by gravity during the draining process.
My antifreeze did not drain from the expander by gravity, so I pulled out the tube leading from the expander on the right side, designed to drain excess antifreeze, and simply blew into it forcefully until all the antifreeze left the expander.
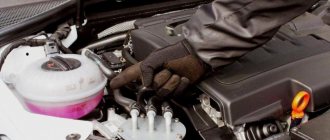
When, with the radiator cap closed, antifreeze has stopped draining from the radiator drain hole, carefully and smoothly open the radiator filler cap 1 click and lightly press it with your palm to the neck, preventing antifreeze from pouring out of the radiator intensively. When the radiator is completely empty, you can open and remove the cover completely.
2.
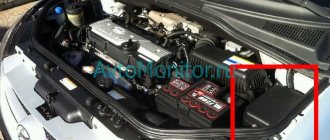
When the antifreeze from the radiator is completely drained, you can begin to drain the antifreeze from the engine block. For this:
On the right side of the engine you can see the pipe leading into the engine block, just below a small bundle of wires.
Carefully unclip the wires from the holders and move them to the side so that they do not interfere with us. For greater convenience, they can be disconnected, but it is better to leave everything as is, so as not to accidentally damage the connectors. So decide for yourself.
Under the wires we see the pipe itself with a metal spring clamp on it.
In order to remove the pipe, I had to ruin the metal scissors (fortunately, our box is full of them), and invent this design for compressing the clamp. But even with her I had to suffer a fair amount