We offer an article on how to change ball joints on a VAZ-2109 with your own hands with detailed instructions.
A ball joint is a part of a car that is an articulation unit between the suspension arm and the steering wheel hub. There are two of them in front-wheel drive cars produced by AvtoVAZ. One of the ball joints (ball joint) is located in the front left part of the car, the other is located on the right side, next to the wheel.
Like any car part, the ball joint needs to be replaced over time. But if we take into account, to put it mildly, the not very good quality of Russian roads, then special attention should be paid to this connection unit, which plays a big role in the safety of vehicle movement. Some car enthusiasts even include ball joints in the list of consumables along with air filters, brake pads and the like.
Choice
When choosing a new ball joint (BJ) for replacement, focus on several basic criteria.
| Selection criterion | Peculiarities |
| Manufacturer | Today there are a lot of manufacturers of ball joints. But not all of them produce truly high-quality parts. That’s why car owners have identified certain companies for themselves. For owners of the VAZ 2109, it is worth paying attention to the manufacturing company Trek. |
| Fakes | A loud, well-known name of the ball joint manufacturer is not a guarantee of quality. There are a lot of fakes on the market now. To find the original, visit the official websites of trusted companies, learn about the features of the original packaging, the nuances of protection that allow you to distinguish fakes |
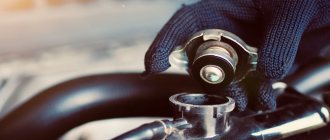
| Frame | There should be no signs of damage, wear or defects on the ball body. High-quality SHOs are always welded from two elements |
| Finger | If you notice that the ball joint pin is painted black, there is nothing good about it. A high-quality finger is also black, but it gets this color as a result of hardening the metal under high temperature. Also try rotating your finger. If you managed to do this without a knob, this is a low quality product. |
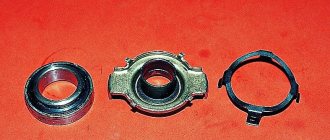
| Equipment | Responsible manufacturers, in addition to the SHO itself, complete the parts with nuts, bolts and boot |
| Anther | Make sure there is no damage, signs of wear, or other defects. |
| Bolts | The mounting bolts must be hardened. If the bolt is yellow, its quality will most likely be terrible. |
| screw | Must have a Teflon insert or cotter pin. Plus look into your finger - there should be a through hole |
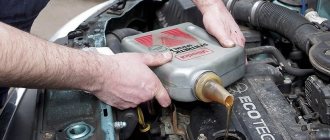
| Lubrication | Often the inside of the ball joint is lubricated at the factory, but practice shows that this amount of lubricant is not enough, so when replacing you must have a little more lubricant on hand |
Brand new set
Replacement of ball joints of the front suspension of VAZ 2108, 2109, 21099 cars
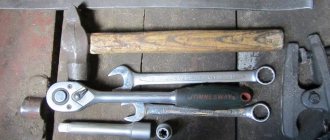
The service life of the front suspension ball joints of VAZ 2108, 2109, 21099 vehicles varies between 50-60 thousand kilometers. Necessary tools, accessories and spare parts
- Socket wrenches, ring wrenches or heads for “17” and “19”
— Ball joint remover (if you don’t have it, then use a mounting tool and a heavy hammer)
— Lubricant Litol-24 or ShRB-4
— New ball joint (or two, if the supports are replaced on both sides at once)
Preparatory work
— We jack up and hang both wheels of the car (in this case, the anti-roll bar does not tighten the suspension and it is easier to remove the ball joint)
— We clean the front suspension parts from contamination
The procedure for replacing ball joints of the front suspension of VAZ 2108, 2109, 21099 cars
— Unscrew the nut securing the ball joint to the suspension arm
We use a key or socket on “19”. Before unscrewing, you can lightly tap the nut and fill it with WD-40.
— Press the ball joint pin out of the hole in the suspension arm
We use a special device - a ball joint remover.
Required tools and materials for DIY replacement
Repairing a ball joint yourself is impossible without the tools listed below.
Table - Tools and materials required to replace the ball joint.
| Name | Note |
| Puller | It is not necessary to replace the ball, but it significantly simplifies the dismantling process |
| Spanner | “at 17”, “at 19” |
| Socket wrench | “at 17”, “at 19” |
| Heads | “at 17”, “at 19” |
| Heavy hammer | Required if there is no puller |
| Grease | ShRB-4, Litol-24 or graphite |
| Balloon wrench | For wheel removal and installation |
| Installation | Can be replaced with any strong rod, piece of pipe or crowbar |
| Metal brush and rags | For cleaning work surfaces |
| Penetrating lubricant | To facilitate the separation of rusted and stuck joints |
Signs of breakdown
If the ball joint is severely worn, the car itself will let you know about it. You just need to pay attention to the characteristic symptoms.
- When hitting bumps, a distinct thud begins to be heard. It can only come from the front of the left or right side of the car if the problem is in the ball joint.
- When the ball joints wear out, the force applied to the steering wheel for turning increases noticeably. At the same time, the ball begins to creak.
- Moving on a flat road, the car begins to behave unstably, it is pulled in one direction or another.
- When the ball joints on one of the wheels wear out, it is positioned incorrectly and has a certain tilt to the side. This can be easily seen by comparing the position of both wheels. If you often drive your VAZ 2109, you will notice how one wheel wears out faster than the other.
If signs of wear are detected, it is recommended to check their actual current condition and then replace it.
Possible faults
The ball joint is extremely sensitive to dirt getting into it. For protection, there is a boot on it that prevents dirt and sand from getting inside. Therefore, the majority of breakdowns occur due to the fault of a failed boot - it can crack and begin to let dirt through.
The following three methods will help you more accurately determine whether there are problems with ball joints.
- Raise the car on a jack. Then grab the wheel firmly and begin to wobble it. If you notice clearly visible play, this indicates the need to replace the ball joints.
- Drive the car into the inspection hole. From below, insert the pry bar into the gap between the ball joint and the suspension arm. If there is still play, it will be visible to the naked eye.
- Contact a car service center, where professional workers using special equipment (which is available in almost any car service center) will measure the degree of wear of the ball joints.
Why do you need to change ball joints?
Faulty mounts can significantly compromise driver safety and ride comfort. Indeed, in addition to knocking in the suspension, the presence of faults in the support can result in the loss of a wheel. And if this happens at high speed, then an accident cannot be avoided. Therefore, it is necessary to replace faulty ball joints as quickly as possible so as not to endanger the life and health of the driver.
Checking status
Before changing the ball joint, make sure that this element has actually failed and is the cause of the car's inappropriate behavior.
There are two ways to check - simple and more complex.
First way
To check you will need to do the following:
- When driving, listen for knocking noises coming from the front of the car. The malfunction of the ball joint becomes especially noticeable when the wheel falls into a hole;
- If, when hitting a hole, there is a dull impact from one of the front wheels, the ball joint should be changed;
- There is another way - put your foot on top of the front wheel, and then start pushing it towards the second front wheel. If you hear a dull thump during manipulation, it is better to check the condition of the ball in more detail using the second method.
Verification procedure
Second way
The second testing method is more accurate, but will require a pit and additional equipment.
- Place the car over the inspection hole.
- Turn on the handbrake and place chocks under the wheels for your own safety.
- Raise the front of the car with a jack. Make sure the car is supported securely as you will have to wobble the car.
- After lifting the wheels off the ground with a jack, begin testing.
- Place one hand on the top point of the wheel, and the other, respectively, on the bottom.
- Using gentle but sharp movements, loosen the wheel from top to bottom.
- If you don't hear any knocks, check the second wheel as well.
- If extraneous sounds appear, you need to ask a friend to place two fingers on the area where the suspension arm connects with the ball pin, as well as on the SHO body. If you feel with your fingers that the ball joint pin is moving inside the body, the ball joint has outlived its usefulness and requires replacement.
DIY diagnostics and replacement
If signs of tired support are heard and felt, it's time to get your hands dirty. To begin with, it is worth carrying out a simple diagnosis. The best way to understand that the support requires replacement is to insert a pry bar under the steering knuckle and rest it on the lower control arm. If you shake the mount, play will immediately be noticeable on the faulty support. You can simply hang the wheel and rock it, holding the top and bottom with your hands. Play may also appear, but it will not always indicate wear of the support.
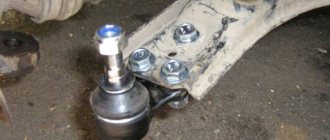
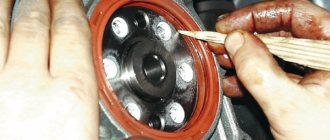
Replacing the ball will not take even half an hour if you have a pry bar, a puller for the support, a jack and a standard set of keys at hand. And, of course, a new support, which must be well lubricated with Litol 24 or Ciatim grease before installation. To do this, the boot is carefully removed from the body, lubricant is filled into it, after which it is installed in place, the support is ready for installation.
The technology for replacing a support on a nine is simple - the wheel is unscrewed, the car is raised on a jack, and a stand is installed. The bolts securing the pin and body are unscrewed, after which you can install the puller, as shown in the photo. Using a pry bar, they help the support separate from the lever, a new one is installed in its place, and everything is assembled in the reverse order. Now the knock in the front suspension will leave the car for the next 50-70 thousand km. Good luck and smooth roads!
Replacing a ball joint on a VAZ 2109
Step-by-step instructions for replacing the VAZ 2109 ball joint are located below.
- Place wheel chocks under the rear wheels.
- Secure the vehicle with the parking brake.
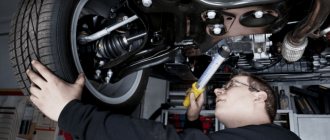
- Raise the side of the car with a jack on which repair work is planned.
- Remove the wheel.
- Apply penetrating lubricant to the ball fasteners.
- Unscrew the lower nut that secures the ball to the lever.
- Tighten the puller bolt with a wrench until the support pin leaves the lever.
- Unscrew the two fasteners that secure the support to the steering knuckle.
- Using a pry bar, press the lever down. This action will release the support. The ball must be removed as soon as it becomes available.
- Install the new ball joint into the seat.
- Reassemble everything in the reverse order of removal.
- Upon completion of repair work on the suspension, it is advisable, but not necessary, to check the wheel toe angle and camber on a stand.
- After driving the car for about 100 km, it is necessary to tighten the threaded connections and inspect the ball for lubricant leaks.
Also check out
- To avoid turning your finger, you need to clamp the lever with a mounting tool.
- Remove the ball joint fasteners to the upper arm.
- Remove the ball.
- Clean the place where the ball joint sits on the lever (there should be no damage or cracks on it).
- Remove the sealing washer from the old ball joint and install it on the new one.
- Before installing the ball joint, you need to lubricate it with ShRB-4 or Litol-24.
- Install the boot and washer.
- Screw the ball onto the lever. Place it in your fist and tighten the nut.
- Unscrew the nut from the lower ball joint. Usually this causes the finger to start scrolling. To avoid this, it is necessary to create a lateral tension at the connection between the fist and the finger, for which a mounting is inserted in the gap between the brake shield and the fist. If there is no result in the gap between the fist and the lower arm, you should install an adjustable pin, and then use it to fix the pin.