Incorrect adjustment of headlights causes inconvenience not only to the driver of the car, but also to other road users. In this case, the headlights shine either “in front of the nose” of the car, or illuminate the upper floors of surrounding buildings and trees. So what is the essence of adjusting headlights and can you do it yourself?
To better understand the process of adjusting headlights with your own hands, we have added detailed video instructions, which you can read at the end of this article.
We have divided this material into two parts: theoretical and practical, which includes a headlight adjustment diagram and instructions for its use.
On the glass of a car headlight lens there is a pattern of a certain shape, which is created by a corrugated notch that scatters and directs the light flux so that, on the one hand, the conditions of visibility and illumination of the road are improved, and on the other hand, with proper adjustment of the headlights, the likelihood of dazzling oncoming drivers is reduced.
- The pattern on the headlight glass “cuts” the light beam along the top edge so that it is directed slightly below the eye level of the driver of the oncoming car. At the same time, the diffuser increases the beam width, thereby providing the required lighting corridor.
- The optimal level of illumination of the right side of the road is achieved by “raising” the right part of the light beam (look at the headlight adjustment diagram a little lower).
Ways to adjust headlights
There are several basic ways to adjust your car's headlights:
- contacting a special service;
- self-adjustment using tuning equipment;
- manual adjustment.
Of course, the most logical and reasonable way is to contact the service. However, you will be asked for a certain amount for the work of specialists. If you don’t have the opportunity to pay yet, and the headlights need to be adjusted urgently, then it’s quite possible to carry out this process yourself.
When contacting the service, check if they have tuning devices. Most of those that offer inexpensive services use the bench method. It is almost the same as something you can do yourself without much effort or expense.
The second option is to purchase special equipment for adjusting headlights, which is used in high-quality car services. However, it is quite expensive, requires special skills and, most likely, will not pay for itself over the course of using the car. It is much easier and cheaper to resort to the third, manual, method of adjusting the headlights.
A special device will help to correctly adjust the direction of lighting, but its price is quite high
In order to adjust the headlights with your own hands and without special devices, you just need to make certain markings and then adjust the headlights according to the diagram. Unfortunately, the accuracy of this method is inferior to that of specialists. The safest thing to do is to carry out the initial setup yourself and contact a workshop at the first opportunity.
Frequently asked questions when adjusting lighting on a VAZ 2107
When setting up headlights on a VAZ 2107, many car owners have questions, the answers to which are given below.
What to do if the headlights are not adjustable?
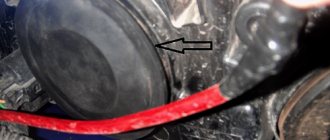
If the headlights of a VAZ 2107 are not adjustable, there are 3 possible reasons: - the hydraulic corrector is faulty; — the screws came off; — headlight parts are broken. The faulty corrector must be replaced with a new one or plugs must be installed instead of its cylinders. You can try to put the screws that have slipped off into place by tightening them all the way, and if their threads are broken, you can cut a new one and insert thicker screws. If parts inside the headlight are broken, it must be replaced.
What kind of liquid is inside the hydraulic corrector?
If the VAZ 2107 headlight range control does not work, most likely liquid has leaked from it. This device uses a glycol-based, low-freezing fluid similar in composition to antifreeze. If it has leaked, it’s worth changing the hydrocorrector of the VAZ 2107 headlights: the replacement will not take much time, and it costs about 300-500 rubles. Catalog number of the part is 2105-3718010-10.
Is it possible to install plugs instead of a hydraulic corrector?
If you are tired of regularly changing the headlight range control, you can remove it by replacing the cylinders with plugs. Before removing the VAZ 2107 headlight range control, you need to buy 2 universal plugs, catalog number 35.3711105. They fit all VAZ. The cost of plugs is up to 100 rubles per pair. It is not advisable to correct excessive headlight tilt by using homemade plugs or by placing nuts, pieces of pipe and other foreign objects on the rod of a faulty corrector. They can easily break the headlight, and replacing it will cost more than a new corrector.
Preparing to make adjustments
To achieve the correct position of the headlights, the adjustment procedure must be performed under certain conditions. Carry out the following preparatory work:
- Find a flat area without a slope adjacent to a vertical wall. One of the suitable options is a concreted entrance to the garage; the role of the setting template will be played by the gate.
- Remove unnecessary items from the trunk and interior of the car, leaving only the factory tool kit, first aid kit and spare tire. The goal is to ensure the curb weight of the vehicle specified in the operating instructions.
- Check the pressure in all tires and adjust them to normal if necessary.
- Clean the optical glass from dust and other contaminants that block the path of light flow. Do not use solvents, only ethyl alcohol-based glass cleaners.
- It is advisable to fill the fuel tank full, fill the washer tanks to the top and, if necessary, add antifreeze to the expansion tank.
A headlight adjustment diagram is drawn on the garage door or wall adjacent to the site. You will need a tape measure, a long straight bar and a marker. The color depends on the chosen background - for a white wall it is better to take a black felt-tip pen, for a dark gate - chalk. The diagram is drawn as follows:
- Drive the machine close to the wall. Using body parts or the car brand emblem as a guide, mark a point on the surface that coincides with the central (longitudinal) axis of the vehicle.
- Measure 7 m from the gate and drive the car to the specified distance. Draw a vertical line through the marked point.
- Take 4 measurements on the car: from both headlight bulbs to the ground and to the center of the car. On models equipped with separate high and low beam optics, the listed measurements are made for all four bulbs separately.
- Subtract 50 mm from the number indicating the distance to the ground. Set this size aside on the wall and draw a horizontal line.
- From the vertical axis, plot the distances to the centers of the lamps along the drawn line. Place marks in the form of segments. The scheme is ready.
Note. For separate optics, you need to draw 2 horizontal lines, and the second one must clearly correspond to the measurement from the high beam bulbs to the ground. Segments corresponding to the location of the outer lamps are laid out on it.
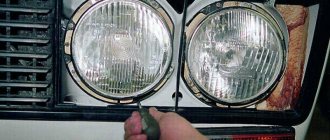
Before adjusting the position of the optics, it is also recommended to treat the adjustment screws with a penetrating aerosol lubricant such as WD-40, since the connection threads could become soured due to extremely rare rotation. As a rule, the adjusting screws are located on the rear plane of the headlight housing, facing into the engine compartment. The shape of the head is for a Phillips screwdriver, hexagon or special key.
We recommend: Table of signs and causes of automatic transmission malfunction
Headlight and optics device 2107
VAZ 2107 cars are equipped with block headlights that combine high and low beam (one double-filament H4 lamp), turn indicators/hazard warning lights (P21W lamp) and dimensions (T4W) in one housing.
The headlights on the VAZ 2107 are identical to those on the 2104 and 2105. Their catalog numbers are 2105-3711011-10 or 2105-3711011-11 for the left, and 2105-3711010-10 or 2105-3711010-11 for the right headlight.
Standard VAZ 2107 headlights from three manufacturers are available for mass sale:
- Kirzhach . An original headlight with a high-quality reflector and optics that produces a clear beam of light. The cost is about 2-3 thousand rubles.
- OSVAR . An original headlight, slightly different in the shape of the glass pattern, but also producing a high-quality beam of light. It costs about the same - 2-3 thousand rubles.
- Formula of light . The Chinese analogue of the original costs from 1,000 rubles, but is of dubious quality. Correctly setting up such a VAZ 2107 headlight is often difficult or impossible, so buying this optics is not recommended.
Alternative, tuning headlights are also on sale, including those with xenon lenses, LED, and others. Their quality requires additional checks, so you should use them at your own peril and risk. In addition, non-standard optics on a VAZ may raise questions among traffic police officers who know well what the original headlights of a Zhiguli should look like.
The design of the VAZ 2107 headlight is quite simple; its main diagram is shown below.
VAZ 2107 headlight diagram: 1 – horizontal adjustment screw, 2 – lamp cover, 3 – power connector, 4 – installation screw-plug or hydraulic corrector, 5 – vertical adjustment screw
What is the size of the headlights on the VAZ-2107
Regardless of the manufacturer, the headlights on the seven are identical and interchangeable, but it only costs to use the same lighting fixtures on both sides. The overall dimensions of the VAZ 2107 headlights are 358.5 mm wide, 196 mm high and 210 mm deep.
Dimensions of VAZ 2107 headlights
How does headlight glass affect adjustment?
Glasses for VAZ 2107 headlights are produced by the same companies that produce assembled modules. Catalog number for the right one is 2105-3711070 or 21056-3711070, for the left one – 2105-3711071 or 21056-3711071. Standard optics are made of glass, but there are also plastic analogues.
Glass has better transparency and focusing characteristics , lasts longer , but if damaged, it distorts the illumination spot more strongly. Plastic is more shock-resistant , but collects scratches , can become cloudy and is afraid of overheating from more powerful lamps.
It is better to use glass for standard halogen lamps, and plastic optics are suitable for cold light, for example, lensed xenon or LED modules (they cannot be installed in a glass corrugated headlight at all: only under plastic or polished glass).
Consequences of incorrect optics adjustment
The number of factors that can lead to an accident increases significantly at night. Therefore, properly functioning headlights are the main guarantee of driver safety. Automotive low beam optics should illuminate the road 30-40 meters ahead, while capturing a small part of the right shoulder. If this condition is not met, the headlights must be adjusted.
At night, properly adjusted headlights are the key to a safe trip.
The consequences that can result from incorrect adjustment of car optics can be extremely unpleasant.
- A strong downward tilt of the headlights leads to increased stress for the driver: he has to constantly strain his eyesight in order to peer more carefully into the poorly lit roadway.
- If the headlights are directed at a large upward angle, this can lead to dazzling of motorists traveling in the opposite direction and create an emergency situation on the road.
- Insufficient roadside lighting can also cause a traffic accident if the driver does not notice a person or obstacle on the edge of the road in time.
The first adjustment of car optics is always made at the manufacturer. Subsequent adjustments to the headlights are carried out by the owner himself as necessary. The motorist can turn to a car service center for help or do the work himself.
Fines
Please note that operating a vehicle with improperly adjusted headlights will result in a fine. The minimum penalty is 500 rubles. However, if driving with unadjusted headlights caused the oncoming driver to be blinded and led to an accident, then the amount increases to five thousand rubles. In addition, the violator is deprived of the right to drive a car for up to one and a half years. If this violation was committed again, the fine will be 25 thousand rubles. You can lose your driver's license for up to two years.
How to adjust fog lights on a VAZ 2110 car
Fog lights (FTL) help to move quite comfortably on dark roads, in conditions of thick fog or heavy rain. In order for fog lights to effectively illuminate the road, they must be adjusted correctly. On a VAZ 2110 car, we make adjustments as follows:
- set the headlight range control to the zero position;
- place the machine on a flat area, at a distance of 5 meters from the wall;
- on the wall we mark a horizontal line that is on the same level as the fog lights on the car;
- using a laser on the wall we mark the center of each headlight;
- since the lifting angle of the PTF should be 2 times less than that of the low beam, the second horizontal stripe is drawn 2-3 cm lower (the tilt angle of the VAZ 2110 headlights is 1.3%!), and not 5 or 6 cm ;
- We carry out the adjustment for each PTF, at this moment closing the second headlight so that its light does not interfere with the adjustment;
- We adjust each headlight first in the center, and then in height.
Just like when setting the low beam, it is important to set the same pressure in the tires; ideally, you can put a person behind the wheel to create the same load as would be when driving a car.
In the instructions that come with the headlights of the VAZ 2110, it is recommended to install the PTF at a distance of 30 centimeters from the ground; when adjusting the height of the light 5 meters from the wall, the strip for adjusting the fog lights runs at 29 cm.
The industry produces fog lights that are installed not only on BA3 2110-2112, but also on Lada Priora. The fog lights of Lada Granta, Kalina-2, Lada Largus, Datsun Mi-Do and On-Do have the same design; the main manufacturers of VAZ optics are AvtoSvet (Kirzhach), Bosch.
Preparatory work
In order for the main stage to be carried out efficiently, a number of important conditions must be met:
| Suspension condition | It is impossible to carry out precise adjustments on a car with unevenly sagging springs and other faults that affect the position of the body. Therefore, if you have problems with this part of the structure, then eliminate them first |
| Same tire pressure | Another very important factor that many people forget is that this will cause the car to not be positioned as it should be and once the tires are inflated, the position will change, ruining all your efforts at alignment. Therefore, make sure that the tire pressure meets the factory recommendations. |
| Structural load | Another important point is that the car must have a full tank, and there must be a weight of 70 kg in the driver’s seat; you can simply put a person there so as not to carry heavy objects |
| Serviceability of light elements | If you have installed light bulbs that are not provided for in the design, or there are cracks in the diffuser, then the adjustment is unlikely to help accurately set the position of the light flux; it is important that all elements are intact and meet all requirements |
Important! You should not install light bulbs of higher power, they will improve the quality of light insignificantly, but the car’s wiring system will be subject to increased loads, which can lead to breakdowns and even short circuits.
Rules for adjusting car headlights
Changing the direction of the axis of the light beam when adjusting the headlights is ensured by rotating the parabolic reflector, the focus of which is the light bulb, by moving it relative to the vertical and horizontal planes.
The correct position of the reflector is established by two vertical and horizontal adjustment screws, which are located on the rear surface of the headlight unit.
To correctly adjust the headlights, it is necessary to combine the light spot formed by the optics with the reference adjustment diagram, which is usually provided by the car manufacturer (in our case, the headlight adjustment diagram for Tavria and Slavuta cars).
Car headlight adjustment diagram
The headlights are adjusted in the following order:
- An unloaded car is placed on a flat horizontal platform at a distance of 5 meters from the screen. Any wall or low fence (up to one meter) is quite suitable as a screen.
- A vertical line “0” is applied to the screen, lying in the plane of symmetry of the machine (look at the adjustment diagram). To the left and right of it, two more symmetrical lines “L” and “R” are drawn, which should coincide with the centers of the left and right headlights.
- At a height corresponding to the distance of the centers of the headlights from the ground, a horizontal line “1” is applied, and a line “2” is applied 50 mm below it.
- When the preparation is complete, turn on the low beam headlights and begin adjusting.
- Closing each headlight in turn, check the location of the light border relative to the adjustment diagram printed on the screen. It should run along line “2”, with the inclined segments starting at points “E”.
- If this does not happen, then you should adjust the headlights using the horizontal and vertical adjustment screws.
Head light adjustment operations
It is better to carry out independent adjustment of headlights in a large enclosed space (in a long garage or hangar). Disassembly and adjustment operations are carried out under electric light. By turning off the light, you can evaluate the results of the adjustment in the dark. Please remember that the driver must be seated behind the wheel during the inspection so that their weight is taken into account. You need to unload the trunk, check the air pressure in the tires, and pump them up to normal.
The correct headlight diagram can be drawn on the wall of a garage or hangar.
The basis for drawing the diagram are the centers of incandescent lamps, which can be marked by approaching the wall one and a half to two meters. By drawing a horizontal line through the marked centers, measuring the central axis of the car from them, the rest of the markings can be easily constructed independently, in accordance with the dimensions of your car. The light is adjusted and checked from a distance of 7–8 meters.
For most domestic models, the luminous flux can be adjusted using adjusting screws located on the inside of the headlight housing. They are easy to find by lifting the hood of the car.
A few simple rules will help you adjust the light correctly:
- The machine is installed on a level area, with the wheels straight.
- Inspect the adjustment mechanism and prepare tools. Not all adjustment screws are equipped with a ribbed head. Some models will require a straight or Phillips screwdriver.
- Before adjusting, lubricate the adjusting screws with VD fluid and check them for rust and dried dirt.
- For combined beam headlights, adjustment begins with low beam.
- The left and right headlights are adjusted alternately. To avoid creating interference, cover the second headlight with opaque cardboard, plywood, or a cap.
- Adjust the headlights slowly, turning the screws small distances. Before starting work, you can turn the screw a quarter turn to understand the adjustment algorithm.
You can see in detail how to properly adjust the headlights of a foreign car in the video:
Source
Applying markings and adjusting headlights yourself
Most likely, you settled on the third method - manually adjusting the headlights. This is not surprising, because it does not require virtually any financial costs (buying chalk does not count). But remember that you must be extremely accurate and careful. Follow all of our step-by-step instructions to adjust your car's lights.
Please note that there are several types of headlights: these are low and high beam devices that are familiar to every car owner. If your car has separate headlights, then you will have to configure each one separately.
But some cars are equipped with block headlights that combine the functions of low and high beam lamps, as well as some other front lighting devices. It will be much easier to adjust such headlights, since you can only adjust the high beam lamp, and the low beam will adjust automatically.
Pay attention to the screws used to adjust the headlight
We recommend: 5 common signs of a faulty fuel pump (fuel pump)
In many headlight models, the screws have special handles that greatly simplify the tightening process. However, in some cases you will have to stock up on a Phillips head screwdriver.
Preparing for adjustment
In order for the results of lighting adjustment to be most accurate, it is necessary to recreate the standard driving situation of the car. This means that the tank should be approximately 50-75% full of fuel! Too full or, conversely, an empty tank can negatively affect the correct setting.
It is also necessary to check the tire pressure of the car. It must comply with the standard for this model. The numerical equivalent of the norm can be found in the instruction manual. Don't forget to put all the necessary items in their place: spare tire, jack and various spare parts that are usually found in the car. Under their weight, the car sags slightly. This may not be noticeable, but together all the parameters will affect the accuracy of the setting.
Moreover, when driving, there is at least one person in the cabin - the driver of the vehicle. Its weight also needs to be taken into account. If you are outside the car during setup, place a load with the same weight as you on the appropriate seat. And also do not forget to clean the headlights from external contaminants.
Optimal adjustment results can be achieved if it is carried out in the dark and in good weather.
Carrying out marking
Now you need to find the place where you will make the adjustment. Usually a special room with a white screen or stand is used for these purposes, but if you set it up yourself, an ordinary flat wall will do. Make sure it is perfectly perpendicular to the ground and not leaning in any direction. In addition, there must be a free space of at least 7 meters in front of the wall. There should be no holes, bumps or other irregularities on it. If you have found a suitable place, you can start marking.
Don’t forget to prepare a long construction ruler in advance (a regular school ruler will not work here) and chalk.
- To begin, you should drive close to the wall and place a point corresponding to the central axis of the car. Focus on the nameplate: it is usually installed strictly in the center.
- Draw a vertical line through this point perpendicular to the ground. Be sure to use a ruler: the straighter your centerline, the more accurate the adjustment. In the figure, this line of symmetry is indicated by the letter O.
- Now you need to drive away from the wall at a distance of 5 meters.
- Using a ruler, measure the distance from the low and high headlights to the central axis of the car (we still focus on the nameplate).
- Measure the distance from the ground to the low and high beam headlights. Write down the results of all measurements.
- Now we need to return to the wall. Draw a horizontal line corresponding to the height of the car's headlights. In the figure it is indicated by number 1.
- Now lower it 50–65 mm down (depending on the height of the car) and draw a second horizontal line. In the figure it is indicated by number 2.
- From the axis of symmetry, put 2 segments on the line equal to the distance from the center of the car to the headlights. Draw one vertical line through these points. In the figure they are indicated by the letters A and B.
- If you are adjusting both low and high beam headlights, then duplicate the diagram based on the corresponding numbers. To avoid getting confused by the lines, set up one type of headlight first, erase the markings, and then set up the second.
Mark the surface on which the test will be carried out in accordance with the diagram
This completes the marking. You can proceed directly to the adjustment.
Adjusting low and high beam headlights
As a rule, the adjustment screws used to adjust the headlights are located under the hood of the car. In this case, the right screw is usually responsible for the position of the headlight on the horizontal axis. With its help, the centers of light beams are adjusted. And the left screw adjusts the height of the border of the light flux.
- If your vehicle has headlight range control, place it in the one-passenger position.
- Cover one of the headlights with a thick, opaque cloth or dark tablet. It is necessary to ensure that the light from it does not interfere with the settings of the neighboring device.
- Turn on the low beam.
- Turn the right screw and adjust the headlight so that the centers of the light beams lie at the intersection of lines A and B with line 2. Now your headlights will shine directly in front of you.
- Now start adjusting the height of the flow: turn the right screw until the border of the light coincides with line 2. Now the lamps are not raised too high, which means they will not blind oncoming drivers.
- Remove the darkening from the adjacent headlight and make the appropriate adjustments for it as well.
- Adjust the high beam headlights in the same way. Remember that they are adjusted according to a different marking: the centers of the light beams are spaced wider, and the border is located lower.
- If there is a block headlight, the adjustment only needs to be done once.
Adjust the headlights so that the centers of the flow coincide with the center of the intersection of the lines, and the height corresponds to the bottom line
Please note that the headlights have special markings indicating percentages. When the car moves one meter away, the luminous flux limit should drop by the corresponding percentage. So if you wish, you can check your car after the tune-up.
Adjusting the fog lights
Properly setting your fog lights is no less important than setting your low beam or high beam headlights. After all, the quality of lighting in bad weather conditions depends on their work. The difference between PTFs is that they emit a low, wide beam of light that does not have a specific center. Due to this, the flow is not reflected in droplets of moisture during fog or rain, which ensures safe movement.
PTFs are located lower than the main headlights and have a more diffuse luminous flux
We recommend: How to properly bleed the brakes on a VAZ-2114?
Because the beams of light are more diffuse, you only need to adjust their height. The principle of marking and configuration is very similar to what we described earlier.
- You will need to drive about 7.5 meters away from the wall.
- Measure the distance from the ground to the fog lights.
- Draw a horizontal line on the wall at this level.
- Draw a second line 100 mm below.
- Tighten the screws of the dimmer so that the upper limit of the luminous flux coincides with the lower line.
The upper limit of the luminous flux should be 10 cm lower than the center of the fog lights
There is another adjustment method. For this you will need a laser level. Simply adjust it to match the height of your headlights, point the level at the wall, and use it to align your fixtures. This method is convenient because you don’t have to erase and draw new lines. It also reduces the risk of distortion.
After you have adjusted all the lights, drive for a while on lightly congested roads. Make sure the lighting is comfortable for you. If the centers are shifted or the height is not correct, repeat the adjustment process. If all your headlights are set correctly, then driving at night in any weather will become safer.
Under no circumstances should you neglect adjusting the headlights. A blinded driver of an oncoming car may lose control and create an accident in which you, too, will suffer. In addition, the correct luminous flux illuminates the road well, which means you will not miss bumps, holes and small animals running across. You can adjust the headlights yourself, because there is nothing complicated about it. But the accuracy of manual adjustment may not be sufficient, especially if you have a machine of non-standard height. Find a quality auto repair shop with professional adjustment equipment and periodically check how correctly your lighting fixtures are working.
Helpful information
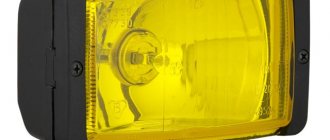
If the driver, after all the work on setting up the fog lights, does not like their glow, then perhaps the reason for this phenomenon lies in the design features of the optics. The color of the beam formed plays an important role in the illumination of the road. The most effective are fog lights that generate a light beam with a color that is in the long-wavelength part of the spectrum. It is this beam that ideally passes through the smallest drops of water. Red light works best in such conditions, but it is prohibited by the rules to be installed in front optics. Of the permitted colors, the most effective in conditions of fog or drizzling rain is the yellow ray.
In conclusion, it should be noted that adjusting the fog lights done by yourself will not be as accurate as it will be done by specialists in a car service center. The main distinguishing point is the presence of a special regoscope device, which is equipped with a measuring optical angle. However, the millimeter precision with which professionals adjust foglights is hardly worth the money and time spent.
Fog lights. For some, this is additional lighting, the need for which arises extremely rarely; for others, it is an opportunity to stand out and make the appearance of their car more attractive. However, in fact, PTFs are indispensable assistants in conditions of poor visibility during fog, rain or snowfall.
It is these small and unremarkable little helpers that save thousands of motorists every day, allowing them not to get lost in the fog on the road. In most cases, fog lights are installed at the front, although cars often have PTF in the rear. But you should not assume that the rear lights are the same as the front ones; these are a completely different type of fog lights, which allows you to make the car more visible in poor visibility conditions. But, unfortunately, simply having fog lights on a car is not enough; without proper configuration and adjustment, these PTFs will be of little use.
Today, dear friends, on FaraInfo I want to talk about how PTFs should be installed correctly, as well as how fog lights are adjusted.
What legislative documents stipulate the rules for installing and adjusting fog lights?
- traffic regulations;
- GOST 8769-75;
- As well as UNECE rules.
When is tuning necessary?
The quality of roads in the countries of the former USSR, especially in the periphery, leaves much to be desired. Long-term operation of the vehicle in such conditions leads to a violation of the factory settings of the external lighting elements. Gradually, the settings get lost, causing the head optics to direct beams of light in different directions - up or directly under the wheels of the car.
Consequences of incorrect headlight adjustment:
- the driver has to strain to see the unlit part of the road surface;
- if the reflectors of the optics are raised at a large angle, passengers of oncoming cars suffer from glare;
- insufficient illumination of the roadside can lead to an accident - the driver will not notice an obstacle or a person walking along the edge of the road in time.
Note. Electrically adjusting the lighting devices does not help the situation, since the servos only change the angle of the optics up and down, and both headlights at the same time. The task of such systems is to adjust the direction of light beams depending on the vehicle load.
When you need to adjust your headlights yourself:
- if you notice multidirectional light streams (for example, the left headlight shines down, the right one shines up);
- drivers of oncoming cars constantly signal about blinding by briefly turning on the high beams;
- after repair, replacement or removal of front optics units;
- after being hit by the front of a car as a result of an accident;
- when installing rims or tires of other sizes;
- after replacing the front “sagging” springs;
- during the installation of fog lights (FTL).
If you happen to change burnt out light bulbs, then you do not need to adjust the position of the light fixtures. Another thing is the installation of new types of elements (xenon, LED) instead of standard halogen bulbs. In this case, it is advisable to adjust the low beam headlights.
In what cases may it be necessary to adjust the headlights?
Factory adjustments of lighting equipment in a car can be disrupted by long driving on uneven roads. Numerous holes, potholes and cracks in the road surface lead to a gradual failure of the settings. As a result, the optics begin to direct light beams in the wrong direction.
Adjusting the headlights may also be necessary if:
- there was an accident, as a result of which the front part of the car was damaged;
- the motorist replaced the headlights or headlights on the vehicle;
- fog lights (FTL) were installed on the car;
- tires or wheels were replaced with analogues that differ in size;
- repairs have been made or the vehicle's suspension rigidity has been changed.
If oncoming motorists regularly flash high beam headlights at you, it means that the optics of your car are blinding them and require adjustment.
It is also worth adjusting the luminous flux if you yourself notice a deterioration in visibility while traveling in the dark. Finally, car owners are recommended to adjust the headlights before going for a technical inspection or traveling long distances.
Not only high beams, but also improperly adjusted low beam headlights can blind the driver.
Necessity
Headlights are given to cars for a reason, as they provide drivers with excellent visibility at night. This allows you not to lose control of the situation and make important decisions in a timely manner. Moreover, if the light beam is not configured as needed, this poses a serious danger to oncoming drivers. They can be blinded, which leads to an emergency situation.
At the same time, if the light is directly near the vehicle, no further than a few tens of meters, then the driver will not see the whole picture, and most of the road will be in darkness. And this will not allow, if an obstacle is detected at speed, to make a quick and correct decision.
For this reason, it is advisable for every car enthusiast to know how to adjust the headlights so that, if necessary, they can make the adjustment themselves. After all, no one knows when it might be needed.