Car headlights are the main source of light on the night road, so the quality of visibility at night depends on their condition. In addition, headlights are one of the exterior elements and give a special appearance to each car model.
During the operation of their car, many owners are faced not only with the problem of natural aging of headlights, but also with being forced to replace them if damaged. Therefore, the aspects discussed in this article will be useful to many car enthusiasts.
How to disassemble headlights with your own hands
To start work, you need to take care of dismantling the headlight, since all actions will be much more convenient and easier if you disconnect this device.
In order to remove headlights for different brands of cars, different methods are used. On some you will need to remove the bumper, on others you just need to unscrew a couple of bolts. You should study the repair instructions for the car you own, which clearly states how to properly dismantle the headlight. Remember that in any case, you need to disconnect the wire from the negative terminal on the battery to ensure the safety of all work. After removing the headlight, you should carefully inspect it for cracks, chips, and abrasions. If there are certain defects, you better take care of purchasing new glass in advance to replace it after disassembly.
Next, you need to place the headlight in the oven to melt the sealant located between the headlight body and the glass. The temperature should be chosen arbitrarily, and care must be taken to ensure that the glass does not melt. If the slightest signs of melting appear, you should turn off the oven and quickly remove the headlight from there. Next, you need to use a thin strip from a metal cutting saw to remove the material that glues the plastic and glass together. To do this, you can use any sharp object, such as a knife or nail.
If you are concerned about the headlight melting in the oven, you should try heating it using a hair dryer. After disconnecting the glass, you need to carefully remove the reflector, as well as other components that you will need. Carry out a thorough check of the serviceability of the contacts, as well as the lamps located inside the headlight
The headlight can be disassembled by carefully cutting off the upper part from the plastic groove in which the glass is installed, then, using a knife to pick up the glass, disassemble the headlight. During subsequent assembly of the headlight, use a transparent sealant or high-quality glue to secure the glass.
Also, you should not forget about compliance with safety precautions, since all actions you perform are carried out independently.
Stages of work
To seal the glass you will need:
- prepare the glue itself. To do this, dilute it and, if necessary, heat it to the melting temperature indicated on the package;
- clean, dry and degrease the surface;
- To seal a crack, heat its edges, where the mixture will be applied next. This is done due to the fact that many types of glue can only be glued to hot (warm) surfaces;
- lubricate the surface and glue it without any effort;
- fix the crack on the tail light. For this purpose, fiberglass and wire are suitable, which must be secured with a frame on the damaged surface to prevent the development of cracks;
- allow the composition to dry (drying time is indicated on the packaging), then remove excess material.
Gluing glass on a car headlight
Alternative ways to glue a car headlight are as follows:
- If you want to glue imperfections on car glass the old fashioned way, you don’t have to buy glue, but get by using a soldering iron. It is suitable if your headlight is made of plastic, as it can melt its edges and glue them back together without the use of foreign substances.
- You can also glue a damaged tail light using plastic tablets. You just need to heat one tablet and then spread it on the damaged glass. After hardening, the surface is treated with a fine-grained abrasive (sandpaper, abrasive clay) to eliminate excess material.
- Sealant can seal cracks of different sizes well. The algorithm of actions here is similar to working with glue. You can choose a “native” sealant (the one used by the manufacturer of your car model) or buy a high-quality analogue. The main rule is to strictly follow the instructions, especially in terms of diluting and heating the composition.
- You can glue the cracks with a special cloth. It is laid at the crack site and filled with acetone. Acetone begins to dissolve the components of the fabric, transforming them into an adhesive composition. Car enthusiasts note the fast drying time of this mixture - approximately 1-1.5 hours.
Using plastic tablets, we seal the taillight.
If none of the above methods suits you, or you have not yet purchased a sealant, you can temporarily glue the surface with tape. Pre-treat the surface as you would with glue and glue the crack. Scotch tape, depending on the quality of the work and the material itself, can glue a crack for a period of from several days to several months.
How to open and disassemble a headlight
How to restore a headlight reflector
Changing the “right-hand drive” low beam beam by disassembling the headlight... This is what the headlight looked like before preparation - the beam was adjusted with pieces of aluminum tape.
How to find the right places on the reflector? We attach a piece of paper ~1×1cm to a thin stick and begin to move it along the reflector, carefully observing the beam. Quite quickly we find the necessary sectors and temporarily seal them with paper tape. As soon as all the “unnecessary” places are found and the beam becomes satisfactory, remove the tape and use a knife to remove the chrome in these places. There were thoughts not to spoil the reflector but to seal it or paint it with something, for example, gray heat-resistant paint for mufflers - but I decided not to risk it .
Description of lenses
The lens is the most favorable component for installing a gas discharge lamp. The internal device allows you to accurately collect the light flux and direct it to the right place, providing a clear cut-off line and a clearly defined daw.
Lenses are divided into:
- xenon;
- bi-xenon
The bi-xenon version comes with a special built-in curtain that covers the light flux in low beams and opens completely in high beams. Thus, one lens is sufficient for installation in a headlight with one module. Classic components are responsible only for high or low beam and are not equipped with a curtain.
How to disassemble a headlight, rules for performing the procedure
Making eyelashes for the headlights
No matter what car the headlight on is broken (on Kalina, on Priora or another vehicle), the rules for disassembling the mentioned device look like this:
- The sealing compound should be heated evenly, relative to the entire perimeter of the lighting fixture. At the same time, the maximum heating temperature of the sealant is 3000 degrees. Otherwise, the device may be damaged.
- Avoid applying significant force when working with a car light. This is due to the comparative fragility of the material from which the device is made.
- When removing the headlight, you must turn off the power supply to the vehicle. Such actions will prevent a short circuit.
At the same time, you should be guided by the information contained in the instructions for the vehicle.
Proper cleaning and assembly
- disassembled headlight from dust and dirt. Glass and reflectors must not be washed with aggressive detergents or hot water. The best solution is a solution of laundry soap and a soft, lint-free rag. Don't rub!
- Then the washed components should be rinsed generously with distilled water and left to dry naturally.
- Assembly is carried out using clean cotton gloves. A special sealant for headlights is applied to the seam (at this stage you need to work carefully and avoid breaking the lines of the composition).
- The glass is connected to the body and dried at room temperature for 24 hours.
- Then you can check the tightness. To do this, the headlight is immersed with glass in water and held for several minutes. In this case, water should not get into the holes on the back wall.
How to get rid of problems if headlights sweat: video about cleaning ventilation ducts
You can eliminate fogging of the head optics yourself. The main thing is to take your time and choose the right materials. Prevention is even more important. You should periodically check that the breathers are clogged. Try not to drive at high speed through puddles with your headlights on, and let the headlights cool down before visiting a car wash. Then the headlights will fog up less often and you won’t have to remove them for drying.
Disassembling the headlight yourself
So, let’s disassemble the headlight with our own hands. As material support for this process, it is necessary to prepare:
- Screwdriver Set.
- Industrial or powerful household hair dryer.
- Set of wrenches (socket and open-end).
- Assembly knife for removing sealant.
- Sealant.
The workplace used to disassemble a car headlight must be free of dirt (dust, debris, moisture) and have sufficiently good lighting.
The process of disassembling the headlights installed in front and behind the car is somewhat different, but there are several general, mandatory rules:
- the sealant is heated with a hairdryer evenly along the entire perimeter of the headlight;
- according to the recommendations of experts, the heating temperature of the sealant should not exceed 3000C, since exceeding this limit can cause thermal damage not only to the glass, but also to the headlight housing;
- Experts consider the optimal distance between the hair dryer nozzle and the headlight to be 20 millimeters;
- The plastic used in most modern car headlights is a rather fragile material, so when working with it it is necessary to avoid using significant force;
- each standard headlight has three mounting points;
- before dismantling the headlight (to prevent a short circuit in the circuit), it is necessary to disconnect the battery terminal;
- during the process of dismantling (installing) headlights, periodically check with the information located in the “Working with the electrical system” section of the operating and repair instructions for your car;
https://youtube.com/watch?v=Y5WEN9DeXTQ
link to product: New company group in VK: .
Instructions for disassembling headlights
In addition to the tools and materials listed above, in the process of dismantling and disassembling the headlight, you will need rags and spare structural elements of the headlight, which are supposed to be replaced (lamps, reflectors, light filters, etc.).
The following is a list of dismantling work, which looks like this:
dismantling the front fender liner, radiator bracket hole cover, front bumper trim, upper bumper reinforcement (if necessary); dismantling the headlight unit; heating the sealant using an industrial (household) hair dryer to the consistency of soft plasticine (heating speed is directly proportional to the power of the device); carefully pulling back the latches and separating the glass and the car headlight housing.
The headlight has been disassembled and is ready for repair work and replacement of faulty elements. Assembling the headlight and installing it in place is done in the reverse order.
Description of automotive optics
Car headlights vary in appearance, size and type. However, the parts meet stringent requirements for certain characteristics. For example, for right-hand traffic, the optics must correctly collect the beam of light, have a clear limitation without flare horizontally and a clearly defined “daw” towards the side of the road. This luminous flux allows you not to dazzle oncoming drivers and illuminate the side of the road on the right.
You can form and direct the light beam:
- headlight reflector;
- lens;
- outer glass.
The reflector is most often used with halogen lamps, but there are exceptions with xenon. The lens is used to form the beam for all types of lamps. It can be halogen, xenon or even LED.
Glass with special guide ribs on the inside can be seen on old foreign cars produced before 1990. The most striking example is considered to be a lantern from an old Zhiguli. For example, on the glass of a VAZ 2107, stripes are clearly visible, which are responsible for collecting the light flux.
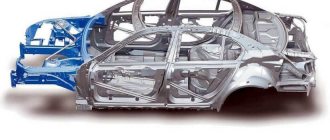
Structurally, any headlight consists of:
- housings;
- glass;
- reflector;
- lamps;
- wires and plugs.
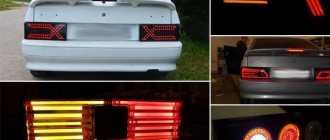
Removing the taillight
The wide design diversity of modern cars predetermined the equipping of them with taillights of equally varied designs and shapes. This factor also determined the lack of universal instructions for their dismantling and subsequent disassembly. Therefore, we will present the procedure for carrying out the corresponding manipulations using the example of disassembling the rear headlight of a Lada Granta car, which includes the following operations:
removing the safety brackets (4 pieces) and removing the edge along the contour of the optical device covering the joint between the headlight housing and the glass, sealed with sealant; heating the sealant using hot air with some caution (too hot air can damage the integrity of the plastic headlight housing); remove the softened sealant using a mounting (stationery) knife; By inserting a screwdriver into the joint between the body and the glass, we separate them from each other.
Once again, we note the necessity of careful monitoring of the connections being made, since violations in this matter are fraught with serious consequences - from malfunctions of individual elements of the electrical supply system, to failure of entire sections of it, and sometimes fires as a result of short circuits in the circuit.
Summarizing the above, we note that this instructional article will help you not only avoid unplanned material costs for replacing failed elements of optical devices, but will also allow you to change the design and functionality of your car’s headlights.
How to disassemble a headlight - OTVO
Well, I’ve finally decided what to do with myself on my day off. For six months now, the left headlight, broken (the plastic is cracked), has been lying around. Since I have some ideas for introducing beautiful and, most importantly, not like everyone else, lighting inside, then I decided to take it apart after all. The head is afraid, the hands are doing) I’ll say right away that disassembling the headlight alone is really hemorrhagic, they don’t lie about it on the forums)) Photo report under the cut.
So, let's start with: I needed: 1. Headlight 2. 3 flat screwdrivers3. Wife's hairdryer (if he finds out, he'll kill). The construction really strangled the toad to buy.4. space for analysis and normal lighting.
1. Decide where to start disassembling the headlight
I twirled it in my hands and noticed that except for the sealant, everything is held on by latches. IMPORTANT - where the turn signal is located, there are 2 screws, a larger one and a smaller one - unscrew them immediately)2. I turned on the hair dryer and brought it to these latches, moving it slightly back and forth for more uniform heating. I’ll tell you right away, to find out when you can start working, you need to find a place (mine is right next to the latches) where the factory sealant protrudes above the headlight , warm it up by poking it with a screwdriver until the sealant is viscous and soft
This way, it becomes clear how long it takes for the sealant to heat up (everyone’s hair dryer is different, some even have construction hair dryers). When the sealant next to the latches heats up, you need to pry it with a screwdriver and pull the latch out of the groove.
IMPORTANT - you need to move the latches very carefully, because the plastic is not very durable and they can simply be broken or torn out. I decided that it is easier to disassemble the headlight from the end where the upper headlight mount is located.3. We warm up (drive) and slowly use a couple of screwdrivers to pick up and push apart the body. This is where I realized that an assistant would not hurt me...4
Slowly I moved the side a little closer to the edge where the farthest bottom and top are located. Then I warmed the edge and separated it.
Yes, the sealant looks creepy... Just one thing - I specially heated the larger part of the top and bottom from the edge, so that when “tearing off” I wouldn’t break anything.5. Then everything is much simpler. We hook a screwdriver to the joint, heat it nearby and slowly move the body away.
I walked from both sides to the edge where the turn signal is located. All…
6. After everything, the sealant remains on the screwdrivers and around the edges.
It's better not to touch him. when assembling the headlight back, you will also just need to heat it up, pull the headlight tightly and wait until everything cools down.
I am aware that this has already been written in many places, but I still wanted to do it myself without extra costs, and I will be very glad if I help someone with my report.
Removing the taillight
The wide design diversity of modern cars predetermined the equipping of them with taillights of equally varied designs and shapes. This factor also determined the lack of universal instructions for their dismantling and subsequent disassembly. Therefore, we will present the procedure for carrying out the corresponding manipulations using the example of disassembling the rear headlight of a Lada Granta car, which includes the following operations:
removing the safety brackets (4 pieces) and removing the edge along the contour of the optical device covering the joint between the headlight housing and the glass, sealed with sealant; heating the sealant using hot air with some caution (too hot air can damage the integrity of the plastic headlight housing); remove the softened sealant using a mounting (stationery) knife; By inserting a screwdriver into the joint between the body and the glass, we separate them from each other.
Once again, we note the necessity of careful monitoring of the connections being made, since violations in this matter are fraught with serious consequences - from malfunctions of individual elements of the electrical supply system, to failure of entire sections of it, and sometimes fires as a result of short circuits in the circuit.
Summarizing the above, we note that this instructional article will help you not only avoid unplanned material costs for replacing failed elements of optical devices, but will also allow you to change the design and functionality of your car’s headlights.