Video on the topic of where the Priora stove valve is - click. DIY car repair manuals plus car maintenance videos.
How to repair a car yourself at home. We will help you with repairs and repair the car yourself. We know how to restore a car with minimal investment. I have attached video instructions.
Category: DIY repairs
Laughter in the topic: “Dear Grandfather Frost - this letter is not spam, but a real opportunity to earn money...”
Published by Admin: at the request of Quint
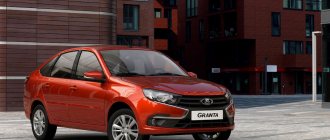
Feedback from a car owner: First of all, the control is clear and pronounced. An appearance that is superior to later models of the third series. Economy on the highway. Personally, on 16 wheels it took me 5.5-6 liters at an average speed of 110. Ha 18- s consumption has increased))
You seem to have found what you were looking for, where the valve for the Priora stove is located - you are welcome. We have posted a video course on how to repair a car yourself. How to repair a car yourself at home. We will help you with repairs and repair the car yourself. We know how to restore a car with minimal investment. I have attached video instructions.
Category: Car repair video
Laughter in the subject: “Oh, that’s it!” - a little spell that a woman casts whenever you have proven to her that she is wrong.
Published by Admin: at the request of Januariy
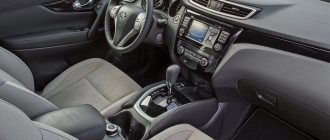
Car owner's opinion: External and internal design, comfort, handling.
If your car's heater fails on the road, it doesn't bode well. Neither the car nor the driver. Especially if it’s far from home, and it’s thirty degrees below zero outside. Any driver can find himself in such a situation, including the owner of a Lada Priora. The heating system in this car is implemented quite successfully, but it has one extremely weak point: the gearmotor. The reliability of this device leaves much to be desired, and it can become a source of headaches for the driver. However, a broken gear motor can be replaced with your own hands. Let's figure out how this is done.
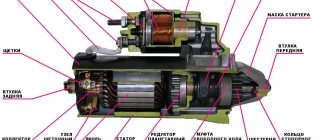
Purpose of the heating gear motor on the Lada Priora
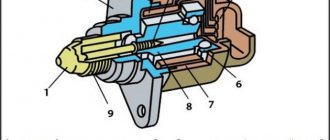
A gearmotor is a device consisting of several plastic gears driven by a small electric motor. The main task of the gearmotor is to open and close the heater damper depending on the position of the regulator on the dashboard.
Geared motors on Priora are made only in plastic, non-separable housings
The plastic from which the gears are made deteriorates quite quickly. After which the driver is forced to change the gearbox. This device cannot be repaired, because, firstly, it is not possible to find spare parts for it, and secondly, it is not so easy to open the plastic housing of the gearbox without breaking it. So there is only one option left: replacement.
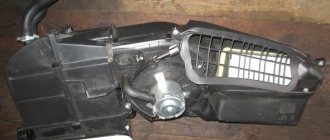
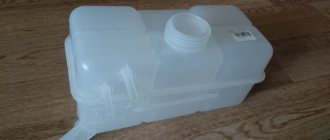
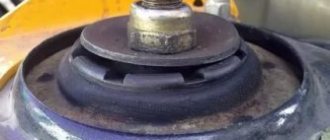
Gearmotor location
The gearmotor on the Lada Priora is located near the expansion tank, under the windshield.
The gearmotor on the Priora is located under the windshield near the expansion tank
It is built into a niche on the wall of the engine compartment and covered with a thick layer of sound-insulating material. This material will have to be removed, since otherwise it will not be possible to get to the gearmotor.
labavto.com
Recommendations are available to Jofo users, please introduce yourself:. Sequence of actions when replacing the heater radiator of a VAZ heater. Troubleshooting and repair of the electrical system of the heater of a VAZ heater. 3 more photos. Heater stove and interior ventilation on a Lada Priora car.
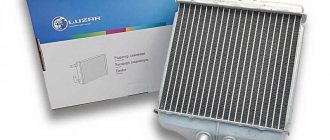
As you know, in the winter season, the operation of a car’s heater largely determines driving comfort. But sometimes it happens that the device simply refuses to work, and this problem especially often occurs in domestic cars. Read more about how to replace the heater radiator on a Lada Priora car below.
Priora heater
Copying of material is permitted only with a link to the source. There is only one reason - the stove does not heat well. The LADA Priora interior heating system performs a number of functions: it heats, cools, and ventilates the interior; in this article we will look at the heater design separately. Key words: heater control unit Priors heater fan Priors air ducts Priors interior temperature sensor Priors heater damper gear motor Priors heater Priors heater radiator Priors Priora heater resistor.
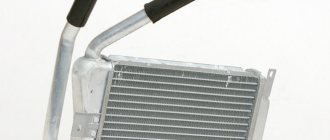
Hello, in this article you will learn how to replace the heater valve on a VAZ. The first sign of this is a puddle of antifreeze under the front passenger's rug. Of course, a puddle can still form from a leak in the heater radiator; here you need to look at what exactly is leaking. The best way to fix a leaking heater tap is to replace it with a new one. The heater valve is also removed when replacing the heater radiator. The average price of a heater valve in the automotive market is about rubles, in some places it may even be less.
Signs and causes of gear motor failure
There are two signs of a gearmotor failure on a Priora. Here they are:
- when starting the heater, a loud grinding or knocking noise is heard from under the dashboard, which becomes louder as the heating fan speed increases;
- inability to adjust the oven temperature. The heater blows either only hot air or only cold air. The position of the temperature regulator on the dashboard does not matter in this case.
All of the above happens for very specific reasons. Here are the most common of them:
- one or more teeth on one of the gear motor gears has broken. The tooth fragments rotate together with the damaged gear and hit the plastic housing of the gearbox from the inside. As a result, a characteristic dull rattle or knock occurs, which is clearly audible in the cabin;
Car heating system malfunctions
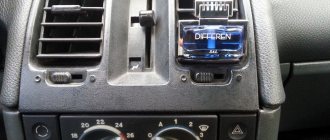
In a Lada Priora car, the heater regulator does not work due to a malfunction of the multi-position switch or a defect in the blower fan. When troubleshooting this problem, when the Priora stove fan does not work, you should look at the fuse box, which is the main source of trouble for the operation of the ventilation device. Many defects in a car's climate system are directly related to the operation of the vehicle's cooling system.
If the fan device is in good working order, but the stove on the Priora does not heat well, then the defect should be looked for by a sequential method of cutting off the tested elements. So, the stove on the Priora is not working well and the interior is quite cool:
First stage : with the engine brought to the optimal temperature, we check the 2 pipes connected to the heater for temperature values. If both products are hot, then there is no circulation of air masses, and if one pipe is hot and the other is cold, then this indicates a lack of circulation of the aqueous solution in the system. We carry out diagnostics of the heater tap in order to deal with the cooling system solution (water, antifreeze).
Replacing the heating gear motor on a Lada Priora
First of all, it should be said that replacing the gearmotor on a Priora with and without air conditioning is done in the same way, since the gearbox is located quite far from this device. It should also be noted that today there are several known ways to remove the gearmotor from a Priora. One of them involves removing only the trapezoid along with the wipers and expansion tank, the second allows you to get by with removing only the tank. But to use these methods, the driver must have extensive experience in self-repair, otherwise problems are inevitable. Therefore, the third method will be discussed below, with the complete removal of all necessary parts. Yes, it will take more time from the car owner, but it is almost impossible to break anything. Now it's time to decide on the tools. Here's what we need:
- new gear motor for Priora;
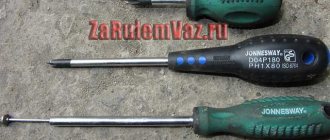
- 2 screwdrivers - flat and Phillips.
Sequence of work
First you will need to perform a few simple preparatory steps. It is necessary to disconnect the throttle valve assembly and move it slightly to the side.
To get to the Priora gearbox, the sound insulation will have to be removed
Then use a Phillips screwdriver to unscrew the screws holding the sound-insulating material.
- There is a wiring harness next to the gearmotor. It is mounted on plastic holders that open manually. The tourniquet is pulled aside.
The wiring harness is mounted on two plastic holders that can be opened manually
The heater is held on by three screws. It only needs to be moved a few centimeters
You need very long fingers to reach the block on the damper sensor.
To open the spring lock, you will have to move it down a couple of centimeters
The gearmotor is held on by only three self-tapping screws, unscrewed with a Phillips screwdriver
Changing the cabin filter
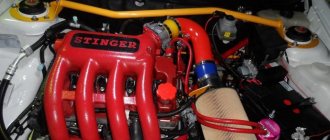
There are Lada Priora configurations that include air conditioning. It could be HALLA or Panasonic. Owners of such cars are also concerned about replacing the stove on a Priora with air conditioning. But first, it’s worth understanding the air conditioners themselves, which differ not only in the country of manufacture.
HALLA is made in Korea and Panasonic is made in Taiwan. You can find out which air conditioner is installed in your car by visual inspection.
Attention should be paid to the button, which is located in the center of the air conditioner control panel. Panasonic system has a button to turn on, but HALLA does not have such a button
Car owners should regularly change the filter to ensure that the cabin is free of foreign odors from the street and the air is clean. Before you find out how to change the heater filter on a Priora, you need to know the type of system that is installed in your vehicle. After all, each cooling system model has different filter elements.
The filter changes differently depending on whether the car has air conditioning or not. If the car is not equipped with an air conditioning mechanism, then proceed as follows:
- Open the hood.
- We dismantle the grill installed under the glass on the left. There are screws on it, closed with plugs. They need to be unscrewed. After completing this step, access to the filter will be freed.
- The cleaning component cover is held in place by four bolts that must be removed.
- We remove the cover, which will allow us to get the filter. We clean the vacated area from possible contamination and debris.
- We install a new filter element and assemble the car in the reverse order.
If the car has a cooling mechanism, the actions will be slightly different.
- Open the hood and find the required part.
- We bend the upholstery material.
- If Panasonic is installed, then the latch on the filter element must be unscrewed. With a Hull cooler, you will need to press the latch, which will open the lid.
- We take out a filter that has already served its purpose and in its place we put a new one, which will need to be twisted using the slots in the housing.
- We install the cover and all parts in their place.
Repairing the Priora stove may be associated with a number of problems that initially need to be correctly diagnosed. We will write several more articles on this topic and consider the main problems in detail. In any case, you need to know how to disassemble the stove on a Priora, because this is the basis.
Important points
There are a couple of nuances, without mentioning which this article would be incomplete:
- The old gearbox should be removed very carefully. A long shank sticks out of it. If you remove the gearbox at an angle, you can damage the edge of the hole for the shank. If this happens, installing a new gearbox will not be so easy. Therefore, advice: when removing the gearbox, it should be pulled in a plane parallel to the floor;
- When buying a new gearbox at a car dealership, you should only buy the original VAZ one. Yes, its quality leaves much to be desired. But this is still better than buying a fake gearmotor, which the spare parts market is literally flooded with now. You can spot a fake by price. A normal gearmotor on a Priora costs 700 rubles and more. And a fake rarely costs more than 300 rubles.
So, replacing a heating gear motor is not a very difficult task and even a novice driver can do it. If a person has held a screwdriver in his hands at least once, he can handle it. All you need to do is follow the above recommendations exactly.
How to replace the heater fan on a VAZ 2170-VAZ 2172?
When replacing the fan, if the cabin filter has not been replaced for a long time, then it can be removed and replaced with a new one, it doesn’t cost a lot of money in car dealerships, but just so you don’t have to get into the car (Still, to change the heater fan, you need to go to that place choose where the filter is installed), you can immediately change it if it is too dirty and thereby drive in the near future with clean air in the car!
Replacing the heater motor on a Lada Priora with Panasonic air conditioning
Replacement
heater motor on a Lada
Priora
with
air conditioning
.
Replacing a Priora stove motor with Panasonic air conditioning
Maybe this is a replacement
and not faithful, but fast!
1) There are two ways by which you can remove the stove fan, we will tell you both, but before we begin to describe them, let’s talk about them briefly, and which one you will use during the work is up to you to decide, the first method is to remove throttle assembly, in removing the front panel upholstery and in removing the cooling expansion tank, but the second method does not imply this; when choosing the second method, you will only need to unscrew the screws and nuts securing the fan and then remove it from the car.
It would seem that the second method is much more convenient and faster, in fact it is, it is done much faster but is very inconvenient, because in this case you will have to get to hard-to-reach nuts, as well as hard-to-reach screws, etc. etc., while when carrying out the second method, you will no longer need to crawl to hard-to-reach places, all the nuts and screws will be before your eyes, but you will still spend more time, because you will remove other parts that are in the first way and you won’t need to touch it!
2) After you have decided and made your choice, go to work; at the beginning of the operation, in any case, you will need to remove the windshield lining (How to remove the lining, read the article: “Replacing the cabin filter on a Lada Priore”), then the block Disconnect the wires and the connector from each other (They are indicated by a red arrow) and remove the wire block from the additional resistor (It is connected to it, this block is indicated in both photographs by a blue arrow), these are all general operations and will need to be carried out in any case.
3) Read this point only if you are carrying out the second method, but if you don’t want to remove anything unnecessary and if you are not going to do the work using the second method, then in this case go straight to point 4, so about the second method, if it First, you will need to remove the throttle assembly (How to do this, read the article: “Replacing the throttle assembly on a car”), but only when you remove it, do not disconnect any hoses, but simply unscrew the nuts that secure the assembly to the receiver and then remove it, and as soon as the assembly is removed, proceed to removing the dashboard upholstery, to do this, use a screwdriver to loosen the screw that secures the steam removal hose to the cooling expansion tank (This is the tank into which coolant needs to be poured, you will immediately find it), loosening the screw, disconnect the hose from the tank and lead it through the hole in the upholstery (see photo 1), then lift the expansion tank and without disconnecting any other hoses from it, carefully move it, otherwise it will interfere with removing the upholstery, then again, use a screwdriver to unscrew it but this once the lower screw, which secures the upholstery (see. photo 2) and the left part of the upholstery (look as the car is moving) remove from the car, then find three clamps that are attached to the clamps and secure the vacuum brake booster hose so that it does not dangle, and so, overcoming the force of the clamps, remove them from the brackets ( see photo 3), immediately after which, using a socket wrench or wrench, unscrew the nut that secures the steering rack screen in the upper part (see photo 4), as soon as the nut is unscrewed, pull this metal screen and remove it from the top the studs and finally the right (last part) of the upholstery (see photo 5) from the car and bend up the end of the brake pedal bracket (see photo 6).