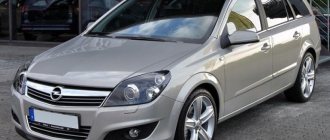
How to reset insp on Opel Astra h
How to erase the InSP inscription on the speedometer
What if you don’t have it at hand or don’t want to just go to the dealer and waste money and time? If there are 5 numbers, for example, then add 0 in front of them to get
For the model OPEL standard; ZAFIRA; Close the doors. Turn off the ignition. After about 10 seconds the display...
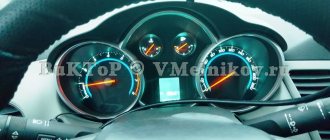
Reading error codes If the car icon with a key lights up on the instrument panel, this means that errors have occurred in the operation of the car and they need to be read in order to determine the malfunction. If there are 5 numbers, for example, then add 0 in front of them to get Next, by pressing the BC button we scroll through the test mode screens.
Turn off the ignition and remove the key from the ignition switch; press and hold the daily mileage reset button; the display on the instrument panel will show the trip meter and the daily mileage counter. Insert the key and turn on the ignition, while holding down the daily mileage button; the display will show a flashing indication “InSP — — -“ , then after about how to remove insp on an Opel Zafira seconds the display will show the maximum mileage “InSP 35 km” for a gasoline engine or “InSP 50 km” for a diesel engine with ECO Service-Flex. Road to home To enable the “Road to home” function, you must do the following: If there are 5 numbers, for example, then add 0 in front of them to make
When pressing the pedals, it is important that the limit switches work, so we press the brake with medium force, and press the gas “to the floor” until it clicks. The first 4 digits show the error code, the next two indicate its meaning.
Errors are shown automatically one after another, the end of the list is indicated by zeros as in the photo. If only zeros are shown, this indicates the absence of errors; the explanation of all the rest is given below.
If there are 5 numbers, for example, then add 0 in front of them to get Next - as usual, 5. To see the remaining mileage, you need to press the mileage counter button with the ignition off - the daily mileage will be displayed, then press and hold the same button again for more than 2 seconds.
6. Features and differences of diagnostics ASTRA -F, -G, -H, -J
Important diagnostic notes:
- On 1.6 and 1.8 liter G generation engines, the module consists of two separate blocks - a control unit and a device for storing firmware. Separate replacement of components is allowed. During scanning, a separate connection to each module occurs.
- There is a possibility of diagnostics through the closure of a pair of contacts. For the ALDL block (10-pin), contact “A” is alternately connected to the others. Various on-board computers are interrogated. In OBD2 blocks, it is enough to close contacts 5 and 6 and turn on the ignition. If there are errors, the Check Engine light will flash.
- New generations of cars are equipped with a CAN bus. At the same time, in the Opel Astra the channels are divided into three: HS CAN - main modules (engine, automatic transmission); MS CAN - medium-speed circuit for switching climate control, multimedia; LS CAN - low-speed, for controlling power windows, locks and other critical components.
The communication of the three buses and their coordination occurs through the CIM and DIS gateways. Otherwise, the diagnostic process for different generations is almost the same.
Video on the topic:
Self-diagnosis of Opel Astra F/ Vectra A:
How to diagnose OPEL ASTRA G:
Op-Com Opel Error Diagnosis:
Firmware for the new Opel Astra J key:
Diagnostics OPEL Astra H:
How to reset insp Opel Astra h
The dashboard display will display the distance traveled and the daily mileage. After 3 seconds, the InSP value will appear on the screen. Without removing your finger from the reset button, press the brake pedal. While holding the button and pedal, turn on the ignition again.
how to reset errors on Opel Astra N
A flashing InSP indication will appear on the display, and after 10 seconds the maximum mileage value of 35 thousand will appear. The inscription will blink for a while and then disappear - InSP has been reset how to remove insp on an Opel Astra h initial state.
Instructions for resetting the inscription InSP alternative method Turn off the car. Remove the key from the ignition. Information about the distance traveled and daily mileage will appear on the screen. While holding the reset button, insert the key into the ignition and turn it to turn on.
The display will first show the flashing value of the InSP indicator, and then the maximum mileage. Some time later it will go out - InSP has been reset to its initial state. To view the remaining mileage, press the odometer button with the ignition off - the daily mileage will be displayed, then press and hold the same button again for more than 2 seconds. To disable the InSP inscription, you should: The inscription will blink for a while and then disappear.
How to remove errors from the Opel on-board computer
How to remove errors from the on-board computer with the KEY Chrysler, DODGE
How to reset errors in OPEL ASTRA G (G), error codes in description
Self-diagnosis of errors on Opel Omega b.
Opel Astra j upper level information display (on-board computer)
HOW TO REMOVE (CLEAR, ELIMINATE) “CHECK” on a car? #check engine
error diagnosis Opel vectra B
Hidden functions of the Opel Astra H on-board computer
How to read Opel errors
Opel on-board computer
OPEL ASTRA H errors. READING ERROR CODES. OPEL ASTRA H diagnostics.
Also see:
- Maintenance of Suzuki X 4
- Suzuki intruder vl1500 bt review
- How to set the timing chain on an Opel Corsa
- Test drive isuzu trooper video
- PTF for Hyundai Solaris catalog number
- Trunk for Nissan X Trail
- Suzuki grand vitara engine type
- Nissan Almera classic and comfort
- Replacing the air filter BMW E90 n46n
- Replacing headlight bulbs on Kia Rio 2013
- What kind of oil to pour into the Kia Sportage power steering
- Regulations for changing the oil in automatic transmission Honda SRV
- You need to charge KAMAZ batteries, how to do it correctly
- Replacing rear springs on a BMW E60
- Installing a rear view camera on a Kia Sorento 2011
Home » News » How to remove errors from the Opel on-board computer
carsofa.ru
Opel Astra H - how to reset InSP
It does not coincide with our maintenance schedule and, in fact, for me personally, it does not carry any important information. Without removing your finger from the reset button, press the brake pedal.
While holding the button and pedal, turn on the ignition again. A flashing InSP indication will appear on the display, and after 10 seconds the maximum mileage value of 35 thousand will appear.
The inscription will blink for a while and then disappear - InSP has been reset to its initial state.
Lifehacks on Astra H
voleg
I came across it on the net. I didn’t know something. If it seems interesting, I’ll continue adding it.
Dad in a cube
pisikot
Dad in a cube
Alexander already posted this: :good:
Maybe someone doesn't know:
1. “The road home”
To enable the “Road home” function, you must do the following: - turn off the ignition and remove the key from the ignition - open the driver's door - flash the high beams
After this, the low beam and reversing lamp go out 30 seconds after closing the driver's door.
2. “Parking in an unlit place”
If you need to leave the car in a dimly lit place, then with the engine turned off, you need to turn on the turn signal left or right. After this, the dimensions remain lit on only one side (“indicated by the turn signal”).
3. “Adjusting the wiper pause”
After briefly pressing down (one stroke), wait the required time and turn on the intermittent mode (up 1 time). After this, the wipers clean the glass at a specified interval.
The interval is adjustable from 2 to 15 seconds. The standard interval is 4 seconds.
4. “Reading error codes”
If the car icon with a key lights up on the instrument panel, this means that errors have occurred in the operation of the car and they need to be read in order to determine the malfunction. Errors in a car have different statuses, so even if they are present, the Check Engine indicator may not light up. So to speak, in normal mode, this requires a dealer Tech 2 scanner. What if you don’t have it at hand or don’t want to just go to the dealer and waste money and time? For this, the manufacturer has provided a manual mode.
For manual transmission or Easytronic: Simultaneously press the gas and brake pedals and hold them. Only THEN insert the key into the ignition. Turn on the ignition (but do not start the car!) Wait a few seconds, holding the pedals, until the message appears
For automatic transmission: Insert the key into the ignition switch. Turn on the ignition (do not start the engine!) Press the brake pedal and hold it Switch the automatic transmission selector to position “D” (Drive) Turn off the ignition and release the brake. Now press the gas pedal and brake pedal together and hold. Turn on the ignition (do not start the engine!) Wait a few seconds, holding the pedals, until the message appears. If everything is done correctly, then the message “ECN” (error code number) and error codes will be displayed at the mileage location.
Features: When pressing the pedals, it is important that the limit switches work, so we press the brake with medium force, and press the gas “to the floor” until it clicks. The first 4 digits show the error code, the next two indicate its meaning. Errors are shown automatically one after another, the end of the list is indicated by zeros (as in the photo). If only zeros are shown, this indicates the absence of errors; the explanation of all the rest is given below. IMPORTANT ! If there are 5 numbers, for example, 70405, then add 0 in front of them to get 070405. Next - as usual
5. “Reset InSP”
InSP - indication of time until service maintenance. To view the remaining mileage, press the odometer button with the ignition off - the daily mileage will be displayed, then press and hold the same button again for more than 2 seconds. The display will show “InSP” and the remaining mileage until maintenance.
It should be noted that despite the standard service interval for Russia of 15,000 km (see service book), the inscription usually appears in the region of 8,000-10,000 km.
Disabling the InSP sign - Basic method: Turn off the ignition, press and hold the daily mileage reset button (the display on the instrument panel will show the trip meter and the daily mileage counter), after about 3 seconds the maintenance interval indication appears (for example, “InSP 15.000” or “InSP 0” "), without releasing the reset button, additionally press the brake pedal, hold both and, without releasing the button and pedal, turn on the ignition; the display will show a flashing indication "InSP - - -", then after about 10 seconds the display will show the maximum mileage (" InSP 35,000 km" for a petrol engine or "InSP 50,000 km" for a diesel engine with ECO Service-Flex). The inscription will blink for a while and then disappear. The maintenance interval is then reset to its initial state.
Disabling InSP - Alternative method: Turn off the ignition and remove the key from the ignition; press and hold the daily mileage reset button (the display on the instrument panel will show the trip meter and daily mileage counter) Insert the key and turn on the ignition while holding down the daily mileage button on the display the display will flash “InSP — — -“, then after about 10 seconds the display will show the maximum mileage (“InSP 35,000 km” for a petrol engine or “InSP 50,000 km” for a diesel engine with ECO Service-Flex). The inscription will blink for a while and then disappear. The maintenance interval is then reset to its initial state.
How to decrypt correctly?
The resulting six-digit codes consist of a fault code (the first four characters) and its meaning (the remaining two). Sometimes a five-digit code appears, in which case you must put a zero in front of the symbols. There are four categories of diagnostic codes, designated by letter.
The letter is not written on the display, it is only available in the error tables and is used to identify the node that has problems in operation:
For example, using the code on the instrument cluster ECN 161450, we determine the error number - 1654. According to the table, only one error P1614 can correspond to it - a communication problem between the immobilizer and the chip in the key. The first digit after the letter in the code determines the class of the error.
Combination of Opel Astra with the “Check Engine” indicator on
There are three class options:
When reading errors, keep in mind that the third digit from the beginning in the error code indicates the type of malfunction.
The following error variations are available:
The last two digits in the code indicate the serial number of the error.
The P1614 error discussed above consists of the following component groups:
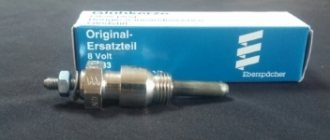
For Opel Astra H cars with diesel sedan and station wagon, the method of reading and decoding errors is absolutely identical. Due to the specific design of cars with a diesel engine, they may have their own errors (for example, failure of glow plugs).
The main error codes for the Opel Astra H in Russian for XER series gasoline engines and CDTi diesel engines are given in the table:
| Error code | Decoding |
| P0100 - 0104 | Air flow meter problems |
| P0105 - 0109 | Malfunction of the sensor for measuring the mixture pressure in the intake manifold |
| P0110 - 0114 | Incorrect operating parameters of the intake air temperature sensor |
| P0115 - 0119 | Check the cooling system temperature sensor circuits |
| P0120 - 0124 | Problems with the throttle position sensor |
| P0125 - 0126 | Abnormal coolant temperature |
| P0130 - 0135 | Check the first oxygen sensor |
| P0136 - 0141 | Check the second oxygen sensor |
| P0170 - 0172 | Check the composition of the working mixture |
| P0176 - 0179 | Check the working mixture composition sensor |
| P0180 - 0194 | Malfunction of the sensor that measures the fuel temperature |
| P0195 - 0199 | Malfunction of the sensor that measures the oil temperature |
| P0200 - 0204 and P0213 - 0214 | Malfunction of fuel injection nozzles |
| P0215 | Fuel check valve failure |
| P0216 | Erroneous signal in the ignition timing timing circuit |
| P0217 - 0218 | Engine or transmission overheating |
| P0219 | Engine speed controller failure |
| P0220 - 0229 | Throttle unit errors |
| P0230 - 0233 | Fuel pump power problems |
| P0234 | Excessive engine load |
| P0235 - 0250 | Malfunctions in the turbocharger (relevant for diesel engines) |
| P0251 - 0260 | Errors in fuel sensors in pump injectors (for diesel) |
| P0261 - 0272 | Injector malfunctions (for diesel) |
| P0300 - 0304 | Problems with ignition by cylinder |
| P0320 - 0323 | Problems with ignition distribution |
| P0325 - 0334 | Knock sensor errors |
| P0335 - 0339 and P0385 - 0389 | Engine crankshaft position sensor errors |
| P0340 - 0344 | Camshaft Position Sensor Errors |
| P0350 - 0354 | Ignition coil malfunctions |
| P0370 - 0381 | Faulty glow plug circuits (diesel) |
| P0382 and P0400 - 0408 | Exhaust gas recirculation system failure |
| P0410 - 0419 | Problems in the intake manifold |
| P0420 - 0434 | Poor catalytic converter efficiency |
| P0440 - 0455 | Errors in the fuel vapor filtration system |
| P0460 - 0464 | Fuel quantity sensor malfunction |
| P0465 - 0469 | Manifold purge sensor malfunction |
| P0470 - 0479 | Errors in the gas pressure sensor in the exhaust manifold |
| P0480 - 0485 | Cooling fan errors |
| P0500 - 0503 | Speed sensor error |
| P0505 - 0507 | Errors in idle speed parameters |
| P0510 | Throttle limit switch faulty |
| P0520 - 0523 | Malfunction of the sensor that detects oil pressure |
| P0530 - 0534 | Air conditioning system failure |
| P0550 - 0554 | Errors in the power steering system |
| P0560 - 0563 | Incorrect voltage in the electrical on-board network |
| P0565 - 0580 | Malfunction of cruise control devices |
| P0600 - 0609 | Electronic control unit errors |
| P0620 - 0622 | Generator errors |
| P0705 - 0709 | Automatic transmission sensor faulty |
| P0710 - 0714 | The fluid sensor in the automatic transmission is faulty |
| P0715 - 0718 | Incorrect operation of automatic transmission torque converter sensors |
| P0720 - 0727 | Malfunction of the sensor measuring the crankshaft speed |
Sensors
One of the common errors on the Astra GTC is error 011014, which indicates a problem with the air temperature sensor supplied to the engine. The sensor can be replaced immediately or wait a few days, since there are not isolated cases of this error indication disappearing.
Serious problems are indicated by error code 59761 or 059761, indicating a faulty thermostat. In this case, there is a slow warming up of the engine, which does not reach operating temperature even after driving for several tens of kilometers. The problem may be caused by erroneous data from the temperature sensor, so you must first make sure it is working. Late releases of the machine when the thermostat fails may display error P00b3. On diesel Astras, a problem with the thermostat may be indicated by code 011508.
The appearance of error 013604 is accompanied by a noticeable increase in fuel consumption. This error indicates an open circuit in the second oxygen sensor. The problem may be in the wiring of the sensor, in its connector and in the sensor itself. Before purchasing a new sensor, you need to look at the condition of the wires and wiring connectors. Another solution to this problem could be to reflash the engine control unit to Euro 2 standard, since it does not require a second sensor.
Error 006800 was observed on a 2008 Astra, first diagnosed as a problem with the throttle assembly. At the same time, there is some uneven idle speed and slightly increased fuel consumption in this mode. The reason was damage to the plastic valve cover through which air was leaking into the engine crankcase. When replacing a part, it must be taken into account that the engine covers of the 1.8 liter Z18XER and 1.6 liter Z16XER are identical.
Engine problems
One of the most common reasons for the Check Engine light to come on is errors 030101, 030201, 030301 or 030401, indicating cylinder misfires. In this case, there is “triple” of the engine, jerking and increased fuel consumption. This problem is associated with the poor design of the ignition module on the Opel Astra, which often fails. In this case, only replacing it will help.
On high mileage vehicles, error message 212052 may appear. This problem is due to contamination or dampness of the electronic gas pedal. If the Check Engine light comes on sporadically, you can simply wait until the moisture that has gotten into the pedal or on the connectors dries. Otherwise, you will need to disassemble and clean the pedal pad.
On new cars, error 000970 was often recorded, caused by mismatched operation of the vehicle's CAN bus due to the battery being disconnected during transportation. In these cases, the error went away over time. On used cars, along with error 000970, codes 001462 and 001463 appear, indicating problems with the solenoid valves of the engine camshaft phase shifters. If the procedure for cleaning the contacts does not help, then you will have to change these valves along with the camshaft gears.
After replacing the timing belt yourself, it is not uncommon for errors 001161 and 001166 to appear, signaling incorrect valve timing. In this case, it is necessary to recheck the correct installation of the shafts. Sometimes the cause of these errors is incorrect operation of the solenoid valves of the phase regulator (they may appear together with errors 1462 and 1463).
The display of errors on the display of the instrument cluster is clearly shown in the video from the author Mr11vlad11.
Problems with electrical wiring
The most common problem of all Opel Astras is flooding and oxidation of the contacts of the fuse box and the engine control unit. This often appears shortly after washing the left arch of the car and is shown with code 000970. The engine cannot be started. To fix the problem, it is necessary to disconnect the contacts of the blocks and wash them with special cleaning liquids. Then the contacts should be lubricated with a special lubricant that prevents re-oxidation.
On cars with automatic transmission, error 170000 may appear. The appearance of the error is accompanied by poor gear shifting while driving. One of the main reasons for this error is damage or rotting of the wires going to the box selector. But there may be other problems, which can only be identified by a detailed inspection of the automatic transmission components.
A common malfunction is rotting of the generator wiring or burnout of the diode bridge. In this case, the battery lack of charge light comes on and error 062103 appears. The situation can only be corrected by replacing the bridge or damaged wiring and cleaning the oxidized contacts. Sometimes incorrect operation of the diode bridge is indicated by error 062104.
Other problems
On some Astra GTC cars with a 1.8-liter Z18XER engine, error 017011 is observed, indicating that the mixture is too lean. At the same time, there is an increased consumption of gasoline at idle speed - about 2.5 l/h. The reason lies in the damaged membrane of the vacuum brake booster, through which air leaks into the engine. In some cases, at idle, you can hear a quiet hiss of air in the amplifier housing. There is only one way to solve the problem - replacing the vacuum assembly. A close one is error 017012, which can also be interpreted as an excessively lean mixture. In this case, the cause may be a damaged membrane, clogged injection nozzles, or impaired operating parameters of the oxygen sensor.
Reset error
After eliminating the cause of the error, it remains stored for some time in the memory of the control unit. You should not rush to reset the error, since it will soon be overwritten by other data that does not contain erroneous information. A faster reset method is any ODB II tester for vehicle electronics. You can remove yourself only the InSP service indicator, which lights up in the field of the daily mileage counter.
To do this you need to do the following:
Service warning
For many of us, our cars are our most valuable possessions. It is necessary for a convenient and uninterrupted daily existence. Without cars, many would be at a complete loss - unable to travel to work, take their children to school, and many other normal things.
Anyone who's been without a car for a day or longer knows how inconvenient it can be - so it makes sense to take care of this important lifeline and maintain it regularly. The typical first service for a used car will be more complex than for a new model. Obviously, the “old ones” will have more wear and tear.
Temporary Service
Interim maintenance will include checking your vehicle's engine oil and filters, electronics, lights (both interior and exterior), operation of all moving parts, battery, coolant, brake fluid and tires, windshield washer fluid, suspension and steering.
Full service
A full service will include all of the above and go into more detail about the brakes, drive belt, radiator, engine and transmission, fuel lines, air conditioning, instead of a visual brake inspection, a full brake inspection will be performed, as well as a full oil change.
The first service for a new car usually includes an oil and oil filter change, and possibly an air filter change. Since the car is relatively new, this is usually a fairly simple and inexpensive procedure.
As with the first maintenance, the second is usually scheduled after 12 months or when the specified mileage has been reached - this will be recorded in your service book. Keeping track of maintenance deadlines without checking the log doesn't have to be difficult; In more modern cars, a warning may flash on the LCD screen or it may coincide with the MOT.
Usually the same maintenance options are offered: minor (intermediate) and full. The checks performed depend on the option you choose and the workshop, but a standard service should definitely include an oil and filter change, as well as a visual inspection of the following components:
- tires;
- brakes;
- headlights;
- coolant, windshield washer, brake fluid, and power steering fluid levels;
- wipers.
Please be aware that if any of these items are replaced, additional costs may apply.
A full service is much more comprehensive and your mechanic will perform checks that are not included in the optional package. For this reason, it is advisable that you have a full service at least every two years. In addition to the checks mentioned above, the mechanic will monitor the condition of your spark plugs, oil and air filters, and light bulbs. The mechanic will also remove the wheel to take a closer look at the brakes.
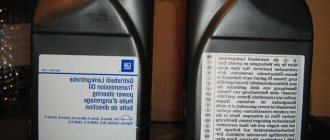
The most common service for any car is changing the engine oil. Motor oil is used to lubricate the moving parts of a car engine. Lubrication reduces friction and heat generated during engine and transmission operation. Your Opel Astra may also be suffering from serious engine oil problems such as oil leaks, low pressure or too much oil in the engine after a certain period of time. In this case, it is necessary to strictly adhere to the service intervals recommended by the manufacturer.
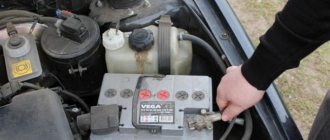
Another common maintenance requirement for your vehicle is a battery interservice inspection. Your vehicle's service light may be on because your battery needs to be replaced. Typically the battery indicator will also light up if this is the case. There are a few things that can go wrong that should be understood before you begin replacing the battery, which are explained in more detail on the charge indicator.
Service warning
For many of us, our cars are our most valuable possessions. It is necessary for a convenient and uninterrupted daily existence. Without cars, many would be at a complete loss - unable to travel to work, take their children to school, and many other normal things.
Anyone who's been without a car for a day or longer knows how inconvenient it can be - so it makes sense to take care of this important lifeline and maintain it regularly. The typical first service for a used car will be more complex than for a new model. Obviously, the “old ones” will have more wear and tear.
Temporary Service
Interim maintenance will include checking your vehicle's engine oil and filters, electronics, lights (both interior and exterior), operation of all moving parts, battery, coolant, brake fluid and tires, windshield washer fluid, suspension and steering.
Full service
A full service will include all of the above and go into more detail about the brakes, drive belt, radiator, engine and transmission, fuel lines, air conditioning, instead of a visual brake inspection, a full brake inspection will be performed, as well as a full oil change.
The first service for a new car usually includes an oil and oil filter change, and possibly an air filter change. Since the car is relatively new, this is usually a fairly simple and inexpensive procedure.
As with the first maintenance, the second is usually scheduled after 12 months or when the specified mileage has been reached - this will be recorded in your service book. Keeping track of maintenance deadlines without checking the log doesn't have to be difficult; In more modern cars, a warning may flash on the LCD screen or it may coincide with the MOT.
Usually the same maintenance options are offered: minor (intermediate) and full. The checks performed depend on the option you choose and the workshop, but a standard service should definitely include an oil and filter change, as well as a visual inspection of the following components:
- tires;
- brakes;
- headlights;
- coolant, windshield washer, brake fluid, and power steering fluid levels;
- wipers.
Please be aware that if any of these items are replaced, additional costs may apply.
A full service is much more comprehensive and your mechanic will perform checks that are not included in the optional package. For this reason, it is advisable that you have a full service at least every two years. In addition to the checks mentioned above, the mechanic will monitor the condition of your spark plugs, oil and air filters, and light bulbs. The mechanic will also remove the wheel to take a closer look at the brakes.
Decoding error codes with meanings
Combination options are different - it all depends on the chosen method. Remember that when you start the self-diagnosis mode, six-digit codes are displayed on the odometer panel. When using a personal computer with proprietary software installed – five characters. The first is a letter that allows you to determine the type of breakdown, and only then the combination is displayed.
First character
Letter characters have the following meaning:
- C – the problem concerns the car suspension.
- P – the transmission or gearbox is not functioning.
- B – elements of the body structure are not working properly - the immobilizer, central locking, mirror folding system, power windows, and so on.
- U – electronic components – additional modules or units – have failed.
Second character
The second character usually doesn’t interest us, but still:
- 0 – common code for OBD-II;
- 1 and 2 – manufacturer code;
- 3 – reserve/
Third character
The number in the third position determines the malfunction itself:
- 1.2 – elements of the fuel or air supply system have failed;
- 3 – the ignition is not working properly;
- 4 – the additional control system does not work;
- 5 – no idle;
- 6 – the electronic control unit module or the electrical circuit through which the manufacturer connected it has burned out.
- 7.8 – the gearbox does not function.
Block in the cabin
It is located under the panel, behind the glove box. In order to gain access to it, you need to lightly squeeze both side walls, lower the glove box completely down and disconnect it. Next, use a coin to turn the mounting screws 90° and remove the glove box holder.
Option 1
Scheme
Description
| R1 | — |
| R2 | Horn relay |
| R3 | High beam relay |
| R4 | Rear window wiper relay |
| R5 | Heated mirror relay |
| R6 | Fog light relay |
| R7 | Rear fog lamp relay |
| R8 | Turn signal relay - right |
| R9 | Turn signal relay - left |
| R10 | Telephone audio transmitter |
| R11 | — |
| R12 | Windshield wiper motor relay |
| R13 | — |
| R14 | Rear window defroster relay |
| R15 | Multifunction control unit |
| 1 | — |
| 2 | 30A) Heater/air conditioner seat heater |
| 4 | — |
| 5 | — |
| 6 | 10A Right headlight - low beam, headlight range control |
| 7 | 10A Front/rear lights (right), license plate lamp |
| 8 | 10A Right headlight - high beam |
| 9 | 30A Headlight washer pump |
| 10 | 15A Horn |
| 11 | 20A Central locking |
| 12 | 15A Fog lights |
| 13 | 7.5A Multi-function display |
| 14 | 30A Windshield wiper motor |
| 15 | 7.5A Electric windows, sunroof, electric door mirrors |
| 16 | 10A Rear fog light |
| 17 | 30A Electric window lift |
| 18 | 7.5A Headlight range control |
| 19 | — |
| 20 | 30A Electric window lift |
| 21 | 7.5A Solenoid valve for blocking the key in the ignition switch (automatic transmission), anti-theft system, audio system |
| 22 | 15A Turn signals/a hazard warning lights, multifunction display, trip computer, indicators |
| 23 | 10A Anti-lock Brake System (ABS), Power Steering |
| 24 | 10A Left headlight - low beam, headlight range control |
| 25 | 10A Front/rear marker (left), license plate lamp |
| 26 | 10A Left headlight - high beam |
| 27 | — |
| 28 | 20A Interior lamp |
| 29 | 10A Turn signal/hazard warning lamp, interior lamp |
| 30 | 30A Hatch |
| 31 | — |
| 32 | 10A Daytime running light system, anti-theft system |
| 33 | 20A Trailer electrical connector - pin 30 |
| 34 | 20A Audio system, multifunction display |
| 35 | 10A Automatic transmission control system, cooling fan motor control unit, air conditioning system |
| 36 | 20A Seat heater, cigarette lighter fuse |
| 37 | — |
| 38 | 10A Brake lights, automatic transmission control system, multifunction display, cruise control |
| 39 | 7.5A Automatic transmission control system, cooling fan motor control unit, air conditioning system |
| 40 | 7.5A Cooling fan motor control unit, air conditioning system |
| 41 | 10A Heated rear view mirrors |
In this version, fuse number 36 for 20A is responsible for the cigarette lighter.
Option 2
Fuse diagram
Designation
| R1 | — |
| R2 | Horn relay |
| R3 | High beam relay |
| R4 | Rear window wiper relay |
| R5 | Heated mirror relay |
| R6 | Fog light relay |
| R7 | Rear fog lamp relay |
| R8 | Relay - turn signal switch |
| R9 | Turn signal switch relay |
| R10 | Telephone audio transmitter |
| R11 | Wheel speed sensor signal converter |
| R12 | Windshield wiper motor relay |
| R13 | Interior lamp relay |
| R14 | Rear window defroster relay |
| R15 | Multifunction control unit |
| 1 | — |
| 2 | (30A) Heater/air conditioner seat heater |
| 3 | (40A) Rear window defroster |
| 4 | — |
| 5 | — |
| 6 | (10A) Right headlight - low beam, headlight range control |
| 7 | (10A) Front/rear lights (right), license plate lamp |
| 8 | (10A) Right headlight - high beam |
| 9 | (30A) Headlight washer pump |
| 10 | (15A) Horn |
| 11 | (20A) Central locking |
| 12 | (15A) Fog lights |
| 13 | (5A) Multi-function display |
| 14 | (30A) Windshield wiper motor, sunroof (convertible) |
| 15 | (5A) Power windows, sunroof, power door mirrors, interior lamp, anti-theft system |
| 16 | (10A) Rear fog light |
| 17 | (30A) Power windows |
| 18 | (5A) Headlight range control, license plate lamp |
| 19 | (10A) Audio system, telephone, multifunction display |
| 20 | (30A) Electric windows |
| 21 | (5A) Solenoid valve for locking the key in the ignition switch (automatic transmission), anti-theft system, audio system, telephone |
| 22 | (15A) Turn signals/hazard lights, multifunction display, trip computer, indicators |
| 23 | (10A) Anti-lock Braking System (ABS), Power Steering |
| 24 | (10A) Left headlight - low beam, headlight range control |
| 25 | (10A) Front/rear marker (left), license plate lamp |
| 26 | (10A) Left headlight - high beam |
| 27 | (2A) Folding roof drive |
| 28 | (5A) Interior lighting pump |
| 29 | (10A) Turn signal/hazard warning lamp, interior lamp, automatic transmission control system |
| 30 | (30A) Hatch |
| 31 | (2A) Electric folding roof (semi-automatic) |
| 32 | (10A) Daytime running light system, lights left on warning, anti-theft system, immobilizer control unit |
| 33 | (20A) Trailer electrical connector - pin 30 |
| 34 | (20A) Audio system, multifunction display, telephone |
| 35 | (10A) Automatic transmission control system, cooling fan motor control unit, air conditioning system |
| 36 | (15A) Seat heater, cigarette lighter fuse |
| 37 | (20A) Seat heater |
| 38 | (10A) Brake lights, automatic transmission control system, multifunction display, cruise control |
| 39 | (5A) Automatic transmission control system, cooling fan motor control unit, air conditioning system |
| 40 | (5A) Cooling fan motor control unit, air conditioning system |
| 41 | (10A) Heated door mirrors |
| 42 | (5A) Seat occupant sensor, interior lamp |
| 43 | (20A) Xenon headlight-right 2002^ |
| 44 | (20A) Xenon headlight-left 2002^ |
| 45 | (5A) Seat heaters 2002^ |
| 46 | (15A) Engine management 2002^ |
| 47 | (20A) Auxiliary heater - Diesel |
| 48 | (5A) Folding roof drive |
| 49 | — |
| 50 | (40A) Cooling fan motor relay - 2.0 diesel/1.7 diesel with air conditioning |
Fuse number 36 at 15A is responsible for the operation of the cigarette lighter.
Fault table
List of Opel Astra H error codes in Russian with a description of the problem and recommendations on how to “treat” it:
Error 161400 - incorrect operation of the engine blocker, possible causes:
The channel “IZO))) LENTA” in its video showed the process of reading and deciphering malfunctions in the operation of an Opel Astra N car.
ABS errors
Problems with the Opel Astra H anti-lock system can be displayed in two digits.
| Code | Description |
| 16 | Damage or short to ground in the control line of the valve solenoid installed on the front left wheel. The reason may be that the winding is shorted to voltage. Code recognition is possible at speeds over 6 km/h. |
| 17 | The solenoid valve control circuit is faulty and is now affecting the device mounted on the front right wheel. |
| 18 | Rear brake circuit valve line damaged or shorted |
| 19 | Valve relay malfunction. An error is detected if the voltage level supplied to the device is more than 5 volts for 30 seconds or higher. |
| 25 | Failure or defective appearance of the gear wheel of the speed controller. Determination of this code is only possible in a situation where the speed of the wheel is 25% higher than the same indicator on other devices for two minutes or longer. |
| 35 | There is a malfunction in the return pump relay circuit. An error occurs when the response from the device takes more than 5 seconds. |
| 37 | The brake pedal switch line is damaged. Most likely, there was a break in the wire coming from the sensor. |
| 39 | Incorrect signal coming from the controller installed on the front left wheel. It is necessary to check the integrity of the sensor and cable. |
| 41 | Failure of the ABS sensor located on the left front wheel |
| 42 | Similar error, only with the controller installed on the right |
| 48 | Low car battery voltage. It is necessary to check the operation of the battery, make sure that there is technical fluid in the banks. It is recommended to test the device with the engine running or stopped. |
| 55 | Failure of the anti-lock control module |
Malfunctions in the operation of the Opel Astra N ABS system are usually associated with poor contact of the sensors installed on the wheels.
Insp on Opel display
In the Service, Maintenance, Tuning section, to the question How to remove the “check” for the Opel Astra Diesel 2008? asked by the author Inquisitive, the best answer is TURNING OFF THE INSP LETTER - THE BASIC METHOD To turn off the InSP inscription, you should: Turn off the ignition, press and hold the daily mileage reset button (the display on the instrument panel will show the trip meter and the daily mileage counter) after about 3 seconds, an indication of maintenance intervals appears (for example, “InSP 15.000” or “InSP 0”), without releasing the reset button, additionally press the brake pedal, hold both and, without releasing the button and pedal, turn on the ignition, the display will show a flashing indication “InSP - -”, then after about For 10 seconds the display will show the maximum mileage (“InSP 35,000 km” for a petrol engine or “InSP 50,000 km” for a diesel engine with ECO Service-Flex). The inscription will blink for a while and then disappear. After this, the maintenance interval is reset to its initial state
Reply from 22 replies
Hello! Here is a selection of topics with answers to your question: How to remove the “check” on the Opel Astra Diesel 2008?
Reply from Destino Post it and the check will be withdrawn.
Answer from Misha To - technical maintenance. Pops up along the way. At a minimum, you need to check the brake pads and change the oil. Connect the scanner and remove That.
Answer from DyNMX Go to astra-h.ru, it is described in detail there. And at the same time you will find a bunch of other useful information on this car.
Carrying out car diagnostics yourself
To carry out diagnostics, you need to perform some steps, which differ for vehicles with manual and automatic transmission.
For manual transmission
For a manual transmission, the following sequence of actions should be performed:
- First you need to depress the brake pedal and accelerator at the same time, but not too much.
- Then you should insert the key.
- Next, turn on the ignition, but do not start the engine.
- We wait until the error message appears. This is a code that needs to be deciphered.
Photo gallery
For automatic transmission
To diagnose an Opel Astra N with automatic transmission, the steps are slightly different:
- First, the ignition key is inserted into the lock.
- Then, as in the case of a manual transmission, we turn on the ignition without starting the engine.
- Press the brake pedal and hold it.
- Set the automatic transmission selector to the Drive (“D”) position.
- Turn off the ignition and remove your foot from the brake pedal.
- In the next step, you again need to press both the brake pedal and the accelerator pedal at the same time, keeping them pressed for a while.
- Turn on the ignition again without starting the power unit.
- Keep the pedals pressed until a message appears on the instrument panel.
- If the sequence of actions has been followed, the “ECN” message will be displayed with a six-digit error code.
When we depress the pedals, you need to press the brake with medium effort, and press the gas pedal all the way until you hear a click, this is necessary for the limit switches to work (the author of the video is VIDEO ZAG).
If there are several faults, the codes will appear one after another. At the end of the list a code of 6 zeros will be displayed. If zeros appear immediately, this indicates that there is no problem. The fault code is in the first four digits, the last two are encrypted with the meaning of the fault. If the number of digits is 5, then to decrypt you need to add a zero in front.
How to reset the service interval on an Opel Astra
The most common reason for a service light to appear is that your vehicle needs regular maintenance. This may include:
Typically, an on-board computer has a screen on the dashboard through which you can “scroll through” information about the car. Scroll through it and read all the messages displayed. Also check the engine health percentage. If you find any messages related to the above problems, or if the oil health percentage is low enough, you have successfully identified the reason why the service light came on.
Service warning
For many of us, our cars are our most valuable possessions. It is necessary for a convenient and uninterrupted daily existence. Without cars, many would be at a complete loss - unable to travel to work, take their children to school, and many other normal things.
Anyone who's been without a car for a day or longer knows how inconvenient it can be - so it makes sense to take care of this important lifeline and maintain it regularly. The typical first service for a used car will be more complex than for a new model. Obviously, the “old ones” will have more wear and tear.
Temporary Service
Interim maintenance will include checking your vehicle's engine oil and filters, electronics, lights (both interior and exterior), operation of all moving parts, battery, coolant, brake fluid and tires, windshield washer fluid, suspension and steering.
Full service
A full service will include all of the above and go into more detail about the brakes, drive belt, radiator, engine and transmission, fuel lines, air conditioning, instead of a visual brake inspection, a full brake inspection will be performed, as well as a full oil change.
The first service for a new car usually includes an oil and oil filter change, and possibly an air filter change. Since the car is relatively new, this is usually a fairly simple and inexpensive procedure.
As with the first maintenance, the second is usually scheduled after 12 months or when the specified mileage has been reached - this will be recorded in your service book. Keeping track of maintenance deadlines without checking the log doesn't have to be difficult; In more modern cars, a warning may flash on the LCD screen or it may coincide with the MOT.
Usually the same maintenance options are offered: minor (intermediate) and full. The checks performed depend on the option you choose and the workshop, but a standard service should definitely include an oil and filter change, as well as a visual inspection of the following components:
brakes;
Please be aware that if any of these items are replaced, additional costs may apply.
A full service is much more comprehensive and your mechanic will perform checks that are not included in the optional package. For this reason, it is advisable that you have a full service at least every two years. In addition to the checks mentioned above, the mechanic will monitor the condition of your spark plugs, oil and air filters, and light bulbs. The mechanic will also remove the wheel to take a closer look at the brakes.
The most common service for any car is changing the engine oil. Motor oil is used to lubricate the moving parts of a car engine. Lubrication reduces friction and heat generated during engine and transmission operation. Your Opel Astra may also be suffering from serious engine oil problems such as oil leaks, low pressure or too much oil in the engine after a certain period of time. In this case, it is necessary to strictly adhere to the service intervals recommended by the manufacturer.
Another common maintenance requirement for your vehicle is a battery interservice inspection. Your vehicle's service light may be on because your battery needs to be replaced. Typically the battery indicator will also light up if this is the case. There are a few things that can go wrong that should be understood before you begin replacing the battery, which are explained in more detail on the charge indicator.