Is the steering wheel worn out? Let's make an exclusive reupholstery yourself!
You can make your car look attractive yourself. All you need is imagination and, of course, desire. You can change or update interior elements or some parts under the hood. In this article I will tell you how to cover an old steering wheel. Do-it-yourself leather steering wheel reupholstery is the first step towards updating and improving the car's interior. Don't think that only specialists can do this. Re-upholstering the steering wheel with your own hands is not only an instructive, but also quite an interesting process.
What kind of leather should I take?
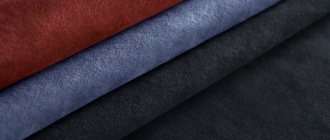
Considering the fact that the steering wheel is a part of the car, human contact with which is made throughout the entire route, therefore, it is necessary to choose only high-quality material for reupholstery and it is desirable that it should be genuine leather. Since any other fabric will deteriorate from constant rubbing of hands on the steering wheel after just a month of using the car. The intended skin should not be very thick, but it should not be thin either. If it is too thick, then you will not be able to pierce it with a needle, and if its thickness is small, then the new steering wheel cover can deteriorate very quickly. The optimal thickness of the material for covering the steering wheel is 1.3 millimeters. An ability such as extensibility should be of average value. This is a very important criterion to consider before purchasing. Its elasticity should allow the material to fit tightly on the steering wheel, otherwise there’s no point in thinking about quality.
You can consider the option of having perforation. This is a rather unusual and attractive look, and it is also pleasant to work with. But, having such positive qualities, I can also highlight its negative side - wear and tear. The only optimal solution for you is natural smooth leather.
Before purchasing, make sure that the material offered to you really has the necessary qualities, and that they are not slipping you a substitute. You also need to pay special attention to additional materials that will be used in this matter. The thread should be as strong as possible, because it will pull the edges together, so it should not break easily. Choose a strong needle, make sure it does not bend. My advice is to buy several of them.
What will you need?
To reupholster you will need the following materials and tools:
- Leather (it must meet all necessary criteria);
- Stitching needle (the needle must be strong). If possible, use Soviet-made needles, as they are really high quality;
- Strong thread (nylon is used);
- Two thimbles (it’s almost impossible to work without them). They will keep your fingers from getting punctured.
- Masking tape, sheets of Whatman paper (it is better to use thick cardboard);
- Pencil or felt-tip pen;
- Film;
- Knife (it is better to use a stationery knife).
After preparing all the material, you can proceed with the remaining processes: cutting and reupholstering.
Making a pattern
In order to correctly tighten the steering wheel, and for the result of your work to have an impressive appearance, you need to make a pattern. To do this, you need to make a preliminary layout (template).
It is made of adhesive tape and film, which must be used to cover the steering wheel. But before this you need to remove the steering wheel, as this will make the work easier.
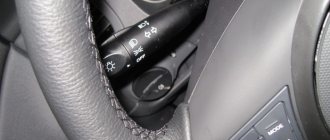
The first step is to remove the cover from the signal and unscrew the fastening nut that holds the steering wheel to the shaft. After this, using loosening movements in different directions, remove the steering wheel from the splines. Now that the steering wheel is removed, you can do the preliminary layout. To create it, you need to wrap a film around the steering wheel and apply masking tape over it. Do not skimp on material, wrap it in several layers.
Once the entire rim is covered, you need to use a marker to make marks where the seam will go (where the parts join). This is done for the reason that it is very difficult to make a one-piece case, so it will be made of four parts. And those places where the parts will be connected to each other are marked with a marker. We also draw a marker along the inside of the steering wheel. It is advisable to draw all lines as evenly as possible. This will allow you to make smoother original parts when cutting. After all the lines have been drawn, the layout must be cut with a stationery knife along these lines.
After cutting, you should have four separate elements. Now they need to be leveled and attached to the cardboard to create patterns for the pattern.
After the patterns are ready, they need to be applied to the base material in order to produce the final version of the covering. But, it is important to remember that you do not need to cut it exactly to size, but give some allowances for each edge of the part and then bend it. This is necessary in order to sew them together efficiently, and so that the thread does not tear the skin during tightening.
That is, the seam will be strong enough and the skin will not tear when stitched. In addition, the folds give the new steering wheel a more aesthetic appearance. Allowances can be given immediately while you are tracing the pattern. You can also first trace, and then use a ruler to add one centimeter to each edge. This way you will maintain an even retreat on each side.
After this, you can check how correctly the cutting of the elements was done. You need to place each of the patterns in the intended place and see how they are positioned: their edges should meet each other. If the stock left is too large, you can trim the edges. If everything is fine, nothing bothers you, you can begin the final process - sewing the parts together.
Steering wheel braid
The steering wheel braid is considered a budget analogue of the previous procedure. This is a ready-made cover that is created for specific steering wheel sizes. The kit will also include lacing, which is used to make the central seam. Many people prefer such materials, since they are made from cheaper raw materials and also have a wider palette of colors.
Even a non-professional can handle installing the steering wheel cover. To do this, there is also no need to remove the wheel itself. However, the work still needs to be done efficiently. Otherwise, the flaw will become more obvious to the driver each time, which is very annoying. Although, there are motorists who do not pay attention to such trifles.
Advantages of braided steering wheel
The advantages of this type of car interior improvement include:
- Reasonable price;
- Quick installation/dismantling;
- Can be installed by yourself;
- There is no need to perform additional work to remove the steering wheel and disable the airbag.
Disadvantages of braided steering wheel
- Often such models are universal, which means that in most cases it is not possible to take into account the individual characteristics of the steering wheel shape.
- If you want to hide a defect in spokes with a standard braid, this will not be possible, because such kits do not have elements for the spokes. Basically they only cover the rim.
- In the case of a complex rim shape, the universal braid will not look as attractive as originally intended.
- Despite the variety of palettes, the store may not have covers in the desired color.
- Although you don't need to hire a professional for installation, the job done for the first time will be immediately noticeable.
- Due to poor quality, the braid quickly deteriorates, which will cause the driver to experience more discomfort. But even new material significantly spoils the pleasure of driving a car. After a short period of time, the braid becomes kinked, requiring constant adjustment, which can be dangerous while driving.
Step-by-step instructions for reupholstering
So, everything is ready, you can start. At this stage, it is important to follow the order of doing the work so as not to mess anything up.
- The first step is to overcast all the edges that will be sewn together. The fact is that each edge will bend (we left indents specifically for this), and since the thickness will double at the bend, it will not have a beautiful appearance and it will be very difficult to pierce such thickness with a needle. That's why stitching is necessary. It will allow you to maintain the required thickness of the leather along the edges and thereby make the edges strong.
- We lay out our (4) parts of the future steering wheel cover on some surface. They need to be laid out exactly in the order in which they will be located on the steering wheel.
- Prepare the needle (pull the thread into it).
- Now you need to sew all the individual elements together sequentially. As a result, you should have a hoop.
- Now you need to pull it onto the steering wheel. Position it so that the seams match the cuts.
- Next, you can fix the cover on the steering wheel using glue or epoxy resin. Everyone makes this decision personally, you don’t have to stick it.
- Now try to stretch the leather (even it out) to determine how much to fold the edges before the final step.
The last stage is the most difficult, since here it is important to maintain uniform skin tension throughout the steering wheel. It is not only difficult, but also difficult. It is much better if you ask someone to help you (one tightens and the other sews).
So, the first thing you need to do is decide which edge to start from. Basically, it just depends on convenience. You need to stretch the skin to form a joint; if the joint does not meet, it’s okay, thanks to its elasticity, the joint will be pulled together with thread. The entire cover is sewn together in this way.
In those places where the cover can go under the signal cover, you need to do without thread and use glue. After completion, you need to straighten the new cover on the steering wheel; if there are any folds, it’s not a big deal. After a few days they will smooth out and the surface will be completely smooth. Now you can install the steering wheel in its original place, secure it with a fastening nut and cover the signal cover.
Covering the steering wheel with leather will significantly change the appearance of not only this element, but will also emphasize the overall appearance of the car's interior. In addition, by doing this yourself, you not only saved your money, but also gained good experience in reupholstering, and also became more familiar with the steering structure of your car.
"Steering wheel reupholstery"
A video about the work of a craftsman reupholstering a steering wheel rim in the BMW M style with leather. After watching the recording, you will learn what tools you need to prepare and how to cover the steering wheel yourself with leather.
https://mineavto.ru
To make driving comfortable, many drivers buy special covers for the steering wheel. This modification creates convenience and makes your hands less tired. Plus, the interior of the cabin is changing for the better. Today there are a lot of different offers on the market. However, you can tighten the steering wheel yourself. The most practical and convenient material for tuning a steering wheel is genuine leather. The use of artificial substitutes is not recommended. Since they do not have proper elasticity and wear out quickly.
Where is the best place to tighten the steering wheel?
Steering wheel reupholstery is a fairly popular and widespread service. For this reason
in St. Petersburg there are a number of studios that will remake your steering wheel in 6 hours
beyond recognition and breathe new life. Of course this work costs money. But to save money, you can make the steering wheel braid yourself and cover it with leather. This procedure does not require special super skills. Yes, and tools can be found in any sewing store. As a result, you get an exclusive design in a single version.
Tools and materials for reupholstery
Covering the steering wheel with leather yourself involves using the following materials and tools:
- To make a template (pattern), it is best to use cling film and wide masking tape.
Thick paper or cardboard.
A stationery or other sharp knife, marker or pencil.
Durable and high-quality thread, preferably nylon.
For safe and convenient sewing, you will need two thimbles for the middle finger.
Durable sewing needles made of hardened steel.
High quality soft genuine leather.
A screwdriver and a wrench to remove and then install the steering wheel.
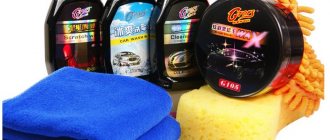
To cover the steering wheel with leather yourself, it is advisable to use two types of material, perforated and smooth leather. The combination of two different textures will not only create an original and pleasant aesthetic appearance, but will also provide comfort for working with the steering wheel.
Perforated leather has increased elasticity. It is soft and comfortable to work with. Smooth leather, in turn, is more resistant to wear. Therefore, if you combine them together, you get a durable, soft and quite abrasion-resistant material. Experts believe that leather with a thickness of 1.2-1.4 mm is optimal for steering wheel covers. You can choose any skin color, it all depends on your taste. As a rule, the most popular cases are made of leather in dark shades. The most commonly used material is black.
Do-it-yourself leather work
How to make and install a heated steering wheel.
Very important: leather is a stretchy material. That's why he needs a tightening
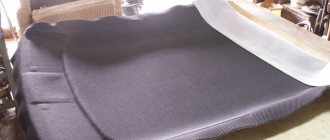
To avoid the common mistake of transferring the contours of the paper model directly onto the leather, then remove about 5 mm from the edges on the sides, but leave a margin on the sides for the steering wheel spokes. As in the picture below.
In the photo - a pattern for covering the steering wheel with leather
Such work as covering the steering wheel with leather can go down the drain due to the slightest mistake. To avoid mistakes and damage to expensive material, you can periodically apply your work to the steering wheel: as they say, “measure seven times, cut once.” And only when you are 100% sure that the size is accurate, cut off unnecessary edges. After that, it's time to pick up the threads. For this purpose, it is better to use nylon ones - they are as durable as possible.
First, sew all the pieces together, positioning them correctly. Don’t forget about stitching the edges, using the loops of which you will then pull the cover directly onto the steering wheel. After sewing everything together, carefully place the cover on the steering wheel and smooth it out so that it fits snugly. By the way, you can pre-moisten the leather product in warm water for 20 minutes and then wipe it. Such leather will be easier to stretch over the surface of the steering wheel, but it will also be easier to tear - be careful.
Leather steering wheel template
In order for the steering wheel to be reupholstered with your own hands to a high quality, you must first make a pattern. To do this, first make a template from film and tape. First of all, remove the steering wheel, having previously removed the signal cover. Then unscrew the nut securing the steering wheel to the shaft and remove the steering wheel from the splines, swinging it in different directions.
After that, using cling film and masking tape, we make a model of the steering wheel and a template for the pattern. We wrap the steering wheel with film. We glue paper-based masking tape on top. Mark the places where you plan to make seams with a marker or pencil. Then carefully cut out the tape along these lines. The result should be four elements, one rectangular and three cross-shaped. We unfold and number all the details for the template. After that, we place them on cardboard or thick paper and make patterns of a similar shape for the pattern.
Leather pattern
To make an original case, you first need to look through various sketches and choose the most suitable one. Of course, only four solutions can be implemented. However, you can make each sector from two or more elements, combining different textures or skin tones. Naturally, this will require more time and effort, but the end result is worth it. You can search the Internet for various options and choose the most convenient and practical. After you have decided on the design of the case, we place the pieces of leather on the table and make patterns using a stationery knife.
When making patterns, it is very important not to miss the next essential point. Each sector of the template is transferred to the skin not strictly according to its shape, but with a small margin. That is, after you have laid the template on the leather, you need to cut it out by 1.0-1.5 cm from the edge of the sector. This margin will be needed to ensure the necessary strength of the seams. Otherwise, after a short period of use, the seams will come apart, and you’ll just have to throw the cover away. As a result, you will need to reupholster the steering wheel with leather yourself.
After the pieces of leather are cut, attach them to the steering wheel and check that all sectors are cut correctly and match in size, taking into account the seam allowance. If necessary, all excess can be trimmed, because all patterns are made with sufficient margin. Once you are sure that all the elements are prepared and correspond to the design intent, you can start sewing.
Preparing a leather case
First, we lay out all the parts on the table in accordance with how they will be located in the case and begin to sew them together in the given order. The edges of the sectors must be swept to avoid tightening of the skin during use. The parts must be sewn together with strong nylon threads, departing from the edge at least 3 mm. All parts are sewn together completely in the form of a ring, with the exception of those seams that you previously marked with a marker.
After the workpiece is completely sewn and all edges are sewn, carefully pull the cover onto the steering wheel so that the joints of the seams are in the places of the cuts. We smooth out the material and eliminate sagging. Some experts advise “setting” the skin on glue or epoxy resin. However, in any case it is necessary to sew the edges.
The re-upholstery process.
Reupholstering a steering wheel with leather always begins with the step of calculating the amount of material required. Due to the fact that the leather braided cover is cut and sewn from several parts, it is necessary to determine the breakdown of the rim into separate fragments. Cuts should be made on the steering wheel at the junction of the leather flaps. For example, you decide to split the steering wheel into 4 parts, with embossed leather on the top and bottom and perforated leather on the sides. After measuring the width and length of each part of the steering wheel, cut out rectangular leather plates, and they should be slightly larger than the sketches. This is necessary so that the skin can be stretched.
The steering wheel is wrapped in a flap, the edges of the flap are butted together on the inside, the joint should be in the middle of the rim
When re-tying the steering wheel, special attention is paid to markings in the places where the thumbs will be located. And the joint should go a little further than the middle of the rim, right under the steering wheel spokes
The notches on the marking lines are needed to ensure that the individual parts of the leather on the rim are positioned correctly. During cutting, the same notches are also applied to the skin so that they coincide with the tail ones.
The first part blank is coated with glue. The glue is rubbed evenly onto the skin. Then you need to leave the flap to dry a little until the glue sticks to your hand. The main secret to reupholstering the steering wheel is that all surfaces must be practically dry. Next in the work you will need a hairdryer. They need to warm up the area of contact between the skin and the rim, then the skin is stretched and evenly distributed over the topography of the rim. After this, using a leather roller or just your fingers, the leather is pressed onto the steering wheel.
First, the leather is glued to one half of the rim right up to the markings on the inside of the steering wheel. The edge of the flap is trimmed along the marking line and marked with vertical notches. The same operation is performed with the second edge of the skin flap.
Each of the sectors of the steering wheel with spokes is cut out and marked with control points, focusing on the control points of the steering wheel markings.
Separate pieces of leather must be sewn into a ring. The edges at the joints should remain on the wrong side. The common edge is trimmed 4-5 mm from the stitch that connects them.
Next comes the crucial step: you need to sew a line along the edge of the leather tape of the case. All stitches should be even and at the same distance. The threads must be very strong. The tape of the cover fits tightly around the steering wheel, the joints should coincide with the slots on the steering wheel, and the edge of the cover should meet on the marking line. The rim is coated with glue, then you need to start inserting the joint on the cover into the slot made on the rim.
When the leather is laid along the contour and the edges on the marking line meet, the edges of the cover are sewn with the same threads that were used in the stitching on the cover. The free edges of the leather are folded in, glued, and the excess leather is trimmed. That's all, reupholstering the steering wheel with leather with your own hands is finished. I also recommend reading the article reupholstering the car interior.
Video
Video - Covering the steering wheel with leather
So, now the most important thing to do is to tighten the edges of the cover so that it is securely fixed to the steering wheel. This procedure is very troublesome, time-consuming and requires a lot of time. First of all, you should decide on the place where the seam will begin. Here you first need to secure the thread, and then you can carefully sew. When tightening the edges of the cover in the area of the signal cover, it is recommended to coat the edges of the leather with rubber glue.
There are many types of seams. However, the most popular are braid, sports and macrame. They look beautiful and form the most durable connection.
Once the cover is completely ready, you can install the steering wheel on the car. The cover may have minor creases. There is no need to worry about this. If you used genuine leather, then due to the increased elasticity of the material, all these flaws will completely disappear over time.
Anyone who has ever held a good anatomically shaped steering wheel in their hands knows that the most practical and aesthetic option is leather covering. Re-upholstering the steering wheel is a rather labor-intensive process and can only be done by experienced craftsmen. Leather with perforations that is pleasant to the touch will have an unusual appearance. However, a more wear-resistant and no less attractive option would be natural smooth leather. As an optimal option, you can choose a combined cover with different types of leather surface on one steering wheel, as well as colors to match the style of the interior of your car.
How to properly remove the steering wheel
Before you make the leather braid for the steering wheel yourself, you need to remove it correctly so that there are no errors with the airbag. Everything must be done in a certain sequence:
- Remove the terminals from the battery.
- Unscrew the lower screws of the steering column housing.
- Remove the plastic on the steering column.
- Lower the steering wheel adjustment lock and remove the remaining plastic.
- Align the car's wheels.
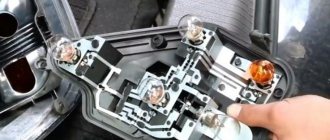
- There are holes on the left and right sides of the steering wheel. There are bolts or spokes that need to be pressed out with a slotted screwdriver..
- Remove the block with the cushion and the signal button.
- Remove the chips from the steering wheel.
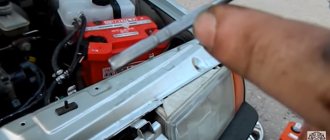
- Unscrew the steering wheel.
- Use a marker to place marks on the steering wheel and on the threaded part where the nut was secured. This will help you put the steering wheel back correctly.
- Tap the circle of the steering wheel with a rubber hammer to make it “jump”.
- It is better to secure the steering column element (snail) with electrical tape to prevent it from turning.
Removing the car steering wheel
These manipulations are the most difficult, because Covering the steering wheel with leather yourself is not difficult. Some experienced craftsmen do not remove the steering wheel and perform the reupholstery “on the spot”. This requires certain skills and abilities. It is not recommended for beginners to do this.
Preparatory reupholstery process: removing the steering wheel, cutting technique
In order for the steering wheel to ultimately have a neat and impressive appearance, it is necessary to make a pattern. To simplify the task, dismantling the steering wheel will help, after which a template is made. To remove the steering wheel, remove the horn cover and unscrew the main nut that secures the steering wheel to the shaft. Next, with shaky movements, the wheel is removed from the splines.
The preliminary layout is usually made of masking tape and film, which should be used to cover the steering wheel. The film is wound in several layers on the surface of the steering wheel, then the rim is wrapped with tape. Using a felt-tip pen, marks are made at the location of the future seam, as well as along the diameter of the inner side of the wheel. The layout is cut along the connecting lines with a stationery knife. This way, the cutting will be even, and during the tightening process the leather parts will be perfectly connected to each other.
As a result, the master ends up with four separate pieces that need to be leveled and applied to the cardboard. The finished patterns for the pattern are applied to the leather material, and the final version of the covering is cut out.
Note!
Pieces of genuine leather are not cut to the exact size of cardboard patterns.
To each edge of the part, you need to add 10 millimeters of leather material so that the craftsman has room for hems when tightening the seams and does not tear the leather when covering the rim. Once all parts of the leather are ready, you should attach the patterns and double-check the size of the indentations, then you can begin the final process - stitching the material.
Final stages
Having completed the firmware, you need to dry the updated leather car steering wheel, made by yourself, with a hairdryer. You help smooth out wrinkles on the surface of the steering wheel. Afterwards you need to wait for the glue to dry completely. If traces of it remain on the surface of the braid, they can be removed with gasoline. Take a dry rag, apply a small amount of gasoline to it, and wipe the steering wheel. The unpleasant smell will disappear within a day.
Blow-drying the leather on a tightened steering wheel
Now return the updated steering wheel to its rightful place. All steps described in the subtitle “How to properly remove the steering wheel” should be performed in reverse order. By the way, when re-upholstering the steering wheel, you can simultaneously install heating.
Now you know how to make your own steering wheel braid yourself. Not everyone can get a leather steering wheel covered perfectly the first time: the threads or the workpiece may break. Don't be discouraged, working with leather requires certain skills and abilities. A separate segment of drivers who cover the steering wheel with leather themselves can do this the third or fourth time. Practice on cheap material for the first time so that you don’t feel bad for the money you spent. But remember, leather braiding is the most reliable and durable. It is this material that will delight you and serve faithfully for many years.
A hand-tied steering wheel will be a source of pride for you.
The correct technology for re-tying the steering wheel
At this stage, it is very important to follow the order of work. To ensure that the covering material fits tightly to the steering wheel, the technician strictly follows the instructions:
- The required thickness of the leather at the edges is achieved by stitching along the lines of future seams. To do this, the master marks all the edges of the material, paying special attention to the folds, where the thickness will double when applying seams. Proper stitching will allow you to avoid defects in the form of leather seals on the covered steering wheel.
- Next, 4 leather parts of the future cover are laid out on a flat surface, numbering their location on the steering wheel from top to bottom.
- A nylon thread is threaded into the needle, and the elements are sequentially sewn together, so that the result is a hoop.
- The solid piece is carefully stretched onto the wheel so that the seams correspond to the cuts.
- The cover is fixed to the steering wheel using a special adhesive or epoxy resin.
- Next, the skin is stretched and smoothed so that it can be determined how many millimeters the edges need to be folded before suturing.
- At the final and most difficult stage, the leather is stitched, during which it is very important to maintain uniform tension of the material along the diameter of the wheel. Typically, such work is done with the participation of an assistant, when the master sews the edges, and a second person helps to tighten the leather cover.
Note!
In the signal cover areas, you can do without threads and attach the skin with glue.
Don't worry if there are small wrinkles on the rim - they will smooth out on their own in a few days. Only a professional can select leather with good elasticity properties, strong, high-quality thread for lining, a special durable needle and the correct type of seam. If you follow the technology for re-upholstering the steering wheel, the material will fit perfectly on the steering wheel and will last for many years. Once the covered steering wheel is ready, you should straighten the leather on the surface and you can attach the updated wheel to the car interior.
A few words about the process of re-upholstering the steering wheel.
The steering wheel can be called one of the driver’s favorite parts in the car interior. Moreover, each driver has his own taste and opinion on what an ideal steering wheel should be. Everyone has their own needs: some people definitely want a polished wooden steering wheel, others like various inlays and rhinestones, and the third chooses a discreet classic in the form of black leather.
The most popular tuning of the steering wheel is its reupholstery. Often car owners want to replace a strange, worn braid with a new one. Specialists who reupholster interiors can always offer to tune the steering wheel by choosing expensive car leather for this, but, as usual, we will save a little.