Load fork: purpose and design
A load fork is a very simple and useful device that can be purchased at any car parts and accessories store or made independently.
Purpose
The load fork is used to diagnose a car battery. Devices are:
- conventional ones, which are used to test 12-volt batteries;
- universal, they can be used to test 24 volt drives.
Checking the battery with a load fork allows you to accurately and timely monitor the condition of the battery: its charge level and overall performance.
Reference. This method of measuring the charge of an energy source is the most accurate of all existing ones.
Using a high-frequency load fork voltmeter, you can check the serviceability of the vehicle generator.
Attention! In order not to become a victim of an unscrupulous seller, when buying a car on the secondary market, it is necessary to check the battery with a load fork.
How the load fork works
There are a wide variety of models of this measuring instrument. They differ in the presence of additional nodes and the number of functions.
A typical battery test plug consists of the following main parts:
- Metal body.
- Digital or analog voltmeter.
- One or two resistors that create a load and are made in the shape of a spiral.
- A thick wire with an alligator clip that is connected to the positive output.
- A metal pin or probe that is connected to the negative output.
There are special nuts on the back wall of the device. They are designed to connect load resistors. To test a small-capacity car battery, one spiral is connected, otherwise both resistances are used.
Reference. The capabilities of the load fork increase dramatically if an ammeter is included in its composition. Such models allow you to measure a large number of different parameters and characteristics of the electrical part of the car.
Orion NV-03
How to check a car battery for performance?
Using this device, you can determine the state of charge and serviceability of 12-volt batteries, as well as check the generator and on-board network equipment.
Structurally, the device is made similar to the previous model, with the exception of a digital voltmeter (liquid crystal display).
When stored, the device is in “sleep mode”. To wake it up from hibernation, you can press the “Mode” or “Select” button on the front panel or touch any battery terminal with a probe.
The device has several main modes:
- - an ordinary voltmeter;
- — measurement of battery voltage with load;
- — mode for viewing the results of previous measurements (“LOG”);
- — saving the results of measurements;
- — viewing saved results;
- — measurement of battery capacity;
- — mode for setting a time limit for measurements.
Design Features
Unlike previous models, a digital voltmeter is used.
Added the ability to determine the battery charge level and the ability to set the measurement time.
Controls:
- Digital LCD display.
- Button . This button navigates between modes and exits installation modes.
- Button—transition from the mode name to numerical measurement values, change numerical values in setting modes.
The procedure for using a load fork as a voltage meter (voltmeter)
By pressing the button we select the mode.
To disconnect the load spirals, you need to unscrew both nuts on the right and left of the stylus.
— connect the crocodile to the ground of the car or to the negative current drain of the battery.
— measure the voltage at any point in the car. If the wire is not long enough, you can lengthen it.
Battery testing
First you need to measure the open circuit voltage. To do this, connect the black alligator clip to the negative terminal of the battery.
We unscrew both nuts (disconnect the load) and pin the probe onto the positive terminal of the battery. We record the readings of a digital voltmeter.
Then we test the battery under load.
If the battery being tested has a capacity of up to 100 A/h, then tighten one nut (connect one load coil).
If the battery is from a truck (capacity above 100 A/h), then by tightening the second nut we connect another spiral.
We measure the battery voltage under load. We pin the probe onto the positive terminal of the battery.
The measurement starts automatically. At the end of the measurement, a beep will sound.
Mode for viewing the results of previous measurements
When selecting this mode, you can view the results of the measurements taken, for which you need to press the button and select the mode.
The display will show the numerical value of the measurement.
To save the results of the measurements, you must press the button and select .
Long press the button. The icon will appear briefly on the display.
The values will be saved.
Determining battery capacity
Using the button, select the “Charge” mode. appears on the display.
After 3-5 seconds, a digital value of the battery charge level (in percent) will be displayed.
How to set the measurement time
To enter the time setting mode, you must simultaneously press the and buttons. The display will show , followed by a numeric value. Using the button, set the required value in seconds from 1 to 9.
For testing batteries with a capacity of up to 100 A/h, the value is set to 5, and for automobile truck batteries, the value is set to 9.
For the device to remember your actions, you must press the “Mode” button.
For more detailed information, read the instructions.
How to test a battery with a load fork
Checking the battery charge correctly with the device is quite simple; if desired, every car enthusiast can master this procedure. The main thing is to fulfill a number of conditions and follow the instructions. Checking the status of the power supply is carried out in two stages: without load and under load.
Preparing for battery testing
To get correct results, the following requirements must be met:
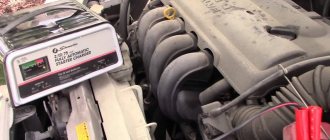
- The device is portable. You can also take readings under the hood of the car without removing the battery. The main thing is to observe the temperature regime: the measurement should take place at a temperature of +20ºС – +25ºС. Otherwise, the device will have to be moved to a heated room. A cold battery cannot be tested.
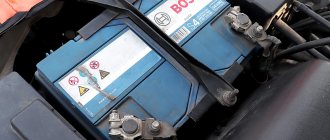
- The power source must be disconnected from the vehicle.
- As much time as possible should pass after the last engine operation, but not less than seven hours. Convenient to take measurements after an overnight break.
- The plugs of the battery being serviced must be unscrewed.
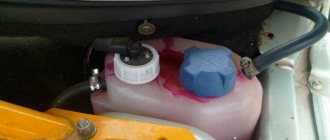
- The electrolyte level should be checked and, if necessary, refilled with distilled water.
- The battery terminals must be clean, without signs of corrosion or oxidation.
No-load verification algorithm
Having fulfilled the above conditions, you can begin testing. The name of the first method speaks for itself: readings are taken without turning on the resistance:
- the positive terminal of the load plug - a cable with a terminal - is connected to the battery positive;
- the probe - the negative terminal of the device - touches the battery negative;
- the voltage level is recorded using the display or voltmeter scale;
- The table determines the charge level.
The table corresponding to the battery voltage at idle and its degree of charge is as follows:
| Voltage value, Volt | 12,6–12,9 | 12,3-12,6 | 12,1-12,3 | 11,8-12,1 | 11,5-11,8 |
| Charge,% | 100 | 75 | 50 | 25 | 0 |
Exercise test
The load test is used only for devices that showed a 100% charge at the first stage and quite rarely, since it can harm the battery.
The following actions are performed:
- the load is connected based on the operating instructions of the device;
- as in the first case, the load plug is connected to the terminals of the energy source: plus to plus, minus to minus;
Attention! When the probe touches the battery pole, strong sparking occurs, since a large current flows at the junction. This is normal.
- readings when testing under load are taken at the fifth second, the plug must be immediately disconnected;
- If the battery is working properly and its charge level is more than half, the voltage value should exceed 9 volts.
If the readings are less than required, you need to repeat the experiment after the drive is fully charged. Lack of changes indicates a device malfunction. The battery should be disposed of.
You can estimate the degree of charge using the correspondence table:
| Voltage value, Volt | >10,2 | 9,6 | 9 | 8,4 | <7,8 |
| Charge,% | 100 | 75 | 50 | 25 | 0 |
Attention! When testing under load, the metal parts (probe and coils) become very hot. You should be careful not to get burned.
Operation and external factors
To correctly test a car battery with a load fork, you need to connect the terminal of the device to the “plus” of the battery, and the measuring pin of the device is connected to the “minus”.
Despite all the ease, it is necessary to study the rules for operating the device, which comes with the equipment.
When using, you must remember that the plug has a minimum temperature of +20 o C, and the battery should not be cold. Failure to comply with the requirements may result in a “deep discharge” of the battery. Taking into account the above criteria, you need to remember that checking a car battery with a plug without removing it from the car (but this is highly not recommended, and it is better to remove the battery) is possible only in a warm climate. If the temperature does not match, it is better not to try to take the readings without removing the battery from the battery.
Important: you must follow all precautions and safety precautions when operating the device - failure to comply can lead to injury! It must be remembered that the pin may heat up when applying a load!
Popular models
Manufacturers offer a large number of different models of load forks. The devices differ in the following parameters:
- design;
- measurement range;
- maximum strength of measured current;
- load size;
- type of battery being serviced, acid or alkaline battery;
- the presence of additional functions, for example, the ability to check individual battery banks.
The most common models, their parameters and characteristics:
- Orion NV-01 is a very simple small model, the small scale gives a large error of 2.5%. The device is suitable for operation in a wide temperature range from -30ºС to +60ºС, measures voltage from 0 to 15 Volts, load 100/200 Amperes.
- Orion NV-02 is an improved model of the previous model. It has a more reliable and high-quality body, the wire is thicker, and the terminal itself is more powerful.
- Orion NV-03 is the most popular model that can be classified as a professional device. Unlike the previous ones, the device has a digital voltmeter and two 100 Ampere spirals, and can save the measurements taken in memory. The plug operates on a standard voltage of 12 Volts in the range of 0 – 16 Volts,
- Orion NV-04 is the most powerful device previously presented. The device is recommended for servicing trucks, can test batteries at 12 and 24 Volts, allows you to test individual elements at 2 Volts, and has a high accuracy of 0.5%. Orion NV-04 is a model that operates in a wide temperature range (from -20ºС to +60ºС) and voltage up to 32 Volts.
Every car enthusiast should know how to use a load fork correctly and have a simple but very useful device in his arsenal. You can buy a load fork inexpensively or make it yourself. In any case, she will help out more than once.
You may also be interested
.
Batteries 0
How to use a load fork with a pointer voltmeter
As an example of a fork, we will use the Orion NV-01 Load Fork. In general, the information provided applies to any load plug with an analog voltmeter.
Load fork measurement
There are many ways to check a battery according to various criteria - capacity, charge, density, but measurements can be made with various devices. One of the devices that allows you to measure battery performance as accurately as possible, without unnecessary problems and unnecessary actions, is a load fork. Not everyone knows how to use such equipment, so you need to know how to properly test the battery with a plug.
The method, compared to measuring with a multimeter, is simpler and allows you to check a car battery with and without a load. This gives a complete picture of the operation and condition of the battery, with little time and effort.
What is a load fork?
This tool is rightfully considered one of the most important assistants for motorists who constantly monitor the status of all systems of their “iron horse”. With the help of a load fork, the driver can easily determine the performance of the car battery, and always be sure that it will not let him down at the most crucial moment.
A standard plug of the simplest design is a high-power load resistor, equipped with two probes and a voltmeter. The latter is integrated into a metal body. A steel pin located on the back surface of the device is connected to one of the outputs of the voltmeter (to the negative one), and a wire (usually it is quite thick) goes to the positive output.
In addition, on the back of the voltmeter there is a clamp with which the device is connected to the battery terminals, and two nuts to which load resistors or spirals are connected.
In stores for motorists these days you can find more “sophisticated” devices for checking the batteries of any vehicles (not only cars, but also trucks). Such modern devices allow you to carefully check and analyze the performance of each component of the machine’s electrical circuit.