Almost every car owner has been involved in an accident at least once and suffered damage to his car. The most vulnerable to external influences is the bumper, which in most modern cars is made of plastic. Sometimes scratches, cracks, chips and other damage simply occur due to unsuccessful parking. Repairing a plastic bumper yourself is not that difficult. Let's get started!
repaired plastic bumper
Of course, you can simply replace it, but this will be quite expensive. If you're on a budget, it's worth trying to repair the bumper yourself.
Some car owners do not consider it necessary to make minor repairs to bumpers, ignoring cracks and chips. But this not only looks unaesthetic, but also reduces safety, since the protective functions of the bumper are impaired.
What is required for repair and how to choose the right technology
In order to restore a plastic bumper, it is best to purchase a special kit, which includes the following materials:
- fiberglass;
- epoxy resin;
- hardener;
- sandpaper;
- putty for plastic;
- mixing container.
In addition, it is worth having the following tools and materials available:
- varnish, paint of any color;
- wire;
- metal reinforcing mesh;
- electrodes;
- electric soldering iron
So, you decided to repair the plastic bumper yourself. Where to begin? First of all, you must first determine the need to prime the plastic. There are several ways to do this:
Setting fire to plastic. To do this, take a small piece of the bumper, clean it of any remaining paint and dirt, and set it on fire. In this case, you need to carefully monitor the combustion behavior of the material. If the material burns and produces black smoke, there is no need for a primer. If the material burns like a candle, then before the main priming you need to apply primer for plastic.
Buoyancy check. The plastic is dipped into water. If it sinks or goes completely under water, the part does not need to be primed first. When the plastic remains afloat, it means that before applying acrylic primer, there is a need to use a special primer for plastic.
Popular materials for bumpers
The automotive industry makes bumpers from several types of plastic. This material is lightweight but durable. The main ones include:
- Thermoplastics. These are polypropylene, polycarbonate, polyethylene and polyamide. The main difference between them is the ability to become viscous-fluid as a result of heating, and to harden again when cooled. Thanks to this, the plastic can be reshaped many times.
- Thermosets. These are polyurethane and fiberglass. Their peculiarity is their inability to return to a viscous state after hardening. Because of this, processing capabilities are limited.
On a note!
It’s easy to find out what material the molding is made of: just look at the inside of the part. The abbreviation is written there in Latin.
Therefore, when repairing a plastic bumper, it is important to know what material it is made of. If the part is made of thermoplastic plastic, then by softening it can easily be made into a single structure again. If it is thermosetting plastic, welding cannot be used.
Bumper Dent Repair
Small dents on the bumper can usually be repaired using a hair dryer. The concave surface of the plastic is heated until it softens, after which the dent is leveled until the original appearance of the part is restored.
But there are also more complex cases, when the dent is significant in depth, and the plastic not only bent, but also stretched. Sometimes these dents are called dents, as is the process of fixing them. Extracting a bumper usually requires more complex manipulations, which are discussed in a separate detailed video:
How to repair a bumper by hand is possible, but it’s better not to
- Let's start with the most famous and controversial method - soldering a brass mesh into a fracture. The essence of the repair is to use a powerful soldering iron to heat the mesh until it is immersed in the molten plastic. The method really allows you to fasten cracked pieces of a bumper, and you will be able to meet dozens of craftsmen who “have been doing this for 100 years, and no one has complained yet,” but this technology has a number of disadvantages:
- metal, brass plates and plastic have different temperature expansion coefficients, so the repair area is not a monolithic structure;
- metal corrosion. Brass has very good resistance to rust, but often damaged parts are soldered or screwed into metal parts, which begin to corrode over time. The process occurs especially quickly if individual fragments of soldered metal parts remain openly sticking out from the inside of the element. Rust will penetrate inside in a relatively short time, thereby compromising the strength of the connection, and can even cause a defect in the paintwork (paintwork) on the outside of the bumper;
- loss of elasticity with a large repair area. In the cold, long cracks after soldering the mesh plates become oak, which is why even a slight deformation of the bumper can lead to new cracks.
Repairing scratches on the bumper
If there are minor scratches, repairing the bumper is as follows:
- Cleaning the damage with sandpaper and sanding. This must be done so that there are no deep scratches left. Sand until the surface is smooth.
- For deep scratches, apply putty. Then sand the area again using an abrasive material or a sander. In this case, the grinding machine is turned on at minimum speed.
- Degrease the surface to remove dust and grease. The next stage is applying a primer, then painting and varnishing.
- Drying with a special lamp. The temperature of such drying should not be more than 60 degrees, which is recommended for such material.
An important point when carrying out such an operation as repairing scratches on a bumper with your own hands is polishing the scratches. This is done using products for painted surfaces and plastic:
- A small amount of the product is applied to the circular attachment of a polishing machine or drill and rubbed in by hand for some time.
- The machine is turned on as soon as the polish can be evenly distributed over the surface.
This operation takes about 20 minutes. The result will be the removal of irregularities and various roughnesses.
Welding a cracked bumper using welding rods
Special welding rods are used for welding plastic bumpers.
In order to do all the work efficiently, it is recommended to determine in advance what type of plastic was used for the factory production of the bumper, and select “donor” welding rods from the same material. To do this, it is enough to find on the inner surface of the bumper the corresponding designation of the raw materials from which this body element is made. Most often we are talking about plastic with the PP index (polypropylene).
When starting the repair, remove the paint and putty from the outside with emery (or a grinding machine) in the split zone, exposing the plastic base. Use a soldering iron with a power of at least 100 W to solder a small depression along the length of the crack. Avoid smearing the plastic.
Then, using a welding rod, the hot air flow simultaneously softens the place of contact of the “electrode” with the groove and the rod itself. As a result, both parts involved in the process are reliably fused to each other. This must be done along the entire length of the crack.
After the outer seam has hardened, the bumper is turned over and the entire operation is repeated from the inside. For greater strength of the seam, it is recommended to make several “locks” from the inside from molten fragments of the rod, applied in several places across and protruding on both sides of the seam by 1.5-2 cm. In this case, the “locks” must be placed on all ends of the crack.
Repairing cracks and chips in the bumper
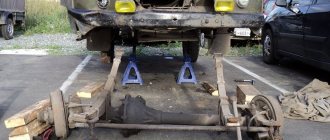
When carrying out a more serious repair of a plastic bumper with your own hands, you must first dismantle this component of the car and carefully treat the entire surface with a degreaser for plastic.
fix cracks on bumper
After this, you can see the actual extent of the damage, because sometimes small cracks are not immediately noticeable due to dirt . Then the sequence of actions is as follows:
- As usual, the damaged area is treated with sandpaper. Using a drill, make a recess in the shape of the Latin letter V.
- Adhesive tape is applied to the damaged area. Then you need to prepare liquid plastic from an adhesive mass and a thickener. Moreover, the liquid plastic must exactly match the type of plastic of the bumper being processed. The mixture is applied behind the tape glued to the bumper.
- When the plastic has hardened, we grind the surface until the defective surface does not stand out and becomes even and smooth to the touch.
- Surface painting and varnishing.
Thus, the question of how to repair a crack in the bumper is resolved.
Necessary materials
To repair and restore damaged parts of plastic bumpers, you will need the following materials:
- preliminary cleaning of surfaces is carried out using a solvent;
- wire, which should be soft and thin;
- welding rods for bumper repairs;
- as reinforcement you will need a thin steel mesh, the width of which does not exceed two centimeters;
- when using staples, liquid plastic will protect them from corrosion;
- primer;
- rubber spatula;
- razor;
- sandpaper;
- dye.
Some of them will need to be purchased, but some can be found right in the household.
Heat sealing repair
Repair of plastic bumpers can be done by heat welding. This is convenient when eliminating torn parts and large cracks. The algorithm of actions will be as follows:
- The tear seam must be softened with a hairdryer.
- The edges of the crack are connected and welded, simultaneously leveling them.
- A reinforcing mesh is laid over the seam and around it, soldering it to the bumper.
- Putty is applied to the surface to be repaired and sanded.
- Apply several layers of paint, then varnish. Dry the surface.
If you need to restore a surface with a destroyed piece of plastic, take a fragment of the same material and solder it together with a reinforcing mesh. Next, primer, putty and paint the bumper.
Bumpers are made from all kinds of plastic. Polyurethane, for example, has a fairly low melting point, so it should be welded carefully without overheating.
gluing the bumper at the crack site
You can also use a heat gun as a welding tool, which has a special operating mode regulator and is therefore more convenient to use. In general, you must always remember that heating should not cause deformation. If the temperature is too high, the plastic softens and returns to its previous position. The heated deformed surface is given its original shape, fixed and cooled.
It is better to start restoring the bumper from the inside, while simultaneously studying the properties of the material, and then weld from the outside.
Sometimes it is easier to fasten the fallen pieces with glue or tape with wire, drilling holes and installing brackets.
Do-it-yourself plastic restoration using fiberglass
For DIY repairs, you can buy a kit for repairing plastic bumpers, which includes:
- polyester resin;
- hardener;
- a small piece of fiberglass fabric.
- Fiberglass can be used as a replacement for brass mesh to reinforce the inside of the bumper. Using fiberglass, it will be possible to restore the missing elements of the part, holes for parking sensors, etc. Without the use of fiberglass, it is almost impossible to repair tuning bumpers, the construction of which uses polyurethane foam or fiberglass.
Technology
The repair instructions are based on the example of the Novol Plus 710 Repair box.
- Clean the repair area from dirt and bitumen stains.
- Using abrasive P80-P120, sand. Sanding removes the outer layer of plastic and thereby increases resin adhesion. The old paintwork is polished with the same abrasives if work is carried out on the outside of the bumper.
- Cut the glass mat so that the finished pieces protrude beyond the crack by at least 2-3 cm.
- Degrease with a clean rag soaked in 646 solvent.
- In a separate container, prepare a polyester mixture (2-3 g of hardener per 100 g of resin). At a temperature of 20C you have 10-15 minutes to work with the finished mixture, so you need to knead it in small portions.
- Using a brush, apply epoxy to a small area of the repair area and lay glass mat on it. Using a brush soaked in the adhesive, press the fiberglass fabric evenly and expel all air bubbles.
- Applying more than 3 layers of fiberglass at a time prevents the bottom layer from drying out quickly. We recommend observing intervals between layers of drying (approximately 10-15 minutes at 20? C). Full polymerization occurs in 50-60 minutes, after which the section can be polished with abrasive materials.
Some subtleties
Retail fiberglass is classified in grams per m2. The coarser the fiberglass, the lower the grams/m2. For the final layers of the front component of the bumper, it is best to use glass mat (600-700 g/m2), since it is the easiest to process in preparation for painting. On the outside, try to apply the resin and lay the fiberglass mat as evenly as possible by hand to reduce the amount of sanding required later in preparation for painting. For initial processing by hand, use P80-P120 sandpaper. To level the surface of the bumper, plastic putty is applied to the repair area.
Other methods for repairing plastic bumpers
If professional tools and equipment are not available, repairing plastic car parts can be done in another way.
To join the edges of the cracks, a clamp or clamp is usually used on the removed bumper. It happens that it is not possible to achieve the desired result with one clamp, then two or three pieces are used.
The seam is closed from the inside with staples. They are soldered at a distance of several millimeters from each other, and the seam is melted.
The outside paint is cleaned with a sanding machine. Then, along the cleaned surface, the outer seam is sealed. After cleaning, it is advisable to blow the seam with compressed air.
When applying putty, you must use a special compound for plastic and a rubber spatula. Then the seam is blown again, dried and primed in two layers. Before applying the next layer, the previous one should be allowed to dry for 15 minutes. Minor defects can be eliminated by applying nitro putty. The surface is sanded again with P1000 sandpaper and degreased before applying paints and varnishes.
Repairing a plastic bumper can be done using epoxy resin and fiberglass. This option is carried out if the plastic is split into several small parts and some of them are missing. The broken parts are glued together with superglue. Epoxy resin is applied to the inside, fiberglass is glued onto it and coated with epoxy resin again.
With this method, the surface can easily be puttied and painted. However, drying takes a long time after treatment with epoxy resin.
Other ways to restore a bumper
Sometimes it is not possible to collect broken fragments from the scene of an accident or they crumble into too small parts. Wide cracks form at the site of the split, which cannot be repaired using the above method. In such cases, other methods of bumper repair are used for restoration. For example, they use strips of plastic; they can be used to weld places with large gaps. First, they look for a plastic that matches the brand. To make a pattern, it is applied to the elements being repaired across the future seam. After this, fragments of the required format are cut out. The patches are heated with a hairdryer and pressed in slightly. Then the seams are additionally reinforced with mesh to add strength. The brass mesh does not need to be protected from corrosion; the steel mesh is coated with liquid plastic for reliability.
The restored surface is leveled and prepared for painting.
Bumper protection
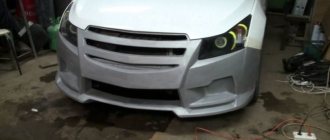
Getting on a steep descent or climb can seriously damage the bumper. Protecting the bumper yourself will reduce the likelihood of defects in this part of the car.
Such protection can be made industrially or with your own hands. With some skill and the availability of tools, it is possible to make yourself a so-called power bumper, which perfectly protects the car from all possible consequences of road accidents.
clean and putty the bumper
Before starting to manufacture the protection, you need to think about what the new part will look like: establish where the attachment points will be, whether arches are needed. It is worth constructing a protection drawing and calculating everything in such a way that changes are not considered a serious structural modification of the car. Attention is also paid to analyzing the weight of the bumper and its maximum load.
It is better to have a specialist weld the bumper frame and do the installation yourself. Reinforced bumpers are attached to the frame or side members. To protect the power bumper, a guard is used.
Making bumper protection with your own hands can have unexpected and not very pleasant consequences, because it is not known how such a part will cope with its task in the event of a car accident.
Chance No. 2: how to repair a bumper with your own hands and video of work processes
Often in traffic you can find a car with a cracked or deformed buffer. What can you do, no one is immune from unsuccessful parking or a minor accident. However, this is not a reason to continue driving a car that has lost its “brilliant” appearance - there is practical experience in restoring this element to its original condition.
General information about the subject
External plastic structural elements are mainly made of thermoplastic plastics. The technology for restoring such products is based on welding, which allows you to get rid of through cracks and even recreate broken fasteners. Actually, the procedure is not much more complicated than preparing and spray painting a damaged area of a car body.
Some car enthusiasts claim that we simply repair the bumper with our own hands using metal brackets. But an experienced car owner knows that like can be treated with like, that is, repair plastic rods are used for soldering. Their composition, color and profile are different; the required rod is selected according to the markings on the buffer.
You need to know the material!
Making the right choice means guaranteeing quality repairs, because inappropriate materials can significantly shorten the life of the automotive element. To find out what a cracked bumper is made of, just carefully examine the inside of the part. Depending on the labeling, the following conclusions are drawn:
- PP – polypropylene base.
- ABS (GF, PAG 6) – hard plastics.
- PUR – polyurethane.
Welding plastic requires high temperatures, for example, 400-450°C is suitable for propylene, and 500°C is necessary to restore an ABS structure. Many car owners learn how to repair a bumper with their own hands in a video where craftsmen use an ordinary 100 W soldering iron.
You can also restore a damaged part using pieces from a bumper with similar markings. They are cut into strips 8 mm wide for PUR, and 4-5 mm wide for polypropylene.
Almost any breakdown can be treated by welding, even broken parts can be reanimated. However, no one has canceled the economic feasibility of such work, since the restoration of numerous defects can hardly be called justified. The cost of a complete restoration and painting will be more expensive than a new buffer.
To perform the repair you will need certain tools. These can be both ordinary household appliances and professional tools. The ideal kit includes the following items:
- Orbital sander or sanding block.
- Grinding wheels of various grain sizes.
- Mini drill like Dremel or drill.
- Clamps and rubber spatula.
- Soldering iron and hair dryer.
- Metal tape.
Materials for restoring a cracked buffer may include:
- Putty and primer.
- Brass mesh for crack reinforcement.
- A can of paint or a can of spray paint.
- Plastic repair rods of the required configuration and composition.
Preparatory activities
The damaged part must be dismantled to eliminate, firstly, excess stress in the crack area. Those who have already done such work will say that now we clean the bumper and only then repair it with our own hands.
The cracked parts fit together. For reliability, they are fixed with metal tape on the outside of the part. If the gaps are quite significant, then you will need clamps to clamp the edges of the cracks. Their number depends on the complexity of the repair.
Restoring a polypropylene bumper
When restoring PP-based parts, reinforcing mesh is not used. The process begins with installing a nozzle with a nozzle with a diameter of 5-7 mm on the hair dryer. Further work is carried out according to the following points:
- On the inside of the buffer at the junction of the cracks, use a Dremel-type mini-drill to make a groove for the plastic rod.
- Using a hair dryer, melt and place the repair rod in the prepared groove.
- Clean the front part of the bumper with an orbital sander with a P240 attachment and repeat the welding procedure in the same way as on the inside.
- Grind the cooled seam from the outside using a nozzle with the same grit P240, and then remove dust from the surface.
Puttying and painting
- Use a special putty for plastic to smooth out the unevenness, trying to keep the layer to a minimum.
- Dilute the primer with solvent 3:1 and apply two coats to a degreased surface. Drying time for the first layer is 15 minutes.
- Apply a developing layer of a contrasting color, followed by sanding with a wheel or sandpaper with grit P800 and P1000.
- Eliminate detected defects using nitro putty followed by sanding with P1000 sandpaper.
- Remove dust with a damp cloth and degrease the part, then paint the plastic with decorative paint with an overlap of 50-100 mm. Apply the paint in 3-4 layers with intermediate drying cycles.
Anyone who is interested in how to properly repair a bumper with their own hands in the video should take into account an important detail. 30-40 minutes after applying the last layer of paint, the part should be varnished. Thus, we obtain a flawless appearance of the repaired part. Don't forget to follow a few simple rules:
- You should try to apply a minimum layer of putty.
- Allow a temporary pause for the putty layer to completely harden.
- Treat the putty area with a sanding wheel or sandpaper with a grit of P800, and then with a grit of P1000.
- It is advisable to apply a developing layer of primer.
Option PUR: how to repair a polyurethane bumper with your own hands and video of technological processes
In the case of a polyurethane buffer, the preparatory stage in the form of work on installing grooves is eliminated. A reinforcing mesh made of brass is applied to the crack; steel is not recommended for use because it is susceptible to corrosion. As an alternative, it is possible to use staples every 10-20 mm. They are recessed into the body of the part across the seam; you must ensure that the bracket does not pass right through the part.
Further, the repair technology does not differ from the restoration of a polypropylene part. Metal mesh or staplers should be embedded in a layer of plastic. Only after this is the seam filled with repair plastic and soldered on the opposite side. Some important technology points should be taken into account:
- You need to solder the mesh or staples carefully so as not to overheat the plastic, otherwise it may become deformed on the opposite side.
- For a complete do-it-yourself repair of a polyurethane bumper, the width of the reinforcing mesh should be 15-20 mm.
- It is better to press the mesh or staples with a flat object.
- If the legs of the staples pierce through the plastic, they should be shortened using side cutters.
- To make it easier to work with metal elements, you can use tweezers.
- To prevent the new enamel from peeling off, it is necessary to sand the paint over the entire surface of the part.
The puttying stage and painting are carried out in the same way as described above - according to the traditional scheme. Repair work to restore the buffer can be combined with painting the car, so the consumption of materials will be more rational. It is important to determine in advance the feasibility of carrying out restoration work. If significant costs are visible in the future, then it is better to buy a new part.
autobann.su
Restoration of fiberglass bumper
There is always a risk of causing damage to the bumper by suddenly running into something. In such cases, a rupture of the lower shelf occurs with the loss of part of it. The first thing you need to do when starting to repair a fiberglass bumper yourself is to measure the gap between the corners. The measurements taken will definitely be needed towards the end of the repair in order to maintain the distance.
First we dismantle the bumper. The part will sag a little at the break point. It is impossible to connect the damaged edges of the bumper, because part of the shelf is missing altogether. We need to glue in this missing link.
To process the destroyed part of the part, an angle grinder is usually used. Having finished sanding the edges, the edges of the gaps are combined, and the bumper is placed on a flat surface to adjust the dimensions.
After cleaning the surface, polyester resin is applied, which is covered with fragments of grade 300 glass material.
Cracks are repaired on the outer surface of the car. To do this, clean the area towards the formed defect, at a distance of five centimeters from it. Sand until the inner layer appears.
Next, lubricate this part with polyester resin, apply glass material and glue the edges. The top layer of material must coincide with the surface of the bumper being repaired.
When the plastic has hardened, it must be sanded and polyester putty applied. Before this, the part is sanded with P80 sandpaper, but no coarser, otherwise the scratches will appear through the putty on the paint.
It is also necessary to repair corner breaks from the outside. The crack is cleaned and the fiberglass that has undergone delamination is removed. Then a patch of glass material is applied. The larger grade of material is much thicker and bubbles may form when applied. The corners are reinforced from the inside by laying glass material grade 300 in four layers.
The patch is sanded flush with the surface using a coarse P40 abrasive. Then another layer of fiberglass is applied if it is necessary to close the cracks.
Then the bumper is painted and installed in place.
Repairing a fiberglass bumper is not the most trivial task, but it is still doable with due diligence. Therefore, before taking action, we recommend that you carefully read our special article: DIY fiberglass bumper repair.
DIY plastic bumper repair: soldering, welding, gluing. Instructions, recommendations
The times of massive metal car bumpers, and even with characteristic “fangs”, are long gone. Today, the vast majority of passenger cars are equipped with plastic elements. On the one hand, this solution allows you to significantly reduce the total weight of the car, while at the same time reducing the cost of the car during its production. After all, body parts made of various metals and alloys are incomparably more expensive. In addition, the cost of a new plastic body kit is much lower than its metal counterparts.
On the other hand, plastic bumpers are much less durable. Even very durable plastic is much more vulnerable to impact, mechanical stress and other external factors. However, restoring a bumper, even a relatively cheap one, is a rather expensive procedure. However, you can save a lot on it if you know the basic principles of repairing modern plastic body parts.
This article will be devoted to how to repair a bumper with your own hands.
Purpose and main functions
Initially, the car bumper performed one single function related to safety. It was a rigid structure designed to absorb impact energy, protecting the life and health of vehicle passengers, and at the same time the car body parts. Meeting these requirements dictated that there were no alternative options for the execution of this specific part. Since about the 20s of the last century, the front and rear bumpers have been made in the form of an external metal cross beam. The more powerful and durable the structure was and the further it extended beyond the longitudinal dimensions of the car, the higher the safety characteristics were considered.
The evolution of the car bumper
Over time, the simple massive metal beam underwent some changes in its design. Special shock absorbers appeared that made it possible to absorb the impact force even more effectively; bumpers began to be given a more aesthetic appearance through chrome plating, improved design and other decorative techniques.
But the real revolution occurred when many manufacturers abandoned the idea of “aggressive” protection with bumpers. Although the protective function of this part is still important today, modern body parts are complex, high-tech structures made from various materials and having a variety of capabilities.
Typical structure
Today, a car bumper is made not of metal, but of plastic or polymer materials. In addition, the structure of a modern body element is a complex multilayer structure. In the vast majority of cases, it consists of the following components:
- Actually the bumper. Or, as the basis of the structure is also called, “amplifier” or “bumper tire”.
- Overlay. A plastic or polymer material that improves the aesthetics of appearance, completes the overall design concept of the design and protects the main structure.
- Absorber. This is the material placed between the base of the bumper and the decorative trims. It can be a foam filler, a material based on polyurethane, silicone, or various composite materials.
Additional functions of a modern bumper
In addition to its main “responsibilities”, which are to protect and create the exterior of the car, a modern plastic bumper provides opportunities for implementing a wide variety of additional functions. Examples include the following:
- Placement of various sensors and electronic systems. Parking sensors, a rain analyzer, and a light sensor are often integrated into the design of the element.
- Installation of main and additional lighting devices. The bumper is the most popular place to place fog lights, additional side lights, and sometimes even main headlights.
- It is in the bumper that the main sensors are located that activate, for example, airbags and other systems.
- Various headlight washing systems, front and rear view video cameras, and other service devices are also often mounted in bumper systems.
DIY plastic bumper repair
Such complexity of the design, its versatility and the use of the most advanced technologies often lead to the fact that even minor damage to it leads to unreasonably high costs of finance, effort and time. There is a widespread belief among car enthusiasts today that it is almost impossible to even simply straighten a plastic bumper after minor damage without the help of a specialist. Nevertheless, we will try to talk in detail about how to do this on our own.
When can you fix it yourself?
Of course, repairing a plastic bumper with your own hands is not possible in all cases. A lot depends on the nature of the damage and the amount of work that is planned to be done. Obviously, after a serious accident, resulting in serious destruction of the entire structure as a whole, the help of highly qualified specialists will be required. However, some malfunctions and defects can be eliminated yourself, saving both time and quite a lot of money. Let's look at the most common situations.
Failure or incorrect operation of sensors or lighting devices
It often happens that due to vibration, temperature changes, or even minor shock or mechanical influences, one of the sensors begins to work incorrectly or simply fails. Often there is a need to replace light elements mounted in the front or rear bumper of a car. Accordingly, the question arises: how to remove the bumper without damaging it? Not in all cases is it worthwhile to immediately contact a car service, since this operation can be performed by yourself.
Of course, a lot depends on the car model, manufacturer, body type and year of manufacture. But there are a number of universal recommendations that allow you to get a general idea of the algorithm for performing such work. Having familiarized yourself with them, all that remains is to apply a certain amount of ingenuity in each specific case.
Removing the rear bumper of a car
Before removing the bumper at the rear of the car, you need to open the trunk. In most cases, the rear member is bolted to the sides of the body. They can be accessed in various ways:
- in cars with a sedan body, it is often enough to simply remove the luggage compartment mat;
- a station wagon body most often requires dismantling the entire rear door trim;
- in some models, it will also be necessary to dismantle the side inner lining of the body, which is most often held on by “clips”.
After the main fastening bolts are unscrewed, all that remains is to carefully unscrew the screws securing the sidewalls of the element itself with the fender liner brackets. Then all that remains is to pull it a little back and down - it should come off easily.
However, it would not be superfluous to read the technical documentation for a specific brand of car before carrying out dismantling work.
Removing the front bumper of a car
To provide access to the front element fasteners, in most cases it is necessary to remove the radiator grille. As a rule, this is not difficult - just open the hood and carefully unscrew the bolts securing the engine compartment protection. After this, the work involves the following approximate algorithm of actions:
- unscrewing the central element of the bumper fastening using a Phillips screwdriver;
- dismantling the plug-in clamps of the radiator grille and the hex bolts located under them;
- removing the plastic dowels located on the inner lower side parts of the bumper.
After that, all that remains is to press the edges of the part from top to bottom, while simultaneously pulling it forward as the car moves.
Removing cracks and chips
Often, repairing a plastic bumper with your own hands makes it quite easy to get rid of cracks, chips and other minor mechanical damage. There are several methods for such minor repairs, depending on the nature of the damage, its physical size and location.
Bonding a plastic bumper
Often, you can get rid of small cracks quite effectively by simply gluing the damaged areas. To do this, it is best to use a special two-component glue for plastic, which can be bought either in specialized car parts stores, or in construction hypermarkets, or even in simple household chemical departments. The technology for using such an adhesive composition is quite simple:
- first you need to thoroughly clean the surface from dirt and dust;
- then you need to degrease it with a soap solution or non-aggressive solvent;
- then apply two-component plastic glue to the joints of the crack.
As a rule, such glue is applied in two steps. First, the crack is filled with a special suspension, which takes some time to dry and set. Then the result is secured by a second component - a special fixative that protects the main adhesive composition from moisture and other external influences.
Soldering plastic
In addition, with relatively minor damage, repairing a plastic bumper with your own hands can be done using soldering. As a rule, this method gives a much more reliable result than applying an adhesive composition. In addition, the results look much more discreet and aesthetically pleasing.
Despite its name, bumper soldering does not require the use of a traditional soldering iron, tin and rosin. The technology for producing this type of work is quite simple. To fill a crack or chip, a special polymer composition is used, which is heated using a heat gun, a hair dryer or some other device and cools quickly, setting firmly. After the bumper has been soldered and the compound has hardened, all that remains is to carefully remove the excess compound using a spatula, construction knife or fine-caliber sandpaper.
One of the varieties of the method discussed above is the so-called welding of plastic bumpers. Again, it does not require the use of complex special equipment. Plastic welding is done using hot air supplied under high pressure using the same hair dryer, only more powerful, or a so-called extruder that melts special plastic granules. This method is used mainly to eliminate damage that is relatively large in size or area.
Painting a plastic bumper
In the vast majority of cases, even after minor cosmetic repairs, such a bumper requires painting to make its appearance uniform. Today, there is a wide selection of different compositions and devices for painting plastic surfaces. It is only important to remember that neither oil nor acrylic paints are suitable for painting plastic.
However, finding special paints and varnishes designed specifically for plastic surfaces is not a problem. And almost any colors, textures and textures. You just need to remember the following nuances:
- to uniformly apply layers of paint or varnish, it is best to use a spray bottle or composition in cans;
- if a bumper that has not been dismantled is being painted, then all other parts of the car at the work site must be covered with paper, film, foil, tape or other protective material;
- It is better to paint in a closed, dry and warm room, at a temperature not lower than +12 degrees Celsius;
- It is necessary to follow safety precautions - use a hat, safety glasses, a respirator and gloves.
As you can easily see, repairing a plastic bumper with your own hands in a number of cases is a fairly simple operation - with a certain amount of skill, almost any car owner can handle it. Saving a fair amount of time, nerve cells and money!
fb.ru