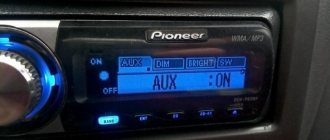
Car owners often face the problem of how to disable demo mode on a Pioneer radio. After purchasing and first connecting a device from this company to the on-board network and making the necessary initial settings, the display will not be able to be turned off. The screen will remain on and display a list of the radio's capabilities. However, the device will not provide the user with any hints on how to deactivate this mode. The radio can be used in this condition, but it will cause inconvenience to the driver.
Step-by-step instruction
To find out how to disable demo mode, follow these steps:
- press the Mute button and hold it for several seconds;
- if the demo program does not turn off, it is recommended to turn off the player, open the service menu and hold down the SRC key for a few seconds;
- turn the volume control wheel until the cursor selects Demo;
- turn off demo mode by selecting Off instead of On;
- close the settings menu by pressing the Band button.
Please note that if the red AAC cable from the player is not connected to the terminal that turns on the ignition, the car's battery may be discharged.
Recovery system to reset data
This method is the most effective and radical measure. It is used when the smartphone stops responding at all, or freezes when turned on and crashes. It happens that an error in the device does not allow you to delete, move or copy elements.
Recovery works using a keyboard shortcut. Each device has a combination that launches this function. So, let's look at step by step how to completely clean your smartphone and do a general reset on Android:
- Turn off the device completely. Wait until the screen, buttons, etc. go dark.
- Now choose the combination that works specifically for you:
- The most widely used: volume down button + power button. On some devices, after pressing this combination, you need to wait until the brand logo appears on the screen, release the power button, and then press it again.
- Combination number 2: volume up button + volume down + power button
- Combination number 3: power button + home button.
After the combination works, the Recovery system will be launched. Next, the program will ask you to select one of the options. You should:
- Select Clear eMMC (Clear Flash, Factory reset)
- Confirm deletion of all data
- The Recovery process will begin
- Now all you have to do is click Reboot System
- Everything is ready, you have returned the gadget to factory settings.
Possible problems and their solutions
Modern car players developed by Pioneer are multimedia centers with advanced capabilities and a large number of settings, which will take time to learn. Demo mode is always enabled by default on Pioneer devices. It is intended to demonstrate the capabilities of the radio when selling it.
If you ask the company employees for help, they will answer that the solution to this problem can be found in the instructions.
The user manual contains step-by-step instructions on how to properly set up the radio, but sometimes it happens that the instructions are lost or are not at hand.
Some users experience that the demo mode is activated again after turning the ignition off and on. This is due to the fact that the player's power passes through the ignition circuit.
When installing a player, a service station employee always asks how best to connect it - directly to the on-board network, or so that it turns off when the engine stops. If you choose the first option, the device will constantly receive energy from the battery, regardless of engine operation. In this case, all settings will be saved in memory. If you are not satisfied with the power option that you chose the first time, you need to contact the service station staff again so that they can change the connection type of the player.
If the player is not directly connected to the on-board network, then problems arise with other functions. For example, the date and time settings on the player, as well as the radio station presets, will be constantly lost. But the direct connection also has a disadvantage, since the player will drain the battery when the engine is idle.
Quite a lot of people have been faced with the question of how to turn off the Pioneer radio. Owners of standard radios especially often face this need. In this case, when you turn off the radio, you will see a transition to the “clock” mode. In this case, the button backlight will work. Drivers usually blame this on the incompetent technicians who connected the device. But, in fact, the reason here is different. This is a technical feature of many radios of this brand. This problem can be solved quite simply. You just need to know how to do it. In fact, this is not the biggest problem, and there is no point in going to the dealership to fix it.
How to connect correctly
To correctly connect the Pioneer car radio, you need to familiarize yourself with the diagram attached to the documentation. The cables are routed under decorative plastic body panels that protect the insulation from physical damage. For correct operation, it is necessary to ensure a continuous supply of positive power that supports the device’s memory. For switching, a yellow cable is used, which is led directly to the vehicle battery.
Wire marking
The Pioneer radio is connected using 2 ISO standard plugs, in which wires of different colors are mounted:
- red - to supply positive power after turning on the ignition;
- blue - supplying positive voltage to the amplifier and motor drive of the antenna;
- yellow - positive signal to support the memory block (does not depend on the position of the key in the lock);
- black - connection with the car body (negative signal);
- purple and purple with a black stripe - for connecting the speaker installed in the rear right door;
- gray and gray with a black stripe - for the loudspeaker located on the front right;
- white and white with black - for switching the loudspeaker in the left front door;
- green and green with black - to send a signal to the rear speaker on the left side.
On some of the radios there are additional cables designed to connect the steering wheel control panel or additional components of the multimedia system. When using component car speakers or amplifiers, the speaker cords are connected to the additional equipment.
Connection diagram
The connection diagram for the Pioneer car radio is given in the operating instructions. The cables are connected in accordance with the color of the insulation; cables coming from the battery and the ignition switch are used to connect power. If you connect the red wire directly to the battery, the head unit will discharge the power supply. To ensure reliable contact between the cords, soldering with tin-lead solders or crimping the joint with a metal tube is used, followed by wrapping with insulating tape.
Shutdown
This is done in the following order:
- Press button 2 and enter MENU. Then select SISTEM, at the next stage press PW SAVE
, all that remains is to turn off the radio with the OFF button. This is how we switch to energy saving mode; - Turn off the radio with button 1. At the same time, a clock indication should appear;
- We press button 4, eventually the display goes out.
Having completed this procedure once, you can subsequently turn off and turn off the radio with the standard button 1. Sometimes, resetting the settings can occur after disconnecting the speaker system from the power supply. In this case, you should repeat the steps described above.
Clicking noises when the engine is running
Many owners of standard radios are faced with the appearance of periodic clicks when the motor is running. To begin with, you need to understand the reason for the appearance of such a not entirely pleasant phenomenon. It's all about the car's energy system. When the power unit operates, small voltage surges regularly occur. This results in interference.
In principle, the radio tape recorder has protection against this. But the standard noise suppressor does not always cope with the problem. Sometimes this happens due to its failure, which is not a rare occurrence. You can fix the problem by simply connecting power to the radio through a noise filter. This is guaranteed to save you from clicking acoustics.
Speaker wheezing
Some drivers encountered a situation where the speakers began to wheeze. At the same time, this does not happen all the time, but only from time to time. Of course, the problem could be a faulty speaker. But, often the reason turns out to be unsuccessful configuration of the system itself. Therefore, troubleshooting should begin by viewing the settings. You are interested in the balance menu. Here you can evaluate how the sound is distributed between the speakers. Pay attention to the uniformity of its distribution. Most often, unbalanced low frequencies cause wheezing.
If everything is correct in the settings, then it makes sense to pay attention to the wire connections. There may be a bad connection somewhere. That is why the speaker wheezes. This may be indirectly indicated by the irregularity of wheezing. Especially if the speakers are in the doors. When you open the door, you move the wire, one time the contact may be normal, another time, not so much. The cause of wheezing may be a broken capacitor.
. In this case, you need to check it.
Sound settings
In order for the radio to play juicily and reproduce low frequencies well, you need to adjust the equalizer curve and adjust the cutoff of low or high frequencies. The equipment supports adjusting the sound balance between speakers; there is a separate function for dynamic bass boost (BASS BOOST).
The sound quality is affected by the bitrate of audio recordings stored on laser discs or removable storage devices. If the recording quality is low, it is impossible to correct the sound picture using the settings.
Equalizer
Equalizer curves with standard parameters are stored in memory; to select the required value, use the menu (EQ Settings subsection). Radio tape recorders support creating your own sound picture by recording parameters in a separate memory cell.
High and low pass filter subwoofer
Setting up the slice is done through the menu, where you need to find the Crossover parameter. The function is supported only by some equipment; the setting algorithm depends on the modification of the acoustic device. Some models allow you to set individual characteristics for each speaker. The cutting height is selected from the list of suggested values.
Subwoofer doesn't work
In standard installed stereo systems with a Pioneer head unit, the sound from the subwoofer sometimes disappears. The problem is an unsuccessful output to the low-frequency speaker. The problem is treated in 2 ways. If the radio is new and under warranty, you can try to exchange it. But this does not always happen; more often it is repaired and returned.
Another option is to re-solder the output yourself. Perhaps the second option is the most optimal. Self-made repairs are much more reliable than warranty repairs. Moreover, no difficulties should arise there.
Conclusion
. Acoustics in a car often require quite a lot of attention. It needs to be configured correctly, this will allow you to make the most of its technical characteristics. How to turn off a Pioneer radio is a question often asked by owners of such equipment. In fact, this is done so simply that the manufacturers didn’t even mention it in the instructions.
Music in the car has become an integral part of the driving process:
- does not allow you to sleep;
- lifts the mood;
- whiles away the time on the long road.
However, situations often arise when you need to change menu settings. You can reboot the head unit in 2 ways:
- reflash the software;
- change settings using buttons (joystick) on the device panel.
How to reset a locked 2 din Android-8 Car Radio to factory settings
Find a combination for Hard Reset using buttons
Find the firmware for your radio.
But as a rule, it is very difficult to find anything on them, and in both cases you have to write to the seller or manufacturer of the radio. I’ll share a little experience, what combinations I’ve seen:
I press the reset button with something sharp and hold it, turn on the radio, after 7-10 seconds the reset starts
I press the home button and turn on the radio. Recovery turns on and select the Wipe Data line
After going through attempts, the radio itself offers to reset, it seems after the 20th attempt
After going through attempts, the radio offers to enter the Google account that was in it
And when nothing helped, and the seller did not answer, then I disassemble the radio, look for the markings and revision on the board, and then look for the firmware based on the markings
lta4_20120822 radio tape recorder Tell me how to find the password
How to unlock your phone if you forgot your pattern key?
If it's still relevant. If you are on the same screen as in the photo, and you can get there: with the smartphone turned off, press the volume up key and hold the power button, the Lenovo logo will appear, release the power key while holding the volume up. Now press the recovery button on the screen. There will be a yes/no choice or something similar; we agree. Next, control between the windows will be with the volume buttons (switch between menus) and confirm with the power button. You need to select the line wipe data/factory reset. Confirm with the on button. The smartphone will be reset to factory settings. Attention! All personal data will be erased!
Reboot to remove code
If the radio does not turn on for a trivial reason - the code is forgotten or the device does not respond to the characters being typed, a reboot will help. For all types and types of audio systems there is a single algorithm for this process:
- remove the radio from the car;
- on the surface of the case we find a 14-digit code;
- rewrite them;
- put the device back into the car and connect it;
- turn on the unlock code calculator;
- enter the number copied from the surface of the case;
- The 4 digits that appear on the display are the new code.
Rebooting equipment of different models has much in common, but there are also differences.
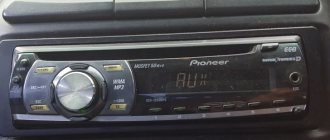
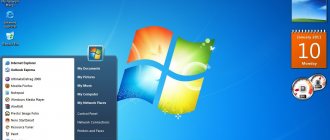
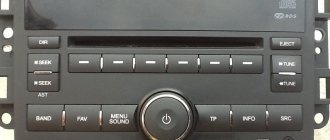
Pioneer radio
Demonstration on JVC car radio
The Japanese from JVC have a demo that turns on automatically if there is no sound playback for several minutes. But disabling the Demo is simple:
- Press the SEL (select) key and hold it until one of the setting items is displayed on the monitor.
- By going through the menu items, select the DEMO OFF item. On some models, select the DEMO ON item and press the button to switch to DEMO OFF.
JVC car radio
Please note: do not open the device case. There is a risk of exposure to laser radiation or damage to the player. There is nothing inside the case intended for user manipulation; servicing must be performed by a qualified technician.
Radio "Pioneer"
Changing the settings of the Pioneer radio allows you to improve the basic parameters of the audio system. You can reboot the Pioneer radio to improve the sound in the following sequence:
- by pressing the sound adjustment knob (vernier) we enter the menu;
- working the joystick left, right, we find the “Audio” section and press the vernier again;
- look for “FADER/BALANCE” and set the number 0, indicating reset of the parameters;
- Use the joystick to bring the FADER indicator to +15.
Radio "Sony"
The Sony family of multimedia systems runs on the Android platform. Therefore, rebooting the Sony radio in the latest modifications is quite simple. Manufacturers have simplified menu navigation and created prompts that appear on the screen. In addition, electronic setup instructions were entered into the system’s memory. This allows you to reboot the radio on Android, following the prompts that appear on the screen. To simplify the procedure, the developers repeated the settings of mobile phones, which is familiar to every owner of a mobile gadget.
Radio Sony MEX-XB100BT
Enter the menu by pressing the vernier. Following the prompts, we alternately adjust the equalizer, then the balances, bass boost and subwoofer.
Go to function settings by pressing and holding the vernier. By going to the menu, you can configure the clock, dimmer, shutdown parameters, reception of radio stations, and speaker operation.
To restore factory settings, you must press and hold the “DSPL” and “BACK” buttons.
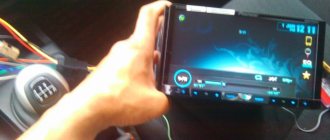
Rebooting the radio when connecting the Yatour adapter
To gain access to an array of music recordings, car owners buy the YATOUR YT-M06/M07 adapter. It allows you to listen to music from a flash drive or SD card without special players.
USB adapter YATOUR
To switch from USB to AUX mode (from listening to a flash drive to an SD card) you need to:
- turn off the radio;
- wait until the flash drive indicator goes out;
- disconnect the flash drive from the adapter;
- connect the AUX wire to the adapter into a special connector;
- turn on the audio system and switch to adapter mode. If track Disk 05, Track 54 lights up on the display, AUX is active.
The latest models of radio tape recorders are complex multimedia systems. However, this did not affect the software reboot process. On the contrary, compared to outdated audio systems, it has become simpler and clearer.