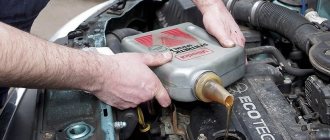
Valve seals (VSE) isolate the internal combustion engine from excess lubricant. They are made from a special type of rubber that can withstand loads. However, over time they still wear out, so excess oil gets inside the power plant. This leads to increased vehicle consumption and other problems. Find out how to replace valve stem seals yourself.
Reasons for replacing caps
On average, oil seals last 100 thousand kilometers or more. But this indicator is average; in fact, it all depends on the characteristic features:
- sealing failures - oil consumption increases sharply for every 1000 km;
- changes in the color of the exhaust - when starting or braking, gray, bluish smoke pours out of the muffler;
- coking of spark plugs.
At least one of the listed symptoms will indicate the need for a thorough check and, if necessary, replacement of the valve stem seals.
Why do valve stem seals fail?
On “old” engines, valve seals last 200 thousand km, and on some Japanese cars on the domestic market, 300-400 thousand km. This does not mean that the valve stem seal will retain its original condition by this time, but it does not require urgent intervention in the cylinder head and replacement.
On modern engines the situation is somewhat different, dramatically different. The service life of this seal can be exhausted by 60,000 km of the car's mileage(!). We will not consider the reasons for this phenomenon in this article - there are many versions, up to a cartel agreement between automakers). Understanding this will not make it any easier for the car owner - repairs still need to be done urgently.
Replacing caps without removing the cylinder head (Instructions + link to Video)
A special lift is not needed to replace caps in a garage. Below is more information on how to carry out work on a 16-valve 1.8 liter engine. At the same time as this procedure, it is recommended to replace the timing belt, tension/idler rollers, pump and antifreeze so as not to disassemble the car again.
- Unscrew and remove the ignition coil module. On some cars, just pull out the spark plugs.
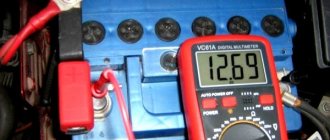
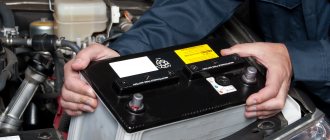
- Disconnect battery. It is enough to remove the negative terminal.
- Disconnect the electronic control unit to remove the multi-core cable and provide access to the left side of the internal combustion engine and the gas distribution mechanism.
- Remove attachments that interfere with removal of the timing belt.
- Remove the timing belt or chain.
- Release the camshaft gears using a camshaft holder and a socket with an extension. Then you need to remove the plastic protective cover.
- Disconnect unnecessary lines (crankcase exhaust hose, fuel hose, etc.).
- Unscrew the valve covers. It is easier to remove the valve cover bolts with a special pipe wrench or socket.
- Unscrew the camshaft bed fastenings using a Torx hexagon.
- Pull out the beds. Here you need a pry bar, which is inserted into the gap and helps to unstick the stock from the sealant.
- Remove all hydraulic compensators using a magnet. Be sure to sign each pusher so that it is inserted into its original place.
Now all that remains is to remove the MSC.
Video: Replacing valve stem seals without removing the cylinder head
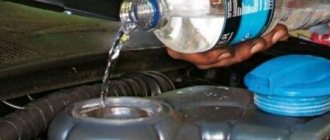
Pay attention to the oil level!
The AUTOPSA technical center recommends that owners of cars with an EP6 engine pay special attention to regularly changing and checking the oil level. If there is a lack of oil, the camshaft bed wears out, the timing and timing mechanisms are disrupted, and this is a typical reason for expensive engine repairs. With a mileage of more than 80,000 km, it is necessary at least once every 1000 km. check the oil level dipstick. If you notice that the oil regularly disappears, then contact the service center as soon as possible to look for a leak. Here are the most common places for oil leaks:
- valve cover and spark plug well gaskets;
- vacuum pump gasket;
- oil pump valve;
- crankshaft oil seal;
- oil filter housing gaskets;
- chain tensioner.
The tightness of the indicated places, with continued increased oil consumption, is the first symptom for revising the EP6 engine and replacing the valve stem seals. Experienced specialists who have seen hundreds of similar engines and know their features well can best diagnose oil scraper equipment.
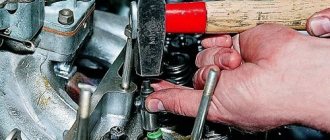
Removing the caps
The work is carried out as follows:
- screw a homemade fitting into the spark plug well;
- connect the compressor, creating pressure in the cylinder - due to the increased pressure in the cylinder, the valve will not fall;
- put the desiccant on, lightly tap it with a hammer and remove the spring with the cracker (we use a magnet again);
- Pull out the oil seal using pliers.
New oil seals are inserted quietly onto the valve, which does not go down, since it is held in place by the pressure from below from the operating compressor. After installing the MSC (you can take the oil seal with tweezers for convenience), you need to press it with a spacer and lightly tap it with a hammer. Replace the spring and dry it. This is how the valve stem seals are replaced without removing the head.
Attention! Before installing a new oil seal, you should install a homemade threader on the valve. A piece of threaded candle will do. It is needed so that the rubber part of the MSC does not lift up during installation. After inserting the oil seal, the homemade element is pulled out.
Necessary tool
Be sure to prepare:
- valve desiccant with nozzles (goat);
- special pliers for removing caps;
- magnet on telescopic antenna;
- hammer;
- tweezers;
- Torx-type hex key;
- shaft holder;
- aluminum tube for pressing in new oil seals;
- a homemade fitting made from a candle - a fitting is welded to one end for threading the compressor hose;
- homemade threader for inserting new MSCs;
- pump (compressor).
And of course, we prepare new consumables: oil seals, valve cover gaskets, belts, rollers, etc.
Replacing valve stem seals without removing the head
The decision to replace oil seals when signs of malfunction are detected is a very correct step
. Sometimes drivers try to solve the problem without “surgical” intervention, using various additives and additives that supposedly soften the rubber and extend the life of the valve stem seals. This decision should not be made: additives either do not have any effect on the seal material, or soften them too much, as a result of which rubber wear only increases.
Replacing oil seals without removing the head is a complex process, so you should devote a lot of time to it, and perform all actions very carefully. How to change valve stem seals? The work algorithm is quite cumbersome, but all these operations must be carried out sequentially and very scrupulously:
1. First of all, you need to wait until the engine cools down and all its elements go into “standby mode”. After this you can start working.
2. The first step is to remove the timing cover. You need to act carefully so as not to damage the gasket (you definitely shouldn’t pick at the cover with a screwdriver).
3. Next, you need to align both shafts (crankshaft and camshaft) according to the marks. Parts should be marked so as not to be confused when assembling the engine, and even better, write down all your actions. When removing the camshaft, you need to loosen its drive. It is advisable to inspect the removed camshaft for the degree of wear - this will help save time and effort during further operation of the car.
How the engine fails and how it can turn out - see here.
What to do if the engine breaks down: actions and reasons.What are the reasons for high fuel consumption? In our article you will find the answer to this difficult question.
4. The next stage is desiccation of the valves. To do this, you should use a special device. The desiccant bracket must be fixed to the bed fastening stud, and its other end is installed with a ring directly on the valve spring plate. While pressing the lever, you must at the same time use tweezers to pull the crackers out of the plate. After this, the valve tappets can be removed.
5. Considering the fact that pistons 1 and 4 are at the top point, it is better to start replacing the oil seals with them. This is due to the need for support for valve expansion - the pistons will provide it.
6. Having finished desiccation, you need to remove the springs and plate. Next you need to take a collet puller and secure it to the cap. By moving the weight up the puller rod, you need to strike the upper stop, thus removing the cap securely and without loss. It is worth refraining from performing this operation using pliers - the fact is that the landing pad for the cap breaks very easily, and even a slight compressive force can cause irreparable damage to it, the elimination of which will cost much more than purchasing a tool with a collet clamp.
7. After removing the seals, it is worth checking the rod and its guide at the same time. The motivation for these actions is the same as when checking the camshaft - taking the opportunity to get the maximum benefit out of the repair.
8. Now that all the previous steps have been completed, you can install new oil seals. To do this, you need to remove the springs from them and insert the seals into the mandrel, after dripping oil onto the rod.
9. Next, the oil seals are installed in their place using a mandrel. To ensure a secure fit, lightly tap the mandrel with a hammer. After installation on the caps you need to install the spring.
10. The next stage is the reverse sequence of actions to that used during disassembly: all elements are installed and dried. Having completed these operations the required number of times, replacing the valve stem seals can be considered complete. All that remains is to install all the elements in their places and adjust each system.
What are the best replacement caps to buy?
MSCs are necessary to seal the gaps between the valve and the guides. For this reason, their quality must be high, otherwise they will quickly wear out and oil will begin to enter the combustion chamber. The best oil seal manufacturers are presented below.
- Nok. The Japanese manufacturer produces high-quality original oil seals, mainly for Toyota and Honda. There are also products for the aftermarket. The service life of these MSKs is guaranteed for 2-3 years or 50 thousand km of vehicle mileage.
- Elring. A German brand that produces excellent products. Oil seals of this form are characterized by elasticity and reliability. True, a number of series were released with inaccurate dimensions, but the manufacturer attributed this to fakes.
- Victor. An American-German holding company that makes very good valve stem seals. Advantages: efficient oil removal, large assortment, originality. The disadvantage is the high price.
It is advisable to replace oil scraper elements at 100-150 thousand km on domestic cars and 200-250 thousand km on foreign cars (Mercedes, Toyota, BMW). And be sure to monitor the signs - oil consumption has increased, you need to check and draw conclusions. The price for replacing valve stem seals without removing the cylinder head at a service station is from 200 to 1000 rubles per set.
What are the consequences of untimely repairs?
Timely diagnosis of the problem in this case plays a very important role. The cost of replacing valve stem seals is low, and it is recommended to combine this work with valve adjustment. However, there is no point in delaying repairs. Oil, entering the engine cylinders and burning in them, forms a number of compounds that negatively affect the cylinder walls and the working surface of the piston. Carbon deposits form on these components, which during engine operation turns into an abrasive, causing accelerated wear. The cost of refusing repairs in this case may be too high and entail, instead of replacing the valve stem seals, a major overhaul of the power unit.
- Sign up for repairs
- or by phone:
- +7
If you analyze how much it costs to replace valve stem seals and overhaul an engine with a cylinder head boring, the answer to the need for repairs becomes obvious. After all, to carry out work on replacing the caps, there is no need to even remove the cylinder head. However, this procedure requires a high degree of training and experience, as well as careful execution of each operation. For this reason, when carrying out this kind of work, the best option is to contact professionals who can perform the entire list of activities related to replacing valve stem seals, as well as adjusting engine valves.
- Sign up for repairs
- or by phone:
- +7