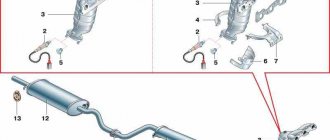
The design of the front suspension of the VAZ 2114 car consists of the following components:
- Subframe, support bearing;
- Oil type shock absorber, spring;
- Stabilizer's pole;
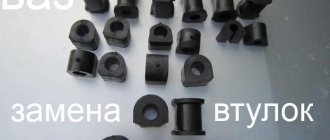
- Silent blocks, rubber bushings.
During the operation of the car, parts wear out and become unusable. VAZ 2114 needs preventative maintenance and major repairs.
The process of replacing suspension elements is not complicated, and the operating principle is intuitive. We carry out restoration work on our own; there is no need to contact a workshop.
Why do you need to change
Important: before making a replacement, the driver must clearly understand why to change the struts, how this may affect the movement, so that in the future the car owner can identify the malfunction at the initial stage.
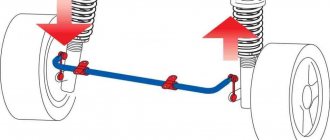
Racks need to be changed for several reasons. Since the anti-roll bar is one of the most important parts of the vehicle's suspension, it must be directly connected to it. Since the stabilizer and suspension are in parallel planes, a perpendicular part is needed that will allow them to interact with each other. The stabilizer strut is just such a part.
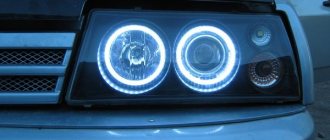
Car suspension
When driving a VAZ 2114, the car can skid when turning. At this moment, a roll is created and the anti-roll bar signals the suspension to overcome this roll by raising and lowering the car in the right places. The fact is that this process goes through the racks, which is why they wear out. In fact, this is quite convenient, since a separate part is subject to wear, and not the stabilizer, suspension and other participating elements, which suffer much less from roll.
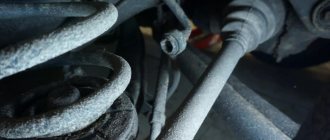
Anti-roll bar
This is interesting: Mitsubishi Lancer 10 ignition coil: how to check and replace
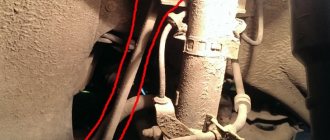
Replacing stabilizers
In order to change the stabilizer struts of the VAZ 2114 and the stabilizer itself with similar elements from Priora, you will need:
- jack;
- set of open-end wrenches;
- set of heads;
- torque wrench.
Replacing the stabilizer
The replacement itself is performed in the following sequence:
- Place the machine on a horizontal, level platform and place it on a jack on the required side.
- Unscrew the mounting nuts of the stabilizer bar struts (first from the right wheel suspension, then from the left wheel suspension).
- Unscrew the mounting nuts of the boom brackets on both (right and left) sides of the machine.
- Remove the set of stabilizers along with the rod.
- Assemble a set of stabilizer and struts from Priora.
- Place the assembled rod in place.
- Secure the bracket fastenings with nuts until there are no gaps in the pad cuts.
- Tighten the mounting nuts of the struts until there is no gap between the arms and the nuts themselves.
- Remove the car from the jack.
- Perform final tightening of all nuts with the machine placed on wheels.
When replacing the rear stabilizer on a VAZ 2114, you should definitely use a torque wrench. Thus, the tightening force of the bracket nuts should be in the range from 13 to 16 Nm, and the tightening force of the strut nuts should be from 43 to 53 Nm.
At the end of the article, I would like to note such an important point as the need to refine the Priorovskaya rod before installing it. This is due to the fact that the engine compartment of the Priora and the engine compartment of the 14th have different sizes.
When installing the rod in its original form, it will fit exactly and rest against the edge of the technological tunnel designed to accommodate the transmission rod and gas exhaust system. All this will lead to extraneous sounds while driving and, in addition, to rapid wear of the stabilizer link.
For this reason, before installation, you should slightly change the geometry of the racks, giving them a slightly larger arc-shaped outline (this can be done with a few blows of a heavy hammer). At the same time, you should not rush, so as not to bend the stand too much or break it. This simple operation will help you install the bar freely and save you a lot of problems.
Varieties
Elements with polyurethane bushings
Today, a total of three types of struts are available for the VAZ 2114.
| View | Characteristic |
| Oily | An ideal rack option for those who adhere to a careful driving style and expect maximum comfort from their car. Considering the condition of the vast majority of domestic roads, it is not surprising that all versions of the VAZ 2114 are equipped with just such racks from the factory. But it’s better not to drive at high speeds; |
| Gas-oil | They began to be installed on Kalina, Granta and other new models from AvtoVAZ. They provide an average level of comfort and a sporty ride. The golden mean between oil and gas struts. Unlike oil ones, when accelerating a car on gas-oil struts, it will not swing, since the body behaves more rigidly and more stable. |
| Gas | The choice of those who prefer full throttle and a sporty driving style. Literally every hole is felt when driving a car with such struts, but they are ideal for racing. They are not suitable for everyday use, since soon the car will literally begin to crumble from shaking and vibrations. |
It is important to note that the VAZ 2114 does not require the installation of identical struts on all four wheels. Therefore, there is room for experimentation and searching for the optimal combination of different types of racks.
- Telescopic stands are installed at the rear, the rod is mounted on a beam behind the bowl and has space for a spring.
- The front pillars are lower than the rear ones, but wider in diameter. They have steering knuckles, plus the attachment system to the bowl is different.
Replacement procedure
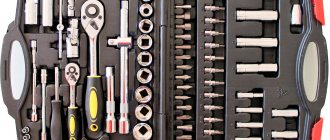
When starting to independently replace struts on a VAZ 2114, prepare the necessary tools and materials:
- Pliers;
- Hammer;
- Chisel;
- Wheel removal wrench;
- Cotter pins;
- Puller;
- Vise;
- Jack;
- Set of keys (24, 22, 19, 17 and 13 mm);
- New racks and components for them.
Unscrew the nuts
Now you can get to work.
- Place the car on a level surface, turn on the handbrake, lift the necessary part on a jack and place supports under the wheels.
- Remove the wheels.
- When changing the front struts, remove the support bearing protection. On the rear pillars the protection is installed on the upper mount.
- Slightly loosen the nut of the rod and the fastening to the body. To do this you need a 13mm wrench.
- Now unbend the cotter pin and use pliers to remove it.
- Use a 19mm wrench to remove the steering rod nut.
- The brake hose fastener is removed. Here you will need two keys - 19 and 17 millimeters.
- The steering knuckle elements are turned out and the strut is pulled out through the arch.
- Next, when replacing the front struts, the bearing is removed from the spring.
- Install new ones in place of the old units and assemble the unit in the reverse order.
Signs of damage
Diagnostics
Problems that have arisen with racks can be quite easily identified by several signs:
- There is a serious leak;
- The pads are knocking;
- When braking or moving from a standstill, squeaking noise occurs in the wheels.
Attempts to repair or restore stabilizer struts are pointless. There is only one option - to replace the units with new ones.
Originals, analogues, article number, price of stabilizer strut for VAZ 2114
Technical data: length 200 x width 28 mm x diameter 10 mm;
| vendor code | Price, rub.) | vendor code | Price, rub.) |
| Original front | |||
| 2108-2906050 | From 750 | 2108-2906055 | From 750 |
| Front analogues | |||
| SCT TS 597 | From 450 – 500 | QML AA1910 | From 450 – 500 |
| Herzog HL | —/— | Trialli SP | —/— |
| Ruville 9172 | —/— | Patron PS4 | —/— |
| Vortex 98564 | —/— | Vortex 98788 | —/— |
Before purchasing, check the compatibility of the spare part catalog number with your car model.
This is interesting: Volkswagen Polo sedan tires: how to choose, sizes, pressure
Causes of failure
The desire to replace stabilizer links arises mainly due to the failure of the old ones. As practice shows, these elements, borrowed from Priora, work better than those native to the VAZ 2114.
Therefore, many specialists in the modification of domestic cars, as well as ordinary owners of the “fourteenth” model who have tried this method, agree on the correctness of replacing the original struts with “Prior” ones.
There can be many reasons why racks fail. The most common of them is the poor quality of the road surface on which we have to drive our cars.
The best way to determine a breakdown is to carry out diagnostics.
Troubleshooting
If the stabilizer bar on a car fails, you will hear a characteristic knock, and the car itself will begin to move to the side when moving in a straight line.
It is also worth paying attention to strong swaying when entering turns.
Article on the topic: How to check compression in a VAZ 2110 engine? (Video)
Checking the condition
Checking the condition of the stabilizer struts is carried out in two ways.
- Professional. To do this, you will need a reliable service center that has the appropriate diagnostic equipment. The accuracy of identifying a breakdown is high, but the price of the service is not low.
- Independent. To do this you will need your own garage and a little time. Turn the wheel as far to the right and left as possible. If knocking or play occurs, the stabilizer struts should be replaced. There is a second method of checking - using an inspection hole. You should unscrew the bottom nut and release the strut. If the hinge moves freely, the stabilizer link must be replaced.
Price issue
More precisely the cost of the racks. For car owners, the amount spent on repairs plays a big role. After all, the VAZ 2114 is far from the most expensive car, and therefore its owners are certainly not millionaires.
Today, ordinary factory racks cost approximately 1000-1500 rubles for the front ones, and up to 1000 rubles for the rear ones. The SS20 struts listed in the list of recommended ones cost from 1,500 rubles for the rear ones and from 2,500 for the front ones.
Kayaba (KYB) racks are the most expensive. The front ones will cost you at least 2,000 rubles, and the rear ones start at 3,000 rubles.
Useful tips
Replacing struts is far from the most difficult procedure when repairing a car. However, it is important to take into account and observe certain nuances so that the quality of the work done is maximum.
Integrity check
Therefore, stick to a few tips.
- Before installing new parts, be sure to wash them using regular kerosene and the almighty product called WD40. The presence of oil in the latter will ensure better performance and mobility of parts.
- When purchasing racks and accessories for them, be sure to check their condition and quality directly on site. Do not throw away receipts in case you suddenly discover a defect or defect already at the beginning of car repair.
- After replacing the struts, tighten the fastening nuts, but do not tighten them. Only when the car is removed from the jack can they be tightened fully and firmly as permissible.
- Check the car periodically and do a wheel alignment. This is an effective method for extending the life of racks. Plus the car will move noticeably better.
- If possible, take the car to a car service center where there is a special stand. It allows you to obtain a diagram of the performance characteristics of the racks. Such a service costs little, and if you change the racks from specialists, they can even carry out diagnostics for free.
Installation details and purchasing spare parts
So, it's time to start installation. The first step is to unscrew the brackets, cylinders and guides. Typically, new discs have a large central hole (CO), and therefore, for correct operation and accurate centering, I would advise cutting a strip from a tin beer can, which must be inserted between the hub and the disc to eliminate play. After this operation, you can put on the disc and screw on a new bracket. Diagnostics of the car's brake system must be performed without fail.
It is immediately necessary to describe one nuance that drivers encounter when auto tuning a VAZ 2114. It may be that one of the finger holes is significantly smaller than the other. Don’t “do magic with it”; go to a car service center, where in a couple of minutes they will make a hole for you that will be equal to 8.5 millimeters.
If you feel that all is not well with the cylinders, then it is better to replace them. The front brake system often presents unpleasant surprises, the cause of which is overheating of the discs and pads. A ventilated disc is always wider than the standard one, so you definitely need to buy new protective covers, guide pads and calipers.
Take more time to inspect the products you are about to purchase. This work is for yourself and is done with your own hands, so you need to buy high-quality spare parts, although this causes a slight damage to your wallet.
The brake system does not like saving, there is no need to be clever here - if the parts have served their purpose, you need to replace them immediately. Before starting tuning, the car must be placed on a reliable stand, or use a lift.
Tuning VAZ cars - interesting material!
How to extend the life of racks
Often the driver wants to know how to extend the life of the struts on his VAZ 2114 car. Moreover, the desire arises when he is tired of constantly doing this. For some drivers, strut models fail after a while, while others can drive them freely for many years. In order for the purchased part to last longer on your favorite VAZ, you need to follow three simple instructions:
- improve driving style;
- choose good stands;
- repair racks.
The first thing you need to think about is your driving style. None of the other methods will work if the driver continues to adhere to an extreme driving style. It is recommended to slow down when turning, as well as during any irregularities. If no roll is created, the stabilizer will not react, and accordingly the struts will not wear out.
To drive a VAZ 2114, racks from any company are suitable. When purchasing a new car, the suspension is equipped with Russian factory struts, but the car enthusiast can freely choose struts of a different brand, too. The main rule is that the more expensive it is, the better the quality. It is recommended to avoid counterfeits, which are most often found among German products.
Most purchased racks can be repaired. It is recommended to repair the spare part immediately after purchase. Often, the manufacturer does not apply high-quality lubricant under the boot, but simple technical petroleum jelly. Just one syringe of good lubricant can increase the service life of the part. It is also recommended to periodically check the spare part, removing dirt under the boot and changing the lubricant each time.
Many still cannot finally decide for themselves what exactly they call a stance. Some are sure that the stabilizer link is a shock absorber, others claim that it is a shock absorber element.
But in reality, there is only one option and the correct one. The strut is the part of the shock absorber without support and spring.
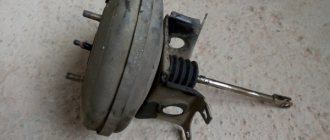
Purpose of the stabilizer and checking its condition
A structural element such as an anti-roll bar plays an extremely important role, especially when driving at high speed. It reduces the amount of vehicle roll when turning and, thus, helps maintain its position on the road.
This, in turn, increases controllability, makes the car more obedient and at the same time safer. But, due to the quality of the surface of most domestic roads leaving much to be desired, as well as as a result of frequent driving on primers, this part fails very quickly.
There are two solutions to this situation - install a new original stabilizer to replace the worn one, or install a stabilizer from Priora on a VAZ 2114.
The last option is the most optimal, because the Priorovsky stabilizer is superior to the stabilizer of the 14th model in terms of massiveness, reliability and service life. In addition, it gives the car a little more rigidity and allows you to feel the road confidently even at speeds over 100 km/h.
The stabilizer installed on the Priora (and, accordingly, which can also be installed on the 2114) comes in two types:
- symmetrical - it can be installed on any side of the suspension;
- asymmetrical - suitable only for one side of the suspension.
Stabilizers are produced by different companies, but their quality (as well as reliability) is approximately the same, and therefore you can purchase any of them as a replacement.
You can find out that the original factory stabilizers have worn out by a number of indirect signs, for example, knocking or extraneous noise in the suspension while driving, skidding when cornering and deterioration in the overall handling of the car on the road.
True, these same “symptoms” are also characteristic of a number of other suspension faults, for example, worn bushings. For this reason, before starting the replacement, you should resort to simple diagnostics, which will accurately show whether the stabilizer is working or whether it is time to change it.
To do this, turn the wheels as far as possible to the left, and then as far as possible to the right. If at the same time there is a strong knock or noticeable play, then the part has become unusable and it’s time to replace it.
Another method of checking can be carried out if there is an inspection hole. In this case, the lower mounting nuts of the struts should be unscrewed from the car installed on the pit. If their hinges move freely, then it’s time to replace them.
As already mentioned, the most optimal solution in this case would be to install stabilizers designed for Priora. But, due to their difference in size from the VAZ 2114 stabilizers, their struts will also need to be replaced. We will describe the procedure for performing this operation below.
How to identify a malfunction
Replacing the VAZ 2114 stabilizer struts will only be necessary if the driver clearly knows that his strut is completely worn out. There are several verification methods for this, among them are:
- focus on knocking;
- skidding on corners;
- unwinding of hinges;
- vibration when touched.
When a strut in a VAZ 2114 fails, you can always hear it, especially when turning. This is a peculiar knocking and rumble that is difficult to confuse with something. As a rule, the rack only makes a rattling noise when it is completely worn out. This noise can be heard in the front and rear of the car at the same time, since the car has two racks installed in opposite places and they wear out almost equally.
Important: Since the rack is easily subject to physical wear and tear, over time it begins to perform its functions much worse or does not perform them at all. This can be felt when turning, as the driver begins to feel the skidding more significantly. You have to hold on to the steering wheel more confidently to avoid getting into an accident.
The VAZ 2114 car is equipped with articulated struts. This is a standard version of the part that is freely sold on the market. Its peculiarity lies in the fact that on both sides it is attached with rotating hinges, lubricated under the anthers. The driver can freely unscrew the strut, remove the hinge and open the boot. If all the lubricant under it has already been used up, it can be reapplied there, but if instead of lubricant a mixture of dirt and Vaseline is found, the rack will have to be changed.
The last effective method includes two stages. At the first, the VAZ 2114 needs to be placed over the pit, one person sharply turns the steering wheel to the side, the other holds the rack with his hand. If you feel vibration and grinding, the part must be replaced.
conclusions
Replacing the VAZ-2114 stabilization struts is quite easy using a minimal set of tools. Every motorist can perform this operation, but if he is not confident in his abilities, then he needs to contact a car service center, where they will do everything quickly and efficiently.
Thank you very much, you were very helpful! I didn’t have to turn to a service center for services where they ask for a considerable amount of money for the work, but here it’s business for a couple of hours! I quickly changed the rear struts on my VAZ-2114 with a clear explanation.
Changing stabilizer links is not that difficult, the main thing is that you have the tools for this.
Egor, here we were talking about stabilizer struts, and not about rear struts.)
Stabilizer struts SS for VAZ
The SS20 stabilizer struts are distinguished by a reinforced design with argon welding around the perimeter of the jumper.
Share with your friends
Applicability
- VAZ 2108-21099
- VAZ 2110-2112
- VAZ 2113-2115
- VAZ 1117-1119 (LADA Kalina)
- VAZ 2170-2172 (LADA Priora)
- VAZ 2190, 2191 (LADA Granta)
- VAZ 2192, 2194 (LADA Kalina 2)
- Datsun mi-DO, Datsun on-DO
Advantages of SS20 stabilizer struts
- reinforced stabilizer link housing with a box-section jumper has increased strength and rigidity;
- high service life of rubber and polyurethane bushings
- argon welding along the perimeter of the jumper provides a tensile force 2.5 times greater than that of a standard part and eliminates rupture of the stabilizer link;
- the ability to choose stabilizer struts with softer rubber or more durable and wear-resistant polyurethane bushings;
- silent blocks retain elasticity down to -40°C and are resistant to gasoline, oils and reagents;
- on the Grant and Kalina 2 stabilizer struts, the size of the upper bushings has been increased;
- 2 year unlimited mileage warranty.
Guarantee
- Description
- Buy
Instead of the standard design, we offer stabilizer link of increased reliability (according to test results, the breaking force is 2.5 times higher than the standard one).
Spot welding cannot be checked visually since it is a closed weld, so it is recommended for use in non-critical connections.
Argon arc welding provides high quality and stability of the weld, which is easy to check visually.
Under critical loads, the SS20 stabilizer strut may be deformed (crushed, twisted, bent), but rupture and integrity will not occur. The car will not lose lateral stability, which significantly increases safety, especially at high speeds.
Equipment options
With silent blocks made of black rubber (Shore hardness 65-70 units), with high dynamic endurance to repeated deformations and loads, with good resistance to air and ozone exposure.
With silent blocks made of imported polyurethane in yellow (Shore hardness - 65-70 units) and red (Shore hardness - 80 units) colors with high resistance to abrasion and abrasive, gasoline, oils and saline solutions, destruction under high dynamic loads and deformations, exposure to ultraviolet and ozone (very slow aging). Environmentally friendly material - does not have harmful chemical emissions. Maintains elasticity at low temperatures down to -40°C.
Silent blocks can be replaced as they wear out.
Replacing front and rear struts and bushings of the Nissan Qashqai suspension stabilizer
The content of the article:
Replacing front stabilizer struts for Nissan Qashqai
I didn’t wait for the “bones” to start knocking and decided to change the suspension stabilizer struts in the Nissan Qashqai. CTR companies
, I decided to try cheaper ones from
DELTA
:
Part number for those interested:
Left stabilizer link - Delta 1N1923; Right stabilizer link - Delta 1N1922. Although there is no difference between them.
Replacement is as easy as shelling pears:
Remove the wheel, jack it up and unscrew it:
On the left side, the stand did not want to unscrew from the top, so the grinder came to the rescue:
DELTA racks
larger thread pitch:
To install the new strut in place, I had to lift the lower arm:
Same thing on the right side:
Everything took about 30 minutes.
Replacement of rear bushings of the Nissan Qashqai suspension stabilizer
I decided that it was time to start rebuilding the entire suspension since the sound was no longer the same when driving over bumps. I was especially concerned about the sound from the front suspension. I started, of course, with the easiest thing - by replacing the rear stabilizer bushings.
The code for the original Nissan Qashqai suspension stabilizer bushings is 54613-JG17C. At the time of purchase, the original was not available and I took an analogue. When purchasing, pay attention to the last digits in the bushing code 54613-JG 17
C, these two numbers indicate the inner diameter of the bushing.
The original diameter on the Nissan Qashqai is exactly 17mm, but if your stabilizer has a large hole, you can install bushings from Nissan X-Trail with code 54613JG 15
C with an internal diameter of 15mm!
Bushings with code 54613JD 18
C on a Nissan Qashqai will of course fit, but the stabilizer will rattle.
The replacement process is very simple. I will only say that for convenience you can drive into a pit or back onto an overpass, as I did.
I'm pulling into my overpass
That's all you need to replace the rear stabilizer bushings
We water the bolts generously with VD and wait a couple of minutes.
Old and new bushing, not much wear
After the replacement everything was fine.
Nissan Qashqai hub repair and maintenance
Contents of the article: 1. Replacing the Nissan Qashqai wheel bearing 2. Preventive lubrication of the Nissan Qashqai hub 3. Reasons
If such signs are identified, it is better to immediately go to a service station for replacement or do the work yourself.
What are the features of the replacement?
When to do it?
In what order are new bushings installed?
Which units are best to buy?
We will consider these and other points below.
Causes of squeaking
Unlike a number of other cars, the Lada Vesta beam, which provides lateral stability, is located only at the front of the car.
The presence of such an element eliminates lateral rolls when moving. The composition of the stabilizer is standard - rubber bands (bushings), rods, clamps and fastenings.
The car owner's task is to maintain the unit in working order. Ignoring this requirement leads to deterioration of the vehicle's stability when cornering, loss of traction, and even a rollover.
Lada Vesta owners often complain about squeaking rubber bands, and the manufacturer is aware of this problem. The company's specialists assured that the defect will be eliminated in the near future.
It is not yet clear what actions the manufacturer plans to take. But the fact that existing car owners will have to deal with the problem themselves is a real fact.
The reasons for the appearance of extraneous sounds in the area of the stabilizer rubber bands are characteristic not only of the Lada Vesta.
This is a “disease” of many cars. It is known that the product plays the role of a torsion bar between two suspension arms (right and left).
For normal operation, the device must have several points of fixation of the torsion system:
• a stand that is mounted on a lever; • stabilizer bushing; • second side of the stabilizer.
Thanks to the presence of two support points, the stabilizer is mounted on the edges of the posts and on the beam bushings. The size of the rubber bands is selected in such a way that the knot is not fixed 100%, but has the ability to twist along the edges.
If the product is tightly secured, the load on the suspension increases, and if it is too loose, the device does not perform its function at all.
When making bushings, manufacturers select a material that ensures reliable fixation of the unit without the possibility of moving it beyond the established limits.
Replacing stabilizer bushings on a Lada Vesta may be necessary if this unit is damaged and does not perform its basic functions.
The reason may be:
• strong discrepancy between the size of the bushing and the diameter of the stabilizer and the dimensions of the compression fasteners; • incorrect choice of material, which does not guarantee the movement of the elastic along the edges without its displacement in the central area; • loosening of the brackets holding the elastic band.
Regardless of the reason, the car owner must take action - perform repair work or replace the faulty unit.
In the latter case, you can solve the problem yourself or involve service station experts to solve the problem.
Replacement Parts
To eliminate squeaks, you can go in two ways - lubricate the existing unit (if it is in decent condition) or change it.
The downside is that such a problem can arise almost immediately and then you will have to decide which part to use to replace the bushing on the Lada Vesta.
Experts recommend installing:
1. New factory products (VAZ-8450006747). Dimensions of the part: 39.5*38*45 mm. The inside diameter is 22 mm. This is only one of the options, because there are enough suitable analogues on the market. 2. Renault Laguna without changes (Febi-45044). 3. Chevrolet Niva. The dimensions of these rubber bands are slightly smaller, so to install them on the Lada Vesta they will have to be adjusted. The downside is that it is difficult to do this at home. If you involve a master in the work, no difficulties arise. Product number VAZ-2123-2906046. 4. Toyota Avensis. Bushings from this model can be installed without any modifications with original clamps from VAZ. Catalog number 488-150-21-10. 5. Kia or Hyundai cars. Here you will have to buy other clamps with the number 54814-1G000. As for the main part, it can be recognized by the following designation - 54813-2K100/KSBSOULF.
An alternative way to solve the problem is to install a grease nipple. To realize this idea, you need to drill a hole in the bracket and make a thread in it.
You will also need a recess directly in the elastic. If squeaks occur, you can use a waterproof grease that is suitable for rubber products.
When to change
According to the rules, the Lada Vesta stabilizer rubber bands are replaced every 20-30 thousand kilometers. But this is in theory, because in the conditions of modern roads, replacement has to be carried out more often.
If even a slight suspicion arises, you need to take action, because the deterioration of the bushings affects the controllability of the car, and this can lead to an accident.
The original bushings have a rubber base. To avoid early replacement costs, it is better to use polyurethane products, because they last longer and are more resistant to negative influences, namely gasoline, oil, acids and other reagents.
In addition, polyurethane successfully retains its qualities when operating at low and high temperatures, which is important for operation in our climate.
How to make a replacement
If you can’t solve the issue with little effort, you need to measure the Lada Vesta yourself or by contacting a service station.
The first step is to remove the load from the stabilizer. To do this, raise the car using jacks or on a lift. It is important that both wheels are in the air during operation.
If you do it yourself, the best solution is to use two jacks, and after lifting, place some supports under the body.
Tools you will need:
• 10*12 open-end wrench; • L-shaped bit with ratchet; • six-beam Torx T40; • key to “thirteen”; • a sharp knife (useful for cutting a pillow).
Replacing bushings on a Lada Vesta begins with dismantling the old components.
The algorithm of actions is as follows:
1. Clean the bottom of the machine from dirt. Pay special attention to the stabilizer bars and fixing bolts. Otherwise, during work, all the dirt will be in your hair. 2. Take T40 and use it to unscrew one bolt holding the rod and bracket. 3. Unscrew the second bolt, but leave it suspended to release the bracket and rotate it 180 degrees. 4. Remove the rubber band and perform similar actions with the second bushing. 5. Remove the bolts that hold the bracket rods. 6. Treat the rod with lubricant to make it easier to attach new units.
Let us immediately note that it will not be possible to unscrew the bolts near the steering rack, because they are limited by clamps. But this is not necessary, because it is enough to loosen the fastening by 60-70 percent.
If you need to replace the bolts, you will have to spend more time - remove the protection, unscrew the steering rack bolts and completely remove the stabilizer rubber brackets.
In the most difficult cases, you cannot do without dismantling the rail. After removing the old cushions, you can begin to install the units in place.
We proceed this way:
1. Cut new parts taking into account the markings. Remember that the product has a high density, so strong pressure is necessary. Be careful with the knife so you don't accidentally cut off your fingers. 2. Place the new part in place of the old bushing. 3. Reassemble the assembly in reverse order. 4. Tighten all bolted connections with a force of 1.8 to 2.4 kgf*m.
If the work is done correctly, the suspension will respond correctly to unevenness, and the handling of the Lada Vesta will return to its previous level.
Results
As can be seen from the article, replacing stabilizer bushings on the Lada Vesta does not cause difficulties even for beginners. There is no point in going to a service station and paying money to a technician, because in a garage it will take no more than 30 minutes to complete the work.
The main thing is not to save money on buying new products.
It is better to take pillows made of polyurethane, which have a longer lifespan and are more resistant to negative influences.