The main options for modifying the carburetor
The first thing you can do when tuning a VAZ 2107 carburetor is to get rid of the throttle drive spring in the primary chamber. This entire operation will take you no more than five minutes. And the effect is noticeable - your car will significantly improve its dynamics. But fuel consumption will increase by only half a liter “per hundred”. Important information! Basic steps for tuning a VAZ 2107 carburetor:
- removing the throttle actuator spring;
- tuning the throttle valve drive of the secondary chamber;
- removing the small diffuser and installing a new one;
- working with jets.
Next, to improve the dynamic characteristics of the VAZ 2107, you can work on the throttle valve drive in the secondary chamber (as a result, it should be mechanical, not vacuum). The entire operation is carried out using a small piece of wire or spring. A ring is made at one end of the wire and placed under the nut that secures the damper drive levers in the secondary chamber. In this case, the protrusion of the outer lever is between the other lever and the wire. As a result of this operation, it is necessary to tighten the nut very well.
What results can we achieve through such manipulations? First of all, an increase in dynamics. At the same time, fuel consumption does not change significantly. In addition, acceleration will be smoother and without drawdowns. Next, it is recommended to remove the small diffuser (it is inserted into the main diffuser located above the throttle valve). In its place, another small diffuser is inserted, marked 4.5 (that is, exactly the same part that is installed in the secondary chamber of the carburetor). In parallel with this, you can replace the standard accelerator pump nozzle. As an alternative, an enlarged one is offered (which can be found in Weber carburetors).
As a result of such manipulations, fuel consumption will remain virtually unchanged. But the acceleration dynamics increase noticeably, especially at the very beginning of the movement. Finally, tuning the VAZ 2107 carburetor can be continued by increasing the jets. Although in all the instructions for the car you will find information that doing this is strictly not recommended. But if you listen to the advice of the “manuals,” then even a small change in the fuel nozzle can lead to a significant increase in consumption and a catastrophic increase in CO levels. But there is some truth here. That's why we recommend starting with minor changes and looking at the results.
Important information! Remember that you carry out all work on the carburetor at your own peril and risk. Therefore, you should not neglect safety measures and recommendations of specialists. We change the main fuel jet to 125, and the air jet to 150. We leave the secondary chamber unchanged. Even after such manipulations, the accelerating dynamics are already noticeably “increasing”. But you may feel that this is not enough. Therefore, we continue to work with jets. We install GTZh 162 and GVZh 190 into the secondary chamber. These are the most maximum parts that have ever been produced. They are installed on Weber 2106 carburetors. As a result of such manipulations, we get a turbocharging effect (when the pedal is depressed until the secondary chamber opens). At the same time, the engine spins up to 6,500 rpm quite easily. There is an increase in fuel consumption, but it is insignificant.
If after all these operations you want more, you can install the main fuel jet 130 for 1500 power units and the main fuel jet 135 for 1600 power units in the primary chamber. It is not recommended to install larger ones. The fact is that in this case, when you sharply press the gas pedal, the fuel in the carburetor will overflow and it will begin to “choke.” As a result, you will not only worsen acceleration dynamics, but also increase fuel consumption. Therefore, this particular combination can be considered optimal. As for the secondary chamber, the jets remain unchanged (taking into account the fact that we have already replaced the standard ones with 162 and 190).
And now a few words about fuel consumption. It will, of course, increase noticeably. But if you don't press the pedal too hard at every traffic light in urban conditions, you can keep it at 11 liters per hundred kilometers. And at the same time, you will get excellent acceleration dynamics of the car at the level of those who regularly “grind rubber.” As for idling, the consumption remains unchanged. After all, the settings haven't changed. It is also important to remember that each engine has its own jets. The scheme described above is something average and universal. The only recommendation is that you should not immediately try to achieve maximum parameters. This can really lead to negative consequences.
And one more important point. Some so-called experts recommend pressurized air. To do this, a hose is placed on the air intake. However, in practice, such a step can lead to serious negative consequences. The fact is that the air filter simply cannot cope with cleaning the air from dust. And this, as a result, will shorten the life of the entire power unit.
We use a repair kit when tuning the VAZ 2107 carburetor
You can also modify the carburetor using special repair kits that are commercially available. One of them is DAAZ. In this case, all work can also be carried out independently, without the intervention of specialists. At the same time, you will not need significant financial investments. The first stage of tuning a VAZ 2107 carburetor using a repair kit is polishing the main diffusers. They are located in the middle part of the carburetor. As a result of these manipulations, you can achieve a reduction in aerodynamic losses when air enters. Polishing should be done using the finest grit sandpaper.
The effect can be enhanced by processing small diffusers with a file. But here you need to be extremely careful, since the emulsion channel may open. Next, you can modify the throttle valves. To do this, you need to file the damper mounting bolts. As a result, the bolt heads should be countersunk.
The next step is to connect the middle and lower parts of the carburetor. At the same time, old gaskets are replaced with new ones. With the help of new jets we can achieve the effect of enriching the fuel mixture and improve dynamics during acceleration. And in order to get acceleration at the very beginning of acceleration, it is necessary to install a 40 “spout” of the accelerator pump. At the last stage, the carburetor is purged, the remaining jets and gasket are installed, and then the carburetor is assembled.
Replacing the carburetor: is it worth it or not?
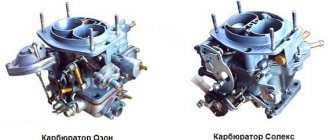
Some experts recommend replacing the carburetor. There are two types to choose from - Solex or Weber. Solex will allow you to immediately achieve better dynamics. But the fact is that there are a lot of problems with it. Therefore, experienced car owners are engaged in the modification of Ozone or Weber.
Important information! Replacing a carburetor is not that difficult. But it is important to remember that as a result, you may not get the expected result. This is due to the characteristics of the carburetors that are suitable for this model. What are the main problems with Solex? The fact is that this unit is very capricious. In addition, it is quite difficult to get rid of the jerking and jerking of the car. And when overclocking, you will notice dips. Finally, the Solexa lid constantly unscrews and the solenoid valve malfunctions. There will be no such problems with Ozone and Weber. And you will have to tune such carburetors no more than once a year.
Adjusting the float mechanism
The operation is carried out in three stages. First, the float is checked to ensure its correct location in relation to the walls of the chamber and its lid. This procedure makes it possible to achieve “ideal” immersion of the float by eliminating the phenomena of deformation of the bracket on which it is mounted. Deformation can be eliminated simply by straightening the fastening element with your fingers.
Secondly, close the needle valve and begin to adjust the 2107 carburetor: put the lid in a vertical position, move the float to the side, and bend the bracket tongue (using a screwdriver). All these operations are performed in order to achieve a gap between the float and the cover at a level of 6–7 mm. Thirdly, open the valve, move the float to the side, and achieve a gap of 15 mm between the needle seat and the float.
Pseudo-turbocharging
You can improve the dynamics by creating a pseudo-turbocharging system. To do this, replace the heated air supply hose, which is attached to the air filter. To do this, select a hose of the same diameter as the original one. But its length should be greater. The hose itself is connected to the radiator as close to the fan as possible. Due to this, a direct supply of air is achieved, which passes through the radiator.
In this case, you can really improve the dynamic performance of the car. However, such tuning of the VAZ 2107 carburetor is fraught with some negative aspects. And many owners refuse such a system. If you install the hose this way, a lot of dust and dirt will get into it. All this will pass through the radiator and accumulate in the air filter. And from there, dust and dirt will fall into the cylinders, since the filter is not able to retain all the debris. As a result, you may experience increased piston wear. But if you don’t mind the engine, then such a system can be installed. It is praised by many car enthusiasts.
All these actions can significantly improve the dynamic performance of the VAZ 2107 car and, at the same time, do not significantly affect fuel consumption. Of course, the results of all this work may seem insufficient to you. In this case, you will have to work on the engine and take the car to professionals.
Grinding the diffuser
It is recommended to start tuning a Solex carburetor by reducing the resistance to air flow in the intake tract. The factory-made diffuser has a lot of sagging and protrusions caused by poor casting quality and subsequent surface treatment. Because of this, parasitic air flows and turbulence arise, which interfere with the flow of the mixture into the combustion chamber.
To correct the situation, you should disassemble the carburetor and visually inspect the diffuser. It usually looks like the one shown in the figure below.
Solex carburetor diffuser with obvious casting defects
Initially, it is necessary to sand all seams and protrusions that have arisen due to imperfect production technology. As a result of the modification, you should get a result as in the figure below.
This is interesting: Possible malfunctions
Diffuser with polished surface
At this stage, it is possible to complete the improvement of the passage of the fuel-air mixture, but as you know, there is no limit to perfection. Experienced car enthusiasts recommend not stopping only at polishing manufacturing defects, but giving the diffuser maximum aerodynamic characteristics. You can achieve good streamlining of the surface by giving it a shape similar to an oval or wing, as shown below.
Diffuser with maximum streamlining
By modifying the surface of the diffuser, you can increase the efficiency of the DaAZ carburetor by up to 20%. Eliminating an aerodynamic error changes the composition of the mixture, so after assembling the carburetor it is necessary to adjust it again.

