Cars admin26.02.2020
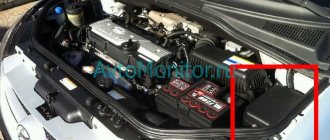
To remove and change the starter on a Hyundai Accent, we open it and look under the hood of the Accent, there we will need to remove the corrugation and the air filter housing and at the bottom we will find where the starter is located on the Accent. Access to the car starter and its removal will not be possible without removing the gear shift mechanism, so unscrew the two bolts, the terminal and pull out the starter.
After this, you can replace the Hyundai Accent starter with a new one or disassemble, repair and replace the old car starter. In this case, the Hyundai Accent starter was also disassembled and the solenoid relay was replaced.
Subscribe
to our channel in
Index.Zen
Even more useful tips in a convenient format
To remove the starter for the manual transmission of the accent, you need to remove the air filter with all its giblets, unscrew the 2 bolts of the gear shift mechanism, undo the cotter pins, and move it to the side. We unscrew the lower bolt with the terminal using a 14 mm wrench. The upper bolt is located diagonally upward from the lower one, be careful, there are 2 bolts in that area, you need the one on the right. It is unscrewed, not without difficulty, with a 14 mm socket with an extension. It’s good if the extension cord is not too long (a long one is very inconvenient). that's all.
The starter in a car is designed to start the engine. A short-term charge is supplied from the ABC to the starter, which in turn rotates the flywheel at high speed. The Hyundai Accent starter is reliable, although it has its own resource, so it also requires maintenance and repair. In the article we will talk about the causes of the malfunction, selection of a starter and replacement and repair procedures, as well as the manufacturer’s recommendations.
The video will tell you how to replace the starter on an Accent
Hyundai Accent starter: do-it-yourself repair and dismantling
- How to remove the starter Hyundai Accent
- Disassembly and repair
How to remove the starter Hyundai Accent
To dismantle the starter, you will need keys and sockets for “12”, “13”, and pliers. All work must be carried out from below the car - preferably on an inspection hole or lift. It is imperative to de-energize the power supply system - a positive wire connects to the starter solenoid relay; it does not have protection in the form of a fuse, so a short circuit may cause a fire. Carrying out dismantling:
- Disconnect the negative cable from the battery.
- Using a socket and ratchet, unscrew the starter mount to the clutch block from the top.
- Disconnect the traction relay control wire (thin).
- Slide off the rubber boot that covers the starter power wire.
- Unscrew the nut securing the wire lug.
- Having removed the wire, you can begin to unscrew all the remaining mounting bolts.
- Using the socket “13”, unscrew the lower fastening bolt.
- That's all, now you can remove the Hyundai starter and begin repairing it.
Installation is carried out in reverse order. It is advisable that all important engine components be replaced before installation.
Disassembly and repair
Now you need to completely disassemble the Hyundai Accent starter and replace vital components:
- Brushes - they are worn out when the rotor rotates.
- Bushings - they contain the rotor and also serve as a negative contact for powering its winding.
- If necessary, the solenoid relay must be replaced.
- The Bendix and overrunning clutch are replaced when there is severe wear or failure - the starter does not rotate the engine flywheel.
The procedure for disassembling the starter:
- Disconnect the wire coming from the contact bolt of the traction relay to the stator winding.
- The relay is secured with two bolts - unscrew them with a Phillips screwdriver.
- Carefully remove the anchor, being careful not to lose the spring.
- Proceed to the back cover - unscrew the two bolts that hold the entire body together.
- Using a curved screwdriver, unscrew the brush assembly fastening.
- Remove the back cover and carefully remove the brushes. Assess their condition. In any case, they need to be replaced.
- Remove the spacer washer from the back of the rotor.
- On the front of the starter there is a support and a gear drive lever with an overrunning clutch. Remove them carefully and replace them if necessary.
- Now you can remove the rotor (armature) from the housing.
Be sure to carry out a visual inspection of the rotor - there should be no wear on it. If it is present, then you need to level the surface on a lathe. If the wear is small, you can clean it with fine-grained sandpaper.
Using a multimeter, check whether the rotor windings are shorted to ground. If there is a short circuit, it would be better to replace the rotor or the entire starter. A new one will last 5-10 years with proper use. To remove the overrunning clutch you will need:
- Install the mandrel onto the restrictor ring at the front of the rotor.
- Carefully knock down the ring; there should be a lock underneath it.
- Remove the retaining ring (clamp); you can pry it off with a flat-head screwdriver.
- Remove the restrictor ring and the overrunning clutch with the gear.
After removing this unit, you need to check it - the gear should rotate freely in only one direction. If it rotates in both directions, it needs to be replaced. Be sure to conduct a thorough diagnosis and a thorough inspection - the rotor and other elements should not have damage, cracks, bends, or deformations. When assembling the Hyundai Accent starter, there is no need to use additional lubricant for the components. Try not to damage the Hyundai Accent sensors and their power circuit during repairs. And finally, watch the video about repairing and replacing the Hyundai Accent starter:
Engine control system malfunction
Without special diagnostic equipment, it is difficult to determine which sensor or actuator has failed. First you need to perform computer diagnostics of the engine. The main components that affect engine starting:
- fuel pump;
- ignition system;
- candles (can be flooded);
- crankshaft sensor;
- flow meter;
- rail pressure regulator;
- idle air control;
- camshaft sensor;
- injectors.
A faulty sensor or actuator must be replaced. If you check manually, then in a Hyundai Accent it is better to start with the crankshaft sensor and fuel pump.
Hyundai Accent KANT › Logbook › Replacing the starter bendix
Last fall, as soon as the temperature began to drop, I began to notice that in the mornings, every other time, the starter turned to idle, i.e. You can clearly hear the starter motor spinning up, but the engine does not turn over. After reading and listening to the advice, I began to blame the Bendix starter for the problem. But somehow the problem came and went, and the car always started the second or third time, and then spring, warming, and I began to think less and less about repairing the starter. But here it is autumn again, again the temperature has crept down and again the car, when cold, starts the second time. I asked the price, was once again pleased with the price of spare parts for the accent, and ordered an AMD Bendix. There was plenty to choose from, but the reasonable price and Korean production pushed us to choose. So let's start replacing. To work, we needed 10mm sockets and wrenches to remove the air filter housing, 12mm sockets to unscrew the nut with the positive terminal on the starter, and 14mm wrenches to remove the starter itself. First, we disconnect the positive terminal from the battery and remove the air filter housing, nothing complicated, 2 bolts on the TV and 3 on the housing itself.
This is interesting: Adapter for diagnosing VAZ cars
Next we go looking for the starter, you can easily find it by following where the negative wire from the battery leads. Once you have found it, you can remove it, to do this, unscrew the lower bolt with a wrench - the head does not fit there, and the upper one with an extension cord, after unscrewing it, unscrew the starter with its back and unscrew the nut with the positive terminal. Then carefully remove the plastic block from the contact by pressing the tab on it and, turning, pull out the starter from above.
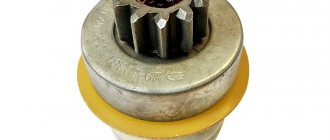
Now you need to change the bendix itself; to do this, unscrew the two long screws on the back of the starter, unscrew the retractor and remove the cover. Next, the clip is knocked off the retaining ring, I was able to knock it off well with the head at 14 and remove the ring itself, pull it up and the bendix is in our hands.
All that remains is to lubricate everything well and reassemble in reverse order using a new bendix.
During assembly, I struggled a little with installing the clip on the retaining ring, but overall everything went without any problems. The whole job took about an hour and a half. The car now starts perfectly, even the sound at startup has changed a little. What I ordered: Bendix starter AMD - AMDEL313 - 321r.
What models are installed
Gear starters are installed on Korean cars from the factory. Starters without a planetary gear are found only on Accent modifications manufactured before 2000. These are direct action models. Although this design is quite simple, the components are more durable, the unit can be easily repaired with your own hands - it is noticeably heavier and takes up a lot of space. And at low temperatures it generally does not work well.
A good original Hyundai Accent starter costs at least 7,000 rubles. Typically, this is a 0.7 kW Valeo gearbox. It has little power, but it is compact and takes up little space. On the Hyundai Accent version with automatic transmission, the starter is already more powerful - up to 1.55 kW. One of the options produced in Korea is 36100-22805.
These models are suitable instead of original devices:
- Unipoint STR3053 1.4 kWt;
- Unipoint STR3104 1.6 kWt;
- AMD EL219;
- Krauf STM0628 1.2 kWt;
- Dashi D-SA007.
Bushings - Hyundai/Kia PXOG 3618221740, 3611211140 (bearings from Oka, VAZ 2108 are also suitable). Battery cable - 37210-25000, for 1000 rubles. The cap for terminal 37257-22001 costs 60 rubles.
How to remove the starter Hyundai Accent
To dismantle the starter, you will need keys and sockets for “12”, “13”, and pliers. All work must be carried out from below the car - preferably on an inspection hole or lift. It is imperative to de-energize the power supply system - a positive wire connects to the starter solenoid relay; it does not have protection in the form of a fuse, so a short circuit may cause a fire. Carrying out dismantling:
- Disconnect the negative cable from the battery.
- Using a socket and ratchet, unscrew the starter mount to the clutch block from the top.
- Disconnect the traction relay control wire (thin).
- Slide off the rubber boot that covers the starter power wire.
- Unscrew the nut securing the wire lug.
- Having removed the wire, you can begin to unscrew all the remaining mounting bolts.
- Using the socket “13”, unscrew the lower fastening bolt.
- That's all, now you can remove the Hyundai starter and begin repairing it.
Installation is carried out in reverse order. It is advisable that all important engine components be replaced before installation.
Disassembly and repair
Now you need to completely disassemble the Hyundai Accent starter and replace vital components:
- Brushes - they are worn out when the rotor rotates.
- Bushings - they contain the rotor and also serve as a negative contact for powering its winding.
- If necessary, the solenoid relay must be replaced.
- The Bendix and overrunning clutch are replaced when there is severe wear or failure - the starter does not rotate the engine flywheel.
The procedure for disassembling the starter:
- Disconnect the wire coming from the contact bolt of the traction relay to the stator winding.
- The relay is secured with two bolts - unscrew them with a Phillips screwdriver.
- Carefully remove the anchor, being careful not to lose the spring.
- Proceed to the back cover - unscrew the two bolts that hold the entire body together.
- Using a curved screwdriver, unscrew the brush assembly fastening.
- Remove the back cover and carefully remove the brushes. Assess their condition. In any case, they need to be replaced.
- Remove the spacer washer from the back of the rotor.
- On the front of the starter there is a support and a gear drive lever with an overrunning clutch. Remove them carefully and replace them if necessary.
- Now you can remove the rotor (armature) from the housing.
Be sure to carry out a visual inspection of the rotor - there should be no wear on it. If it is present, then you need to level the surface on a lathe. If the wear is small, you can clean it with fine-grained sandpaper.
Using a multimeter, check whether the rotor windings are shorted to ground. If there is a short circuit, it would be better to replace the rotor or the entire starter. A new one will last 5-10 years with proper use. To remove the overrunning clutch you will need:
- Install the mandrel onto the restrictor ring at the front of the rotor.
- Carefully knock down the ring; there should be a lock underneath it.
- Remove the retaining ring (clamp); you can pry it off with a flat-head screwdriver.
- Remove the restrictor ring and the overrunning clutch with the gear.
This is interesting: Lighting candles on Shabbat today in Moscow
After removing this unit, you need to check it - the gear should rotate freely in only one direction. If it rotates in both directions, it needs to be replaced. Be sure to conduct a thorough diagnosis and a thorough inspection - the rotor and other elements should not have damage, cracks, bends, or deformations. When assembling the Hyundai Accent starter, there is no need to use additional lubricant for the components. Try not to damage the Hyundai Accent sensors and their power circuit during repairs. And finally, watch the video about repairing and replacing the Hyundai Accent starter:
Factory recommendations
The manufacturer does not recommend repairing the starter yourself, since it believes that this should be done by specialists who are trained in this. Although, it is possible that many garage repair specialists do an excellent job without special training provided by the manufacturer.
Thus, they admit that anyone can repair the Hyundai Accent starter if they wish, if they have the tools and hands. Although, there are situations when it is worth contacting a specialized station, since it is impossible to diagnose the cause of the malfunction and breakdown.
Starter
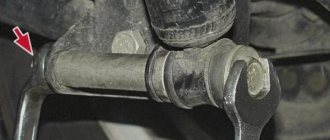
Using a 12mm socket, unscrew the bolt securing the generator to the adjusting bar.
. and remove the generator belt tensioner.
Remove the oil filter (see “Changing the engine oil and oil filter”, p. 31). Unscrew the nut of the lower mounting bolt of the generator several turns.
. remove the bolt from the slot in the oil pump housing.
. and remove the generator.
We install the generator in the reverse order and check the tension of the drive belt (see “Adjusting the tension and replacing the generator drive belt,” page 38).
The car is equipped with a starter, which is a four-pole, four-brush DC electric motor with excitation from permanent magnets, with a planetary gearbox, a roller freewheel clutch and a two-winding traction relay.
Permanent magnets are attached to the steel starter housing. The starter housing and covers are secured with two bolts. The armature shaft rotates in plain bearings. Torque from the armature shaft is transmitted to the drive shaft through a planetary gearbox. A freewheel (overrunning clutch) with a drive gear is installed on the drive shaft. It transmits torque in only one direction: from the starter to the engine, separating them after the engine starts. This is necessary to protect the starter gearbox and armature from damage due to excessive speed.
The traction relay is used to engage the drive gear with the ring gear of the engine crankshaft flywheel and turn on the power to the starter motor, which occurs when the ignition key is turned to the “START” position (in a car with an automatic transmission, the gear selector lever must be in the “P” position or "N"). After closing the contacts of the traction relay, the retractor winding is switched off.
Disconnect the negative cable terminal from the battery terminal.
It is more convenient to remove the starter from a vehicle mounted on an inspection ditch or overpass.
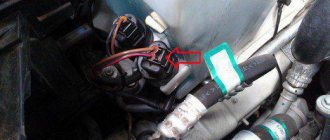
Disconnect the wire connector from the starter.
Use a 12mm socket to unscrew the nut.
. and disconnect the wire tip from the starter terminal.
Using a 14mm socket, unscrew the two fastening bolts (the lower bolt also secures the tip of the ground wire).
Bulkhead
In order to properly sort out the starter, in addition to tools, you need to prepare a number of essential things - fine sandpaper, chrome paint, solvent or gasoline. If there is a suspicion of wear of the internal elements, then either a ready-made repair kit or spare parts are purchased separately. In particular, bushings, brushes, bendix - depending on what exactly has gone bad.
The body is washed in gasoline on both sides. If there is a lot of dirt, it is hard, it will be better to clean it off with a knife or screwdriver first. Treat rusty areas with a brush. Be sure to work on the anchor manifold. It needs to be sanded and the grooves between the slats cleaned. Soft wire is suitable for this - never a needle, since it is hard and makes the edges of the grooves sharp. This will cause the starter brushes to wear out faster.
