What is a crankshaft oil seal?
The crankshaft of an internal combustion engine is constantly and generously washed with oil poured into the oil pan, as a result of which, due to continuous rotation during operation, lubricant can leak outside the housing. And many motorists know first-hand about oil leakage, as well as the problems associated with this process. However, at the boundaries, namely, in the outlet holes through which the shaft is connected to external components, there are usually seals, front and rear. It is easy to distinguish them; the latter is a slightly larger and more massive ring.
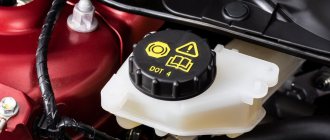
Due to the fact that these gaskets are subject to friction as long as the engine is running and the connecting rods are spinning the crankshaft at high speed, the oil seal material must have a certain heat resistance. Regular nitrile (nitrile butadiene rubber or NBR) will not work, as it will burn and crumble literally on the go. Fluorine rubber FPM or silicone are much better suited for seals. When choosing a crankshaft oil seal, you should also pay attention to factors such as shape and markings.
The inner edge should be sharp and the outer surface lettering should be easy to read.
Operating rules
During operation, the shaft is in constant contact with the insides of the oil seal. If you do not reduce friction, then after a short period the oil seal will dry out and leak liquid.
In order for the washing machine oil seal to last as long as possible, you will need to use a special lubricant.
It is necessary to improve the functional characteristics of the element. Lubrication helps protect the oil seal from wear and cracks. To prevent unnecessary water from penetrating the bearing, the seal will need to be lubricated regularly.
How is the oil seal used?
Even if you know what an oil seal is, information about the nuances of its installation and operation will not hurt. In particular, some seals have inclined marks to allow oil to escape; when installing such rings, pay attention to the presence of an arrow indicating the direction of shaft rotation. This is especially true for non-original cuffs. By the way, about analogues. Sometimes it is very difficult to choose an oil seal by size, especially if it was imported, and only domestic ones are available for sale (of those, choose only red-brown ones, they are made of fluorine rubber).
In such cases, if you are sure that from now on you will use only available seals, if their sizes are too large, you can bore out the seat, and if they are too small, press an adapter ring into it. In terms of width, it is permissible to exceed the original by 2.5-3 millimeters, no more; the substitute can be narrower by the same amount. If the oil seal is too thin, you will have to install a spacer ring along the outer diameter to the missing width to the pressing pulley for the front seal and the flywheel for the rear.
Additional Tips
Here are some more important recommendations:
- You cannot install an oil seal that has an internal diameter that does not correspond to the standard one. This most often forces additional manipulations, which will result in a violation of the seal or a change in the seating surfaces of the products.
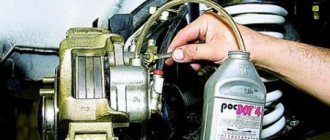
- The surface is lubricated before installation. One of the important nuances that should be taken into account in recommendations on how to properly press in the oil seal.
- The oil seal is removed from the packaging by hand using caution.
- The shaft must not have sharp corners or edges.
- No heavy objects are used to tap the seal during installation.
- The placement of the product must be coordinated with the center of the shaft.
- Before installing the seal into the socket, it is necessary to ensure that its temperature matches the environmental conditions.
- When using PTFE products, it is necessary to ensure that no lubricant gets on the working edges.
How to replace the oil seal yourself
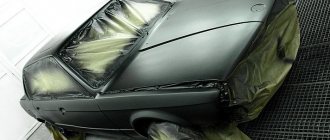
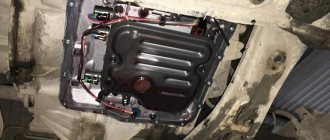
The front one is easier to replace, since access to it is not difficult. First, remove the casing of the camshaft timing belt. There may be no belt; sometimes transmission is carried out directly, using gears. In any case, the main pulley with a serrated edge will also need to be removed, for which we unscrew the mounting bolts (usually there are 6 of them). Then you need to remove the hub on which the pulley sat. To do this, unscrew another bolt and carefully knock down the hub with mounting blades; in extreme cases, if the part is pressed too tightly, you need to use a special puller.
To prevent the shaft from spinning while changing the gasket, it is recommended to shift the gearbox to fifth position and set the parking brake.
Types and location of oil seals on the crankshaft
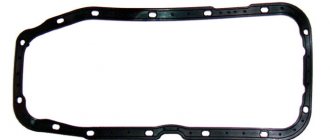
Oil seals are used in various elements of the car, including the crankshaft. They ensure that the lubricating fluid does not leave the engine. The element is made in the shape of a ring with an elastic inner edge and also has a rigid outer ring. A spring is used to strengthen the inner edge. It prevents oil from escaping. The devices installed in any car can be of two types:
- Rear oil seal. It is characterized by high wear resistance, which is reflected in service life equivalent to the period of use of the vehicle. It has bulky dimensions.
- Front oil seal. The device is slightly smaller in size and is also more prone to wear. The module is located in the oil pump cover. To gain access to it, you need to disconnect the timing belt element. The oil seal itself is located under the lower crankshaft pulley.
When is it necessary to replace the crankshaft oil seal and how to do all the work
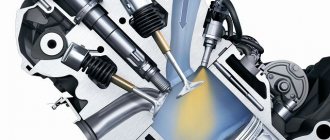
During operation of the car's power unit, its parts and mechanisms are lubricated with engine oil. The lubricant significantly reduces the level of negative effects of friction force, thereby increasing the service life of structural elements. As you know, the crankshaft extends outward for subsequent connection with the flywheel. It is precisely to ensure that engine oil does not leak out of the system through the holes of the rotating shafts that a special sealant made of silicone or rubber was developed - the crankshaft oil seal. Replacing the crankshaft oil seal is an emergency job. Why is it important to respond to a problem with the seal in a timely manner, and how to fix the breakdown yourself? Next we will look at this issue in detail.
Purpose
The oil seal looks like a rubber ring, the main role of which is to seal between the static and moving elements of the washing machine. It is the details of the tank that limit the penetration of water into the space between the shaft and the tank. This part acts as a kind of sealant between parts of a certain group. The role of oil seals should not be underestimated, since without them the normal functioning of the unit is almost impossible.
What is the crankshaft oil seal for and where is it located?
The main purpose of the oil seal is to prevent engine oil from leaking from the engine. Reliable sealing of the holes is possible due to the pressure inside the crankcase, which ensures the tightest possible pressure of the oil seal to the part. Thanks to this principle of operation, the liquid in the internal combustion engine system does not leak and does not subject the engine components and assemblies to excessive frictional loads.
The oil seal is made of heat-resistant material: fluorine rubber, silicone. Also on the outside of the seal you can see some notes; most often, they tell the driver in which direction the crankshaft is rotating. Information is necessary in order to correctly install new sealing elements
The design of the power plant determines the presence of two oil seals - front and rear. The rear rubber product is designed for installation on the part of the crankshaft that connects to the flywheel. The crankshaft end is a flange, so the rear seal has impressive dimensions and a fairly large amount of material, which ensures its long service life.
The front rubber element is mounted on the limit switch, which is the drive for the engine mechanisms. Its dimensions are smaller than the similar part at the other end, therefore the front oil seal is significantly inferior in terms of service life.
Causes of oil seal leakage
The service life of the part ranges from 100 to 200 thousand kilometers, depending on the quality of the spare part itself and how carefully the car enthusiast takes care of the internal combustion engine. However, replacing the engine oil seal may be necessary much earlier.
Factors causing premature wear are:
Causes of crankshaft oil seal wear
A high-quality crankshaft oil seal from a reliable manufacturer lasts an average of 100 thousand kilometers. However, it is worth considering that the rear and front seals have different sizes, therefore, the reasons and rates of their wear are different. For the following reasons, oil seals can leak:
- In case of untimely replacement of engine oil, various foreign inclusions penetrate into the oil seal installation areas. They can leave minor mechanical damage on the surface of the material, thereby shortening its possible service life.
- Despite the fact that the oil seal is made of heat-resistant material, constant overheating of the motor leads to the loss of its sealing properties
- If the product was made of low-quality material, unable to cope with its functional responsibilities throughout the entire declared resource
- Problems with the machine's power unit can also affect the life of the seals. An increase in crankcase gas pressure and crankshaft runout lead to deformation of the oil seal and force it out of its seat.
- The quality and correct installation of new rubber elements also significantly affects their service life. The cause of oil leakage becomes obvious if, while replacing the crankshaft oil seal, its position is disturbed or deformed.
Owners of domestic cars have noticed more than once that the front oil seal leaks after only 30 thousand kilometers. Moreover, the oil begins to leak for no known reason. To accurately determine the problem area that is leaking, you should remove a small amount of leaking lubricant and place it in the liquid.
Placing a drop of oil in water is necessary in order to accurately determine where the problem area has formed in the system. Transmission oil from the gearbox spreads over the surface of the water, but motor oil retains its shape even after being placed in liquid
Next, you need to visually inspect both oil seals and try to find a leak on one, or both at once. It is also important to check the oil pump gasket; due to the fact that these rubber elements are located nearby, oil leakage through the gasket is often perceived as a breakdown of one of the seals.
Causes of malfunctions
The main cause of the malfunction is simple mechanical wear. Any oil seal is, by its nature, a consumable - after a certain period of time it begins to deteriorate, since it is made of an elastic material.
The malfunction may manifest itself in the form of changes in shape, swelling, scarring, rupture or chipping of the material from which the consumable is made. Another manifestation of a malfunction may be the cuff being completely squeezed out of the seat.
Other causes of problems with the camshaft oil seal are incorrect selection of consumables, manufacturing defects, or incorrect installation. In these cases, the oil seal also does not perform its functions and needs to be replaced.
Is it possible to drive with worn oil seals?
Further operation of the vehicle is not recommended for several reasons. Firstly, engine oil consumption increases due to its leakage through rubber products. Secondly, the power unit becomes contaminated with adhering dirt and dust.
But, the most compelling reason to refuse to drive a car with leaking oil seals is the fact that loss of oil can lead to serious damage to the internal combustion engine, which can be eliminated by carrying out a major overhaul of the engine.
The most serious breakdown that can occur in a car due to a lubricant leak is considered to be a broken timing belt. On cars, this problem results in expensive repairs, because on many models the valves are prone to bending
Another common problem is transmission malfunction. However, drivers encounter this kind of trouble most often in the event of a malfunction of the rear oil seal. Failures of electrical equipment mechanisms and all kinds of sensors are less common.
The role of the omentum in the design of the SMA
The design of the washing machine is such that the drum is located in the tank. To ensure that the mechanism rotates normally and evenly, a bearing is installed in the center of the tank. To protect the bearing from moisture and lubricant washout, a rubber seal - oil seal - is installed on top of the ring. The part evenly covers all holes through which water can penetrate.
If you remove the rubber ring, then the lubricant will be washed away from the bearing, causing friction and wear of the components. This will lead to destruction of the shaft and damage to the washing machine. Moreover, the malfunction is very serious, so sometimes it makes sense to buy new equipment rather than repair the old one.
How is the crankshaft oil seal replaced?
To successfully complete the task, you first need to arm yourself with all the necessary tools and prepare an inspection hole in the garage to perform a whole range of work.
Developments from the following manufacturers are recommended for purchase:
| Name | Manufacturer | Price |
| Victor Reinz | Germany | 350 rubles |
| Elring | Germany | 300 rubles |
| Ajusa | Spain | 650 rubles |
| Espra | Spain | 250 rubles |
| Goetze | Germany | 600 rubles |
Screwdrivers, wrenches, sockets, and new seals should be on hand. All work comes down to separate replacement of the front and rear crankshaft oil seals.
Changing the front oil seal
Access to the front crankshaft oil seal largely depends on the specific make of the car, so before carrying out all the work, it is advisable to read the operating instructions with all the necessary information. For owners of domestic cars, in particular the VAZ brand, all work comes down to the following steps:
- At the first stage, the tension of the generator belt is weakened
- The belt is completely removed from the pulley
- The nut that serves to clamp the pulley is unscrewed
- Remove the pulley from the shaft
- In car modifications with a transverse engine, the oil pump housing is removed
- Pry a screwdriver under the oil seal and remove it from its seat
- Installing a new seal
- We assemble the parts in reverse order
Location of rubber elements on the crankshaft
In the design of power plants, two oil seals are used on the crankshafts - front and rear. They both prevent lubricant from leaking out of the engine. The rear oil seal is installed on the end of the shaft to which the flywheel is screwed. Due to the fact that this end switch is presented in the form of a flange, the dimensions of the oil seal are quite large, with a significant layer of rubber. This ensures a considerable service life of the rubber element.
The front oil seal is located on the end of the shaft, which is used as a drive for systems and mechanisms of the power plant or auxiliary equipment. The rubber element is located behind the drive gear, which is mounted on the shaft end and secured with a key connection. The dimensions of this oil seal are smaller than the rear one. And this affects the resource of the element.
Due to the leak, oil gets onto the outer surface of the engine, causing it to become dirty. This also increases the consumption of lubricant, which must be replenished periodically. Leakage is especially dangerous for engines in which the timing belt is driven by a belt. Oil-based liquids have a negative effect on rubber elements. If oil gets in, the belt can delaminate and break, which is especially dangerous if the engine is “plug-in” (if the belt breaks, the pistons collide with the valves).
Oil seal packing: types, how to select it and replace oil seals
Stuffing box packing is the most popular type of seal not only for centrifugal pumps and valves, but also for many other equipment.
This type of seal is a round or square cord impregnated with some material, such as asbestos or graphite. Seals for centrifugal pumps are necessary in order to eliminate, or rather reduce, fluid leakage from the working chamber of the equipment.
The content of the article
Gland seals, unlike mechanical seals, are not airtight. To maintain them in working condition, it is necessary to ensure minimal leakage for wetting.
Causes of leakage. Determining the location of the leak
The reason for the leak is that the oil seal is skewed
An oil seal can leak for several reasons:
- Natural wear and tear. No matter how carefully the elements of the crank mechanism (CCM) are adjusted to each other, the crankshaft still vibrates during rotation, which leads to wear on the inner surface of the oil seal. Because of this, it no longer fits tightly to the shaft and lubricant leaks out through the gap;
- Loss of elasticity. This happens due to the rubber drying out, it becomes “tanned” and the tightness of the seal decreases;
- Installation is skewed. Incorrect installation leads to the appearance of leaks through which lubricant under pressure leaks;
- Low quality rubber element installed when replacing a leaking oil seal. There are many fake spare parts on the market and the likelihood of purchasing a defective product is high.
Since the oil seal is located in a place where inspection is not very convenient, the problem is judged by traces of oil under the car and severe contamination of the lower part of the engine. But it is worth noting that lubricant can also leak in other places - from under the pan gasket, oil filter. Therefore, before eliminating a leak, it is necessary to carefully inspect the lower part of the power unit in order to accurately determine the location of the leak.
This can be done on an overpass or inspection hole, after first dismantling the crankcase protection (if there is one). In the case where it is impossible to determine the location of the leak due to severe contamination, the bottom of the engine is cleaned, and then, after a short trip, everything is inspected again. Dust will stick to the leak site, which is used to determine the location of the leak. Having established that the oil is leaking due to a damaged or worn oil seal, you can begin replacing it. Note that although the front crankshaft oil seal leaks more often than the rear, it is much easier to replace it.
The technology for replacing this rubber element is the same for any engine, but the complexity of the work depends on the design features of the engine itself.
When is it necessary to replace transmission seals?
There are oil seals in every gearbox. Their number depends on the type of drive; the functionality will be the same in all cases. The main task of oil seals is to prevent oil leakage from the main element of the transmission - the crankcase. In addition, they provide protection from dust and dirt to the internal parts of the gearbox.
The oil seal performs its functions only if it is fully operational. But, of course, he cannot work forever. As a result of regular intense loads, the element wears out and requires replacement. Oil seals are consumables. They are located in the clutch housing, near the inside of the gearbox. Replacing the seals in the box involves disconnecting the casing. The machine must be on an overpass or above an inspection hole.
There are no high loads or heating of elements in the gearbox; transmission oil is not supplied under high pressure (except for hydromechanical automatic transmissions). However, leakage can still occur. This is a serious problem as the oil level decreases, causing rapid wear of the gearbox and serious damage can occur.
- The main sign of a leak is transmission oil stains remaining after the car has been parked for a long time. You need to make sure that the problem is with the gearbox, as engine oil may leak due to improper installation of the filter.
- If you have established for sure that the leak is coming from the gearbox, you must stop using the car and carry out diagnostics and repairs. If the malfunction is not corrected in time, a decrease in the oil level will lead to wear and breakdown of the gearbox.
In addition, due to increased leakage, the gearbox may fail at the most inopportune moment. In this case, simply replacing the seals will no longer be enough. The box will have to be removed, troubleshooting and completely repaired.
Of course, the price to fix the breakdown will be much higher than if you had to buy only new oil seals.
It is important to note that periodic monitoring of the oil level in the gearbox allows you to promptly notice and eliminate the malfunction and avoid possible problems in the future. It should be checked regardless of the condition of the box.
You also need to monitor the occurrence of noise, crunching and grinding noises during gearbox operation. If any of these signs appear, as well as difficulties with shifting gears, it is necessary to diagnose the gearbox.
If you do not detect in time that there is a transmission oil leak, it will completely leak out of the gearbox. In this case, it will be necessary to carry out expensive repairs of the gearbox, while the cost of the oil seal is 50-100 rubles.
Oil seals are consumables. If they break, they cannot be restored. Therefore, if an element ceases to perform its functions due to damage or wear, it must be replaced with a new one.
Also, the replacement of the gearbox seals is carried out together with the change of the CV joint. If it is necessary to install this unit, the gearbox seals are also changed. This is done because if the oil seal is removed, it will no longer be fully operational.
In an automatic transmission and a manual transmission, replacing oil seals is almost the same. At the same time, it is important to understand that an automatic transmission has such an integral part as a torque converter. This is a device with blades that works on the principle of a windmill - it transmits torque from the engine to the gear shift mechanism, which allows the car to change the speed without driver intervention. The advantages of a torque converter are the absence of a clutch pedal, smooth acceleration of the car, and protection of the engine from overloads.
The weak point of the gas turbine engine is the rubber seal. If the automatic transmission seal needs to be replaced, then the sealing ring of the unit also needs to be changed.
The operation of the element is designed for approximately 200 thousand km. However, it may wear out earlier. Even small gearbox oil leaks must be eliminated and repaired, otherwise premature wear of the shaft, pump and the entire gearbox as a whole may occur.
Algorithm for replacing the crankshaft oil seal
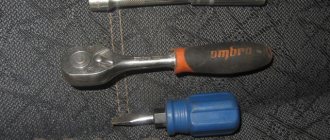
To replace the front crankshaft oil seal, you will need a standard set of wrenches, specialized tools (wrenches for unscrewing the crankshaft pulley bolt), a gear puller (for cars with a timing belt drive), and truings for pressing in a new rubber element.
Video: A simple method for removing the oil seal
If you take cars equipped with engines with a timing belt drive, then the replacement technology is as follows:
- We place the car in the pit and immobilize it.
- We provide access to the attachment drive pulley mounted on the crankshaft.
- Remove the accessory belt.
- We provide access to the timing belt.
- We set TDC according to the marks (on the camshaft gear, crankshaft pulley, flywheel). We fix it in this position.
- Unscrew the crankshaft pulley mounting bolt. Once again we check the installation of marks.
- Loosen the timing belt tension roller.
- We remove the belt.
- We pull the drive gear off the crankshaft (carefully so as not to lose the key). Usually the gear is pulled off by hand, but sometimes a puller is required.
- Thoroughly wash and clean the surface near the crankshaft end switch.
- Pry off the oil seal with a screwdriver or pliers. We do this carefully so as not to damage the seating surfaces, since even the slightest scratch will lead to a loss of density and renewed oil leakage.
- We wipe the seating surfaces with a rag.
- Lubricate the new oil seal and put it in place, making sure that the edges do not turn under.
- We hammer the rubber element until it stops using a straightener (a piece of pipe of the appropriate diameter).
- We put everything back together, making sure that the marks match and the drive belts are tensioned correctly.
But this is a general technology. If you take each engine separately, there will definitely be nuances.
Work progress
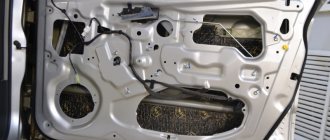
To install a new oil seal, you will have to completely disassemble the washing machine. To do this, you will need a standard set of tools available in every home. The parsing algorithm includes the following steps:
- disconnect the top cover from the housing; to do this, unscrew the bolts holding it located on the rear wall of the unit;
- unscrew the bolts located around the perimeter of the rear part of the case and carefully remove the back wall;
- tighten the drive belt, the procedure is easiest to perform by rotating the shaft with your free hand;
- remove the cuff surrounding the hatch door; to do this, disconnect the metal ring holding the rubber seal;
- disconnect the wires from the heating element and the electric motor, not forgetting to disconnect the ground;
- remove all hoses and pipes attached to the tank;
- separate the water intake level sensor;
- remove the shock absorbers and springs supporting the drum;
- remove the counterweights located inside the housing;
- remove the motor of the machine, to do this, unscrew the mounting bolts and move the engine forward;
- remove the tank with the drum from the machine;
- open the tank body, gaining access to the drum, using a hexagon, unscrew the pulley.
After disassembling, you will gain access to the oil seal, bushing, and bearings. Removing the O-ring is very simple; just pry it off with a screwdriver. Next, you need to inspect the system elements; if replacement is necessary, install a new oil seal. To do this, it is advisable to well lubricate not only the installed parts, but also the seat.
It is important to install the removed ring correctly. The question may arise, which side should the oil seal be placed on? This issue is really important, so inspect the seal carefully. If there are no factory marks on it, install it so that it most tightly covers the niche in which the moving elements of the bearing are located. Water should not get inside.
Should I use silicone sealant in my work? It will come in handy in cases where the washer tank was non-separable and had to be cut to gain access to the seal and bearings. Sealing and re-gluing the tank will be a necessary measure during the subsequent assembly of the machine.
source