The brake system in any car is the most important safety element. Despite the fact that it is one of the most reliable in the entire car design, it must be constantly maintained and repaired. In the VAZ 2114 model, the braking system is quite simple, so it can be repaired by the car owners themselves. Almost any procedure for replacing braking elements involves further pumping the brakes. Many people do not understand how to bleed the brakes on a VAZ 2114, so we will consider the procedure step by step.
Useful video:
Signs of air in the brake system
Airing the car's braking system is fraught with serious consequences, because... the next time you try to stop the car, the brake pedal may fail and not work. Diagnostics at every maintenance is a sure way to preserve the entire design. Most civilian vehicles are equipped with a hydraulic braking system from the factory. When the driver presses the pedal, force is transferred to the vacuum booster, which drives the calipers with pads. Due to this, braking occurs.
The situation when air enters this circuit manifests itself as follows:
- Increasing pedal free play;
- Too high “softness” and “cottonness” when pressed;
- Complete pedal failure.
Air ingress is caused by untimely maintenance of the machine. Infrequent replacement of pads leads to the fact that the calipers have to work for a complete fit, because The pads themselves are worn out. A lack of fluid in the circuit leads to early wear of the cylinders in the caliper and gradual leakage of air.
The lack of air in the circuit depends on how to properly bleed the brakes on a VAZ 2114. The procedure is not complicated, but it requires attention and double-checking, because The performance of all components must be normal.
Brake system VAZ 2115
Safety when driving a car is ensured by several systems, however, the main role is still assigned to the car's brake system. Timely braking saves you from traffic accidents, and the hand (parking) brake helps to secure the car on an inclined surface. It is these elements of the car that need to be given special attention. Timely diagnostics and repairs will help protect you and your car.
Malfunctions
Possible malfunctions of the brake system and methods for eliminating them are given in the table:
Increased brake pedal travel
Leakage of brake fluid from wheel cylinders
Replace failed parts of wheel cylinders, wash and dry pads, discs and drums, bleed the hydraulic drive system
Air in the brake system
Remove air from the system
Damaged rubber o-rings in the master cylinder
Replace the rings and bleed the system
Damaged rubber hoses for hydraulic brakes
Replace the hoses and bleed the system
Increased runout of the brake disc (more than 0.15 mm)
Sand the disc; If the disc thickness is less than 17.8 mm, the brake disc should be replaced
Fluid leakage through the pressure regulator pusher O-rings
Replace O-rings
Insufficient braking performance
Oiling of brake pad linings
Wash and dry the pads
Piston jamming in wheel cylinders
Eliminate the causes of jamming, replace damaged parts, bleed the system
Complete wear of the brake pads
Replace the brake pads
Overheating of brake mechanisms
Stop immediately and let the brakes cool down.
Using pads with mismatched linings
Use only pads recommended by the manufacturer
Incorrect pressure regulator adjustment
Adjust the pressure regulator drive
Loss of tightness of one of the circuits (accompanied by partial failure of the brake pedal)
Replace damaged parts, bleed the system
Incomplete release of all wheels
There is no free play in the brake pedal
Adjust pedal free play
The protrusion of the adjusting bolt of the vacuum booster rod relative to the mounting plane of the master cylinder is impaired
Adjust the protrusion of the 1.25-0.2mm adjusting bolt
Swelling of the rubber seals of the master cylinder due to gasoline, mineral oils, etc. getting into the liquid.
Thoroughly flush the entire system with brake fluid, replace rubber parts, bleed the hydraulic drive system
Master cylinder piston jamming
Check and, if necessary, replace the master cylinder, bleed the system
Necessary tool
The pumping process should be carried out with a partner, because... It will be difficult to do the work yourself. To get results when working independently, you will need the following tools:
- A hose suitable for the fitting on the wheels of the car;
- Set of keys and sockets;
- Brake fluid;
- A rag for cleaning dirt from the caps;
- Container for liquid accumulation;
- Spare fittings in case the old ones break off.
It is also worth knowing the procedure for bleeding the brakes on a VAZ 2114, because... When performing the procedure, you should start with the rear wheels.
Procedure for bleeding the brakes
Before starting the procedure, you should check all connections and hoses for leaks. If there are leaks and signs of friction, replace the hoses with new ones. Also keep in mind that the brake fluid you will fill must match what is already in the circuits. Starting from the rear wheel, the procedure is carried out diagonally. Only by following the procedure for bleeding the VAZ 2114 brakes will you get a good result.
For convenience, we present the sequence of pumping the brakes of a VAZ 2114:
- Rear left wheel.
- Front right wheel.
- Rear right.
- Front left.
If you have to bleed the brakes alone, study the video instructions for using a nipple from a tubeless wheel and an extended hose.
Preparing for work
Bleeding the brakes on a VAZ 2115 is not as easy as it seems, so let’s move on directly to the process of bleeding the braking system. Everything needs to be done one by one, namely:
- Rear right;
- Front left;
- Rear left;
- Front right.
It is very important to do everything in this order
If you decide to bleed the brakes on a VAZ 2115 yourself, otherwise nothing will come of it. First of all, check the brake fluid level. The most important thing is that at the first stage of pumping it reaches the maximum amount. If necessary, add more, but the mark should reach “MAX”. When you understand that the oil level is normal, you can start working.
Sometimes the rear wheels of a car may be hanging out. To get rid of this problem, you need to unlock the pressure regulator and insert a screwdriver between the piston and the plate.
In fact, in a specialized service station
everything is done more simply, but this guide is intended for drivers who decide to bleed the brakes themselves. By the way, do not forget to remove the screwdriver from the brake system after you have fixed the problem.
Bleeding brakes on a VAZ 2114
Having decided in what order the brakes are pumped, you can begin. Note that it is convenient to pump in a pit. Step by step bleeding the brakes of a VAZ 2114 looks like this:
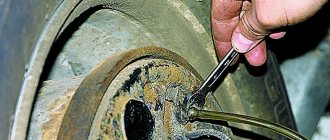
- Get to the rear wheel and find the bleeder fitting with a cap on the drum.
- Remove the protective cap and clean the surface from dirt.
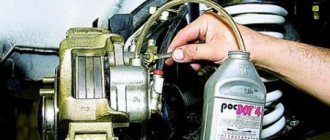
- Next, put a hose of a suitable size on it, the other end of which leads into a container to collect the liquid.
- An assistant presses the brake pedal several times and leaves it pressed.
- Using a size 8 wrench, unscrew the fitting half a turn.
- The liquid from the fitting is drained until bubbles stop appearing. During the process, you need to add liquid to the tank and keep it at least at the minimum level.
- Next, go to the front wheel and carry out the same actions as described in paragraphs 3-6.
It is not recommended to carry out the work independently, without the help of a partner, because... To do this, the front wheels of the car will have to be hung. You will also have to find a way to supply pressure to the system.
Never add plain water to the tank. When frost sets in, the hoses will freeze and burst, making it impossible to stop the car. Carry a spare bottle of DOT4 fluid with you. If the reservoir level is low, add DOT4 to the correct level and locate the source of the leak.
Do not forget that at the moment when the air leaves the brake system, you must not allow the level in the reservoir to drop below the minimum. If this happens, the system will air again. To visually study the process, we recommend watching the video with step-by-step instructions.
Sequencing
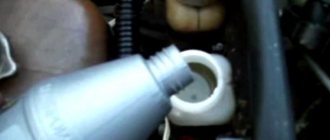
First you need to open the hood of the car and open the cap of the brake fluid reservoir. Make sure it is filled to the maximum. If not, add to about. After this, follow the steps in the following sequence:
- On the rear right wheel, find the cap that covers the fitting. Remove the cap and clean it of dirt.
- Fill a clear glass or plastic container with brake fluid.
- Place one end of the hose onto the fitting and place the other end into a glass or transparent plastic bottle. The hose must be lowered into the liquid.
- Ask your partner to sit behind the wheel and gently press the brake pedal 7 times with breaks of 2 seconds. After this, he must press the pedal again and leave it in this position (pressed all the way).
- While an assistant holds the pedal, use a wrench to unscrew the fitting 2-3 turns.
After all these steps, you will see that brake fluid will flow into a transparent container through the hose. Watch how it drains.
There will be visible air bubbles in it that need to be removed. Drain the liquid until the bubbles disappear. Then screw the fitting back on. Only after this can your assistant release the pedal. When the liquid flows into the container, monitor its level in the tank. If necessary, add brake fluid. If during pumping it completely leaks out, you will have to start the whole procedure from the beginning.
Repeat similar steps for each wheel in the above sequence. This mechanism of action is suitable not only for the VAZ-2114, but also for models 2113, 2115.
We recommend: Changing the automatic transmission oil: recommendations from experts
Many car owners are wondering: is it possible to carry out pumping alone? Yes it is possible. Only in this case, the pressure should be produced not by pressing the pedal, but by using a powerful compressor for these purposes. It should create a pressure of 2 atmospheres.
Car owners have to carry out pumping in different situations. Air can enter when replacing copper pipes at the rear or other components of the brake system, when hoses are damaged, when replacing brake fluid, or if the seal in the unit is broken. Regardless of the reason, after air enters the GTZ (brake master cylinder), bleeding must be carried out. Otherwise, the brake simply will not work.
The failure of the brake pedal in VAZ cars can be overcome by carrying out the process of bleeding the system.
Before you start bleeding the brake system, you need to study the car's instructions, which contain a clear bleeding scheme. If there is no such scheme, then the wheels are pumped from right to left (rear right and left, then the front ones in the same way).
You also need to prepare the following necessary elements: a hose and any plastic or glass container.
The work progresses like this:
- Brake fluid is poured into the master cylinder;
- The brake pipe fittings are cleaned;
- Brake fluid is added to the container, into which one end of the hose is inserted. The other end is inserted into the fitting;
- An assistant is brought in to press the brake pedal several times and hold it down. At this time, you need to unscrew the fitting and check the liquid that leaks out. When the system is aired, air bubbles may be noticeable;
- Next, the fitting is tightened and bleeding continues with three wheels, which should be pumped according to this scheme.
If bleeding the wheels yourself is not successful, then you need to contact a service station, where highly qualified specialists will inspect and bleed the car’s brake system.
Where does the air in the brakes come from?
Untimely maintenance and inattention to the technical condition of the machine are not all the reasons why air problems occur. Let's consider several main reasons for the violation of the tightness of all circuits:
- Replacing technical fluid throughout the entire circuit involves draining the old DOT4. At the moment of refilling, air also enters the circuit;
- There are hoses going to the brake cylinder, damage to which is a very common situation on VAZ. Over time, they begin to “sweat” and become airy;
- Cylinder leaks (both rear and front);
- Leak from the GTZ.
Timely maintenance involves replacing all fluids in the car, incl. and brake. Ignoring this fact plays a cruel joke on drivers. With long runs, moisture somehow gets into the system, which reduces the resistance of DOT4 to low temperatures. In cold weather, the pipes can crack and render the machine stopping unit unusable. Also, do not allow DOT4 to come into contact with paint surfaces. It contains quite aggressive elements that can damage the paint. If you carry out manipulations yourself, using a compressor to pump up pressure, follow the safety rules. Excessive pressure will cause the pipes to rupture and spill their contents onto you. After completing the work, do not rush to accelerate and check the effectiveness of the brakes at high speed. It is enough to press the pedal several times and feel how much it sinks. In a situation where following the instructions does not produce results, contact the service specialists. It is better to pay for brake system repairs with money than with your safety.
