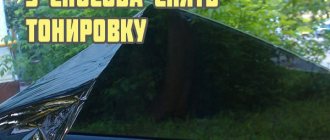
The headlights of domestic cars, low and high, do not suit most car enthusiasts. In one case it is very dim, in another case the headlights shine very low. The last problem can be solved using a simple modification method, which will take no more than five minutes, but the effect will be amazing.
To raise the main beam of the headlights, you will need to slip small pieces of wire under the “high beam” lamp, as shown in the figure. The thicker it is, the higher the headlight will illuminate the main beam. Example on headlights. It should be noted that this modification does not require disassembling the headlight.
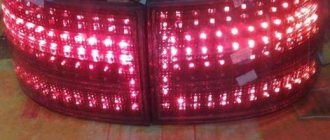
Test of high beam headlights after modification, sequence in the photo:
Fog lights and low beam headlights;
Fog lights, low and high beams.
The second method is to bend the leg of the farthest paw.
By the way, it is possible to raise the low beam of the headlights either by conventional modification or by a set of measures. If you don’t need high beams in a car, then it is possible to make 2 low beam headlights.
You need to understand and find out the reasons why the headlights on the VAZ 2110 and 2114 shine poorly as quickly as possible. Light on the road is the key to your well-being after sunset, and especially in winter, when it gets dark early (and dawn comes late). If bad weather conditions in the form of rain or snow are added to the general theme, then the lack of lighting becomes literally dangerous.
Driving almost by touch means, first of all, risking the integrity of your iron horse: an undetected hole can seriously damage the chassis, or even cause a skid, which is fraught with injuries not only for your car, but also for oncoming/passing people.
Why the headlights on the VAZ 2110 and 2114 shine poorly, you need to look for the reasons until you are completely sure that it is this factor that interferes with proper functioning. Simply changing lamps to more powerful ones does not always solve the problem and may turn out to be an unnecessary waste of money.
Glass
The simplest reasons are usually the most likely.
Dirty headlights
reduce illumination by 50%. Wiping them with a dry cloth is not a good idea. With this approach, you also scratch the glass, which over time will make their dim glow permanent. If you don’t want to regularly wash your headlights by hand, install a washer. By the way, the unit from Volga is perfect for the “ten”. Moreover, the installation is quite simple and can be done on your own.
The glass may break. If you notice a crack on the surface, you will have to remove the headlight unit and replace it with a new one.
If your car has been well-used, the glass may naturally become cloudy from age. Since it is in the forefront when moving, dust, grains of sand and small debris, hitting the headlight at speed, leave microscopic scratches on the glass. Most of them are so small that they are not even visualized, but at the same time they refract and scatter light according to the principle of a prism. The glass will have to be replaced; and so that the next replacement moves as far away as possible, you can cover it with a protective film.
The international problem of burning motorists' eyes
I don't know who needs to see this. But THIS means that your high beams are on and I CAN'T SEE ANYTHING
And also, motherfucker, if there is no fog, turn off your fog lights!
Full light in 1999:
Possible control method:
Threat. The accordion meter only swore at the last picture, but it’s on topic here. The main message is in the first 3 pictures, according to them the accordion meter was silent.
Reflector
If everything is in order with the glass, a possible reason for the dim glow may be a peeling reflector. No matter how powerful the lamp you screw into the headlight, you will not get the proper brightness of light. On most foreign cars, in this case, you have to change the entire headlight; On VAZs, only the reflector can be replaced. Moreover, the procedure is very simple:
- The headlight unit is dismantled with the battery disconnected;
- The glass is removed from it. It is placed on a sealant, which is softened by heating using a hair dryer. Then the glass is pryed up and carefully removed;
- The light bulb is unscrewed;
- The shabby reflector is dismantled, a new one is installed, and the headlight is assembled in the reverse order.
Before installing the glass, do not forget to clean both it and the body of the old sealant and degrease it before applying a new layer.
Voltage problems:
Especially typical for cars with halogen lamps. A lack of voltage can be caused by a malfunctioning generator or oxidation/breakage of the contact. Normal light is produced at a voltage of 13.8-14.2 V, and the same should be at the ends of the working lamp. A drop on it of no more than 0.2-0.3 V at 2000 rpm is acceptable.
A lower voltage indicates that there is a faulty contact in the circuit. It is required to detect and eliminate the defect; Installing stronger lamps before repair is strictly prohibited: it can lead to overheating and even ignition of the faulty contact.
Light direction
Insufficient lighting may be caused by unadjusted headlights. Moreover, at one time the adjustment could be correct, but due to an accidental shock (for example, a bumper catching a curb) it was disrupted. You can correct the position yourself, without optical instruments.
- A flat wall is selected, the car is installed at a distance of 5 m from it and loaded as standard: the tank must be full, and someone must be sitting in the driver’s seat.
- Markings are made on the wall: the central vertical line should coincide with the center of the car, the side lines should coincide with the center of the headlights.
- Horizontal is carried out at the level of the lamps. The border of the light spot is marked 6.5 cm below.
- The glass is removed from the headlight to access the adjustment screw, the second one is covered with any cardboard. The direction is adjusted to exactly hit the point of intersection of the lines. The adjustment is carried out with the low beam on: then the high beam will also be adjusted correctly.
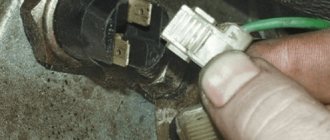
If the contacts are damaged
So, let's say you figured out why the lamps are not working well or why one headlight is dim. This means that the problem can now be fixed.
If the headlight's contacts are loose or damaged, it may not be immediately obvious. A distinctive feature of this malfunction is that the headlights periodically begin to burn brighter. This happens, for example, after the car shakes due to hitting a bump, during a sharp turn or hitting the hood.
In such cases, the contacts temporarily change their position, clinging more tightly, and the lamps begin to work at full capacity.
However, we note that such a characteristic is only a sign, and not a way to repair lamps. In order to fix the problem, you need to fix the problem with the contacts.
The contacts may be damaged or clogged, or they may become loose. The easiest way to fix this problem is to contact a car service.
But you can also try to remove the headlights yourself, check the contact coils and, if they come off, weld them or cover them with epoxy glue.
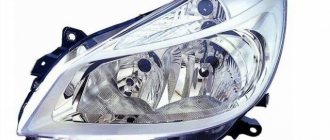
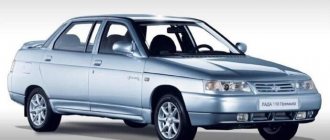
Refinement of Kirzhach headlights on VAZ 2110. Improving illumination and comfort
Many owners of this car complain about poor light, so upgrading the Kirzhach headlights on the VAZ 2110 will be an opportunity for them to improve it. There are many complaints from drivers about it; they note the poor light of products from Germany, a narrow luminous flux and some other shortcomings. The situation cannot be corrected by installing more powerful lamps, so owners are forced to resort to various tricks.
If there are problems with optics, alternative proposals appear, but their cost is high.
Modification of Kirzhach headlights on VAZ 2110
is a real proposal for a way out of this situation. If you take the time to search for suggestions on how to improve the lighting on this car, you will find many suggestions. With our advice, we will try to help drivers improve the illumination of the road, and therefore increase the safety of themselves and other road users.
About affordable lighting equipment for dozens
Today, the automotive market is filled with lighting equipment from various manufacturers, with the help of which you can not only improve the illumination of the roadway, but also transform the appearance of the car thanks to their updated appearance. Most owners choose products from two companies. This is domestic, Kirzhach optics from this company receives good reviews, and German branded from Bosch.
No one can say for sure which one is better, but some features of these products should be mentioned. The optics are expensive, but have a built-in lens for the low beam lamp. Its presence allows you to focus the light flux, which means improving your visibility of the roadway. These headlights lend themselves well to numerous tuning options. Also for these products there is a legal installation of xenon.
If, to improve illumination, we take original products from Bosch as a basis, then it does not have all of the above features and advantages. Manufacturers do not produce modifications of these products, but their price is somewhat lower than domestic products. Bosch optics are more susceptible to contamination, since their glazing area is larger than that of a domestic headlight.
Let's talk about remodeling
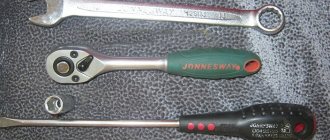
For those who decide to upgrade their lighting, products from the Kirzhach brand are the most suitable option. They allow several modification options, and there is also the possibility of installing xenon. Thanks to such modifications, the efficiency of the headlight and its light output increases. Having the skills to work with various plumbing tools, you can perform such alterations yourself.
In order to begin upgrading these products, you must first remove the headlights from the car. Next, you will need to completely disassemble the removed optical elements. First of all, you need to carefully separate the glass from the headlight housing. It is attached to the body using a special sealant. This work must be done carefully so as not to damage the glass, otherwise you will have to buy a new one.
After completely separating the glass from the body, the procedure will be something like this:
- We begin to remove the reflector; to do this, we need to unscrew several screws;
- Now you can remove the connectors and remove all the wires from the rear of the headlight;
- The spring near the hydraulic corrector is removed to make it possible to remove the frame from the body;
- Using a screwdriver, remove the low beam module from the housing and completely disassemble it.
A little about the improvement
The purpose of such an operation can be only one, improving the illumination of the roadway. Experts break it down into several stages, they can be like this.
- Work to move the lens closer to the reflectors;
- Refinement of curtains;
- Changing the shape for the reflector.
Only carrying out all stages of refinement can lead to achieving the desired results in improving Kirzhach optics. We need to talk about these stages separately
How to move the lens?
This operation is carried out to move the lens to reduce its area that receives illumination from the lamp. This achieves a decrease in the curvature of the lens. This can be done this way:
- It is necessary to completely disassemble the module and remove the lenses from it. Cuttings must be made at the proposed new location for installing the module. At this time, it is necessary to carefully monitor the position of the curtain; it should always be at a distance of 50 mm;
- In the marked place, you need to saw off the module and strengthen the lens; for this, previously made cuts are used, and the module becomes somewhat shorter. It is important to take this point into account; the lens heats up, so the optimal approximation size will be 10 mm.
About altering the curtains
It is needed to prevent blinding of drivers ahead. To do this, the curtain is made straight. First, a template is cut out of cardboard, then a metal product is made from it. The finished product is installed on the module, before which it can be covered with foil for better dispersion of the light flux.
If desired, you can find several more additions to this modification in different sources. Do-it-yourself modification of Kirzhach headlights on a VAZ 2110 also brings moral satisfaction for the owners. Therefore, be careful and prudent, and everything will work out for you.
- Do-it-yourself modification of the VAZ 2109 and 2110 stove. There is never enough warmth
- How to install lenses in headlights? Guide and review
- Which fog lights are best? An objective view from the outside
Simple ways to improve your headlights. No complications
Lada 2110 › Logbook › Refinement of lens modules of “Kirzhach” headlights
Hello, today I decided to talk about how I modified the Kirzhach headlight modules so that you could see where you were going at night.
I did the alteration almost a year ago, but the photo report remains. The main part of the information was taken from the website lada2111.rf/. but, as always, I had to figure something out myself.
From the moment I started driving the 10, I really didn’t like the low beam. The situation got better after installing Philips BlueVision 55w H1 lamps, but still not so great. There was no desire to splurge on Bosch headlights, and I really wanted to add “angel eyes” to these lenses. And then, one day, in one auto store I saw LED rings that I really liked and decided that it was time to change everything for the better in these headlights (in mine).
On New Year's weekend (which was in 2014) I went to the garage, took off the bumper, took off the headlights, brought them home and washed them off the dirt. I was very worried about the glass, but in vain. After a “hot shower,” the glass, although lazily but pliable, peeled off from the headlight with the help of a thin knife.
Headlights love hot showers too =)
After that, we disassemble the headlight, remove the headlight mask (that shiny piece of garbage) and unscrew the modules. Since we also need beautiful headlights, we paint the mask as desired. I painted it gloss black. It’s better not to skimp on paint, otherwise the high temperature inside the headlight may cause cheap paint to crack or even fly off.
Well, while the paint dries, let's return to the modules. Let's analyze them completely. We remove the lens, the shutter, drill out the brass rivets to disconnect the body and the reflector.
Rivets. They need to be drilled out.
Next, we go to the garage, taking with us a part of the module (the one that is NOT the reflector), set up our favorite grinder there and cut the tin approximately in half. Of course, you need to mark everything out first. You need to make marks on the sides with a marker or any other writing/scratching object. Then, using these marks, we also make cuts so that we can later assemble and configure the module with their help. I just made a hole on one part.
There in the garage, we grind off the edge of the module at the place where the lens is attached. The main thing is not to overdo it.
I can also say about the ring, I think that not all modules have them. On the module that was my first, the experimental one, so to speak, it was not there. That is, as if, “everything has already been ground down before us.”
Since the lens moves closer to the reflector, but its focal length does not change, the curtain also needs to be changed. We find the case of the old power supply from the computer, use an awl/nail to trace the reflector on it and cut it out with metal scissors. We sharpen it using sandpaper and smooth it with a file.
The upper limit is a little more complicated. It should be perfectly smooth. Well, of course, it won’t work out perfectly, but we must strive for it. We finish it with a file and sandpaper as a finishing touch.
The border of the curtain should be smooth
Old and new curtains.
You need to attach the curtain to the reflector exactly in the middle in order to get the highest concentration of light right near the STG (light-shadow boundary). I recommend using a caliper.
To accurately and reliably fix the curtain for drilling holes in it, I glued it to the reflector with superglue.
An evenly installed high-quality curtain is the key to success for high-quality light
After this, we assemble the modules with bolts instead of rivets. The rim of the module lens was also painted black.
Pre-assembled module
We connect the assembled module to the power supply/battery and set the focus on the wall further away. This is done using the part of the module with the lens that we sawed off. We move it back and forth until the border of the light becomes clear. Then tighten the nuts.
Since I also wanted to get rid of this yellowish tint in the headlights, I covered the entire module with self-adhesive foil. It helped a lot.
We install the module into the headlight using elongated bolts with spacers, since we shortened the module itself.
“Eyes” I attached the headlights to the mask with the same superglue, I drove for almost a year until they fell off.
Before placing the glass on the sealant, it is better to check that the modules on the spacers are level, otherwise it is unlikely that the headlights will be adjusted properly.
We put the headlights on the car, wait for the night, and set them up. And here it is, the “wow” effect. After modifications, the light began to please.
Website about joints
Everyone knows that Bosch headlights do not illuminate the road well at night.
When driving in the near one, it’s hard to see - the road runs away, but when driving in the far one, you interfere with oncoming cars. I invite you to go with me on an unforgettable journey of tuning Bosch VAZ 2110 headlights. Let's start with the fact that we need to remove and disassemble the headlight. I won’t tell you how to remove and disassemble the headlight. There are many posts on this topic on the Internet, step by step. We need to slightly change the design of the headlights, namely, replace the H1 lamps with H7 ones. In my opinion, the H7 lamp fits perfectly into this headlight. The dimensions of the lamp H1 and H7 are the same both in height and in the location of the chrome thread. Look at the photo: You can drill the required hole with a circular saw like this.
We disassemble and remove all the saws we don’t need. The one closest to the center is our saw, which will drill a hole in the headlight reflector. You need to drill a hole so that the H7 lamp is completely immersed in the hole and rests only on the collar. Taking my son as an assistant (he held the reflector), armed with a drill and loading our saw into the chuck, I drilled a hole. The smell from drilling is not very pleasant, so it is better to drill outside. This is what happened.
By the way, you can drill with another tool. For example, I have this thing. In our store it costs 30 rubles!
Let's try on our H7 Lamps. They fit perfectly and are locked with the same clamps that held the H1 lamps. That's basically all there is to drilling. Now we take a soldering iron and plug it into a socket, and in the meantime we cut off the “+” and “–” terminals that supply the H1 lamp with electricity. We strip the wires, solder other terminals (mothers). We will need 4 of them per headlight. We also need heat shrink casing. Taking advantage of the moment, I inserted LEDs into the dimensions in place of the lamps. This is what happened.
I don’t know about others, but my reflector kept falling off. Here's how I solved this problem:
I simply drilled a hole in advance and screwed in the screw and washer without fully tightening it. Now it's not going anywhere. As for the lamps, I took “Novator” and “Narva” at 55 w each.
Having installed the headlights on the car and adjusted them (by the way, I installed the lamp with the beads facing up), I drove out into the dark on an unlit section of the road. I was very surprised by my result. Now everything is very clearly visible at close-up - not only the road itself, but also the edges of the side of the road. The headlights do not shine 10 meters from the bumper, but further and better. Here's a photo from the car. This is the neighbor.
In the photo the high beam is on, about 35 steps from the car.
I called a friend - he also has a “ten” with Bosch headlights. We compared my headlights and his on the same section of the road. This is what happened. This is the low beam on a friend's car.
I took this photo standing between the cars. There is a difference and what a difference!
This photo is also from about 35 steps closer. On the right is a friend's car, on the left is mine!
Maybe many will start to judge me for ruining the headlights, etc. I'll tell you honestly: before tuning, I tried to install lamps from Osram, Philips, and many others - the result did not suit me. If you find the same article on the Internet, you should know that I wrote it. I received a fee for it, but it was small. And I’m just posting it here because it’s not here. And finally, I want to say (well, just food for thought): now you can insert H4 instead of H7 lamps. But that's a completely different story! Good luck to everyone on the roads! Not a nail or a rod!
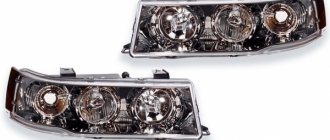
Disassembling headlights
Before you start modifying the headlights in a VAZ 2110 car, you need to perform the following simple steps:
- Their removal and disassembly. Using a utility knife, the glass is carefully removed from the headlight, and since it is secured using a special sealant, extreme caution is required so as not to break it. But if it breaks, then this is not a problem, you can buy it separately;
- Next, the reflector is removed, unscrewing several bolts.
- The next step is to remove all the wires from the back of the headlight and the spring from the place where the hydraulic corrector is inserted, and only then is it possible to remove the frame with the module itself from the headlight housing.
- Remove the low beam module using a screwdriver and disassemble it completely.
Making an element by hand
The main advantage of the method is that if the hydraulic corrector becomes deformed, you do not need to repair it - you just need to manually adjust the headlights.
For one optical element you will need:
- lock-nut;
- a pair of nuts with turned ends to secure the bolt in the body of the product;
- M8 bolt 6-10 cm long;
- The corrector housing from the device is in working condition.
On the back side of the correction housing, drill a hole for normal movement of the bolt in it. The structure will sit smoothly thanks to the nuts with ground edges. For extra confidence, you can seal the nuts with epoxy glue.
Adjusting the luminous flux
In order for the VAZ 2110 to be driven comfortably, all the rules of correct light supply must be followed so as not to blind oncoming drivers. There are special screws on the headlamp housing that are used to adjust the light supply.
When you turn the left screw, the angle of inclination of the optics changes vertically, respectively, turning the right screw changes the optics horizontally.
To correctly set the luminous flux, a horizontal line is drawn from the ground to the center of the headlights and another similar horizontal line is drawn 65 cm below it. After all the preparation has been completed, you can proceed directly to the adjustment:
- the right headlight of the car is covered with cardboard paper and the low beam is turned on;
- Using the adjusting screws, the center of the light beam of the left headlight is set, which is done in the same way with the right one.
Nuances of domestic cars
Owners of modern foreign cars are in many ways happy people. Of course, their cars are “stuffed” with electronics and automation, so a huge part of the settings is performed by the car automatically or using a computer.
This also applies to headlights. Their glow is adjusted electronically depending on the road surface, tire pressure level and a number of other parameters. That’s why they can rarely blind oncoming cars, notice obstacles on the road in time, and manage to see warning signs and speed limits.
Domestic cars, including the VAZ 2110, are deprived of these advantages. Light adjustments have to be done manually.
If this is not done, problems will be difficult to avoid.
Frankly speaking, it is still better to perform the settings at specialized service stations. But if you don’t have the money for this, or car service services are too expensive for your budget? In this situation, you can resort to the help of your own hands, as well as a pair of hands of a friend. You won't be able to do it without an assistant.
Alternative option
If the driver of a VAZ 2110 car seems that simple Kirzhach headlights do not provide good road lighting, then a bi-xenon module can be installed in them if desired.
The Kirzhach headlight module and the bi-xenon module are not very different, but this will not be an obstacle to replacing them.
Installing a bi-xenon module consists of several stages:
- Removing the module seat in the headlight to install a new part in its place;
- The next step is to connect the xenon lamp wiring to the standard wiring.
Installation of xenon lamps is very simple, because it occurs without changing the wiring. After the alteration, the lighting will be completely different from what it was before. After changing the modules, the ignition unit is attached to any point, there are many places for this, it is installed anywhere at the driver’s request.
Afterwards, everything is put back in its place and the glow at night is checked in practice.
After modernization, modifications and various alterations, at the request of the driver, the Kirzhach headlight must be mounted back on the VAZ 2110 using a sealant or a special construction sealant.
Choosing an optical system for Lada 2110
One of the most popular models of optical systems on the market today is the “Pro sport” system.
However, this model of headlights has a number of disadvantages that cannot be left unnoticed, since the safety of both the driver and passengers directly depends on the quality of the lighting emitted by the car. Based on reviews on the Internet, we can conclude that the “Pro sport” headlight emits low quality lighting and is unable to properly provide visibility of the track at night. Therefore, it is worth considering purchasing a Kirzhach headlight.
Example of headlight packaging
After unpacking the headlights and checking the package, the question arises: “Where to start?” In this case, You Tube will be your best assistant. On this site you can find many interesting videos on the topics of tuning headlights, fine-tuning lights, etc. Even if these videos differ from your vision of the work process, do not be upset, since each master uses a variety of approaches and materials in his work. Your task in this case is to emphasize for yourself the basic principles and approaches to installing headlights and get a high level of motivation, since without it it will be very difficult to achieve the desired result.
The price for headlights of this model ranges from 2350 to 2550 rubles and largely depends on the dollar exchange rate. Also, to the initial costs it is worth adding the cost of a can of paint 200 rubles and masking tape 48 rubles. The approximate amount of initial costs is 5148 rubles.