Why do the thresholds of the VAZ 2110 rust?
There are several reasons:
- Irregular anti-corrosion treatment. On vehicles of the VAZ family, preventive treatments must be carried out before each winter season of vehicle operation.
- The car was damaged in the threshold area and poorly repaired. In this case, corrosion develops very quickly and after 2-3 years through holes may appear.
- Winter operation on roads where a lot of reagents are used. Salts settle on the thresholds of the car and after a short period of time “break through” the external anti-corrosion treatment, starting the corrosion process. If you operate a car in such conditions, you need to wash it once a month and preferably with warm water.
- Damage to the external protection of the threshold and its untimely restoration.
- Blockage of drainage elements in thresholds. Drains should be checked once a year throughout the entire body.
The threshold consists of three parts:
- External lining.
- Amplifier inside.
- Connector.
Thresholds can corrode in different ways, but generally, if there are through holes, you will need to purchase the entire three-piece threshold kit.
Threshold article number for the right side is 21100-5401060-00, for the left side 21100-5401061-00. Ask for connectors and amplifiers in stores; they are not available for order according to factory articles.
The sequence of actions for replacing the threshold box
- It is necessary to place the car on a level surface; a level garage floor, boards, etc. will do. This is very important, because when repairing rotten cars, the gaps of doors and other elements can slip away.
- By marking the positions of the hinges on the pillars, you can remove the doors, as they interfere with the removal and installation of the threshold.
- If the car is rotten and you are afraid that the body will “fold”, you need to fix the original position. This can be done by inserting guy wires into the door opening, guy wires from the projection of the rear sofa and in the A-pillar, placing a block about 1 m long and pressing it lightly with a jack. Thanks to these simple manipulations, you will keep the gaps of all doors in their old position.
- Experienced people on my favorite body forum divided the replacement of thresholds into two options: correct and not quite correct. Proper repair involves replacing both fenders and sills. At worst, the threshold and the hams of the wings. This is necessary because the threshold is welded to the front pillar and to the rear arch far under the wings, and replacing the threshold without dismantling the wings remains problematic, if not impossible. But if everything is in more or less normal condition, then you can resort to the second method - welding the amplifier and butt welding the threshold trim.
- Also, before sawing the threshold, it is necessary to inspect the condition of the inside of the threshold with the noise insulation removed; if it is rotten, then it is necessary to weld a curved piece of metal that needs to be used to connect the inside of the threshold with the floor panels.
- After you have fixed the car body, you can begin to dismantle the old threshold. This can be done as you prefer, starting from the front or the back. It is better to brighten the weld spots, use a chisel less, because the edge is deformed, which is then quite difficult to straighten. For additional rigidity of the boxes, you can leave a strip from the old amplifier and lining in the area of the rubber seal, or one of them, this makes it easier to weld the new threshold and increases its rigidity.
- The threshold consists of three parts - an amplifier, a connector, and a threshold cover. When replacing thresholds, the connector is often not a standard one, but is made from a suitable piece of tin a little wider than the standard one.
- After dismantling the threshold, it is necessary to clean the edges from rust and old welding residues.
- VERY IMPORTANT! Thresholds must be replaced as quickly as possible, within reasonable limits, of course. That is, you should not cut off the threshold and leave the car for 2-3 days, it may lose its geometry.
- If the hinges of your doors are in order, but the upper corners of the doors touch the pillars, then this can be fixed. It is necessary, with the doors open, to use a jack and an extension to rest against the ledge of the rear sofa and the upper curtain of the door. Then grab this distance with a pipe from inside the rack. Try on the door if you need to add or remove. After welding the thresholds, the pipes can be cut off.
- The new threshold is welded in the following sequence - amplifier-plate-connector. After cleaning all the surfaces that will be welded, you can begin welding the threshold amplifier. It must be cooked semi-automatically in a carbon dioxide environment through drilled holes with a diameter of 5-6mm. To make it easier to install the amplifier in the area of the B-pillar, provided that the old amplifier is more or less intact, you can leave a piece of the old one and weld the new amplifier to it. In the lower part, a threshold connector is also welded through drilled holes. The CONNECTOR is welded at this step only to the amplifier! It is welded to the floor last.
- Attention! Trying on the threshold overlay is carried out only with the doors installed! Otherwise you might miss :)
- After welding the threshold amplifier, it is necessary to clean the welding points and weld the trim through the drilled holes in the threshold trim. The pad is welded to the rack in several ways, depending on what is more convenient, the main thing is that the connection is strong.
- Lastly, the connector is welded. There's a little trick here. The connector is welded to the floor panel; this can be done from a hole or through holes drilled in the floor panel. In order not to catch scale on your head, you can drill holes in the floor and, pressing the connector from below with a jack, weld it through the holes.
We recommend: How to change the brake drum on a VAZ 2107
Tools and materials for work
To repair VAZ 2110 thresholds you will need a lot of different tools. Below is a list of tools and materials without which high-quality threshold repairs cannot be made:
- power tools (angle grinder, drill and accessories);
- semi-automatic welding machine and accessories;
- knife for chopping metal;
- a set of keys;
- ratchet crank;
- hammer;
- center punch;
- marker for marking;
- compressor;
- body pliers;
- spray gun;
- gun for applying anti-corrosion agents;
- epoxy primer;
- degreaser;
- putty;
- sandpaper or red scotch-brite;
- solvent;
- polyurethane sealant for welds;
- external anti-corrosion agent (for example, Body Autoflex or Teroson RB2000);
- anticorrosive for internal cavities (Movil, Pushsalo and others oil-based).
Step-by-step replacement process
- First, remove the doors, seats, bumper and front fenders. Also remove carpets, seat belts and sound insulation.
- Protect your car windows. Sparks from grinders and welding can damage them. It is also advisable to cover the doorway with cardboard so that nothing gets into the interior.
- Disconnect the negative terminal of the battery.
- Place the vehicle on a pit or tipper.
- Attach the new threshold and use a marker to mark the lines along which you will cut the old one.
Do not cut to size right away, give 5-6 mm of margin. You can always cut it to size in time. - Use a grinder to cut through the previously marked areas.
Be sure to wear glasses when working with an angle grinder. - We core all the contact welding points along the edges at the top and bottom of the threshold. Next, we drill out the points, and then use a body knife to separate the metals from each other.
- After you have separated the threshold, remove it and evaluate the condition of the bottom, amplifiers and connectors. If necessary, cut off rotten parts of amplifiers, connectors, or remove them entirely.
- Cut out the required pieces from the repair parts and weld them in place.
- Prime all welds and repair inserts with epoxy primer, having previously “filled” the abrasive with a scratch to create conditions for good adhesion of the materials.
- Cut the butt pieces to size and drill holes for welding along the edges at the top and bottom of the threshold.
It is better to make holes with a 7 mm drill at intervals of 3-5 cm. - “Stuff” the groove inside the threshold with abrasive and paint it with epoxy primer.
- We bring the threshold and secure it with pliers or screws.
- We make “pot holders” and gradually scald the threshold around it.
- We clean all welds, grind the threshold with abrasive and apply epoxy primer.
- We apply sealant to the non-facial welds, putty on the facial seams and paint. You can also apply an anti-corrosion agent, for example, Body Autoflex, before painting.
- After all the work has been done, anticorrosive the hidden cavities with Movil or Pushsal.
The process of replacing thresholds for VAZ 2110, 2111, 2112 is clearly shown in this video:
Replacement process
Replacing thresholds on a VAZ 2110 car is divided into three levels: removal of old elements, fitting and welding of new parts, painting work. Initially, we drive the car into the garage in such a way that it is possible to open the interior doors wide open. If the garage is narrow, then we press the car against one wall of the box. Disconnect the battery.
On a note! Work can be carried out in stages. First on one side of the car, then on the other. Thus, the machine will maintain structural rigidity.
The doors need to be removed. To do this, you have to disassemble the door trims. Disconnect the wiring from the power locks and power windows and pull it out. Next, disconnect the limiters (10 mm wrench). We unscrew the door hinges (13 mm head) and remove the doors themselves. Now you need to remove the front fender. After this, we remove the internal plastic linings and remove the floor covering, bending it deep into the interior.
Removing old items
After disassembly, we are presented with a free doorway and threshold. You can raise the repair side of the machine with a jack by 40-50 cm, this will make it more convenient to work. Using a marker, we outline the outline along which we will cut off the old ones: the cover and the connector. We install the cutting disc on the grinder, put on glasses and begin to slowly cut off the threshold. You can drill out the old resistance weld, but as practice has shown, it will be more effective to cut it off.
On a note! The threshold connector on the VAZ 2110 has a simple design. If you have strips of metal 20-25 cm wide and 08 mm thick in stock, then you can make your own connector.
After dismantling the threshold trim, access to the amplifier appears. It must be cut along the contour. Using a grinder we remove rotten parts of the floor. Then, instead of a cutting disc, we install a grinding disc. We begin to clean the old welded points of the threshold, simultaneously removing the detached metal. We carefully and carefully carry out the cleaning, since the grinder has high speed and can easily make an unnecessary hole or remove part of the seat.
Fitting and welding of new parts
We take the sill trim and try it on the car. We outline the outline of the new part and remove it. Where it is necessary to trim/sharpen, we do this immediately until the seat completely matches. We carry out the same operation with the connector. We assess the condition of the jacking platforms. If a significant defect is detected, they should be replaced.
After adjustment, we drill holes in the new parts around the perimeter through which welding will be done. If you have a body puncher, then we use it. The distance between the holes is 2-3 cm. After drilling, the surfaces of the holes are cleaned of metal residues to ensure a tight fit.
The inside of the threshold and connector are cleaned with a brush to remove the black shipping paint. The amplifier is cleaned on both sides. The prepared surfaces are degreased and 2-3 layers of anti-corrosion primer are applied to them. Dry the paintwork before welding.
Next, you should proceed in the following sequence:
- we assemble the structure from the threshold and connector on a machine using clamps;
- first we weld the connector to the bottom of the car;
- remove the clamps and take out the threshold;
- we install the internal amplifier in its place and weld it around the perimeter;
- put the threshold trim in place and fasten it to several welded points;
- we check the accuracy of the geometry;
- We weld the overlay thoroughly to all adjacent parts;
- We clean the weld seams with a grinder and a grinding disc.
On a note! Some craftsmen, before major welding, put the doors in place and check the correct installation of the threshold using the lower door gaps. Then the doors are removed and the part is scalded around the perimeter.
Painting work
After replacing the thresholds on the VAZ 2110, we will do the body treatment ourselves. Initially, we clean the threshold from the black coating. This is a transport paint that does not have anti-corrosion characteristics. Degrease the surface. Apply a layer of putty to the weld seams. You need to wait until it dries and sand the surface. The operation should be repeated several times until the repair area of the surface becomes perfectly flat.
Now, the surface of the threshold and connector should be primed in several layers. After drying, the weld seams on the bottom of the car should be treated with brush sealant. This will prevent water from entering the interior. Further, the primed surfaces can be treated with anti-gravel coating and paint in several layers. Through the technological holes of the body, it is necessary to treat the internal cavities of the threshold with Movil. If the repair was carried out on one side of the car, you should rearrange the car and do the same operation on the other side.
Let's summarize
To replace VAZ 2110 thresholds with your own hands, you need to have many specific tools and skills. If you are not ready to learn bodywork and invest money in tools, trust the replacement of the threshold to professionals. The price of replacing a threshold with painting and anti-corrosion treatment is from 7,000 to 12,000 rubles.
The four-door front-wheel drive sedan VAZ 2110 was produced for 13 years. AvtoVAZ stopped producing the model in 2005. Thanks to the large number of components, it is easy for drivers to maintain and repair the body and chassis.
The price of thresholds for the VAZ 2110 from official dealers starts from 1,700 rubles. per set. Tuning body kit parts cost up to 6,000 rubles.
Important points
- All work on replacing thresholds should be carried out with the machine installed on a level surface, without distortions.
- Before welding the top edge of the new thresholds, you should definitely try hanging the doors on the car yourself. There are often cases when doors after welding either close with difficulty or do not close at all. And this can happen due to one slight misalignment of the thresholds, which is not always possible to notice with the naked eye.
- You should never skimp on anti-corrosion treatment of thresholds. If it is not carried out, all the work done will go down the drain in a few years.
- It is best to clean thresholds from rust and dirt using a solvent. When working with it, you need to follow safety rules: use gloves, wear safety glasses (this is especially important if you have to work on the bottom of the car while standing under an overpass - drops of solvent can easily get into your eyes), and apply the solvent itself only with a paint brush.
- Before welding the thresholds, a series of holes with a diameter of at least 3 mm should be drilled in the areas of metal to which the threshold is planned to be attached. This will greatly facilitate the spot welding process, and the threshold will be held more firmly.
We recommend: Removing scratches on a car body without painting
The main thing when replacing thresholds is accuracy and attention. It is very important to cut out all rusty and damaged metal from both the underbody and the sills. If even one small area of rust remains, the destruction of the structure will begin again. And, of course, anti-corrosion treatment when replacing thresholds is mandatory.
Design features: description
Today on a car you can find two design options for thresholds: removable and non-removable. The factory equipment of 2110 involves the installation of non-removable parts that fit into the side of the body and provide the necessary structural rigidity. For a permanent threshold, rolled or black steel with a thickness of at least 0.9 mm is used.
The part is welded to the bottom, preventing the central part of the car from twisting during a frontal impact. This is also an element of passive safety.
Removable sills protect the underbody of the car from mechanical damage, prevent the rapid spread of corrosion and improve the overall appearance of the car. They are installed from inside the cabin, attached to the bottom with self-tapping screws. Rolled iron is used in production and the part is chrome plated.
To further protect both removable and non-removable parts, plastic door sills, steel moldings, aluminum fairings, and body kits are used. Structurally, the non-removable element is a box welded from several elements:
- Amplifier. The part is spot welded to the sidewall and bears the main force load from vibrations.
- Connector. The lower part of the threshold. May consist of one continuous or several parts.
- External part. It is located directly under the door and is painted at the final stage of repair.
- Inner part. Visible from inside the car after installation.
Official VAZ dealers offer original repair kits for body repairs. The parts correspond to the dimensions and are suitable for the thickness of the metal. But, like factory elements, they do not undergo the galvanizing process. After reinstallation, all parts must be carefully treated with anti-corrosion compounds, in some cases, if the element is changed, partially puttied.
How to determine the scale of restoration work on thresholds
So:
- Before you find out whether the thresholds on a VAZ 2110 need to be replaced or whether it is enough to carry out cosmetic repairs to the body in the form of straightening or painting, the car must be installed on an overpass or raised on a lift.
- Then they quickly inspect the places of corrosion, dents, where the paint is peeling off, which flakes off until it reaches a strong adhesion to the car body.
- The areas that need to be replaced and where there are still “live” parts are determined. Replacing the threshold in a VAZ 2110 also means additional costs for painting work. Sometimes it is enough to replace only a small section of the threshold and the VAZ 2110 will look like new, and the car body will serve for many more years. This option is possible if the threshold receives a mechanical shock, when the paintwork is damaged and rust occurs. In this case, it is 15 centimeters longer than the corrosion area, there must be a new threshold along the direction of the car, and 30 centimeters longer in the direction of the trunk.
Replacement of thresholds of a VAZ 2110 car
First of all, it is necessary to clearly determine the size of the areas to be restored. If the excess is cut off, then patches will need to be welded onto the uncovered areas, but this is unsightly, and sometimes it will not allow you to close the door.
Worn section of the threshold
The threshold consists of three main parts: the outer panel, the connector and the amplifier. They are connected to each other by spot welding. The instructions suggest the following procedure on how to replace the thresholds on a VAZ 2110:
- The front and rear doors are removed.
- The aluminum threshold located under the door seals and the lower part of the door seals are removed, and the mats are partially raised for ease of work.
- Rotten thresholds are removed. Initially, the area located near the front door is dismantled, then near the rear and lastly in the area of the B pillar.
- Old thresholds are removed using fine drilling or a grinder. In the first case, the locations of spot welding are marked, then these areas are carefully drilled.
- If you are completely replacing the threshold of a VAZ 2110 with your own hands, then the holes are drilled in the rear, on the side where the reinforcement for installing the jack is located, and in the front where the old connector will be stored.
- When dismantling the outer panel, it is necessary to leave small areas on the side of the front and rear wings, approximately 50 millimeters of the old panel, to which the new outer part of the panel will be butt welded.
- On the front side of the wing, you need to leave a small part of the connector.
- The threshold amplifier is removed.
- After removing the old threshold, the remaining metal is cleaned of rust, if necessary, the amplifier is adjusted to install the jack, rotten areas on the bottom of the body are cut out, and the places where welding will be performed are cleaned of rust and old paint.
- Replacing the threshold on a VAZ 2110 starts with the connector. At the rear it must be placed overlapped on the subframe reinforcement; at the front it must be placed end-to-end with the old section of the connector.
- The purlin is welded.
- The amplifier is shortened, a cutout is made on it, which is located in the area where the rack is located, otherwise, during installation, the old piece of the amplifier left behind will interfere with it.
- The edge of the lower amplifier and connector is aligned.
- The lower part of the amplifier is welded to the connector, starting from the middle to the edges.
- Weld points are cleaned.
- The outer threshold panel is pre-adjusted as accurately as possible.
- Final adjustment of the threshold dimensions on site. You need to start from the top, leaving minimal gaps.
- The welding areas are cleared of soil intended for transporting the part.
- Holes for welding are drilled in the lower part of the outer panel.
- The outer panel is hung and secured at the top with screws or clamps, as shown in the photo.
Hanging outer panel
- Through previously drilled holes, the lower part of the panel is welded to the amplifier, and a connector is welded to the bottom of the body.
- Metal is welded at the top of the threshold.
- The patches are welded on the bottom side.
- Welded seams are cleaned, puttied, checked for leaks, and painted.
You can watch the video in detail on how to replace the thresholds and bottom of a VAZ 2110. Timely replacement of the thresholds of a VAZ 2110 increases the service life of the car body and improves its appearance. You can also find out on our resource how to replace door sill covers.
Features of repair of VAZ 2110 thresholds
Before repair, a complete diagnosis of the bottom is necessary. On the overpass, the metal of the bottom is tapped, and the quality of the jacks is checked using a screwdriver or an awl. Replacing the VAZ 2110 thresholds has some features; it is carried out either at a service station or independently. Rules for self-repair:
- The car is installed on a flat surface at a height, which is convenient: you don’t have to bend down to the ground during welding and cutting.
Before welding the upper part of the permanent threshold, it is recommended to hang the dismantled doors in place. In 30% of cases, independent welding of parts leads to a slight distortion of the body geometry, which cannot be determined with the naked eye. As a result, this will lead to the doors closing with difficulty or not closing at all.
- The internal element is treated with anticorrosive. It is recommended to use an oil or paraffin composition for interior work in the cabin and bitumen mastic for external metal processing.
- A rotten threshold must be completely replaced. If you need to get rid of rust, a solvent is used. After cleaning the element with a grinder, it is necessary to treat the surface with a composition that removes rust. All work is carried out wearing gloves and safety glasses.
Replacing thresholds of VAZ 2110 - video
VAZ 2110 cars are not distinguished by high quality body metal. It is very susceptible to corrosion, however, like other cars produced by AvtoVAZ. If anti-corrosion protection is not applied in time, then after eight to ten years, the vehicle body may become rust-through. That is why it is very important to be able to independently change the thresholds on the “ten”. It is their replacement that we will talk about in this article.
Now we will show photographs that show the result of active use of the VAZ 2110 car for ten years.
What is needed to repair thresholds on the “ten”?
To repair thresholds on the “ten” with your own hands, you must have the following materials:
1. Three discs for an angle grinder. Their cost is about one hundred and fifty rubles. 2. Two disks for stripping. Their cost is about sixty rubles. 3. One carriage per grinder. Its cost is about three hundred rubles. 4. A set of thresholds for the “ten”. Its cost is about a thousand rubles. 5. The right side of the figure eight bottom, which will be used for patches. Its cost is about five hundred rubles. 6. Two kilograms of mastic, which will cost about one hundred and thirty rubles 7. Two brushes. Their cost is about sixty rubles. 8. Soil solution. It will cost about two hundred rubles. 9. 646th solvent. It costs about fifty rubles.
The total cost of materials for repairing the “tens” thresholds will be about two and a half thousand rubles.
In addition to the above materials, you will need certain tools:
1. Grinder 2. Electric drill 3. Set of automotive tools 4. Semi-automatic welding unit 220V
Let us remind you that in the previous article we demonstrated a test drive of a Priora with a robot, which has already won the hearts of the first buyers.
Preparatory stage for work on replacing thresholds on a VAZ 2110
The first thing you need to do is disconnect the battery. Next, you need to disassemble the right side of the vehicle. To do this, you must dismantle the rear wheel and front fender, remove the seal and both doors, remove the seats, remove the side trims, remove the seat belts, remove the car interior mats, and also remove the soundproofing coating.
After this, you need to use a grinder to cut out all the rotten areas of the bottom of the vehicle.
After you cut out the unusable parts, you should clean the remaining surface of the bottom down to metal using a carriage brush.
Video. DIY threshold repair for VAZ 2110
Do-it-yourself replacement of VAZ 2110 thresholds
Now you need to use a semi-automatic welding machine to weld the connector. Please note that before welding, the joints must be thoroughly cleaned. We make sure to carry out all work wearing goggles, and also keep several buckets of water ready to put out a fire if one occurs.
It is necessary to weld the amplifier to the new threshold and coat its inside with the purchased mastic. At the same time, you must ensure that the mastic spreads in all directions. Next, we weld them to the already installed connector.
Now, using a trowel disc, you need to clean the seams. Also, the threshold needs to be clamped with the connector from below; for this there is a special bend on it. After this, you need to weld the bottom patches and clean the places where they are welded, and also coat everything with mastic. During assembly, which we note, is done in the reverse order, all accessible metal elements must be treated with primer.
This type of work takes the average owner about two full days. If this is too much for you, you can contact a vehicle service station. There, such a repair will cost you about five thousand rubles including spare parts.
DIY replacement: step-by-step instructions
A complete replacement of the thresholds is carried out if the part has corrosion wear of more than 50%, there are holes, or the rust has reached the amplifier. Partial overcooking is carried out after a mechanical shock, if there is significant deformation and in cases of a single corrosion plaque. A patch is welded onto the threshold. To replace, you will need the following tools:
- angle grinder (grinder);
- wide chisel, set of screwdrivers;
- electric drill with a set of drills;
- clamps and latches will be needed for installation before welding;
- gas welding or electric semi-automatic;
- automotive primer;
- bitumen mastic;
- iron brush, R-80 sandpaper.
Before welding the part, it is necessary to dismantle the interior and doors. Preliminary work step by step:
- The car is draining fuel.
- The negative terminal from the battery is disconnected; in some cases, the battery is removed completely.
- The doors are being dismantled.
- The trim of the pillars is removed from the interior, the carpet can be rolled to the side and covered with a rag.
- The overhead protective threshold, if any, is dismantled.
It is recommended to remove all plastic trim to avoid ignition due to sparks from the welding machine. The dashboard is covered with rags, the glass can be covered with paper so that dust from the grinding machine does not settle on them. Instructions for overwelding parts of a fixed threshold:
- Mark the cutting lines of the old element with a marker.
- Using a drill, along the marked line, drill holes with a diameter of 0.4 mm at a distance of 8–10 cm from one another. If a standard unit is changed, the factory spot welding areas are drilled out.
- Use a grinder to cut out the old element exactly along the marking line. You can use a wide, sharp chisel. Drilled holes make cutting process easier.
Cutting or cutting takes place in the following directions: in the area of the front door, rear door, and the last section to be cut is in the area of the central pillar. The quality of the lower edge of the rack amplifier is checked: if the part is rusty, it is replaced or a power patch is welded.
- If the metal of the rack amplifier is in order, the outer panel is partially cut off. In the area of the stand and wings, it is necessary to leave 5 cm of old metal, to which the new outer part will be welded.
- Check the amplifier: in 70% of cases the part must be replaced. Remove the steel panel. The cut should pass through the welding point of the amplifier.
- Clean the seat from dirt and rust with a grinder. Cut out rusty areas completely, sand them down to white metal, and treat them with a solvent or rust converter.
- Weld the threshold connector to the subframe reinforcement with an overlap and align the lower edge.
- Fit the outer part to the connector and secure with clamps.
- Weld the connector to the bottom of the body, do not loosen the clamps.
- Weld the outer part.
- Clean the weld seams with a grinder and sand them.
- Apply a layer of automotive putty, prime the surface after drying, and paint at the final stage.
Replacing thresholds is a rather labor-intensive and labor-intensive process. At the service station, repairs are carried out by two experienced craftsmen. When replacing yourself, special attention must be paid to the fit of the new element and check the installation locations of the jack.
Replacing thresholds 2110
On the VAZ 2110 model, replacing thresholds is not particularly difficult, but the process is labor-intensive and requires certain professional skills in working and handling tools and materials (welding machine, grinder, drill, putty, primer, etc.).
- First, you need to mark the cut lines of the old thresholds, drilling holes with a diameter of 4 mm along such lines at a distance of no more than 8 cm from one hole to another.
- Next, the old threshold, other parts damaged by corrosion, and the threshold connector in the upper and lower parts of the threshold are cut off with a grinder.
- Please note that when cutting off the outer sill panel, you need to leave some metal (at least 5 cm) near the front and rear fenders. The reason is that a new panel will be attached to these areas of metal by welding. You also need to leave some metal in the area of the middle pillar (under the pillar).
- As part of the repair, you should clean the surface with a brush in the place where the new threshold will stand, and also treat the surface (a rust converter will be required).
- Having completed the preparation, you need to hang the doors in order to accurately and correctly weld the new threshold.
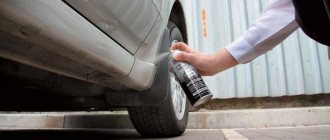
- Once the element is installed, the threshold can be puttyed, primed and painted. It is also strongly recommended to treat the thresholds with anti-corrosion compounds and protect them with anti-gravel or use another method of protecting the thresholds.
In general, when changing the thresholds of the VAZ 2110, you need to pay attention to the following points:
Before cutting the threshold, you need to carefully inspect all areas. If there are places that can be straightened, primed and painted, it is better not to cut out such areas. The remaining rusted parts or thresholds are completely cut off with a grinder strictly along the lines with drilled holes.
We also recommend reading the article about how to treat the underbody of a car against corrosion. From this article you will learn about available ways to protect the underbody of a car from rust, how to treat the underbody against corrosion, etc.
- Please note that the thresholds are cut first in the area of the front doors, then in the area of the rear doors, and only then in the area of the B-pillar.
- After cutting the thresholds with a metal brush on an angle grinder, remove any remaining rust and dirt along the edge of the cut. Other small rusty areas also need to be cut out.
- In those places where welding will be carried out, cleaning must be done in the best possible way.
- Before installing thresholds on a VAZ 2110, they need to be treated with anti-corrosive agent, special primer, etc. The threshold amplifier is also processed in parallel.
- During installation, a new threshold reinforcement is usually overlapped to the subframe reinforcement, and the lower edges are leveled.
- It is important to fit the outer panel to the connector as accurately as possible. If it is not possible to fit, you can widen the recess. The precisely placed panel is secured using clamps.
- Next, the connector is welded to the bottom, after which the upper part of the threshold is also welded (without loosening the clamps).
- Welded seams must be thoroughly cleaned, then puttyed and checked for complete tightness. Afterwards you will need to prime them and paint them thoroughly.
Do-it-yourself painting of VAZ 2110 thresholds
The standard repair kit from official dealers is designed for subsequent painting of the part and is supplied in shipping primer, which must be cleaned off before welding. After replacing the threshold, when the primer layer has dried, it is painted:
- Sand the surface with high and low abrasive sandpaper.
- Paint the body using a spray gun or spray gun. It is necessary to apply two layers of auto enamel. The sprayer is kept at a distance of 25–30 cm from the surface.
- Apply the first layer of auto enamel, wait for the paint to dry for 7-10 minutes.
- Apply a second coat of paint.
- After complete drying, apply protective varnish.
Average prices for work on replacing thresholds on a VAZ 2110
Specialized services carry out a complete replacement of threshold 2110 with painting in 2 days, the cost of work starts from 15,000 rubles, the customer’s repair kit is used. The work includes:
- checking the bottom, side members, jacks;
- complete dismantling of the interior;
- dismantling wings, front trim, doors;
- cutting out waste elements;
- installation of new ones using high-precision welding;
- complete anti-corrosion treatment;
- painting;
- installation of overlays, at the request of the customer.
It is recommended to additionally protect the parts with plastic or metal fairings: this will increase the service life of the main part. The cost of the cover starts from 150 rubles; you can install the fairing yourself in 30 minutes.
Iron
Original parts are produced by the AvtoVAZ workshop; the thresholds are made of rolled steel and covered with transport primer. Spare parts are installed in their original place. The metal does not undergo additional galvanization; after repair, anti-corrosion treatment is required.
The set includes a perforated amplifier. Cost 2500 rub.
For self-repairs, profiles are used instead of a threshold. The pipe is installed in place of the original part and is attached to the bottom with cross members. It is distinguished by increased corrosion resistance due to the metal thickness of 1.5 mm and an additional layer of zinc.
Characteristics of door sills for VAZ 2110
Typically, plastic 2 millimeters thick, black, is used to make linings:
- For the VAZ 2110, manufacturers have mastered making door and sill trims from fiberglass.
- The more expensive door sill trim for the VAZ 2110 is made of aluminum or stainless steel sheet.
- Car enthusiasts often place plastic sill covers with mesh on top of metal thresholds.
- The thresholds are well absorbed and retain their appearance for a long time.
- Although they seem fragile, they are able to withstand a decent impact on an obstacle, which indicates not only protecting the car from scratches, but also protecting it from serious damage.
- The cost of repair, even from a strong blow when the pad itself is broken, will not be expensive. In this case, it is enough to straighten the curved part of the threshold and purchase a new trim.
Plastic
Plastic thresholds for the VAZ 2110 are produced by several licensed manufacturers. The most famous and popular:
- RS Tolyatti. The cost of the plastic kit is 1600 rubles. When replacing, a steel reinforcement is required, which is not included in the kit. Parts are made from impact-resistant, lightweight ABS plastic, element thickness 3 mm. The parts are installed on the load threshold or base using self-tapping screws or auto glue, are not painted, and are easily adjusted to body dimensions.
- LLC M-version. The company produces tuning sills and body kits for the VAZ 2110/12 line. Parts are made of carbon fiber, can withstand loads of up to 300 kg, and are resistant to chips. The elements must be painted after installation, the cost is 4,700 rubles, the amplifier is not included in the kit.
Article: 21104-8415122/23-12, additional articles: 2110-5109076
Order code: 113835
- Buy with this product
- show more
- Passenger cars / VAZ / VAZ-21101 drawing
- » href=»/catalog/vaz-3/legkovye_avtomobili-30/vaz_2110-10/kovriki-6/#part38502″>Front right trimBody floor / Rugs
- Passenger cars / VAZ / VAZ-21121 drawing
- » href=»/catalog/vaz-3/legkovye_avtomobili-30/vaz_2112-12/kovriki-6/#part47118″>Front right trimBody floor / Rugs
- Passenger cars / VAZ / VAZ-21111 drawing
- » href=»/catalog/vaz-3/legkovye_avtomobili-30/vaz_2111-11/kovriki-6/#part42810″>Front right trimBody floor / Rugs
- Passenger cars / VAZ / VAZ-2110, 2111, 21121 drawing
- » href=»/catalog/vaz-3/legkovye_avtomobili-30/vaz_2110__2111__2112-1092/kovriki_salona-6/#part2730139″>Front right trimBody / Interior mats
There are no reviews for this product yet.
What affects the cost
The location of the repair is a major factor in the cost of replacement. If you carry out repairs yourself, drivers only spend money on purchasing the necessary material and parts. Tools are often either rented or already present in the garage.
When repairing at a service station, the work is expensive, and this is justified. The design of the threshold, despite its simplicity, requires great skill and care when replacing. If you are not confident in your skills as a welder, straightener and tinsmith, it is better to entrust the replacement of thresholds to a specialist.
Step-by-step instructions for replacing thresholds on a VAZ 2110 Link to main publication
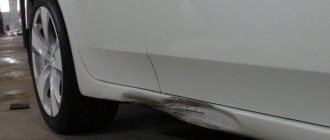
By looking at the condition of the underbody of the car, as well as assessing how rotten the sills of the VAZ 2110 are, you can easily determine how old the car is. Unfortunately, the body of the tenth generation VAZ without proper care can turn into dust with through holes after 8-10 years. The car takes on an extremely expressionless and careless appearance.
Features of repair and replacement of thresholds at service stations
VAZ-2110 owners most often repair the sills of their cars with their own hands. Based on the cost of the car, repairing thresholds at a service station is impractical.
For those owners who are thinking about repairs at the station, we can give approximate prices for these services :
- Removing the threshold – from 500 rubles.
- Installation of a new threshold – from 6,000 rubles.
- Painting the threshold - from 1,000 rubles.
- Materials – depending on quality, from 900 rubles.
- Threshold repair, which consists of welding holes - from 1,000 rubles.
Replacing thresholds at a service station is quite an expensive procedure.
In total, it turns out that repairing or replacing the threshold will cost from 6 to 9,000 rubles . This amount will most likely have to be multiplied by two, since thresholds are usually changed on both sides. The total is 12–18,000 rubles . Given the price of a VAZ car in the amount of 60–90,000 rubles, carrying out this procedure at a service station is very expensive.
Most owners of domestic cars prefer to carry out repairs themselves, which helps to significantly save money.
Reasons for replacing thresholds on the VAZ 2110
The bottom and sills of the VAZ 2110 are susceptible to corrosion, as a result of which they rust and collapse. Mainly due to the fact that it is this part of the car that is most exposed to moisture and other aggressive environmental factors, such as reagents and salt, which are sprinkled on roads during icy conditions. Mechanical damage cannot be ruled out : impacts and scratches first lead to dents and chips of paint on the thresholds, and then rust occurs. The quality of the metal itself plays an important role. In these cases, the need to change the thresholds becomes obvious. The work of replacing thresholds involves the use of both welding and abrasive tools. Carrying out painting, puttying and other work. In other words, this is an enterprise that should last at least several days with fairly good labor productivity.
The easiest way to work is with a semi-automatic welding machine, with which anyone can learn how to weld. If you don’t have it, then you probably shouldn’t run to the store. You can always contact your friends or a specialized workshop.
After all, the unit costs approximately more than 15 thousand rubles. For a full repair of a VAZ 2110 at a service station, you will be asked for approximately 3 thousand.
rubles And it will last for ten years. But if you decide to do the repair yourself, then these instructions will help you.
Thresholds for VAZ 2110: which ones to choose
There are several options for selecting thresholds for a VAZ. You can purchase used thresholds removed from another car, so-called “cooperative” elements (they come in different qualities), as well as original 2110 thresholds.
With proper treatment and protection against corrosion, factory thresholds for 2110 can last at least 8-10 or more years in active use. Catalog number of thresholds: right threshold on VAZ 2110 - 21100540106000, left threshold 21100540106100.
If you use other parts, it often happens that the “cooperative” element (not the original thresholds on the VAZ 2110) does not fit well with the body, modifications and adjustments are required. Also, the metal of such products is often of dubious quality. The result is that the thresholds rot in 2-3 years.
How to change the thresholds of a VAZ 2110
- To avoid distortion of the car body, place the car on a flat surface.
- Remove the locker, doors (rear and front), driver and passenger seats, car fenders. Also remove seat belts, floor mats, and sound insulation from the floor.
- Protect your car windows with homemade curtains, which can be made from cardboard. This will be needed to prevent them from being damaged by sparks flying from the grinder. Otherwise, black spots will appear on the windows that cannot be removed.
- Remove fusible and plastic machine components from the work area.
- Disconnect the battery to prevent it from being affected by the welding machine.
- Mark the cut lines for the old thresholds. A series of holes with a diameter of at least 4 mm are drilled along these lines , located at a distance of 5-8 cm from each other.
- Using a grinder, cut off the old threshold, part of the bottom damaged by corrosion, as well as the threshold connector at the bottom and top of the VAZ threshold.
- When cutting off the outer sill panel, be sure to leave areas of metal at the front and rear fenders. The length of these sections is at least 5 cm; it is to them that the new panel will be welded later. You should also leave a small area of metal under the B-pillar.
- Continue the repair by scraping the surface where the new threshold will be located using a scrubbing brush, and then treat the surface with a corrosion neutralizer .
- Before carrying out welding work at the stage of installing a new part, first hang the doors to ensure correct installation.
- After installing the component on the car, be sure to treat the surface with an anti-corrosive agent or special primer.
It must be remembered: the larger the area of the damaged areas, the more material and effort will be required to repair them. From the tool we need:
- welding unit (the most convenient and simplest option would be semi-automatic welding);
- grinder and 3 discs for the grinder, a hard metal brush for the grinder;
- a set of new thresholds, amplifiers and connectors for the VAZ 2110;
- grinding tool;
- electric drill;
- metalworking tools;
- packaging of automotive mastic;
- 2 medium-sized paint brushes;
- can of primer;
- bottle of solvent.
How to replace it yourself (step by step with photo)
- The car is installed on the overpass.
- A visual inspection of the bottom and sills is carried out. Places of maximum corrosion are identified, as well as places that can still be restored by straightening, priming and painting. It must be remembered: the larger the area of the damaged areas, the more material and effort will be required to repair them.
Thoroughly rusted threshold of VAZ 2110 - After determining the area of damage to the thresholds, the front and rear doors are removed from the car.
- Once the doors are removed, the aluminum threshold is removed (it is located under the door seals). The bottom of the door seals is also removable; the floor mats should be removed from the interior or raised as high as possible so that they do not interfere with further work.
- The cutting lines of the old thresholds are outlined. A series of holes with a diameter of at least 4 mm are drilled along these lines, located at a distance of 5-8 cm from each other.
- Rusted thresholds are cut off using a grinder. The grinder should follow exactly the lines with the previously drilled holes (this greatly simplifies the cutting process). As a rule, the front door sills are cut off first, then the rear door sills, and then the area in the area of the cab's B pillar is removed.
Thresholds from a VAZ 2110 are cut off with a grinder - When cutting off the outer sill panel, be sure to leave sections of metal at the front and rear fenders. The length of these sections is at least 5 cm; it is to them that the new panel will be welded later. You should also leave a small area of metal under the B-pillar.
A section of metal left under the middle pillar of a VAZ 2110 - The threshold amplifier is removed.
- The freed space is thoroughly cleaned of dirt and rust using a metal brush mounted on the grinder. If there are small rusty areas left somewhere, they are cut out. Places where welding will be performed should be cleaned especially carefully.
- The new connector is welded to the subframe reinforcement, usually with an overlap. The bottom edge of the amplifier and connector is aligned.
A new connector is welded to the subframe - The outer panel is adjusted to the connector as precisely as possible. If necessary, the recesses in it should be widened to ensure the most precise fit of the panel in place.
External threshold panel is adjusted - The final fitted panel is secured with clamps.
- After this, the connector should be welded to the underbody.
The bottom of a VAZ 2110 with a new connector welded - Then, without loosening the clamps, weld the upper part of the threshold.
Fully welded threshold VAZ 2110 - All seams remaining after welding must be thoroughly cleaned, puttied, checked for leaks, primed and painted.
This is interesting: A pilot batch of Lada Granta hatchbacks will be released at the end of the year