DIY car repair - what you need to know
This post is about how an ordinary man named Tony undertook to fix - at the request of his wife - the noise in the engine of her Kia Sorento. He had neither the extra $1,600 assigned by the service for this work, nor any special experience, nor the space, nor the appropriate tools. Nevertheless, he managed.
In his story, it seems to us, what is important is not the details of what exactly Tony repaired, but the thoughtful and thorough approach with which he approached the matter. His advice will be useful to anyone who might find themselves in his place.
Repair
Repairing washing machine faults requires skills in working with tools and at least minimal knowledge of electronic equipment. The approximate work plan presented below will allow you to avoid annoying mistakes and eliminate problems yourself.
Washing machine pumps
Even professionals rarely attempt to repair a broken drain pump. This device is not too expensive and is easier to replace entirely. The main thing is to find a part of a suitable brand in the store.
The pump is replaced as follows.
- Remove the bottom panel.
- Using a screwdriver, disconnect the pump from the machine body.
- By pressing on the drain valve from the outside, push the pump inside the housing and pull it out.
- Disconnect all wires leading to the pump.
- Remove the drain hose and pipe.
- Installing a new device.
After this, you need to reassemble the washing machine, performing all the steps in reverse order, put it in the working position and check the operation of the new part by turning on the wash without laundry.
Washing machine control module
In many models, the control board is located at the top of the front of the machine; removing it is not difficult. Having freed the substrate with the microcircuit from the fixing strips, you need to carefully examine it. Signs that repairs are needed include:
- the plate has changed color in some places, the tracks have darkened;
- torn capacitor caps;
- The place where the main processor is installed has darkened.
If you discover one of these defects, it is better to immediately contact the workshop. After all, to repair a microcircuit you will need both the appropriate skills and the ability to work with a soldering iron.
Bearing replacement
If the washing machine starts spinning loudly, then one of the reasons may be damage to the bearing. To change bearings in a top-loading machine, you must:
- Disassemble the device body and remove the back wall.
- Remove the belt from the pulley, allowing access to the bearing system.
- Unscrew the central bolt securing the pulley to the drum and remove the pulley.
- Unscrew the three screws securing the structure and remove the coupling with bearings.
- Remove the O-ring and oil seal from the shaft, which will also have to be replaced.
Then all that remains is to install new parts and reassemble the washing machine, doing the work in reverse order.
Replacing the heating element
The heating element often requires replacement. It can burn out from long-term use or unstable voltage in the electrical network. From constant contact with water, the tubes of the heating device become covered with scale.
Changing the heating element is not difficult, you just need to do the following:
- Remove the back panel, since most often the heating element is located in the rear of the case.
- Disconnect the electrical appliance connection terminals.
- To remove a faulty heating element, you need to unscrew the nut using a wrench and press on the stud with a screwdriver. Use a twisting motion to remove the damaged part from the seal.
- Install the new part, trying to place the heating element evenly, without deforming the seal.
- Insert the stud into place, tighten the nut, and connect the wires.
By photographing the position of the parts and wires before disassembling, you can make your work much easier.
Shock absorbers and dampers
Shock absorbers and dampers protect the components of the washing device from vibration and premature destruction. However, these elements themselves wear out quickly and often require replacement.
It is enough to change the seals in the dampers. Replacing shock absorbers is a complex job that requires complete disassembly of the washing machine body. It is better to contact a service center with this problem.
Prepare the repair site and tools
photo: unsplash.com
It can be anything, depending on the complexity of the repair. A stuffy garage is not suitable for polishing a car, and to get to the bottom, you will need, if not a lift, then at least an overpass.
In addition to the inspection hole, you will also need tools, including special ones. It’s best to find both space and tools from friends involved in the auto industry who are willing to give you shelter for a while.
If you manage to come to an agreement with them, consider that you have taken a very serious step.
Replacing brake fluid
A novice driver is given two whole years to learn how to change the brake fluid in his car. It is this average period that is determined by the manufacturers of both the vehicle and the technical fluid. The exceptions are racing cars of Maserati and Ferrari. For these models there are strict replacement rules: after 5 and 10 thousand mileage.
Brake fluid is checked using a tester; this device should always be in the garage.
Complete replacement is carried out according to the rules of the technological map. The only tools you need are a 8- or 10-gauge wrench, a hose, rags or rags, and a vessel into which the used compound will drain.
Collect all documentation
photo: flickr.com
Not just a branded manual for your car. To disassemble or change a particular unit, sometimes you need step-by-step instructions, preferably in a visual format: pictures, or better yet, a video. YouTube is here to help you.
In addition to official documentation, use specialized resources. For example, there are paid foreign resources Mitchell 1 or AllDataDIY with a gigantic library of documentation: portals that provide such information.
Plus social networks, thematic forums. Here, carefully separating the mud from the truth, you can also find practical advice, tips and real help.
Minor repairs
When the damage does not cause deformation of the subframe and body, then only local repairs to the car's upholstery are performed
If small scratches appear, it is recommended to use special polishes or markers. It is easy to work with, the main thing is to follow the recommendations specified in the instructions. To remove scratches and even small chips, there is no need to disassemble the car. All processes take a little time.
If traces of rust have already appeared, then you will need:
- Remove corrosion by sanding.
- Plaster the damaged area.
- Sand it.
- Apply a special primer.
- Cover with paint. The dye is sold in small cans.
Before doing body repairs yourself, remove the paint and primer from the damaged area with a scraper.
If there are dents on the surface of the car body, the process of restoring the appearance becomes more complicated. You can deal with shallow defects simply by pressing on the metal from the reverse side. This method is relevant if there are no chips. For deeper dents, the following options for correcting the situation are possible:
- The anvil is covered with a cloth in a few words. This will protect the paintwork from further chipping during the straightening process. The part on which the dent is located is placed on the anvil and its surface is tapped from the inside. This is done carefully, starting from the center of the dent and gradually moving to the outer edges of the defect.
- Straightening with vacuum or pneumatic suction cups is simple and safe. To do this, you need to apply special suction cups to the damaged part. Then all the air is pumped out of them. This will allow the device to be firmly attached to the surface of the machine. To eliminate the defect, you need to pull the device, and the metal will be pulled behind the suction cup, leveling out to its original form.
- To do your own body repairs, you will need a gas torch that runs on propane. With its help, you will need to heat the damaged part and then cool it sharply with water. If everything is done correctly, the metal will stretch and, as a result, defects will disappear.
When choosing a method for removing dents, you should remember that the work must be performed carefully, in a special room and, preferably, under the guidance of an experienced technician. Poor quality restoration of the vehicle's appearance can lead to serious damage.
Document all your actions
photo: flickr.com
Now that all the preparatory work is completed, it's time to get down to business. Before you plunge headlong into the hole, take a picture with your phone of the current state of the unit you want to repair. Don't rely on memory: after a few days in the heat of the moment, you won't remember anything. Take photos from different angles and cover them with a detailed video.
For small things like fasteners or bolts, prepare storage areas; Clear Velcro or zipper bags work great. Sign what you put inside. When working with wiring, arm yourself with tape and also mark which connector corresponds to which.
Troubleshooting elements
The next stage will be troubleshooting, which will determine the signs of a malfunction and also show what condition the mechanics are in. What is this procedure:
- Measurement of the crankshaft for size, hardness, deflection and alignment.
- Diagnostics of the condition of the plane and body of the cylinder block.
- Condition of the piston group.
- Worn elements and cylinder head housing.
- Other indicators.
- Feasibility of engine repair.
be patient
photo: unsplash.com
Don’t rush, the proverb “The slower you drive, the slower you go” is just about car repairs. If you make a mistake or get stuck while assembling, disassembling, replacing, step back and take a deep breath. Please review the technical documentation again.
Do not hesitate to seek advice from motorists more experienced than you. Having poked fun at you a little, they will most likely help you with useful advice.
Types of body repair
In the professional environment, there are three main types of body repairs - small local, external, complex and major. Each category of work is characterized by its own individual characteristics and deserves separate consideration.
Complex repair
Complex repairs are also called complete or major repairs. It is impossible to do such work on your own, as they require a fairly serious approach and the availability of modern professional tools. Complex repairs are carried out under such circumstances as:
- eliminating the consequences of various types of accidents;
- replacement of cladding elements and important parts;
- removal of significant violations of body geometry;
- elimination of complex deformations.
To carry out major or complex repairs, you will need serious equipment - stocks, lifts. With their help, you can effectively control the general parameters of the car body and set control points for the body geometry. Only highly qualified specialists can cope with this. You can only do repairs with your own hands that are characterized by relatively minor damage.
Local repair
This form of repair work is used for minor external damage to the vehicle body. This is an ideal solution for problems such as:
- shallow and small chips and scratches;
- minor dents;
- metal corrosion at the initial stage.
Local repairs do not require serious material expenditure and the use of expensive modern equipment. All that may be required from the master is paint, polish and a set of special tools.
Painting
If a full car painting is required to restore the appearance of the vehicle, you will have to turn to professionals for help, just as with complex repairs. You can only carry out minor local painting work yourself.
Events of this kind are carried out only for special cosmetic purposes. This can be not only removing scratches, but also applying airbrushing. To carry out such restoration processes, you will need to prepare not only paint and varnish materials, but also airbrush and painting tools.
Don't let fear paralyze you
photo: Ninety Eyes / unsplash.com
Tony describes that when he got to the timing chains of his wife's Kia Sorento, he realized that they were the source of the noise. The mechanics with whom our author consulted unanimously agreed that the chains needed to be changed.
Although the repair required for this situation was detailed in the Kia manual, it took Tony a week to replace it because the new components did not fit with the old ones. To solve the problem, Tony sat down closely with the hardware, thoroughly delving into the design of the engine. Afterwards the work turned out to be not so difficult.
Where to begin
Many motorists wonder where to start repairing gasoline engines? The answer is quite simple - it is necessary to determine the signs: is repair of the unit generally necessary, or is the problem hidden in something else? To do this, you will have to carry out a number of diagnostic procedures. They are divided into 2 types: electronic and mechanical.
Electronic diagnostics can show whether car repairs are necessary in terms of electronics and whether there are any problems at all. To do this, the electronic engine control unit is checked, as well as the condition of all sensors and connections. If no problem has been identified, then there is no point in going any further, as you may create a problem that will have to be solved.
Mechanical diagnostics will require a lot of time, effort and knowledge. To carry out this operation, there are instructions on the Internet, but in this article we will try to explain everything in much more detail and clarity. If problems are discovered during diagnostic operations, gasoline engines will have to be disassembled and repaired.
By the way, there is an engine repair manual for this, which is issued by the manufacturer, both in paper and electronic form. So, let's look at the process of repairing a car, or rather its power unit, in more detail.
If you do it, do it well.
photo: unsplash.com
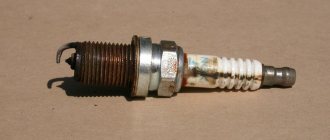
If you have already taken on the repair and plunged into it below the waterline, see if it is worth replacing the available components, which, although in good working order, are no longer fresh (their replacement period is approaching the end). If replacement isn't too expensive, go for it. So, Tony “for the company” changed the oil pump, which had worked for more than 200,000 km, the spark plugs and the ignition coil.
Body repair
During the operation of the car, the body is subject to deformation as a result of an accident or carelessness, and takes on the influence of the environment. Service station specialists require a minimum of 4,000 rubles per element for body part repairs. Therefore, car owners in most cases prefer to carry out repairs themselves.
Body repairs can be divided into two groups:
- Local (chips, scratches, minor dents, metal corrosion in the initial stage);
- Complete (damage that caused violations of the body geometry, deformation of the subframe).
It is possible to carry out local repairs at home. A complete repair will require slipways, a lift and professional equipment.
Assembly of the unit
The assembly of the unit is carried out using a stand that allows you to rotate the engine 360 degrees. So, let's look at the sequence of the operation:
- Installation of liners and “laying” of the crankshaft.
- Installation of connecting rods and piston group.
- Installing the yokes in the correct position, as well as their final tightening.
- Installation of gaskets and covers covering the motor.
- Installation of the oil pump and pump.
- Installation of the crankshaft pulley.
- Installing the cylinder head(s).
- Pallet installation.
- Assembly of small units.
- Installation of fuel equipment.
- Other assembly work.
This process is quite labor-intensive and difficult, so it is recommended to entrust it to professionals.
Auxiliary works
Auxiliary work includes pressure testing and alignment of the clutch. The first is a process that determines the tightness of the cylinder head and block. Using kerosene, the inside of the engine is filled, after closing all the holes. If no leaks are found, then the engine is completely sealed, but if there are cracks, then they need to be welded.
The second process involves setting the centrifugal clutch force in relation to the crankshaft. As a rule, it is carried out at a special stand, which is not available at all car services. The clutch is attached to the crankshaft and they are balanced together. This will help reduce wear and friction.