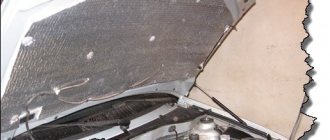
Today we will touch on such an issue as steering wheel repair. Agree that the standard steering wheels on many cars are simply pathetic. Or they were normal, but time has left marks on them in the form of scratches, nicks, torn seams, and so on.
Leather re-suturing is a fairly common service. In cities such as Moscow, St. Petersburg, Yekaterinburg, Krasnodar or Minsk in Belarus, for example, there are many workshops where they will remake your steering wheel in just a few days, breathing new life into it.
Yes, of course, Volgograd, Nizhny Novgorod, Belgorod and any other, even a small city in Russia and the CIS, will offer at least one master who can do such work for you.
But ordering a service is too easy. And you will have to pay more. Therefore, I invite you to tell us about how you make your own packaging.
Braid with stitching around the edges
This is the most common type of garter tape. Different stitch patterns can be created by weaving the thread between the stitches in different ways. You can thread the thread under each stitch or skip 1-2 stitches. You can skip stitches alternately on one side or the other. Below we will look at a few stitches for this type of weaving. Here are some things to consider when re-braiding your hair.
- First, clean the steering wheel of any dirt.
- If the steering wheel is damaged, small irregularities can be eliminated by wrapping the damage with adhesive tape, thereby leveling the surface, and only then proceed with installing the braid.
- Pull the tape along all sides of the steering wheel.
- Lacing may take several hours. The length of lacing depends on the type of stitch you choose. After each stitch, pull the thread so that the edges of the braid come together.
- Start lacing from the wrong side along the edge of the needle. Thread the needle and thread through the hole in the existing stitch. This will help keep the thread knot under the weave.
- Only tighten the threads when the braid is in place, otherwise it will be difficult to unscrew them back.
- The braid can be glued in the knitting needle area. Use upholstery glue. Modern adhesives are water-based. It is non-toxic and washes off easily.
Zigzag stitch
A simple zigzag stitch to join the edges of the braid with stitched stitches.
This is the simplest stitch. A needle and thread are passed under each stitch of stitches sewn along the edges of the braid (or, for smaller stitches, an equal number of stitches are passed each time). At each stage, the needle changes direction (stitches are made alternately from one edge of the braid to the other). We recommend: How to properly install a child seat in a car?
Hexagonal seam
Hexagonal seam. Used to join the edges of braids using stitched stitches.
So named because of the similarity of the various sections of the stitch to the hexagon. This is done as follows: a needle and thread are passed under parallel stitches on different edges of the braid, two parallel stitches are passed, then two parallel stitches (or more if the stitches are small) are joined again, starting from the same edge as the previous one. This creates a hexagon with a diagonal stripe.
Pentagonal seam
The needle and thread are threaded through one stitch, then one opposite stitch is passed (or several if the stitches are small), and the thread goes into the next stitch on the opposite side. That is, the line is performed with one stitch. The stitch segments are shaped like a pentagon.
The process of sewing on the tape using the pentagonal stitch, also known as the Euro stitch as it is used by many European car manufacturers.
Diamond seam
Diamond stitch. Used to join the edges of braids using stitch stitches. The yellow threads are machine stitches along the edges, the blue threads are hand-embroidered connecting stitches.
The needle and thread are threaded into each stitch sewn along the edge of the braid. Unlike the basic stitch (shown first in this article), the needle and thread are always threaded in the same direction. This means that the thread goes through two opposite stitches, then goes through two more opposite stitches, entering from the same side as in the previous step. The stitch segments are made in the shape of a diamond with a transverse line.
We make a case
Work loves order - we lay out materials and tools on the table in accordance with how they will be located in the case. We sew the elements in the given order. You should sweep the edges of each sector so that there is no tightening of the skin in the future. For stitching, the best choice would be strong nylon threads - you need to retreat at least 3 millimeters from the edge . All parts, except the marked seams, must be sewn in the form of a ring.
After you have all the edges sewn and the workpiece is completely sewn, begin to pull the new cover onto the steering wheel so that the seam joints are in the places of the cuts. Afterwards we eliminate sagging and smooth the skin. You can put the skin on epoxy resin or glue - but this is everyone’s choice.
Steering wheel reupholstery - the final stage
The reupholstery of the steering wheel has not yet been completed, the last stage remains. We need to tighten the edges of the cover so that it is tightly fixed to the steering wheel. We warn you that this procedure is quite labor-intensive and can take a lot of time. First of all, decide where the seam will start. You need to secure the thread and then sew the cover together with careful and precise movements. In the place where the edge tie touches the signal cover, you need to thoroughly coat the edges of the leather with glue - preferably if it is rubber glue.
When work on the cover is completed, you can safely install the steering wheel on the car. You may see slight creases on the cover - this is not a big deal. If you took natural high-quality leather, all minor defects will disappear over time due to increased elasticity. As you can see, covering a steering wheel with leather yourself is accessible not only to craftsmen; the main thing is patience and minimal sewing skills.
Choosing material
Of course, leather on the steering wheel would be most preferable. This material is natural, strong and durable, and feels good to hold in your hand. Alcantara can serve as an alternative.
But start with the skin. Its price is not that high, and there are various design options. In order to choose leather for making steering wheel braid, you must follow several rules.
- Naturalness. Artificial leather is not suitable and does not have such properties. And in general, if you take on this job, do everything efficiently.
- Thickness. We don't need thick skin. It will be difficult for you to get through. Thin leather wears out quickly. The optimal size is 1.3 mm.
- Extensibility. Strictly average. The elasticity should ensure a tight fit to the wheel.
- Perforation. This is not necessary, although perforated leather is more pleasant to work with. At the same time, wear and tear is greater than that of ordinary leather. It depends on you. When reupholstering the steering wheel, I chose smooth leather.
In addition to a leather car steering wheel, you will need many auxiliary materials and tools.
Tools and materials
The steering wheel trim kit on a Mazda, Nissan, BMW or any other car, even a Ford Focus, will always be the same.
You have to lean on it:
- leather;
- a strong needle that will be used for stitching fabric;
- with durable nylon thread;
- a pair of thimbles to protect your fingers;
- masking tape;
- normal density cardboard;
- with adhesive film;
- marker or pencil;
- A sharp knife (you can buy it at a building materials store).
All is ready. Now your car can be transformed. Start with the little things, with the steering wheel. Leather wrapping is not the easiest task for a beginner, but it can be done. I myself once decided to do something similar. The result exceeded all my expectations and you can do the same. I'm a jack of all trades.
The whole process can be divided into two stages:
- creating a pattern;
- Tightening.
If you can do everything correctly at the first stage, then it will be much easier to redo the upholstery later.
Pattern
Here's a step-by-step guide to lay it all out and get the point across.
- Remove the steering wheel. I don't know what kind of car you have, so I can't give specific instructions on how to remove the steering wheel. Check your repair manual if you don't know, watch a video, or just go with instinct. No, just kidding. Work only in accordance with the repair manual;
- Get rid of the old braid. It is not difficult. You can simply cut the seams and remove the worn material;
- Wrap the steering wheel in film. Do not save the material, but wrap it carefully so that there are no changes in height or unevenness;
- Place masking tape around the top. Be sure to use a marker to mark where the seam will go;
- Cut off the tape that was previously wrapped around the marked lines. Essentially, you will have multiple parts for the layout. Once they are rolled up, straighten the tape and place something heavy on top of it. Leave it overnight. The next day the layout will be smooth and neat;
- You can use pieces of masking tape as a guide to make a stronger cardboard base. That is, place duct tape on a piece of cardboard, trace it to size and cut it out. However, this is not necessary;
- Now, in accordance with the pattern of 4 layout elements (usually there are 4), the leather is cut to the desired size. Here, try to cut accurately without violating the dimensions. Otherwise you will have to trim, straighten and so on. Why create unnecessary problems;
- Number the pattern pieces to indicate which piece of leather will go where.
In principle, the basis is already there. It's not as difficult as it seems at first glance. But the next step is no less important - sewing. If you've ever sewed, you know what we're talking about. For those who have never even made a sock in their life, it is better not to approach embroidery. I'm serious! Otherwise, the result may be very disappointing. Basic skills required.
Wrapping procedure
If you are diligent and consistent in your efforts, you will succeed and your car will have a truly beautiful handcrafted steering wheel.
- Take a strong thread, stick it into an equally strong needle;
- The distance from the edge of the skin should be about 2-3 mm. If you sew too close to the edge, it will simply tear when stretched;
- All parts must be connected together to form a ring. Therefore, it is important to mark the details with a marker;
- The inseam will be on the wrong side, so don't worry about it;
- When the ring is ready, place it on the steering wheel, lining up all the edges to make sure everything fits;
- The skin will “walk” on the wheel if it is not secured. Here I solved the problem by treating the wheel with epoxy resin. It held the skin tightly, but still allowed the material to be moved around a bit until it dried;
- Carefully sew all edges together. If you are good with thread and needle, you can get a beautiful decorative stitch;
- Stretch the skin evenly so that the tension is approximately the same in each area.
Little wrinkles on your new cover don't have to scare you. This is normal for the skin. In a few days it will smooth out and look perfect. Be patient. Recommended: How to reduce fuel consumption in a VAZ-2114?
Making a braid template
First, select the fur you want to decorate the steering wheel of your car with - it could be mink, arctic fox, or maybe you prefer faux fur. The most practical option would be sheepskin.
Materials, tools:
Roll of cling film. Wide tape. Sheets of thick cardboard. Felt pen or marker. Sharp knife. Scissors. Manufacturing technology:
- To take measurements and cover the steering wheel, you need to dismantle it.
- Wrap the surface very tightly with film. Apply several layers of tape on top of the film, also tightly.
- Make markings of the pattern pieces, preferably no more than four fragments. Otherwise, it is difficult to sew together a large number of small pieces.
- Next, using a sharp knife, the workpiece should be divided into parts according to the markings, which need to be held under pressure for some time.
- Place the resulting templates on sheets of thick cardboard. Carefully outline with a felt-tip pen and cut along the outline. Don’t forget to number all the parts so that you don’t get confused in future work.
Materials and tools
Since the steering wheel is in constant contact with the driver's hands, quality, strength and durability should be taken into account when choosing a trim material. There are many options - you can choose fur, artificial or natural leather, silicone, foam rubber or wire.
The most popular and practical is a braid made of genuine leather. This braid retains its appearance for a long time, it is pleasant to the touch, has good functional properties, looks expensive and respectable. You can wipe it with a damp cloth with alcohol to remove dust. It is better to give preference to perforated leather. It is softer and thanks to the pores it breathes better.
Important: Choose automotive leather, not furniture leather, otherwise the work will go down the drain in a short time.
Before you begin changing the steering wheel style, you need to prepare all the necessary materials and tools. These include:
- leather;
- large sewing needle (you can use a knurled needle);
- strong nylon conspiracy;
- thimble;
- cardboard cutters;
- masking tape;
- sticky film (you can use sticky film for packaging);
- marker or pencil;
- medium density cardboard;
- glue or epoxy resin.
Basic parameters for selection
In order to determine the required size of material for the braid, you do not need to remove the steering wheel. It is enough to take a tailor's meter and take measurements along the outer part of the rim . This will be the basic setting. You also need to measure the diameter of the rim to determine the required width of the upholstery strip.
In this case, an addition of 3-5 mm per seam is taken into account. Most often, the outer diameter is in the range of 35-41 cm. A smaller steering wheel is typical for sports cars, and a larger diameter is preferred for luxury cars. In addition to aesthetic perception, there are legally approved standards for steering wheel sizes.
Types of lacing with nylon thread
According to Russian GOST, the rim diameter should not exceed 40 mm.
Not all traffic police officers are on duty with calipers to take measurements, but if there is an obvious discrepancy, you can be punished for such an excess.
Braid with holes for lacing
Another version of soutache has small holes along the edges for lacing instead of stitching. The weaving process is the same as described above. The only difference is the line.
Straight stitch (zigzag or fillet)
The simplest stitch is when threading thread through holes along the edges of the braid.
The simplest lace stitch is the zigzag (or spiral) stitch. It starts on the back side of the braid, the thread passes through a hole on one edge and enters the same hole on the back side. The needle and thread then go through another hole on the back side, and then into a hole on the front side of the other edge. This process is repeated as many times as necessary.
The holes for the laces are the same number on both sides. A string must be threaded through each hole. In the case of a universal braid, the design of which does not include steering wheel spokes, several holes can be made in the front and back, reaching the spokes. An alternative is to place empty stitches in the front spoke holes only. You have to remember that for every empty stitch you make, you need to pass the back braid hole on the needle. Then, having made the last single stitch over the spoke and passed the same number of eyelets on the reverse side, you can continue to make regular stitches, joining the edges together, passing through the steering spoke.
Cross stitch
This seam consists of two threads, threaded by hand through small holes along the edges of the braid. When completed, it looks like an X, which is why it has that name. This seam is very durable thanks to the double lacing. Even if one thread breaks, the connection will remain in place.
Cross-stitch. Used to connect two edges of a braid with holes.
Cross stitch can be done with one needle and thread (in two stages) or with two needles (one thread) at the same time.
It is used not only for re-upholstering the steering wheel, but also for re-upholstering and decorating other parts of the car (gearbox knobs, handbrake levers, car seats, motorcycle seats, etc.).
First buttonhole. To start a stitch, thread the needle and thread through the holes so that the thread goes all the way around and pull it tight.
First Diagonal Stitch: Pass the needle and thread through the next hole, diagonally, and pull the thread to create the first half of the cross stitch. It's important to always do this in the same order so that each stitch looks the same (for example, the left side of each stitch should always be on top of the right).
Pass another needle and thread through another hole on the other side and pull. The first cross is already ready.
The process occurs as follows: a needle and thread enters a hole on the front side, located at an angle to the location of the thread, and on the back side, a needle and thread enters the nearest hole on the opposite side. The second needle repeats the same process in a mirror image.
On the reverse side, the stitches will appear parallel to each other. You can also change its position to create a different stitch type. The cross stitch will be on the back and the parallel stripes will be on the front side.
Repeat stitches as many times as necessary. Finish the seam with a double loop and a purl knot.
Baseball stitch (American stitch, V stitch)
This seam is most often used when hand stitching handlebar braid. This stitch is similar to the stitches on a baseball, hence its name. This stitch is also used for stitching gear shift knobs, handbrake levers and other car interior parts.
Stitching is done manually using two threads through holes along the edges of the braid. The principle is the same as when lacing boots. The finished seam line resembles the letter V.
To make this stitch, you will need two needles (preferably dull ones, as sharp ones can damage the fabric and your fingers). The thread should be thicker (1 mm).
Pass the needle and thread through the hole in one of the edges, on the front side of the braid. The needle will come out the other side. Then pass the needle and thread around the junction of the two edges and again through the hole on the right side of the opposite edge. This way the needle and thread will come out the other end. Starting from this point, continue stitching in the same manner.
Hold the edges of the braid with your free hand as you move forward. Always insert the needle through the wrong side. This means that the tip of the needle will always point away from the handlebars.
Crimp each stitch, pulling the thread lightly and connecting the edges of the braid with the fingers of your free hand. Most of the work should be done by joining with your fingers rather than crimping the thread.
Braid pattern
Tools and materials:
Any type of fur. Templates. Sewing pins. Cotton threads. Set of needles. Scissors.
Technique for performing the work:
- Cutting the material begins with fixing the pattern on a piece of fur. To do this, place the fur with the fleecy part at the bottom and the wrong side on top.
- Using sewing pins, secure the patterns to the surface. In order to be able to sew these fragments together, it is necessary to leave an allowance of up to half a centimeter around each.
- We sew the parts together, you can do it by hand, but using a sewing machine, of course, the seams are stronger and neater. The fur edge needs to be swept over so that the lint does not fall out.
DIY steering wheel reupholstery
- The braid kit includes everything needed for installation. The kit includes thread, a needle and detailed illustrated instructions for re-stitching the steering wheel.
- The steering wheel to be reupholstered may or may not already be covered in leather. It is best to remove old skin. It can be applied all over the steering wheel or just around the spokes. This is a rubber cement that can be easily removed. Glue can also be used in these areas when re-stitching the steering wheel.
- The leather braid with cord is slightly smaller in size to stretch and fit around the handlebars when worn. If something doesn't fit well, it's the wrong size.
- To install braids that have a pattern for the steering wheel of a specific car model (for re-flashing the steering wheel along with the spokes), it is better to remove the steering wheel.
- The edges of the soutache may have holes for lacing or stitches to secure the connecting thread. Therefore, the lacing process is different. We will consider both options.
- Before lacing, secure the braid on the handlebars in several places. You can wrap masking tape around the steering wheel or temporarily tie a cord to it.
- For a three-spoke steering wheel, prepare 2.5-3 m of thread for the top long section and 1.5 m for the short section.
Create a template
In order to achieve high-quality leather covering of the steering wheel with your own hands, you need to start working by making a pattern. The template can be created from tape and film. We remove the steering wheel (do not forget to remove the signal cover), then unscrew the fastening nut connecting the steering device to the shaft. When removing the steering wheel, you need to swing it in different directions.
Next, we make a model of the steering wheel from masking tape and cling film, and then a template. This is done like this:
- The steering wheel is wrapped with film.
- Painting tape is placed on top.
- The places where the seams will be are marked with a pencil or marker.
- Carefully cut out the tape along the lines. As a result, you should have four elements in front of you: three cruciform and one rectangular.
- We unfold all the parts for the workpiece and number them.
- Next, we lay them out on thick paper (cardboard) and make patterns of the same shape that will be used for the pattern.
What will you need?
To reupholster you will need the following materials and tools:
- Leather (it must meet all necessary criteria);
- Stitching needle (the needle must be strong). If possible, use Soviet-made needles, as they are really high quality;
- Strong thread (nylon is used);
- Two thimbles (it’s almost impossible to work without them). They will keep your fingers from getting punctured.
- Masking tape, sheets of Whatman paper (it is better to use thick cardboard);
- Pencil or felt-tip pen;
- Film;
- Knife (it is better to use a stationery knife).
After preparing all the material, you can proceed with the remaining processes: cutting and reupholstering.
Types of seams
Macro seam
Macro is a very popular seam, often used to reupholster the steering wheels of many German car brands.
We mark the future line on both sides using a compass and a gel pen.
The distance from the edge is 4-5 mm, so the seam turns out more beautiful.
We make a line on a typewriter. If it is not there, then after marking with a pen using sharpened tweezers or a compass with 2 needles, we fill the holes along the line at an equal distance and make an imitation of a machine seam.
We apply it to the part, immediately fasten the thread, threading it first from the bottom, so that the knot is inside.
Then, on the other side (already from the front side), we thread the needle and also thread it from the inside through the first hole. We do the action 2 times. The stitches should be parallel to each other.
Without tightening, we lace through one stitch to the end.
Then, prying the thread, we begin to tighten, forming our seam.
And we get the final result
Sports Seam
Let's return to the previous lacing of the macrome, before tightening. If you add another thread, a second one and run it through the skipped stitches, you will get a “Sport Stitch”.
We stretch the threads and get a beautiful seam.
Sports seam 2
We mark and make a seam as mentioned above, all work is similar to the previous one...
The only difference is that everything is sewn with one thread in each stitch.
Then we carefully tighten it slowly and get such a wonderful seam.
Seam Pigtail
To make the markings we will use a compass with a gel pen.
We mark a straight line along the joint and make holes in a checkerboard pattern (not opposite each other) along the entire perimeter of the product.
We take a needle with a small eye so that the holes do not become larger, and thread a thread measuring 5 times the length of the future seam. We make a knot at one end, thread it through one bottom hole to the knot, then into the adjacent hole on the other part, pull them together and make a couple more stitches between them.
Alfa Romeo 164 2.0 R4 TB New level › Logbook › Wooden steering wheel. Manufacturing technologies
Hello again!
Many have been waiting for this recording and it’s finally happened! In this post I will talk about the technologies for making a wooden steering wheel. But before I begin my story, I would like to immediately clarify a couple of questions that you may have: 1. I WILL NOT make such steering wheels to order! In this post I will talk about the technologies known to me and the materials used, but I do not have enough time to make such things to order. In addition, some of the work was done by my cabinetmaker uncle, but he also refuses to do it to order (he already asked). 2. If you have not previously dealt with “heavy” equipment (jointers, planers, stationary milling cutters and circular saws), be extremely careful and careful. I started using such machines in my distant youth and worked on them for 9 years. Some safety habits still apply today, as the large number of cutting elements rotating at 6000 rpm makes it difficult to relax. So let's get started! I will talk about 3 technologies for making a wooden steering wheel. More precisely, about 3 possible options for preparing the rim. Milling, gluing and subsequent work are the same in all options.
1.
I read the first method a long time ago here and it interested me very much.
In principle, it describes almost the entire process. Unfortunately, the author of the entry, voluntarily or not (I don’t know), was removed from the site about 2 years ago and personal correspondence with him regarding the subtleties was lost... Pros:
in my opinion, this is the easiest way.
In addition, any type of wood from pine to oak is suitable for this method =) Disadvantages:
lack of a smooth pattern of wood texture, transitions between pieces are visible.
2.
The second method is that the rim is made from a “solid” piece of wood.
In this case, it is necessary to use wood with a dense texture - ash, oak. Pros:
fairly simple manufacturing, possibility of making an anatomical steering wheel.
Cons:
in the final product we have a straight pattern, and not a radial one, as we would like.
3.
The third method is more labor-intensive, but allows you to get the full effect of the “factory” steering wheel.
It consists of using thin strips of wood glued together to form a “rim” to prepare the rim. For this method, it is advisable to use softer and more flexible woods, such as elm. Pros:
“correct” texture pattern.
Cons:
labor-intensive process.
And now about how I did it: At first I followed method 3. Several elm boards were “expropriated” from my uncle, photos of which I posted a few posts earlier. The boards were cut into strips 5 mm thick in sufficient quantity
After sawing, plan the strips to a thickness of 2-3 mm. This will allow us to “roll” the strips more easily and provide better adhesion. Next, we prepare the matrix, according to which we will actually bend the fingers of the strip
Remember that the height of the matrix must be greater than the width of the strips. And yet, here I made a mistake, because of which I later had to redo everything using the 2nd technology. The matrix should not be half like mine, but 3/4, then you have a better chance of getting an even circle on the rim and making a better product.
When the preparatory work is completed, we begin gluing, using a large number of clamps, KleyBerit glue and mat.
We need 4 such gluings: top/bottom and face/back side. Making a whole circle is not the best option, because... By the time you adjust the edges for joining, all the glue will dry =)
In the meantime, we begin to prepare the steering wheel itself for pasting and subsequent milling, namely, we tear off the whole thing.
Further, as I already said, I took the gluing blanks and the steering wheel itself to my uncle, but he rejected the gluing because... they did not reach the normal radius, and I don’t have time to set new ones... Therefore, I decided to use the second technology and cut it out of a single piece, which, in fact, was already done without my presence, and a week later I took this miracle:
Source
Methods for installing braids
- Tight handlebar cover
- Fastening with lacing
In the first case, the size of the braid must correspond to the size of the steering wheel. If the cover is smaller, it will not fit. And if it is larger, then this is fraught with troubles while steering - it will slide along the rim and there is a high possibility of not turning the steering wheel when turning.
The braid is mounted from top to bottom. Before installation, the braid must be heated, it will become softer and more pliable. If the cover is difficult to put on, do not be afraid to use brute force. If you don't have a lot of sizes to choose from, it's better to go with a smaller case than to buy one that's too big.
For installation using the second method, not only natural leather products are more suitable, but also other soft laced braids on the steering wheel: products made from suede, eco-leather and Alcantara.
And you don’t have to turn to car service specialists for help. Many leather blanks already have holes for lacing. Almost all braid kits have visual instructions for installation and lacing techniques. They are sold already prepared for this procedure, and it is not difficult to carry out.
Leather care
Leather braid care involves removing dirt only with mild hand soap and a soft sponge or towel. Avoid using strong all-purpose detergents as they may remove the special coating that is applied to the leather to make it last longer. For skin care, you can apply leather conditioner (UV protection) every 4-6 weeks. This will help protect the leather from drying out and cracking. It must first be sprayed onto the fabric or applicator, and then rubbed into the leather braid.
Wrapping procedure
Removing the steering wheel and old braid
Before starting work, you must remove the steering wheel using the vehicle repair and operation manual. Before dismantling, disconnect the battery! If there is an airbag in the housing, wait at least five minutes.
Remove the old braid. You can simply cut along the seam.
Creating a pattern and cutting out a new braid
Next you need to make a pattern. To do this, first the steering wheel is carefully, evenly, without differences in height, wrapped with film, and then tightly with masking tape. Using a marker, the future pattern is divided into four parts and a mark is made along the inside of the steering wheel for the inner seam.
Before cutting, you must number all the parts. Cut strictly along the lines!
Using the marked marks, you need to cut the masking tape and remove it from the steering wheel. It turns out four parts of the pattern. To level them, you can put a weight on top for several hours. Or make a denser template from cardboard, placing elements of masking tape on it.
Then, according to the sample of the resulting pattern, the elements of the future leather braid are cut out, and an allowance of 1.5-2 ml is made along the length. Each element must be marked. Do not forget that the final result depends on the accuracy of the work at the pattern making stage.
The pattern pieces are sewn together using a sewing machine or a needle and thread. It is necessary to retreat from the edge by 2-3 mm, otherwise the material will tear under tension. All parts are connected to form a ring. The finished ring is applied to the steering wheel. Everything must fit exactly to size. If the braid runs along the steering wheel, it is necessary to sew it along the seam. For additional fixation, the steering wheel can be lubricated with glue or epoxy resin.
Fastenings for manual sewing of braid
After this, you need to make fastenings that will hold the seam connecting the edges of the braid.
There are two types of fastening:
- holes;
- stitches along the edges of the product.
Holes along the edges of the braid can be made manually using an awl, or using a sewing machine with a needle without thread with a rounded tip.
The number of holes should be the same on both sides, the distance from the edge is approximately 4 mm, between the holes 4-5 mm. The work is quite labor-intensive, you should get about 600 holes.
The second method is much simpler - just use a sewing machine to make a stitch along the edge of the braid with a stitch in increments of 5-6 mm. The distance from the edge of the product is 4 mm.
All knots are made from the inside and secured with no more than two stitches.
Sewing the braid on the steering wheel
There are many options for braid lacing. The choice depends on the type of fastening and personal imagination. The simplest is to lace up like sneakers, threading a strong thread into the prepared fastenings. You should start from the bottom and move counterclockwise, carefully straightening the folds and stretching the material well.
Reference! If in some place it was not possible to straighten the skin perfectly, you can use a hairdryer. When heated, the skin becomes more elastic and small wrinkles are smoothed out.
After finishing the trim, you should hide all the threads under the leather, glue the knots with glue and run a hairdryer along the entire length of the steering wheel so that the leather fits better to the steering wheel. All seams can be coated with special leather glue. This will prevent them from unraveling.
Dimensions
To find out the size of the steering wheel cover, you need to measure its diameter. If you need to make a gift, there is a standard table for all types and sizes of steering wheel braids.
- S (35-37 cm) – small cars (Oka, Tavria, Kia Picanto)
- M (37-39 cm) - universal size for most passenger cars and medium crossovers from Europe and Japan
- L (39-40 cm) – early VAZ, Volga and Moskvich models and American models
- XL (42-43 cm) – UAZ, Gazelle, Sobol models
- XXL (47 cm) – foreign trucks
- XXXL (49 cm) – KAMAZ.
Manufacturers of high-quality braids include “Autoprofi”, “Autoluxe”, “Sparco” and “Aligator”. These are popular and well-known companies, known to every car enthusiast for the large number of car accessories they produce.
There are many nameless Chinese factories that make leather and leatherette products, and not always of poor quality. But it depends. There are plenty of other small manufacturers
There is always a choice, it is important to know what your darling wants!
Craft product Crafts for boys Emergency situation Painting Game steering wheels for kindergarten Wood
After some time had passed after the parent meeting, at which they asked to make steering wheels for the group, someone’s dad brought the carved steering wheels as is (not processed - not sanded.) In general, I took them. After some thought, I decided to make them role-playing as well. Ambulance, Fire, Police, Ministry of Emergency Situations, Post, Taxi, Military vehicle.
reverse side of the steering wheels
I’ll be glad if someone finds this idea useful))
Well done! And most importantly, it’s educational.
Thank you, exactly))
Thank you) the boys are happy!
Hello! what a great idea. )
Can you tell me more about making the steering wheels? What and how did you paint them?
Advantage of genuine leather steering wheel cover
One can argue for a long time about whether natural materials or synthetic ones are better, and statistics will indicate a large number of positive properties of the second types of materials. But people still prefer to use natural materials in decoration - as if the soul is calmer and aesthetically more attractive.
But in addition to the decorative distinctive features of natural leather, it is also worth noting that it does not absorb moisture and does not absorb various odors. Synthetic materials tend to deteriorate faster and absorb odors from hands. That is why a steering wheel cover made of genuine leather will be much more preferable to a cover made of synthetics.